

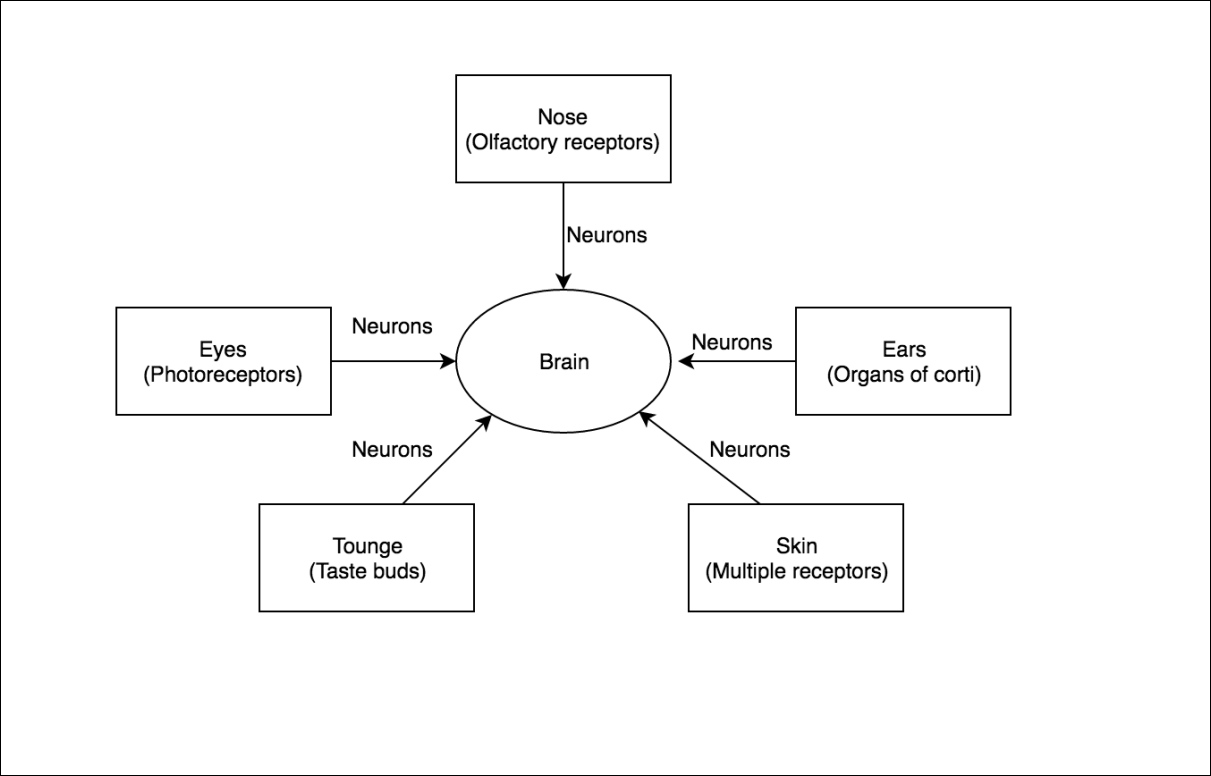
We will start exploring the microcontroller by comparing it to something we already know about: our brain. Let's refer to the following diagram. You have already seen this diagram in the last chapter, but this one has more clues to demystify the microcontroller:
Note
Close your eyes for a moment, and think about everything you know about yourself: your hobbies, things you like, things you do, and so on. Write it down in your observation notebook. We are going to learn about ourselves today!
Microcontrollers are a fascinating piece of technology created by our species. They consist of three major parts; they are:
Processor core: This processes everything; it is is the brain of the microcontroller
Program memory: This consists of instruction and acts as memory for the controller, just as our brain has memory.
Inputs and Outputs: This is used to process external data. This is also where external devices connect all of which are controlled by the micro controller...
I am assuming that we already have the Arduino Software installed and setup in our computers. If you haven't yet, refer back to Chapter 2, Systems and Logic, and you will be able to find out how to do that.
Note
We can always refer to https://www.arduino.cc/en/Guide/HomePage for more help.
Now comes the part where you will understand why this chapter is called The Magic Wand. Remember how I told you about a process you must follow for any problem statement you might have faced? Don't remember? That's okay, head back to the last chapter and have a quick look at it again.
Let's understand more about the skeleton (or the structure) of code we should follow when we write Arduino code.
Remember how I keep talking about having a process? The process or method that you follow while writing code for Arduino is by identifying two things:
The part of the code you want to run just once
The part of the code you want to keep running
Let's take an example....
We all know what power is, right? Okay, let's not assume; let's quickly go back to Chapter 2, Systems and Logic and refresh our knowledge about power. Come back here once you have read that.
All set? Great!
Now that we know what power is, let's find out why it is important to us. Arduino boards have an LED that switches on every time we connect with our computer, have you noticed that? No? Try it once, it will have a quick blink of some sort.
Every time you connect you Arduino board to the computer, you are powering it up. The USB port in the computer gives out 5 volts and some amount of current.
Note
Find out how much current comes out of the USB port and write it down in your observation notebook.
An Arduino board typically functions on a 5V and 200mA power input. If the board is not given that much input, it won't power up at all, which means you won't be able to use it.
What happens if there is more current or voltage given to the board?
To make sure that the microcontroller gets...
Before we start, what is an IDE? IDE stands for Integrated Development Environment (it is nothing but a fancy name for software!). It contains a lot of useful tools we will use hereon for all our projects.
We write code in the IDE, and we call it a sketch. IDE converts the code we write to a language that our Arduino boards understand; this process is called compilation. Before doing that, it checks for any errors we might have made in the code.
IDE can only check for syntax errors not the logical errors. Syntax errors are the errors in the arrangement of words while we type that code. This arrangement should match the norms that are defined by the language. IDE is not going to let you proceed to upload the code until all the syntax errors are corrected by you. Most of the mistakes I have done have been in missing out on writing ; at the end of each line of code.
Other syntax errors include not declaring the variables properly, using variable names in the code without declaring...
What happens inside a microcontroller almost looks like magic. Think about it for a second: an Arduino Uno is executing 125,000 instructions per second. It is that fast! You may ask what an instruction is. Every line written in code is basically an instruction for the core processor of the microcontroller. So when we say digitalRead(), that is an instruction.
Let's take an analogy to understand how a microcontroller works.
There are worms on the earth. Each worm is equivalent to an instruction or an operation that needs to be done.
There is a bird in the sky. Bird is going to take these worms to the chicks in the nest.
Chicks (or the core) eat the worms (or execute an operation/instruction). The mother bird has to keep bringing the worms to the chicks. The system is going to be fast when the chicks have already finished eating the worm before the mother bird brings in more worms.
This means that an operation needs to be executed before another operation...
What's your favorite dish? Do you like pudding? My mum makes this delicious pudding that has chocolate chips in it. Every time I taste it, it has the right amount of sugar in it and the perfect amount of a very gingery flavor that makes a tickle on my tongue, always.
My mum tells me that this recipe was given to her by her grandma, and the original recipe didn't have chocolate chips in it and there was no cardamom either. Over the ages, as she acquired new tastes, she kept adding or subtracting things depending on her mood sometimes, sometimes mine. Isn't that a beautiful thing? Wouldn't it be amazing if you could cook a dish exactly like your mum did?
When you can look into how something was built and the source (or the recipe) is made available and can be modified and redistributed, it is called open source. If it is in the hardware domain, it is called open-source hardware, if it is in the software domain, it is called open-source software.
Without Arduino...
We learned a lot of important things in this chapter. Starting from how a microcontroller is made very similar to a human brain to what should be the approach towards coding a microcontroller. We then learned the importance of the power supply in Arduino, how it is very important to know the operating voltages on Arduino. We then learned how to use the Arduino software-some important parts of the software-and how to look up for help online. We learned about how a microcontroller works internally, and finally, we learned about what is open-source hardware and software. In the next chapter, we will learn how to finally take all the learnings into code and start working on our first project. I am super excited about this, are you too?