


Using Gradle to build, configure, and manage app dependencies
In the course of creating this project, you have principally used the Android platform SDK. The necessary Android libraries were downloaded when you installed Android Studio. However, these are not the only libraries that are used to create your app. To configure and build your Android project or app, a build tool called Gradle is used.
Gradle is a multi-purpose build tool that Android Studio uses to build your app. By default, Android Studio uses Groovy, a dynamically typed Java virtual machine (JVM) language, to configure the build process and allows easy dependency management so you can add libraries to your project and specify the versions.
Android Studio can also be configured to use Kotlin to configure builds, but as the default language is Groovy, you will be using this. The files that this build and configuration information is stored in are named build.gradle.
When you first create your app, there are two build.gradle files, one at the root/top level of the project and one specific to your app in the app module folder.
The project-level build.gradle file
Let’s now have a look at the project-level build.gradle file. This is where you set up all the root project settings, which can be applied to sub-modules/projects:
plugins {
    id 'com.android.application' version '7.4.2' apply
    false
    id 'com.android.library' version '7.4.2' apply false
    id 'org.jetbrains.kotlin.android' version '1.8.0'
    apply false
}
Gradle works on a plugin system, so you can write your own plugin that does a task or series of tasks and plug it into your build pipeline. The three plugins listed previously do the following:
com.android.application: This adds support to create an Android applicationcom.android.library: This enables sub-projects/modules to be Android librariesorg.jetbrains.kotlin.android: This provides integration and language support for Kotlin in the project
The apply false statement enables these plugins only to sub-projects/modules, and not the project’s root level. The version '7.3.1' specifies the plugin version, which is applied to all sub-projects/modules.
The app-level build.gradle file
The build.gradle app is specific to your project configuration:
plugins {
    id 'com.android.application'
    id 'org.jetbrains.kotlin.android'
}
android {
    namespace 'com.example.myapplication'
    compileSdk 33
    defaultConfig {
        applicationId "com.example.myapplication"
        minSdk 24
        targetSdk 33
        versionCode 1
        versionName "1.0"
        testInstrumentationRunner
            "androidx.test.runner.AndroidJUnitRunner"}
    buildTypes {
        release {
            minifyEnabled false
            proguardFiles getDefaultProguardFile('proguard-
               android-optimize.txt'), 'proguard-rules.pro'
        }
    }
    compileOptions {
        sourceCompatibility JavaVersion.VERSION_1_8
        targetCompatibility JavaVersion.VERSION_1_8
    }
    kotlinOptions {
        jvmTarget = '1.8'
    }
}
dependencies {…}
The plugins for Android and Kotlin, detailed in the root build.gradle file, are applied to your project here by ID in the plugins lines.
The android block, provided by the com.android.application plugin, is where you configure your Android-specific configuration settings:
namespace: This is set from the package name you specified when creating the project. It will be used for generating build and resource identifiers.compileSdk: This is used to define the API level the app has been compiled with, and the app can use the features of this API and lower.defaultConfig: This is the base configuration of your app.applicationId: This is set to your app’s package and is the app identifier that is used on Google Play to uniquely identify your app. It can be changed to be different from the package name if required.minSdk: This is the minimum API level your app supports. This will filter out your app from being displayed in Google Play for devices that are lower than this.targetSdk: This is the API level you are targeting. This is the API level your built app is intended to work and has been tested with.versionCode: This specifies the version code of your app. Every time an update needs to be made to the app, the version code needs to be increased by one or more.versionName: A user-friendly version name that usually follows semantic versioning of X.Y.Z, where X is the major version, Y is the minor version, and Z is the patch version, for example, 1.0.3.testInstrumentationRunner: This is the test runner to use for your UI tests.buildTypes: UnderbuildTypes, a release is added that configures your app to create areleasebuild. TheminifyEnabledvalue, if set totrue, will shrink your app size by removing any unused code, as well as obfuscating your app. This obfuscation step changes the name of the source code references to values such asa.b.c(). This makes your code less prone to reverse engineering and further reduces the size of the built app.compileOptions: This is the language level of the Java source code (sourceCompatibility) and byte code (targetCompatibility).kotlinOptions: This is thejvmlibrary thekotlin gradleplugin should use.
The dependencies block specifies the libraries your app uses on top of the Android platform SDK, as shown here (with added comments):
    dependencies {
    // Kotlin extensions, jetpack component with Android
       Kotlin language features
    implementation 'androidx.core:core-ktx:1.7.0'
    // Provides backwards compatible support libraries and
       jetpack components
    implementation 'androidx.appcompat:appcompat:1.6.1'
    // Material design components to theme and style your
       app
    implementation
        'com.google.android.material:material:1.8.0'
    // The ConstraintLayout ViewGroup updated separately
       from main Android sources
    implementation
        'androidx.constraintlayout:constraintlayout:2.1.4'
    // Standard Test library for unit tests
    testImplementation 'junit:junit:4.13.2'
    // UI Test runner
    androidTestImplementation
        'androidx.test.ext:junit:1.1.5'
    // Library for creating Android UI tests
    androidTestImplementation
        'androidx.test.espresso:espresso-core:3.5.1'
    }
The dependencies follow the Maven Project Object Model (POM) convention of groupId, artifactId, and versionId separated by :. So, as an example, the compatible support library specified earlier is shown as:
'androidx.appcompat:appcompat:1.6.1'
The groupId is android.appcompat, artifactId is appcompat, and versionId is 1.5.1. The build system locates and downloads these dependencies to build the app from the repositories block detailed in the settings.gradle file explained in the following section.
Note
The dependency versions specified in the previous code section and in the following sections of this and other chapters are subject to change and are updated over time, so they are likely to be higher when you create these projects.
The implementation notation for adding these libraries means that their internal dependencies will not be exposed to your app, making compilation faster.
Here, the androidx components are added as dependencies rather than in the Android platform source. This is so that they can be updated independently from Android versions. androidx contains the suite of Android Jetpack libraries and the repackaged support library.
The next Gradle file to examine is settings.gradle, which initially looks like this:
pluginManagement {
    repositories {
        google()
        mavenCentral()
        gradlePluginPortal()
    }
}
dependencyResolutionManagement {
repositoriesMode.set(RepositoriesMode.FAIL_ON_PROJECT_REPOS)
    repositories {
        google()
        mavenCentral()
    }
}
rootProject.name = "My Application"
include ':app'
On first creating a project with Android Studio, there will only be one module, app, but when you add more features, you can add new modules that are dedicated to containing the source of a feature rather than packaging it in the main app module.
These are called feature modules, and you can supplement them with other types of modules, such as shared modules, which are used by all other modules, like a networking module. This file also contains the repositories of the plugins and dependencies to download from in separate blocks for plugins and dependencies.
Setting the value of RepositoriesMode.FAIL_ON_PROJECT_REPOS ensures all dependencies repositories are defined here; otherwise, a build error will be triggered.
Exercise 1.04 – exploring how Material Design is used to theme an app
In this exercise, you will learn about Google’s new design language, Material Design, and use it to load a Material Design-themed app. Material Design is a design language created by Google that adds enriched UI elements based on real-world effects such as lighting, depth, shadows, and animations. Perform the following steps to complete the exercise:
- Create a new Android Studio project as you did in Exercise 1.01, Creating an Android Studio project for your app.
- First, look at the
dependenciesblock and find the Material Design dependency:implementation 'com.google.android.material:material:1.8.0'
- Next, open the
themes.xmlfile located atapp|src|main|res|values|themes.xml: There is also athemes.xmlfile in thevalues-nightfolder used for a dark mode, which we will explore later:<resources xmlns:tools="http://schemas.android.com/tools"> <!-- Base application theme. --> <style name="Theme.MyApplication" parent="Theme. MaterialComponents.DayNight.DarkActionBar"> <!-- Primary brand color. --> <item name="colorPrimary">@color/purple_500 </item> <item name="colorPrimaryVariant">@color/ purple_700</item> <item name="colorOnPrimary">@color/white</item> <!-- Secondary brand color. --> <item name="colorSecondary">@color/teal_200 </item> <item name="colorSecondaryVariant">@color/ teal_700</item> <item name="colorOnSecondary">@color/black</item> <!-- Status bar color. --> <item name="android:statusBarColor">?attr/ colorPrimaryVariant</item> <!-- Customize your theme here. --> </style> </resources>
Notice that the parent of Theme.MyApplication is Theme.MaterialComponents.DayNight.DarkActionBar.
The Material Design dependency added in the dependencies block is being used here to apply the theme of the app. One of the key differences that Material Design Components (MDC) offer over the AppCompat themes that preceded them is the ability to provide variations to the primary and secondary colors of your app.
For example, colorPrimaryVariant enables you to add a tint to the primary color, which can be either lighter or darker than the colorPrimary color. In addition, you can style view element colors in the foreground of your app with colorOnPrimary.
Together these bring cohesive branding to theme your app. To see this in effect, make the following changes to invert the primary and secondary colors:
<resources xmlns:tools="http://schemas.android.com/tools">
    <!-- Base application theme. -->
    <style name="Theme.MyApplication" parent="Theme.
        MaterialComponents.DayNight.DarkActionBar">
        <!-- Primary brand color. -->
        <item name="colorPrimary">@color/teal_200</item>
        <item name="colorPrimaryVariant">@color/
            teal_700</item>
        <item name="colorOnPrimary">@color/white</item>
        <!-- Secondary brand color. -->
        <item name="colorSecondary">@color/purple_200
            </item>
        <item name="colorSecondaryVariant">@color/
            purple_700</item>
        <item name="colorOnSecondary">@color/black</item>
        <!-- Status bar color. -->
        <item name="android:statusBarColor">?attr/
            colorPrimaryVariant</item>
        <!-- Customize your theme here. -->
    </style>
</resources>
- Run the app now, and you will see the app themed differently. The action bar and status bar have changed background color in contrast to the default Material themed app, as shown in Figure 1.18:
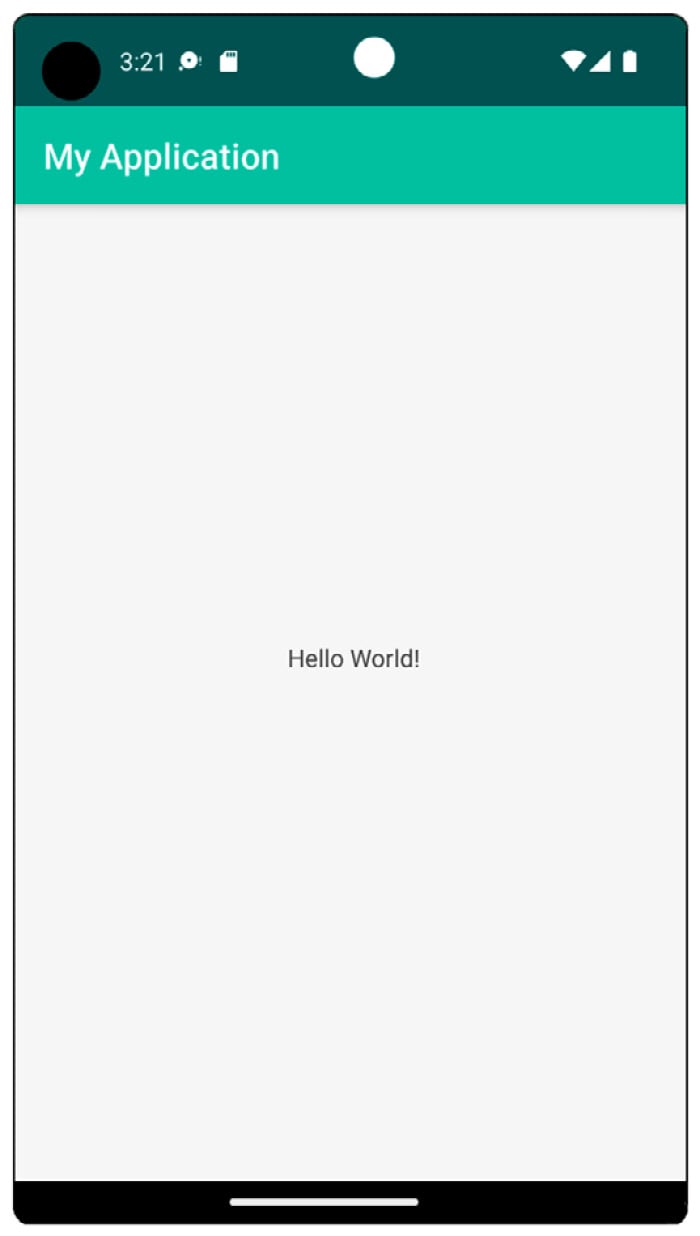
Figure 1.18 – App with primary and secondary colors inverted
In this exercise, you’ve learned how Material Design can be used to theme an app. As you are currently only displaying TextView on the screen, it is not clear what benefits material design provides, but this will change when you start using Material UI design widgets more.
Now that you’ve learned how the project is built and configured, in the next section, you’ll explore the project structure in detail, learn how it has been created, and gain familiarity with the core areas of the development environment.