


The Android manifest
The app you have just created, although simple, encompasses the core building blocks that you will use in all of the projects you create. The app is driven from the AndroidManifest.xml file, a manifest file that details the contents of your app. It is located at app | manifests | AndroidManifest.xml:
<?xml version="1.0" encoding="utf-8"?>
<manifest xmlns:android=
    "http://schemas.android.com/apk/res/android"
    xmlns:tools="http://schemas.android.com/tools">
    <application
        android:allowBackup="true"
        android:dataExtractionRules="@xml/data_extraction_
              rules"
        android:fullBackupContent="@xml/backup_rules"
        android:icon="@mipmap/ic_launcher"
        android:label="@string/app_name"
        android:roundIcon="@mipmap/ic_launcher_round"
        android:supportsRtl="true"
        android:theme="@style/Theme.MyApplication"
        tools:targetApi="31">
        <activity
            android:name=".MainActivity"
            android:exported="true">
            <intent-filter>
                <action android:name="android.intent.action.
                  MAIN" />
                <category android:name="android.intent.
                  category.LAUNCHER" />
            </intent-filter>
        </activity>
    </application>
</manifest>
A typical manifest file, in general terms, is a top-level file that describes the enclosed files or other data and associated metadata that forms a group or unit. The Android manifest applies this concept to your Android app as an XML file.
Every Android app has an application class that allows you to configure the app. After the <application> element opens, you define your app’s components. As we have just created our app, it only contains the first screen shown in the following code:
<activity android:name=".MainActivity">
The next child XML node specified is as follows:
<intent-filter>
Android uses intents as a mechanism for interacting with apps and system components. Intents get sent, and the intent filter registers your app’s capability to react to these intents. <android.intent.action.MAIN> is the main entry point into your app, which, as it appears in the enclosing XML of .MainActivity, specifies that this screen will be started when the app is launched. Android.intent.category.LAUNCHER states that your app will appear in the launcher of your user’s device.
As you have created your app from a template, it has a basic manifest that will launch the app and display an initial screen at startup through an Activity component. Depending on which other features you want to add to your app, you may need to add permissions in the Android manifest file.
Permissions are grouped into three different categories: normal, signature, and dangerous:
- Normal: These permissions include accessing the network state, Wi-Fi, the internet, and Bluetooth. These are usually permitted without asking for the user’s consent at runtime.
- Signature: These permissions are shared by the same group of apps that must be signed with the same certificate. This means these apps can share data freely, but other apps can’t get access.
- Dangerous: These permissions are centered around the user and their privacy, such as sending SMS, access to accounts and location, and reading and writing to the filesystem and contacts.
These permissions have to be listed in the manifest, and in the case of dangerous permissions, from Android Marshmallow API 23 (Android 6 Marshmallow) onward, you must also ask the user to grant the permissions at runtime.
In the next exercise, we will configure the Android Manifest. Detailed documentation on this file can be found at https://developer.android.com/guide/topics/manifest/manifest-intro.
Exercise 1.03 – configuring the Android manifest internet permission
The key permission that most apps require is access to the internet. This is not added by default. In this exercise, we will fix that and, in the process, load a WebView, which enables the app to show web pages. This use case is very common in Android app development as most commercial apps will display a privacy policy, terms and conditions, and so on. As these documents are likely common to all platforms, the usual way to display them is to load a web page. To do this, perform the following steps:
- Create a new Android Studio project as you did in Exercise 1.01, Creating an Android Studio project for your app.
- Switch tabs to the
MainActivityclass. From the main project window, it’s located atapp|java|com|example|myapplication.
You can change what the project window displays by opening up the Tool window by selecting View | Tool Windows | Project – this will select Project view. The drop-down options on the top of the Project window allow you to change the way you view your project, with the most commonly used displays being Project and Android:
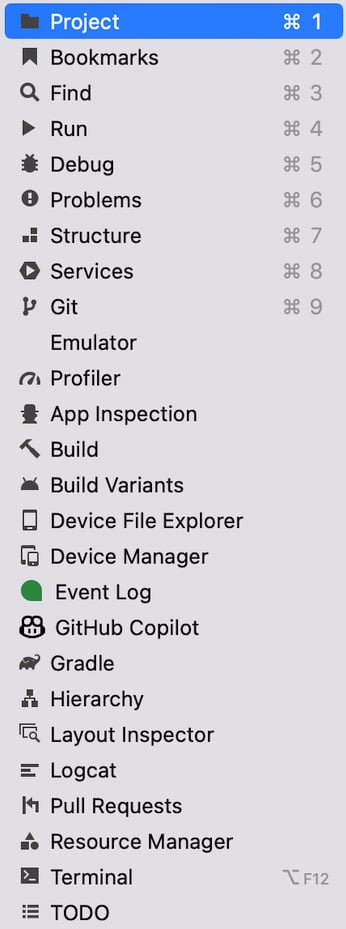
Figure 1.15 – The Tool Windows drop-down menu
On opening the MainActivity class, you’ll see that it has the following content or similar:
package com.example.myapplication
import androidx.appcompat.app.AppCompatActivity
import android.os.Bundle
class MainActivity : AppCompatActivity() {
    override fun onCreate(savedInstanceState: Bundle?)
    {
        super.onCreate(savedInstanceState)
        setContentView(R.layout.activity_main)
    }
}
You’ll examine the contents of this file in more detail in the next section of this chapter, but for now, you just need to be aware that the setContentView(R.layout.activity_main) statement sets the layout of the UI you saw when you first ran the app in the virtual device.
- Use the following code to change this to the following:
package com.example.myapplication
import androidx.appcompat.app.AppCompatActivity
import android.os.Bundle
import android.webkit.WebView
class MainActivity : AppCompatActivity() {
    override fun onCreate(savedInstanceState: Bundle?){
        super.onCreate(savedInstanceState)
        val webView = WebView(this)
        webView.settings.javaScriptEnabled = true
        setContentView(webView)
        webView.loadUrl("https://www.google.com")
    }
}
So, you are replacing the layout file with WebView. The val keyword is a read-only property reference, which can’t be changed once it has been set. JavaScript needs to be enabled in WebView to execute JavaScript.
Note
We are not setting the type, but Kotlin has type inference, so it will infer the type if possible. So, specifying the type explicitly with val webView: WebView = WebView(this) is not necessary. Depending on which programming languages you have used in the past, the order of defining the parameter name and type may or may not be familiar. Kotlin follows Pascal notation, that is, name followed by type.
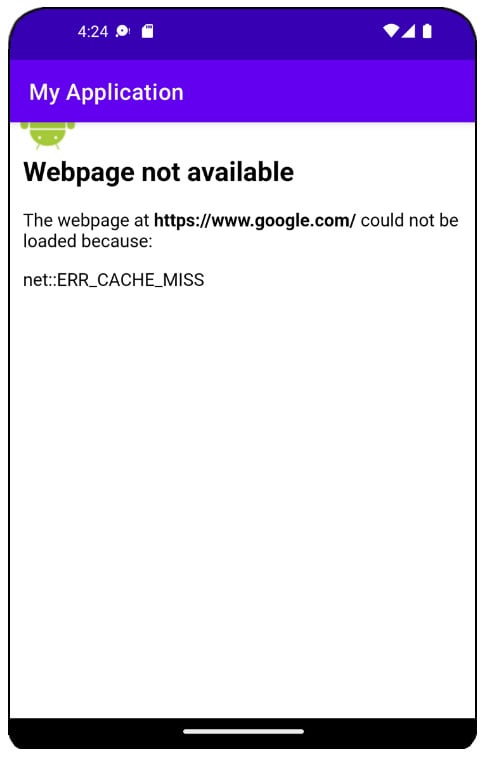
Figure 1.16 – No internet permission error message
- This error occurs because there is no
INTERNETpermission added to yourAndroidManifest.xmlfile. (If you get thenet::ERR_CLEARTEXT_NOT_PERMITTEDerror, this is because the URL you are loading intoWebViewis not HTTPS, and non-HTTPS traffic is disabled from API level 28, Android 9.0 Pie and above). - Let’s fix that by adding the
INTERNETpermission to the manifest. Open up the Android manifest and add the following above the<application>tag:<uses-permission android:name="android.permission.INTERNET" />
You can find the full Android manifest file with the permission added here: https://packt.link/smzpl
Uninstall the app from the virtual device before running up the app again. You need to do this, as app permissions can sometimes get cached.
Do this by long-pressing on the app icon and selecting the App Info option that appears and then pressing the Bin icon with the Uninstall text below it. Alternatively, long press the app icon and then drag it to the Bin icon with the Uninstall text beside it in the top-right corner of the screen.
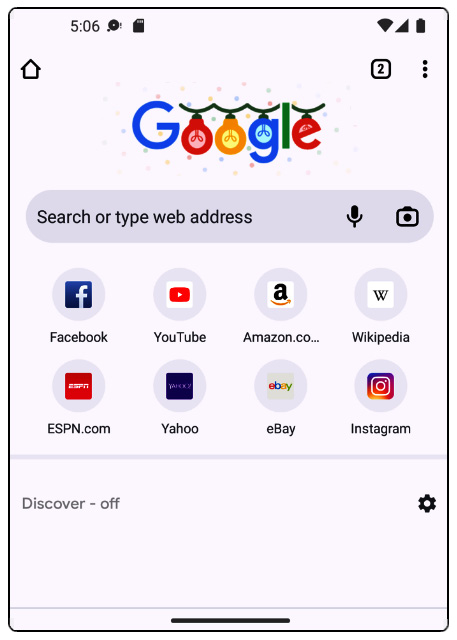
Figure 1.17 – App displaying WebView
In this example, you learned how to add a permission to the manifest. The Android Manifest can be thought of as a table of contents of your app. It lists all the components and permissions your app uses. As you have seen from starting the app from the launcher, it also provides the entry points into your app.
In the next section, you will explore the Android build system, which uses the Gradle build tool to get your app up and running.