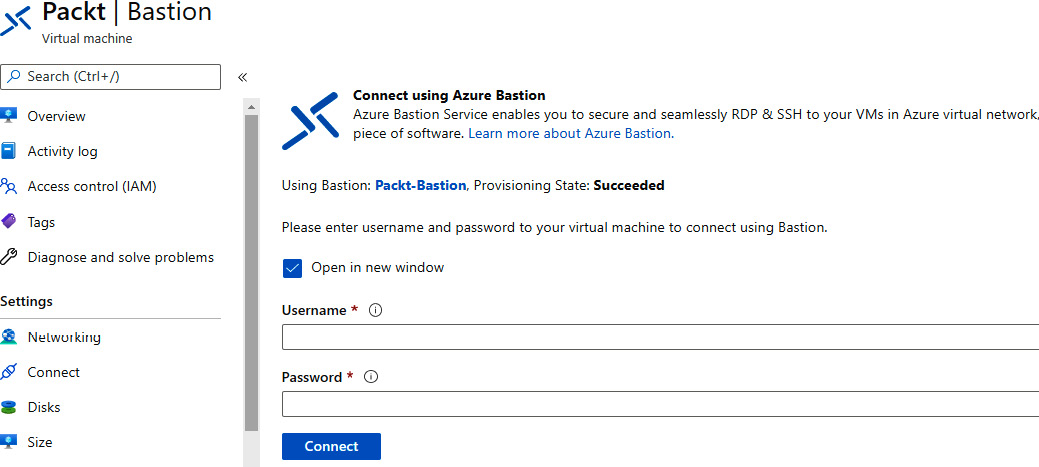
9. Connecting to resources securely
Exposing management endpoints (RDP, SSH, HTTP, and others) over a public IP address is not a good idea. Any kind of management access should be controlled and allowed only over a secure connection. Usually, this is done by connecting to a private network (via S2S or P2S) and accessing resources over private IP addresses. In some situations, this is not easy to achieve. The cause of this can be insufficient local infrastructure, or in some cases, the scenario may be too complex. Fortunately, there are other ways to achieve the same goal. We can safely connect to our resources using Azure Bastion, Azure Virtual WAN, and Azure Private Link.
We will cover the following recipes in this chapter:
- Creating an Azure Bastion instance
- Connecting to a virtual machine with Azure Bastion
- Creating a virtual WAN
- Creating a hub (in Virtual WAN)
- Adding a Site-to-Site connection (in a virtual hub)
- Adding a virtual network connection...