


New project setup – application assistant
Every time you create a new project inside Bubble, you will be asked to set up this project for the very first time. This is the application assistant. Bubble will show the get started steps and ask you a few questions to make sure you have your initial settings ready to go. This process is helpful but can also be skipped. All the little details and settings you will be asked to define during these steps can also be found inside Bubble later, so if you skip them, you can always go back and change them later. Let’s take a look at how the getting started steps appear.
Step 1 – favicon and application name
The first step will ask you to upload a favicon for your application. A favicon is a little icon, an image, that shows at the top of your browser window. Each page on your browser has a tab and each tab has an icon – this is the favicon. The image you upload here to Bubble will be used as a favicon for your application and users will associate this image with navigating your web app. My recommendation is that you upload an image of 16x16 pixels in size and in .png format to be used as your favicon. The second thing Bubble will ask for is your application name. If you don’t have one yet, just add something and change it later.
Note that on the right side, Bubble is going to show an example of how your favicon and your app name will look on the browser tab.
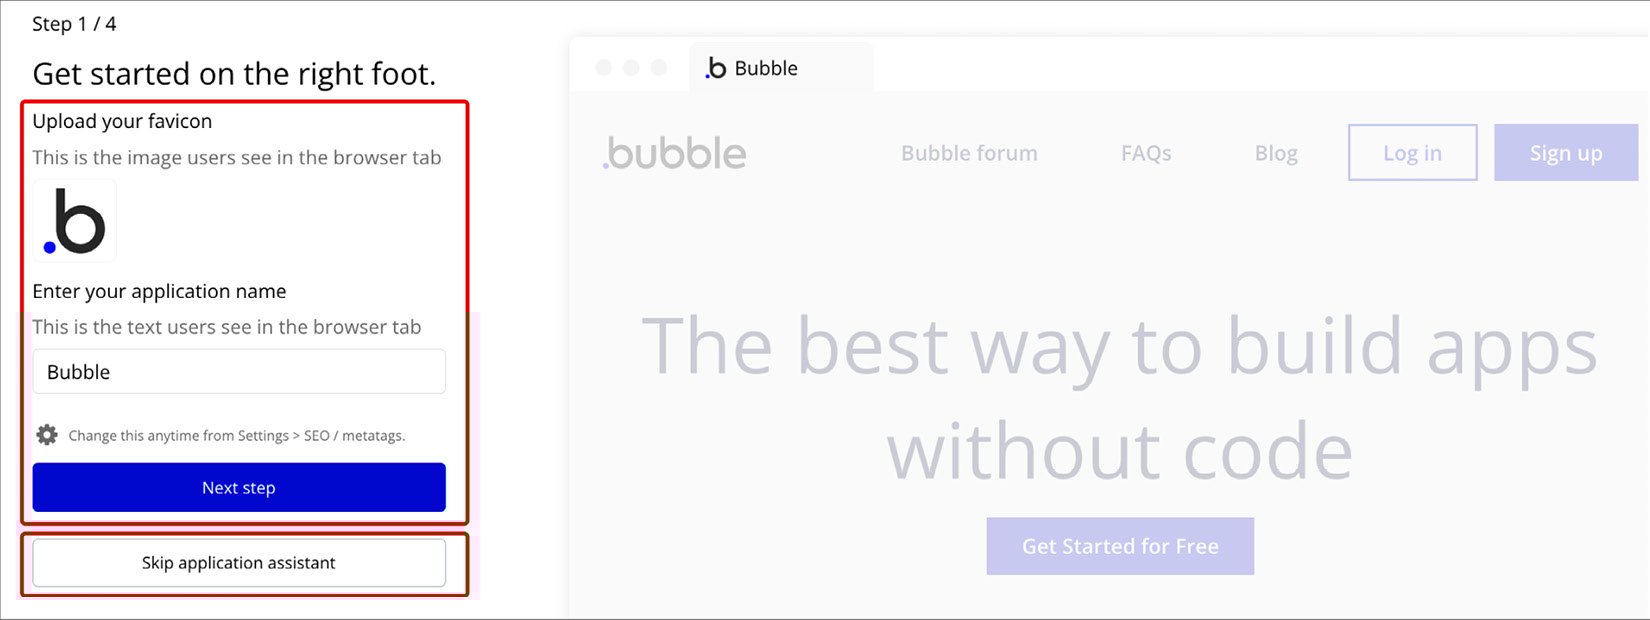
Figure 1.9: Bubble.io – application assistant – step 1
Now, of course, if you don’t want to continue answering these questions and want to just jump straight into the project, you can click the Skip application assistant button. Feel free to do so.
Step 2 – default font
Now Bubble will ask you to pick your project’s default font. This is the primary font of your application, meaning it will be visible in texts, buttons, and so on. You can also use more fonts in the future and change the primary font as well. At this point, you can choose one option from the list provided by clicking the dropdown or just pick the default and continue to the next step.
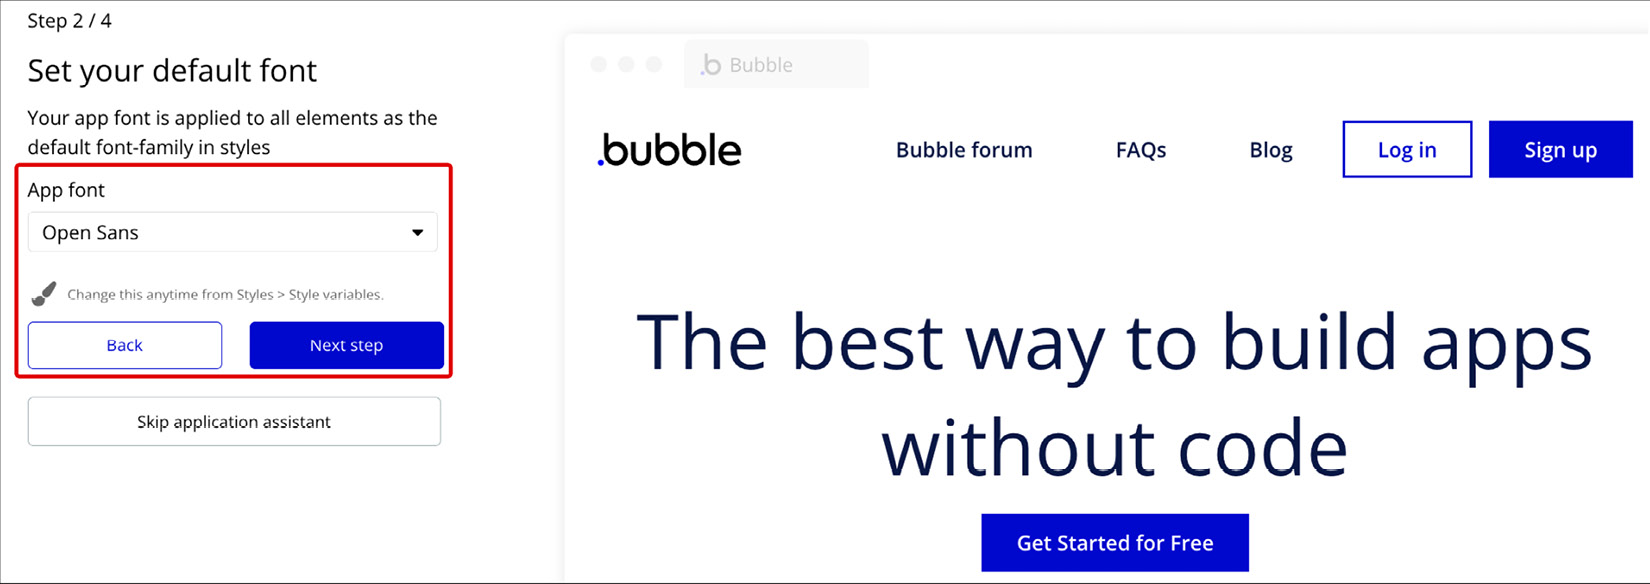
Figure 1.10: Bubble.io – application assistant – step 2
Once you pick an option Bubble will show an example layout on the right side with the selected font so you can have an idea of how it will look.
Step 3 – default colors
During this step, you can define a few colors that will be used on your application including the Primary color, Primary contrast, Text color, Surface, Background, Destructive, Success, and Alert. Again, you can change the colors and see how they appear on the right side. Use the color picker by clicking an existing color or specify your own hex codes if you already have your own specific brand colors. If you don’t know much about design, just use the default colors and change these later.
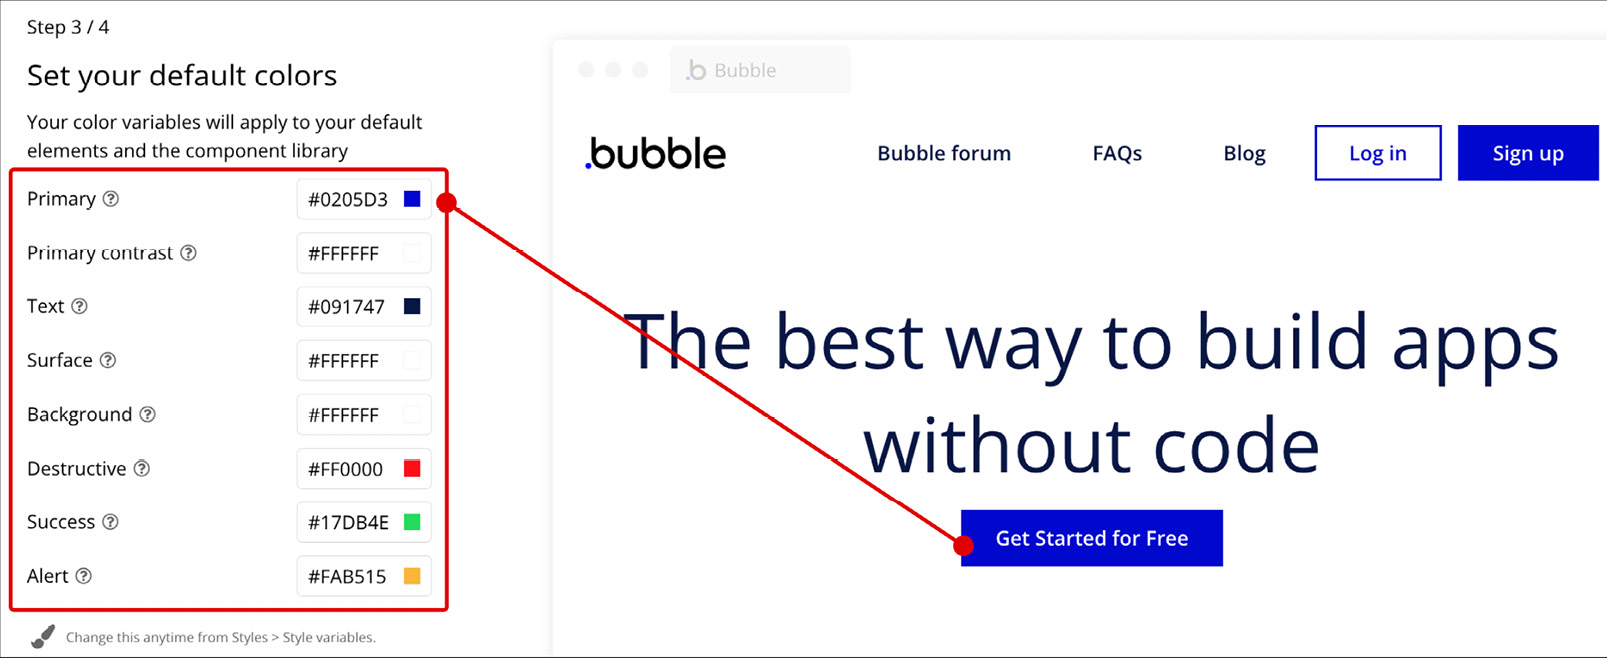
Figure 1.11: Bubble.io – application assistant – step 3
Once you are done configuring your colors, you can preview how it looks on the right side. If you are happy with your colors just click the Next step button to continue.
Step 4 – choosing plugins
Bubble has a lot of plugins you can install in your application to have extra features available for building amazing projects. These are like superpowers that let you build beyond what Bubble is capable of by itself. This step lets you pick plugins from a list visible on the right side, so you can save time by adding some plugins at the very beginning. If you wish to install a plugin, just click the Install now button. If you don’t see a plugin you need on this list, you can click the Browse all plugins button, find the one you need, and install it that way.
If you know a specific plugin and know you are going to need it, this can be the perfect moment to install it. If you don’t have any idea of what plugins you will use, I recommend you just skip this step and install plugins later as required. Remember, you can always go back to the plugins page to install or remove plugins.
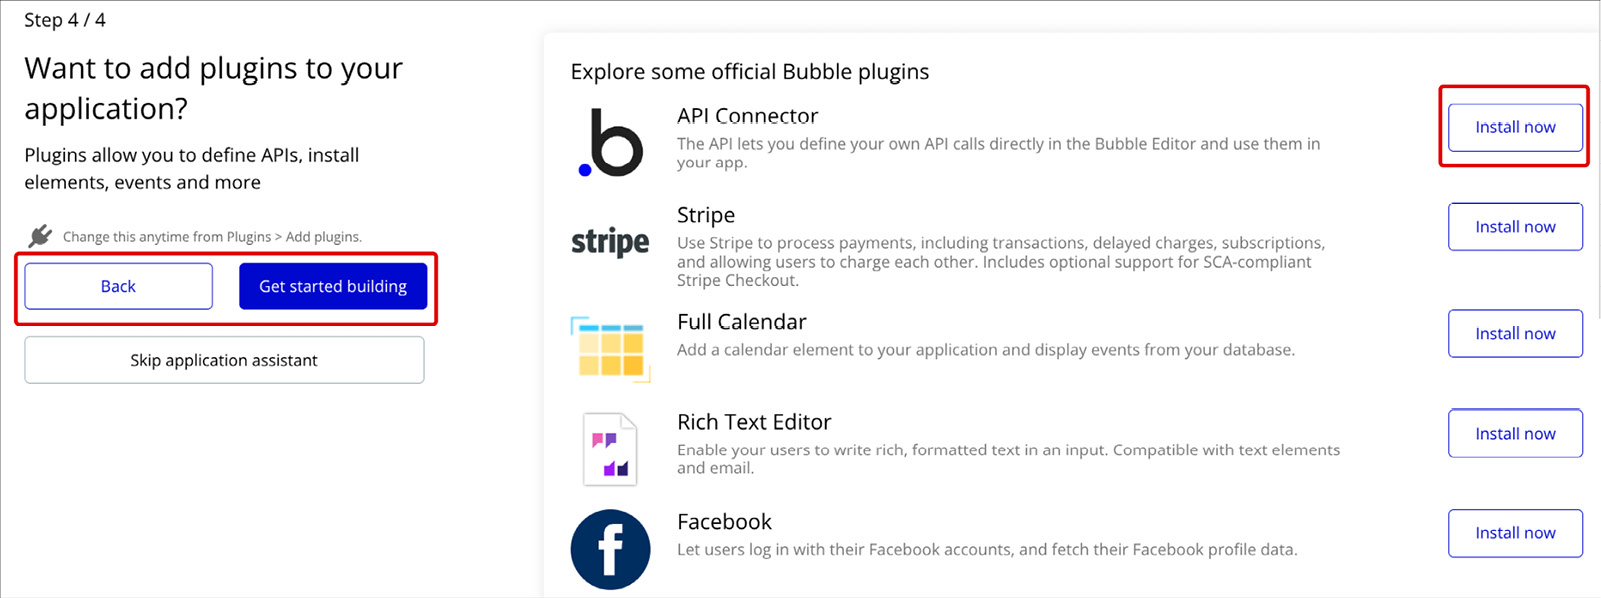
Figure 1.12: Bubble.io – application assistant – step 4
Once you are done with this step, click the Get started building button to finish the application assistant process.
Finishing the application assistant
At this point, you have created your very first project and configured the initial settings using the application assistant. Next, Bubble will take you to your project and show you the Bubble editor.
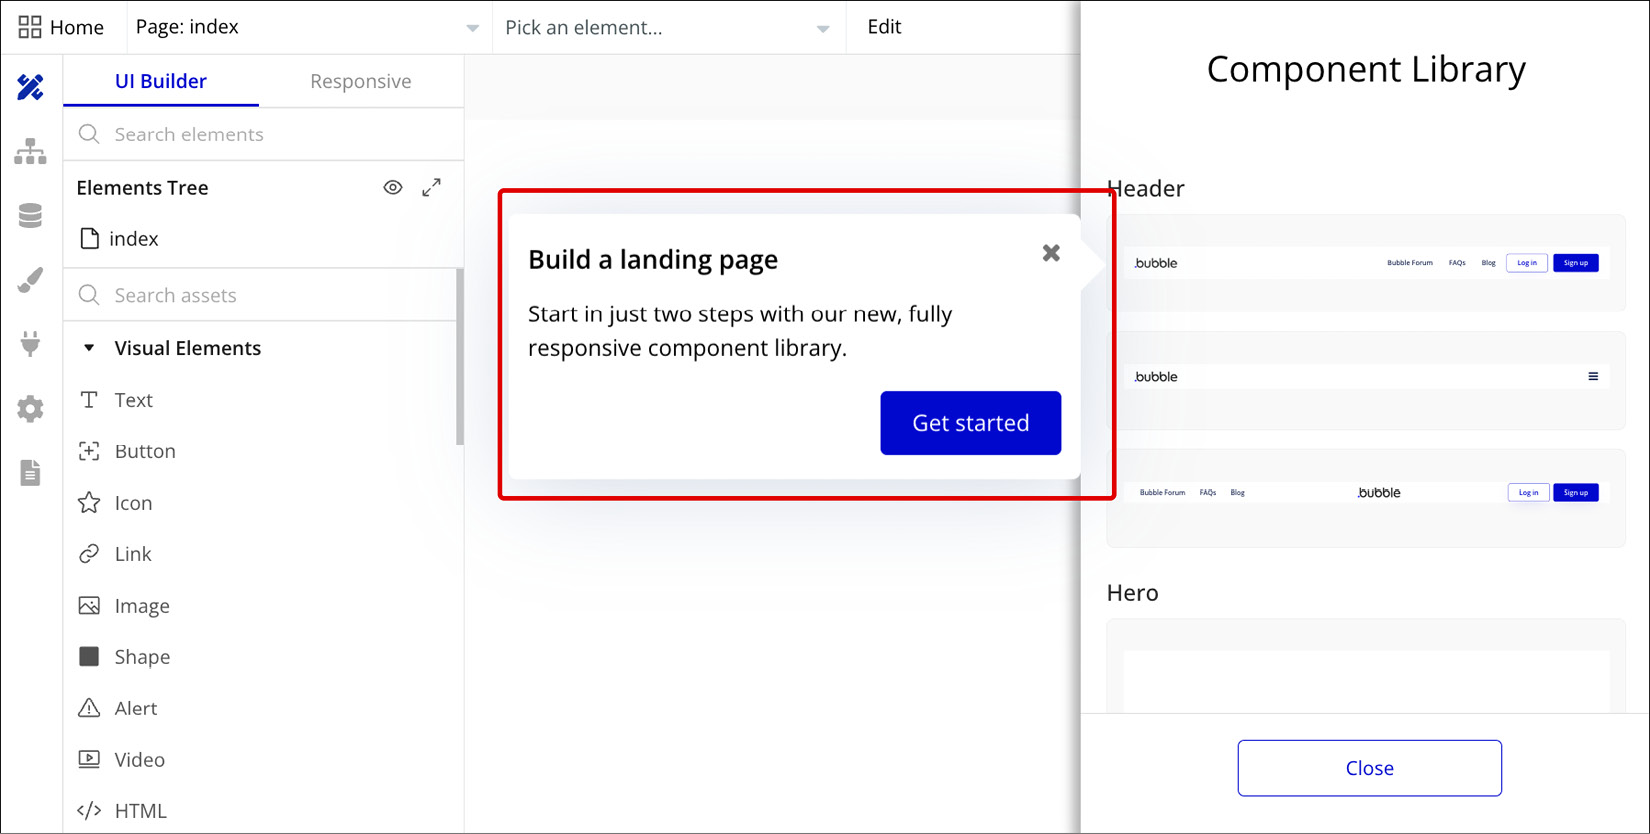
Figure 1.13: Bubble.io – the Bubble editor with a guided tour
Note that Bubble will continue to help you understand how the tool works by giving you a guided tour showing you around, what is what, and where things are. Following the tour is optional by clicking the blue buttons or you can choose to skip it. Your project has now been created and is ready to go, so you can start building! In the next sections, you will learn the essentials of the Bubble editor so you know where things are and how to navigate the tool.
With your account and project created, you now have the foundation to start building with Bubble. If you exit the project you just created, you will see your account workspace (dashboard) with all your projects side by side. To do that, just click the Bubble logo on the left-top corner of the page.
Here is an example of what your account and projects list looks like:
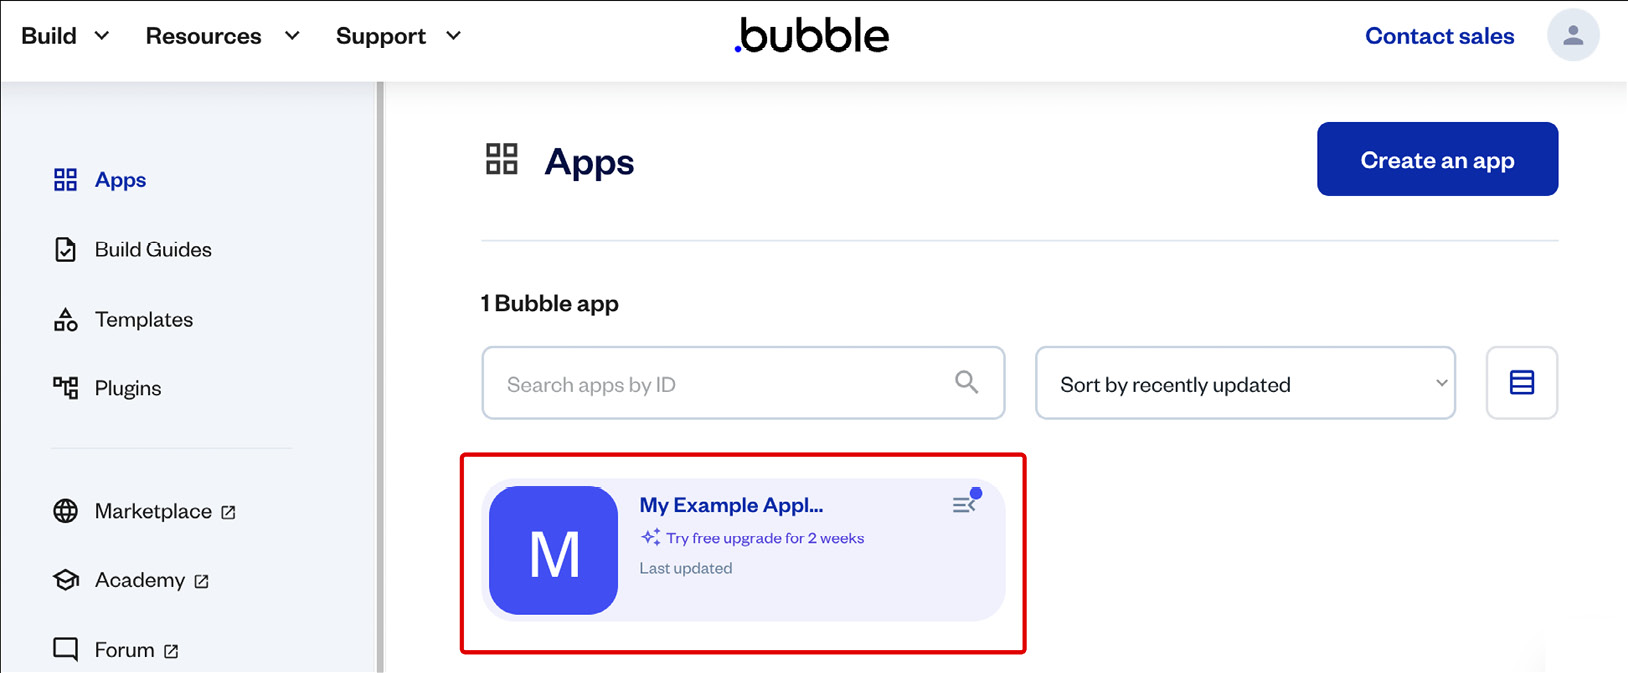
Figure 1.14: Bubble.io – your account and projects
This area is where you can visualize all the projects created under your account. We will cover it in greater detail in the next sections.