Reader small image

You're reading from  Creative Motion Mastery with Adobe After Effects

Product typeBook
Published inFeb 2024
PublisherPackt
ISBN-139781804617281
Edition1st Edition
Right arrow
Author (1)
Vishu Aggarwal
Vishu Aggarwal
author image
Vishu Aggarwal

Vishu Aggarwal is a Passionate, Professional & Multi Vendor Certified Trainer. He's an enthusiastic learner, creative designer, and an individual always eager to explore more in the fields of Graphic & Web Designing, Digital Video-Sound Editing, Instructional Design, Digital Marketing, UX/UI, 3D Animation, Virtual Reality, and Game Design. Being a career focused professional, he supports businesses across industries with extensive media and digital marketing services. His all-around experience and expertise in delivering niche multimedia and graphic design training, video editing, and many such media-related areas enable him to contribute towards accelerated organizational branding and performance with unparalleled creative outcomes.
Read more about Vishu Aggarwal

Right arrow

Deep-Dive into Text Animations

Adobe After Effects offers many ways to animate text. One of the most powerful and effective ways to animate text in After Effects is to use a text animator, which can animate individual characters, words, or lines of text using the range selector, using which you can create multiple types of text animations. In this chapter, you will learn about the different techniques and text properties used for text animation in Adobe After Effects.

The main topics covered in this chapter are as follows:

  • Opening the project and creating the text layer
  • Styling text using the Character and Paragraph panels
  • Working with text animations
  • Saving an animation as a preset
  • Using multiple text animators
  • Animating text on a path

Technical requirements

The lesson files for this chapter can be found at https://packt.link/gbz/9781804617281.

Before starting the chapter, it would be beneficial to preview the final output and end project file provided with the Chapter 3 | Lesson 3 exercise files. By doing so, you can gain a clear understanding of the desired outcome and have a visual representation of what you will be working toward throughout the chapter.

Previewing the final output allows you to see the completed project, demonstrating how the various elements, effects, and animations come together. You can observe the overall look and feel, the arrangement of different components, and how they interact with each other. This preview serves as a reference point, giving you a target to aim for as you progress through the chapter.

Opening the project and creating the text layer

For this, let us open the lesson2_start.aep project in which we will perform our operations for ease of learning in this chapter:

  1. Go to File | Open project | Lesson3_Start.aep.
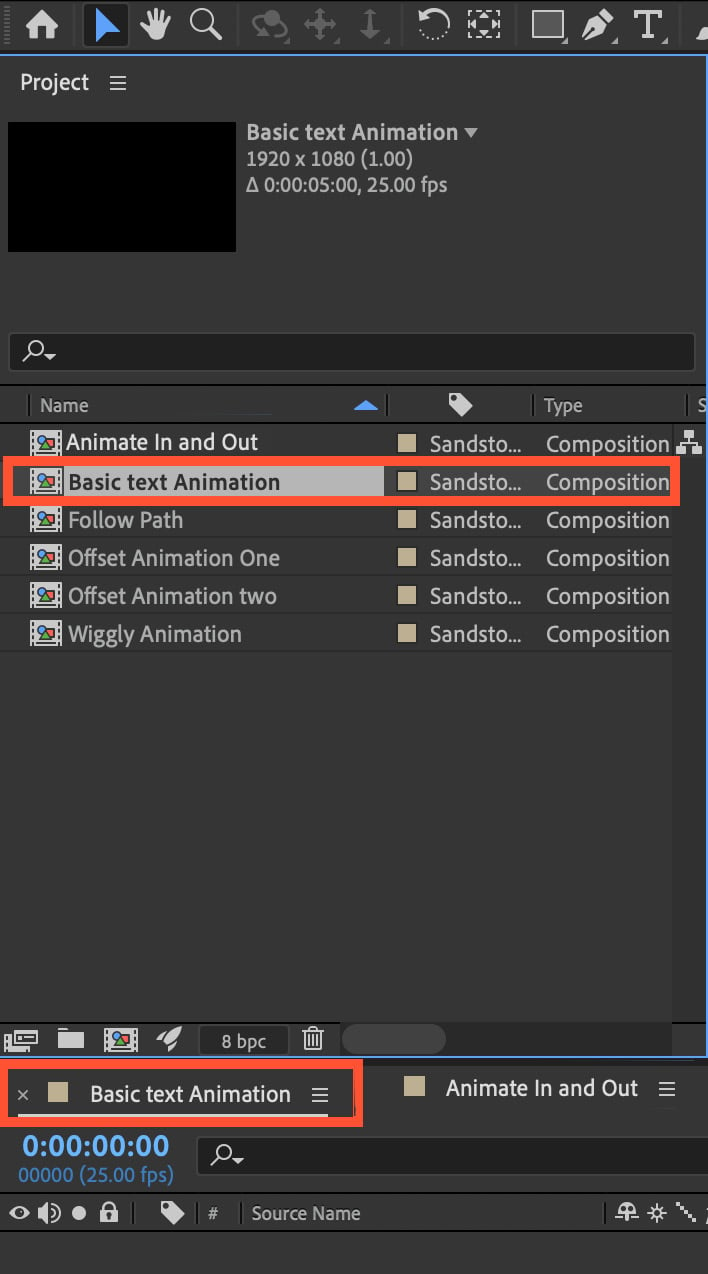
  2. Now double-click on the basic text animation composition in the Project panel to open it in the timeline.
Figure 3.1: Project and Timeline panels showing our Basic text Animation composition

Figure 3.1: Project and Timeline panels showing our Basic text Animation composition

It is a 5-second blank composition at Full-HD resolution. Here we are first going to learn how to create a text layer:

Figure 3.2: Text tool highlighted

Figure 3.2: Text tool highlighted

  1. To create a text layer, select the text tool and click on the composition.
  2. Once you click on the composition, you can write your text. In the Composition window, write basic text animation:
    Figure 3.3: Composition displaying basic text animation text

Figure 3.3: Composition displaying basic text animation text

If the text is not in the center, then go to the Move tool and move the text...

Styling text using the Character and Paragraph panels

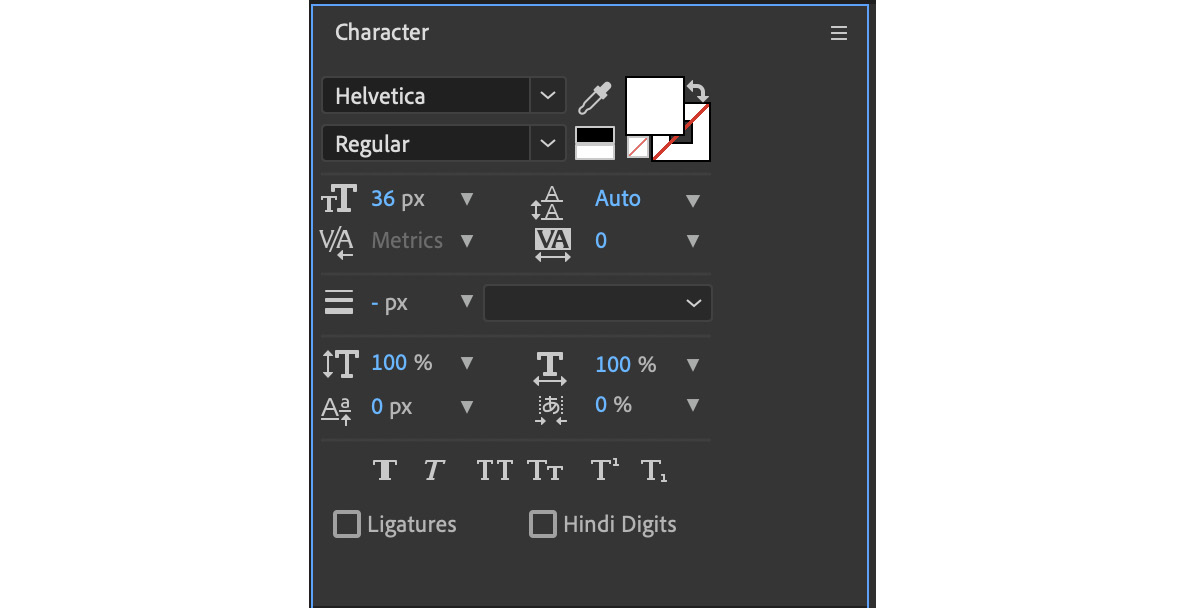
Now, we will see how to change text properties such as the font and font size. Open the Character panel as follows:

  1. Go to Window | Character, or alternatively you can find the Character panel to the right of the Composition panel:
Figure 3.4: Character panel with default settings

Figure 3.4: Character panel with default settings

  1. In the Character panel, change the font to Roboto.

    If the Roboto font is not already installed on your system, then you can easily install it from Adobe Fonts as follows:

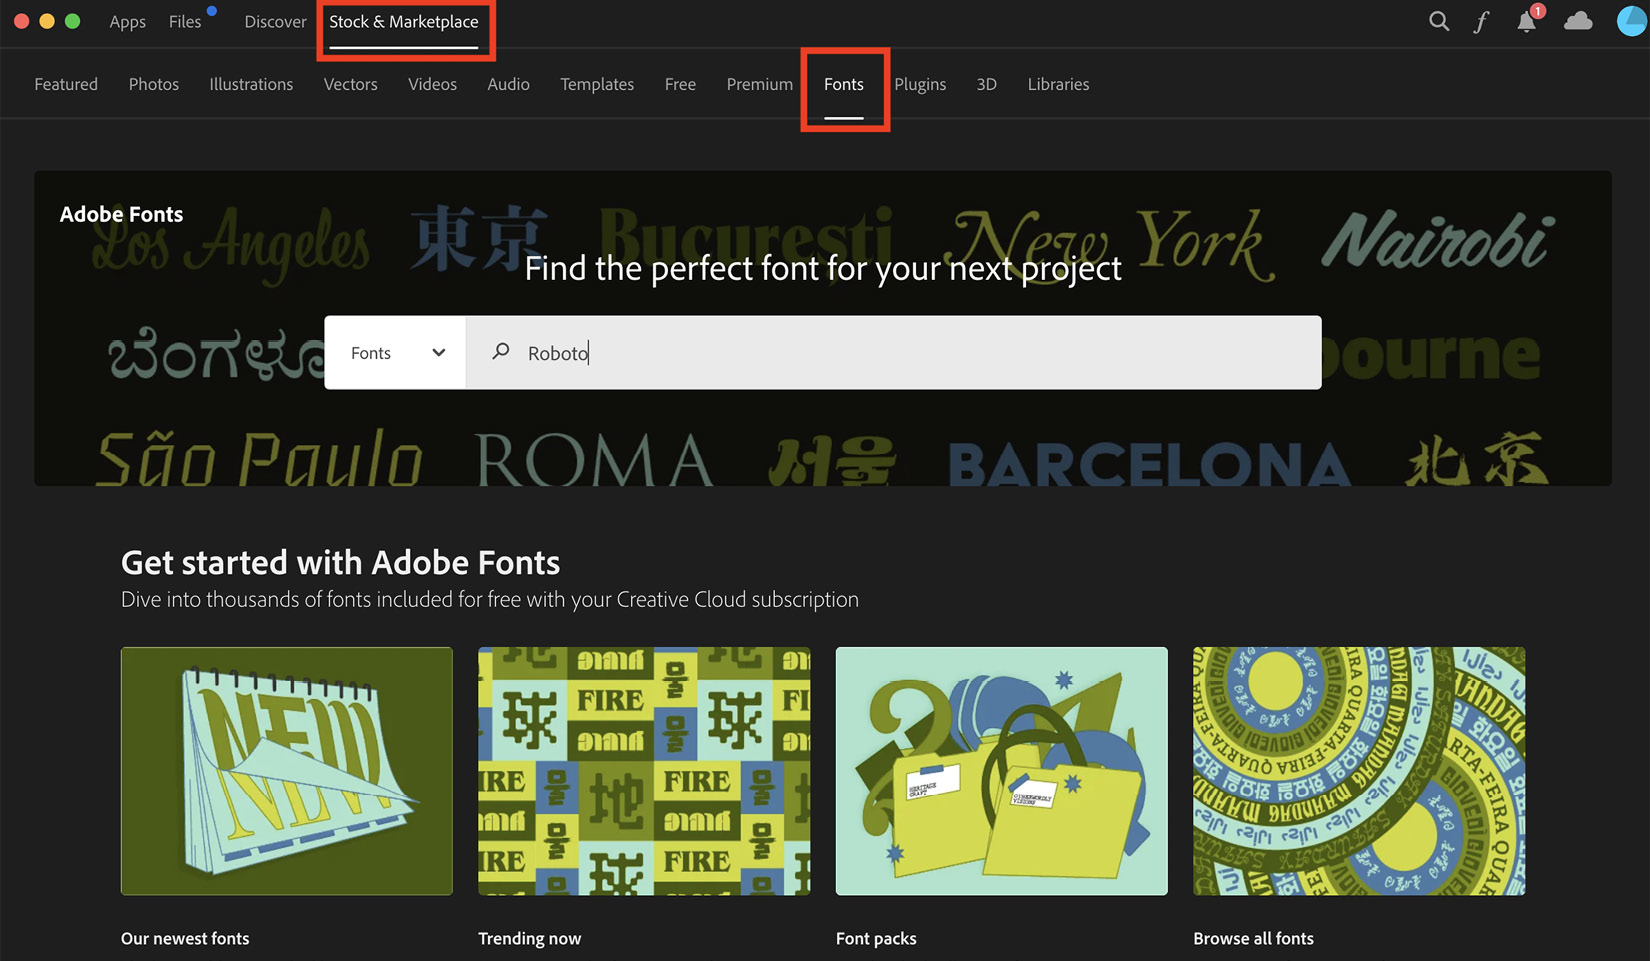
    1. Open Adobe Creative Cloud.
    2. Go to the Stock & Marketplace tab and then the Fonts tab.
    3. Search for the Roboto font and press Enter:
Figure 3.5: Search for the Roboto font in Creative Cloud

Figure 3.5: Search for the Roboto font in Creative Cloud

  1. It will open the font on a web page named fonts.adobe.com.
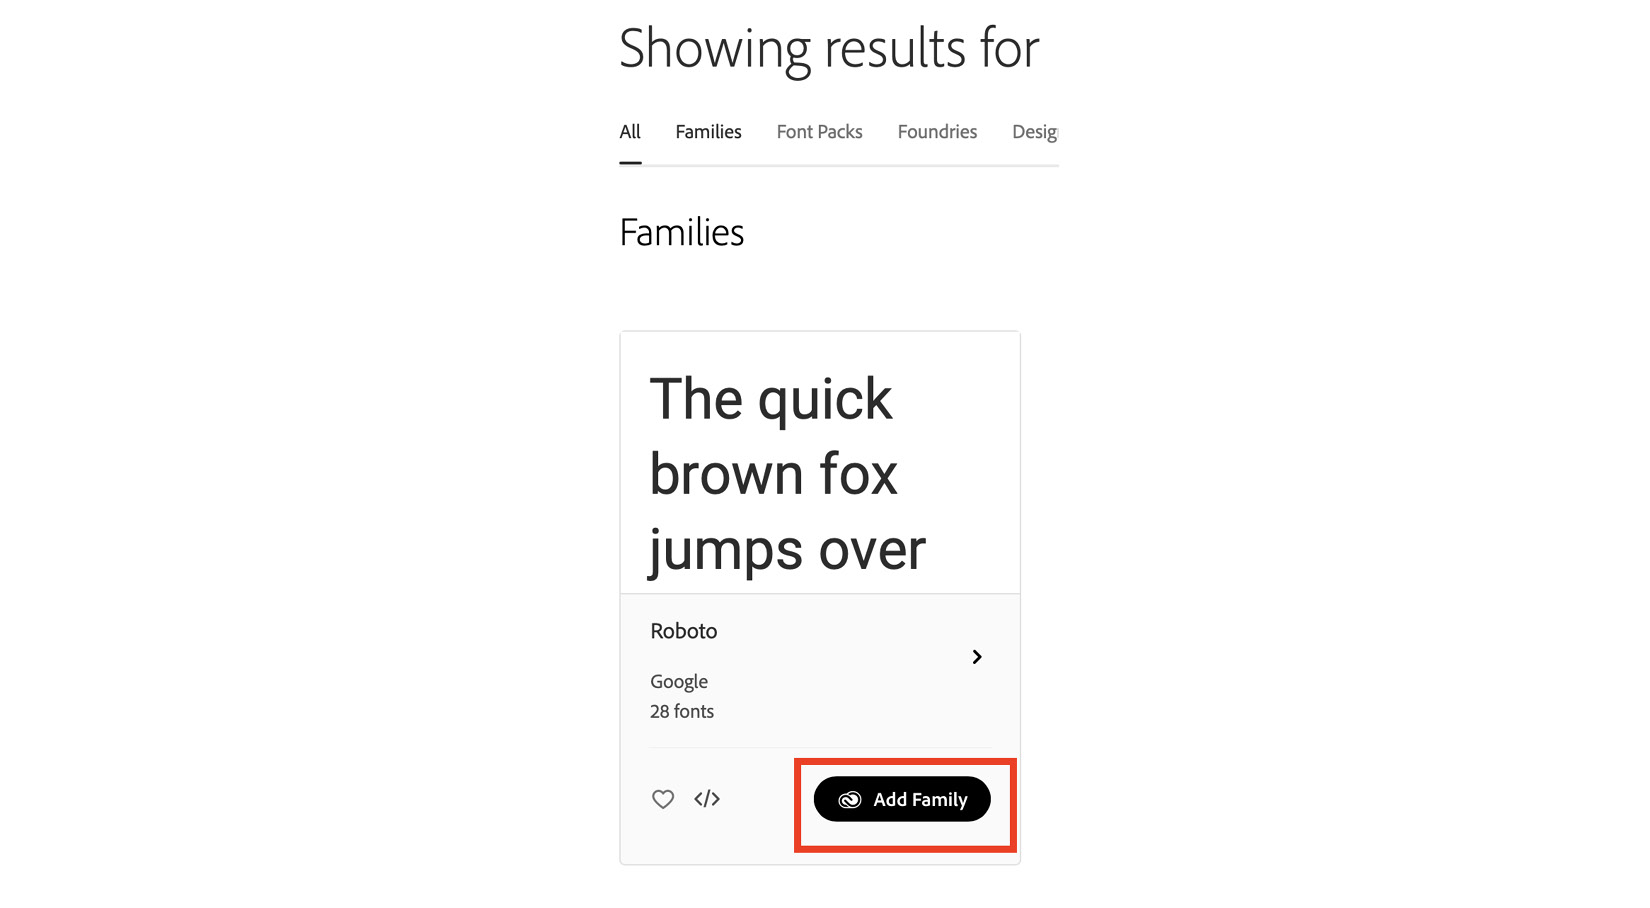
  2. Now activate the Roboto font family:
Figure 3.6: Showing the Roboto font family activated on fonts.adobe.com

Figure 3.6: Showing the Roboto font family activated on fonts.adobe.com

After activation...

Working with text animation

In Adobe After Effects, the text animator is a powerful feature that allows you to add animation and effects to text layers. It provides a wide range of options to animate individual characters, words, or lines of text, giving you creative control over how your text behaves and looks in your compositions.

In this section, we will see how to create animated text based on properties including position, scale, rotation, blur, and tracking opacity.

Let’s get started. First, we need to add the property to the text layer that we would like to animate:

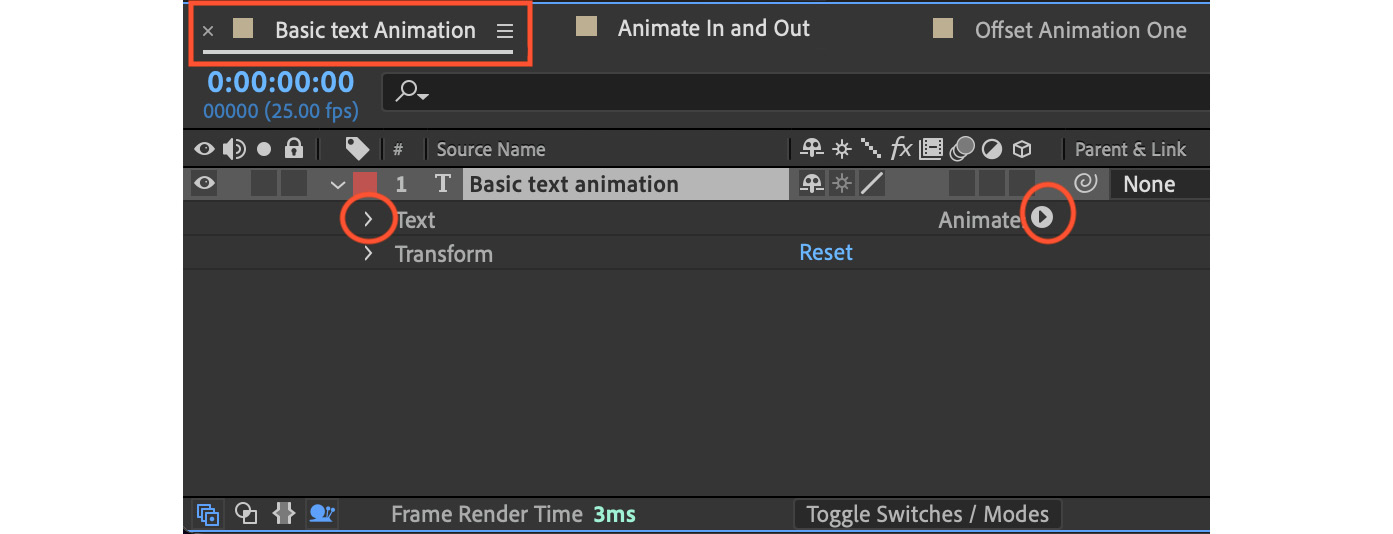
  1. Select the text layer in Basic text Animation and click on the drop-down arrow to reveal the text options. Here, you will find an Animate option, as shown in the following screenshot. Click on the animate icon to reveal the properties available:
Figure 3.9: Basic text animation layer in the Timeline panel

Figure 3.9: Basic text animation layer in the Timeline panel

  1. Select the Scale property from the Animate menu:
  2. ...

Saving animation as a preset

Now, we will look at how to save text animation presets so we can reuse the same animation in the future without needing to reconfigure everything. Specifically, we will save the animation created in the previous section as a preset. Before doing so, change the Based On option back to character-based, and then follow these steps:

  1. Make sure to select Animator 1 in the Basic text Animation layer.
  2. Now go to the Effects & Presets panel on the right side. If this panel isn’t visible, then go to Window | Effects & Presets to enable it.
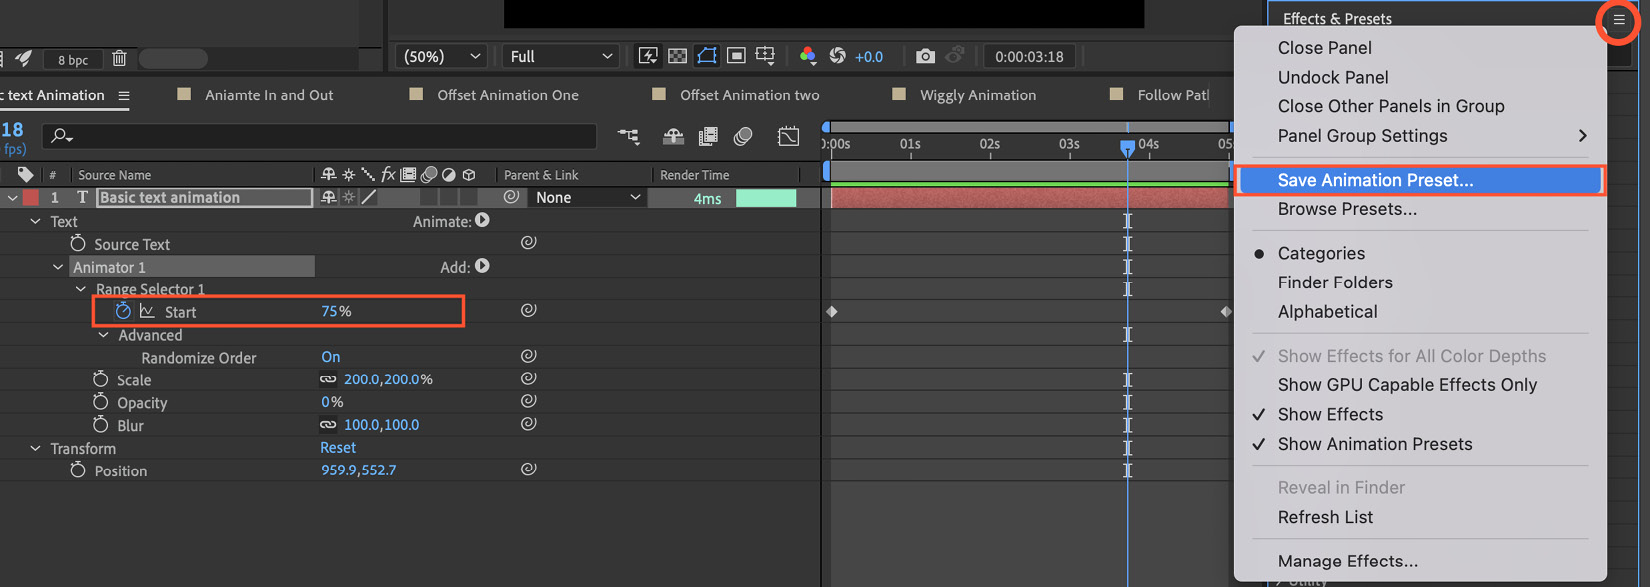
  3. In the Effects & Presets panel menu, select the Save Animation Preset... option:
Figure 3.18: Save Animation Preset...

Figure 3.18: Save Animation Preset...

This will open a window to save the preset in the user preset folder.

  1. Name it Animate In then click Save, and your preset will be saved.
  2. To view the preset you just saved, go to Effects & Presets, open the animation presets dropdown...

Using multiple text animators

Let us see how to apply animation presets and create in and out animations for our text by using multiple text animators.

To do so, move on to the next composition titled Animate In and Out. If it is not open in the Timeline panel, go to the Project panel and double-click on the Animate In and Out composition (as shown in Figure 3.1) to open it. Then, let’s begin!

  1. Select the Animate In & Out text layer and position the timeline playhead at 0 seconds.
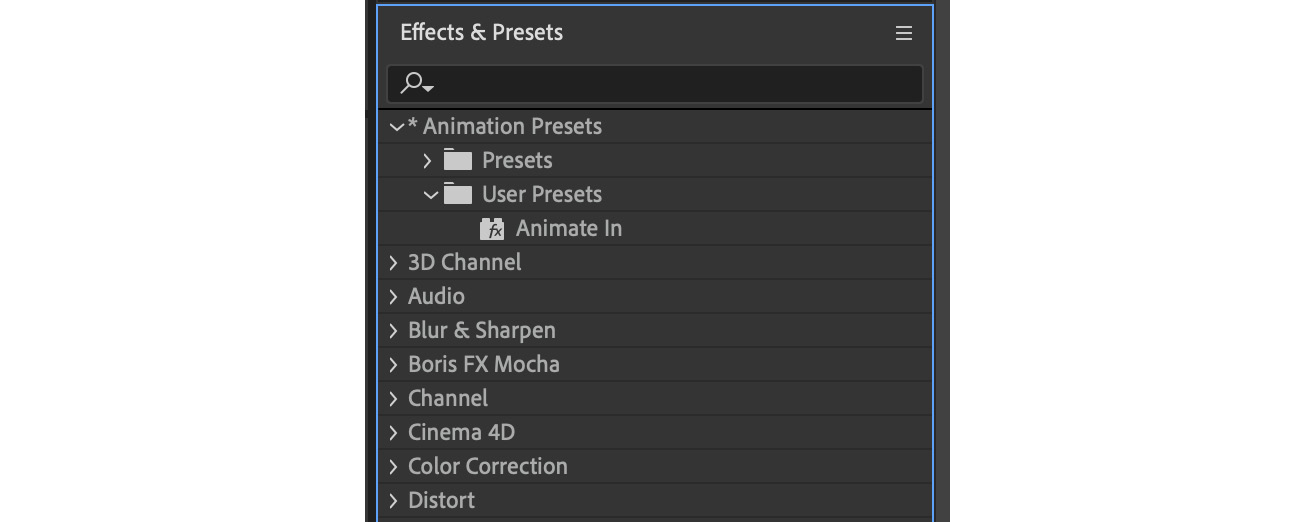
  2. Go to the Effects & Presets panel and expand the Animation Presets dropdown. Expand User Presets and double-click on the Animate In preset (this is the preset we saved in the Saving animation as a preset section):
Figure 3.19: The saved animation preset that needs to be applied on the Animate In & Out text layer

Figure 3.19: The saved animation preset that needs to be applied on the Animate In & Out text layer

  1. We have Animator 1 to animate our text in. Right-click on Animator 1 and rename it Animator In.
  2. In the Range Selector 1...

Animating text on a path

Let’s now see how we can animate our text to move along a path:

  1. Open the Follow Path composition if it is not already open. You can do this by double-clicking on it in the project folder. This composition contains some text reading Follow Path.
  2. Select the Follow Path text layer. The selected layer will be highlighted in the Composition panel with a line drawn across it. This line is referred to as the path.

    If you do not know how to draw a path, it will be explained in Chapter 4, when we cover how to create shape layers and paths. The path shown in this composition was created using the Pen tool in Adobe After Effects, which will also be discussed in the next chapter.

    For now, though, we want to animate the text along the highlighted path.

  3. To do this, go to the dropdown of the Follow Path text layer. From there, open the dropdown of Path Options, and then select Mask 1 in the path. This is the path that we can see in the composition.
  4. ...

Summary

In this chapter, we learned about the unique properties of text animation offered in Adobe After Effects. We also learned how to work with the text animator and the different options available. Finally, we also learned how to make some text follow a path. There are a lot of properties in Adobe After Effects for working with text animation that you can explore and apply in your own work.

Everything we covered in this chapter allows you to create custom text animations instead of just relying on the predefined text animation presets. You can now get creative by unleashing your own custom text animations.

Another recommendation is to inspect the effects and presets available, looking at their settings and learning how to make new text animation effects from them. To learn more about working with animation presets, you can refer back to Chapter 2.

In the next chapter, we will learn about shape layers and tools such as the Rectangle tool and the Pen tool, among others....

lock icon
The rest of the chapter is locked
You have been reading a chapter from
Creative Motion Mastery with Adobe After Effects
Published in: Feb 2024Publisher: PacktISBN-13: 9781804617281
Register for a free Packt account to unlock a world of extra content!
A free Packt account unlocks extra newsletters, articles, discounted offers, and much more. Start advancing your knowledge today.
undefined
Unlock this book and the full library FREE for 7 days
Get unlimited access to 7000+ expert-authored eBooks and videos courses covering every tech area you can think of
Renews at $15.99/month. Cancel anytime

Author (1)

author image
Vishu Aggarwal

Vishu Aggarwal is a Passionate, Professional & Multi Vendor Certified Trainer. He's an enthusiastic learner, creative designer, and an individual always eager to explore more in the fields of Graphic & Web Designing, Digital Video-Sound Editing, Instructional Design, Digital Marketing, UX/UI, 3D Animation, Virtual Reality, and Game Design. Being a career focused professional, he supports businesses across industries with extensive media and digital marketing services. His all-around experience and expertise in delivering niche multimedia and graphic design training, video editing, and many such media-related areas enable him to contribute towards accelerated organizational branding and performance with unparalleled creative outcomes.
Read more about Vishu Aggarwal