


Deploying a sketch on microcontrollers
Following the introductory section, we will delve into our first recipe to familiarize ourselves with the Arduino IDE and better understand how to compile and upload a sketch on an Arduino platform. To accomplish this objective, we will use a pre-built Arduino sketch to blink the LED on our microcontroller boards.
Getting ready
An Arduino sketch consists of two functions, setup() and loop(), as shown in the following code block:
void setup() {
}
void loop() {
}
The setup() function is the first function executed by the program when we press the reset button or power up the board. This function is executed only once and is generally responsible for initializing variables and peripherals.
After the setup() function, the program executes the loop() one, which runs iteratively and forever, as illustrated in the following diagram:

Figure 1.23: The setup() function runs once
These two functions are required in all Arduino programs.
How to do it…
Open the Arduino IDE, and follow the steps to make the on-board LED of our microcontroller boards blink:
Step 1:
Connect either the Arduino Nano or Raspberry Pi Pico to a laptop/PC through the micro-USB data cable. Next, check that the Arduino IDE reports the board’s name and serial port in the device drop-down menu:

If you have connected the Arduino Nano, the device drop-down menu in the Arduino IDE should report Arduino Nano 33 BLE as the board’s name, as shown in Figure 1.24.
Instead, if you connect the Raspberry Pi Pico, the Arduino IDE should report Raspberry Pi Pico as the board’s name.
Near the board’s name, you can also find the serial port. The serial port, which in Figure 1.24 is /dev/ttyACM0, depends on the operating system (OS) and the device driver. This serial port will be our bridge for communication between the microcontroller and the computer.
Step 2:
Open the prebuilt Blink example by clicking on Examples from the left-hand side menu, BUILT IN from the new menu, and then Blink, as shown in the following screenshot:
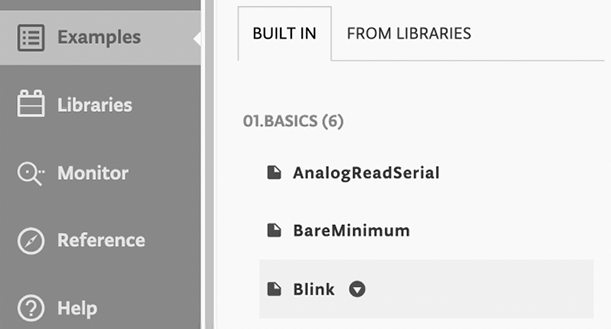
Figure 1.25: Built-in LED blink example
Once you have clicked on the Blink sketch, the code will be visible in the editor area.
Step 3:
Click on the arrow on the left of the board dropdown to compile and upload the program to the target device, as shown in Figure 1.26:

Figure 1.26: The arrow on the left of the board dropdown will compile and flash the program on the target device
In embedded programming, we generally use the term flashing when referring to the uploading of the program to the microcontroller.
The console output should return Done at the bottom of the page, and the on-board LED should start blinking, which means the sketch has been successfully compiled and uploaded to the microcontroller!
There’s more…with the SparkFun Artemis Nano!
The LED blinking sketch we just uploaded on the Arduino Nano and Raspberry Pi Pico is also available for the SparkFun Artemis Nano microcontroller.
In the local Arduino IDE, the Blink example is in File -> Examples -> 01.Basics -> Blink:
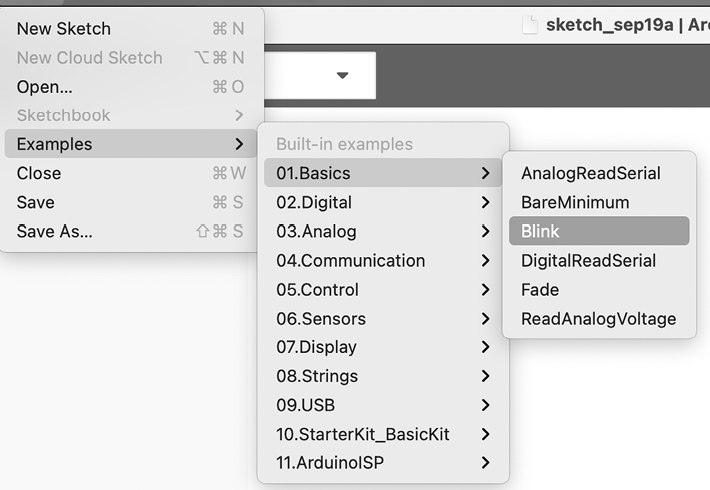
Figure 1.27: Built-in LED blink example in the local Arduino IDE
Once you click the Blink example, a new window with the sketch will be displayed. Before compiling the program, connect the SparkFun Artemis Nano to a laptop/PC through the USB-C data cable and make sure the device drop-down menu shows RedBoard Artemis Nano as the board’s name:

Figure 1.28: The device drop-down menu reporting the SparkFun Artemis Nano board
Then, click on the arrow on the left of the board dropdown to compile and upload the program to the target device. After a few seconds, the console output should return Upload complete, and the on-board LED of the SparkFun Artemis Nano should start blinking!