


In this section, you will learn what TensorFlow is, how to install it, and how to build simple models and do simple computations. Further, you will learn how to build a logistic regression model for classification, and introduce a machine learning problem to help us learn TensorFlow.
We're going to learn what kind of library TensorFlow is and install it on our own Linux machine, or a free instance of CoCalc if you don't have access to a Linux machine.
First, what is TensorFlow? TensorFlow is a new machine learning library put out by Google. It is designed to be very easy to use and is very fast. If you go to the TensorFlow website, tensorflow.org, you will have access to a wealth of information about what TensorFlow is and how to use it. We'll be referring to this often, particularly the documentation.
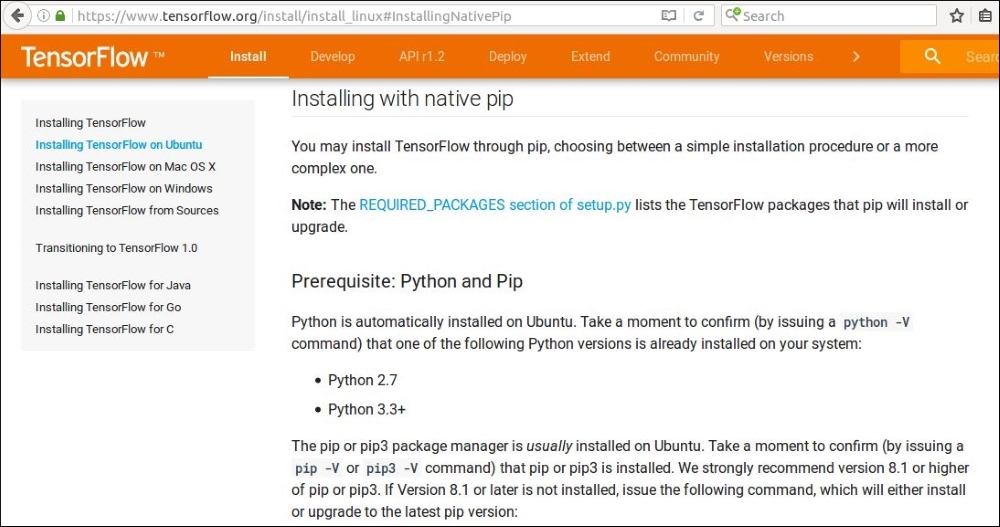
Before we get started with TensorFlow, note that you need to install it, as it probably doesn't come preinstalled on your operating system. So, if you go to the Install tab on the TensorFlow web page, click on Installing TensorFlow on Ubuntu, and then click on "native" pip, you will learn how to install TensorFlow.
Installing TensorFlow is very challenging, even for experienced system administrators. So, I highly recommend using something like the pip installation; alternatively, if you're familiar with Docker, use the Docker installation. You can install TensorFlow from the source, but this can be very difficult. We will install TensorFlow using a precompiled binary called a wheel file
. You can install this file using Python's pip module installer.
For the pip installation, you have the option of using either a Python 2 or Python 3 version. Also, you can choose between the CPU and GPU version. If your computer has a powerful graphics card, the GPU version may be for you.
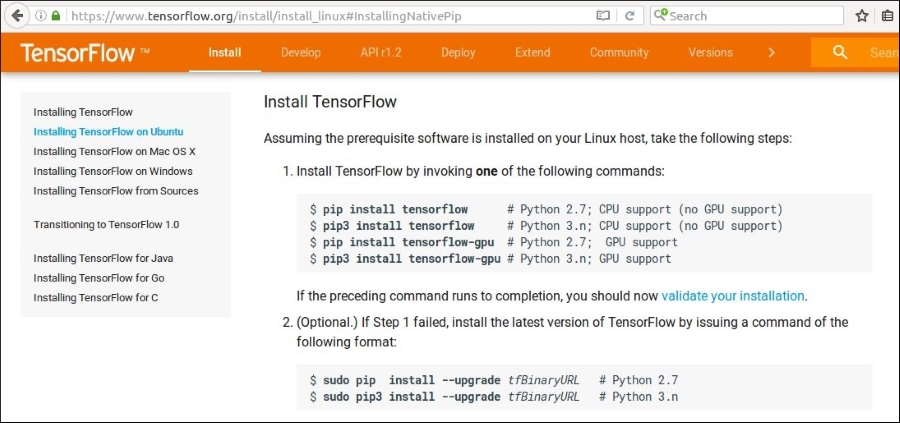
However, you need to check that your graphics card is compatible with TensorFlow. If it's not, it's fine; everything in this series can be done with just the CPU version.
Note
We can install TensorFlow by using the pip install tensorflow command (based on your CPU or GPU support and pip version), as shown in the preceding screenshot.
So, if you copy the following line for TensorFlow, you can install it as well:
# Python 3.4 installation
sudo pip3 install --upgrade \
https://storage.googleapis.com/tensorflow/linux/cpu/tensorflow-1.2.1-cp34-cp34m-linux_x86_64.whl
If you don't have Python 3.4, as the wheel file called for, that's okay. You can probably still use the same wheel file. Let's take a look at how to do this for Python 3.5. First, you just need to download the wheel file directly, by either putting the following URL in your browser or using a command-line program, such as wget, as we're doing here:
wget https://storage.googleapis.com/tensorflow/linux/cpu/tensorflow-1.2.1-cp34-cp34m-linux_x86_64.whl
If you download this, it will very quickly be grabbed by your computer.
Now all you need to do is change the name of the file from cp34, which stands for Python 3.4, to whichever version of Python 3 you're using. In this case, we'll change it to a version using Python 3.5, so we'll change 4 to 5:
mv tensorflow-1.2.1-cp34-cp34m-linux_x86_64.whl tensorflow-1.2.1-cp35-cp35m-linux_x86_64.whl
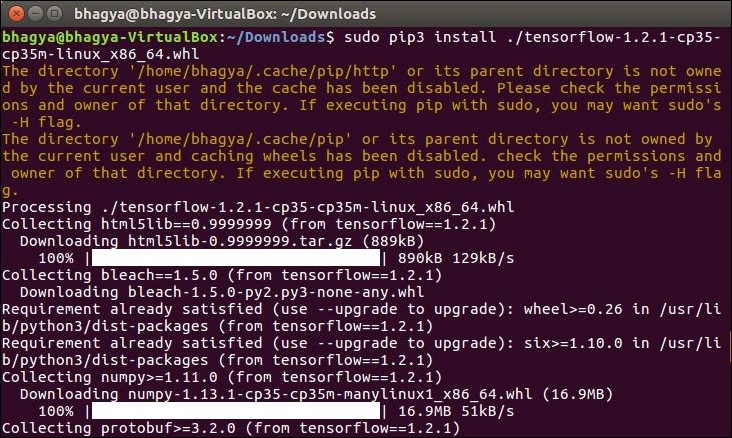
Now you can install TensorFlow for Python 3.5 by simply changing the installation line here to pip3 install and the name of the new wheel file after changing it to 3.5:
sudo pip3 install ./tensorflow-1.2.1-cp35-cp35m-linux_x86_64.whl
We can see this works just fine. Now you've installed TensorFlow.
If your installation somehow becomes corrupted later, you can always jump back to this segment to remind yourself about the steps involved in the installation.
If you don't have administrative or installation rights on your computer but still want to try TensorFlow, you can try running TensorFlow over the web in a CoCalc instance. If you go to https://cocalc.com/ and create a new account, you can create a new project. This will give you a sort of a virtual machine that you can play around with. Conveniently, TensorFlow is already installed in the Anaconda 3 kernel.
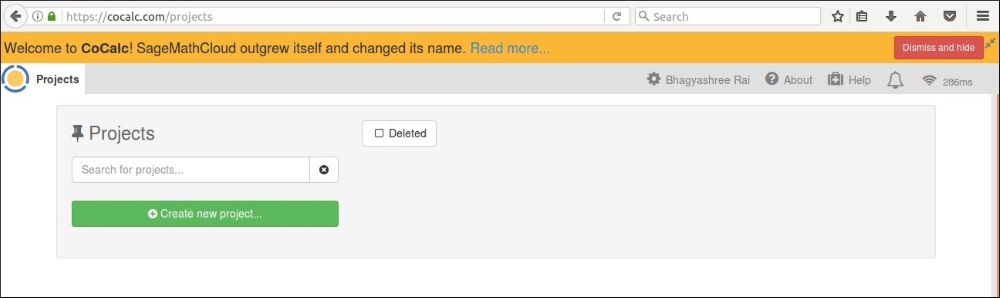
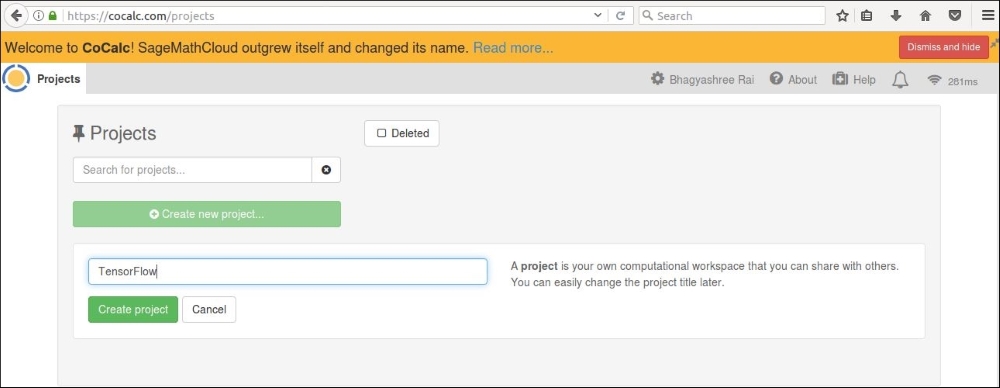
Let's create a new project called TensorFlow. Click on +Create new project…, enter a title for your project, and click on Create Project. Now we can go into our project by clicking on the title. It will take a couple of seconds to load.
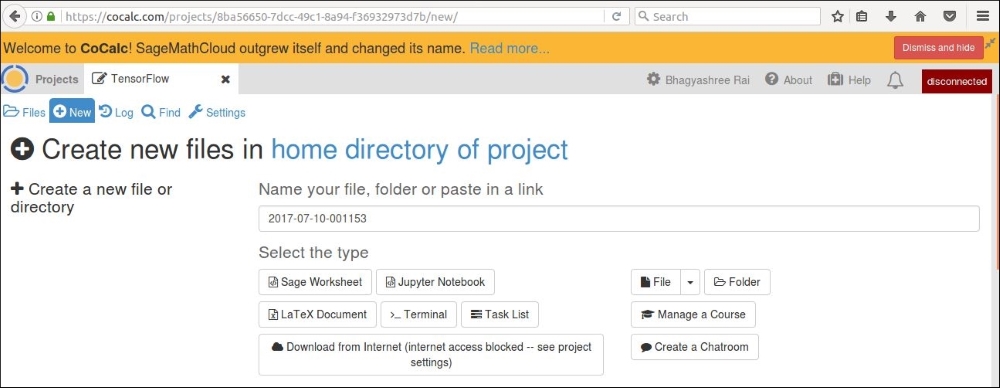
Click on +New to create a new file. Here, we'll create a Jupyter notebook:
Jupyter is a convenient way to interact with IPython and the primary means of using CoCalc for these computations. It may take a few seconds to load.
When you get to the interface shown in the following screenshot, the first thing you need to do is change the kernel to Anaconda Python 3 by going to Kernel | Change kernel… | Python 3 (Anaconda):
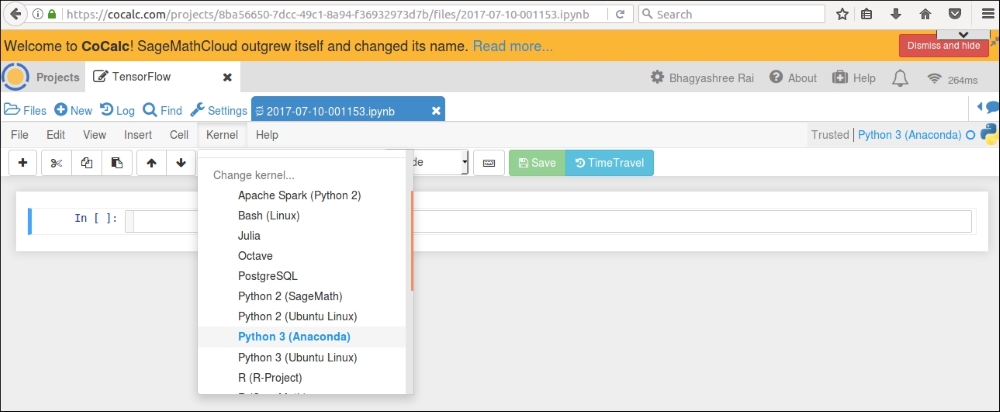
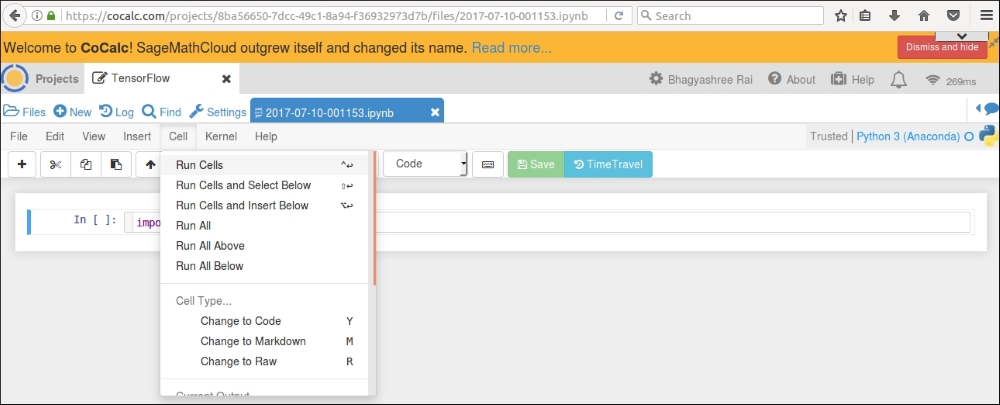
This will give you the proper dependencies to use TensorFlow. It may take a few seconds for the kernel to change. Once you are connected to the new kernel, you can type import tensorflow in the cell and go to Cell | Run Cells to check whether it works:
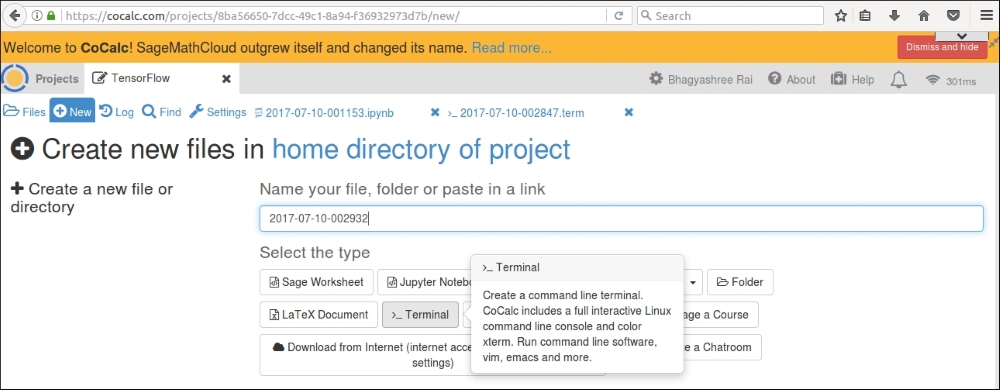
If your Jupyter notebook takes a long time to load, you can instead create a Terminal in CoCalc using the button shown in the following screenshot:
Once there, type anaconda3 to switch environments, then type ipython3 to launch an interactive Python session, as shown in the following screenshot:
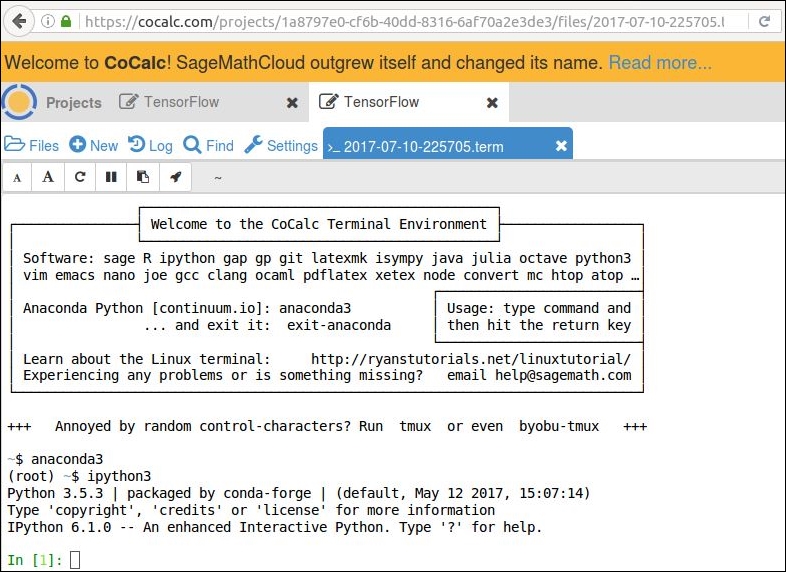
You can easily work here, although you won't be able to visualize the output. Type import tensorflow in the Terminal and off you go.
So far in this section, you've learned what TensorFlow is and how to install it, either locally or on a virtual machine on the web. Now we're ready to explore simple computations in TensorFlow.