

In the previous chapter, we looked at how we can configure the page flow inside Bonita. We had a look at the history and overview pages, and also learned about externalizing the Web forms. In this chapter, we will learn about customizing the look and feel of the Web forms inside the Studio and also of the inbox view. In addition, we will have a look at the other appearance options that are available for customization. Note that the Look'n'feel editor is available only in the Subscription Pack version. However, the CSS and other properties can be changed in the Community Edition, too. But for completely changing the Look'n'feel properties, the Subscription Pack is needed.
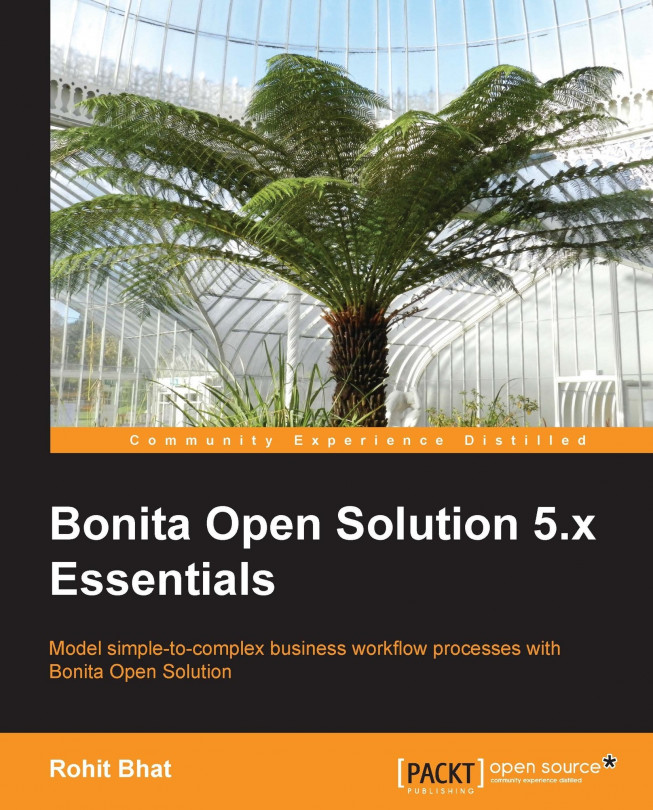
Open the TicketingWorkflow process and open the Web form of the BookTicket step. Let us have a look at the customization options available to us at the form level in Bonita. Click on the TripOptions radio button. Here, we can specify the look and feel of these options in the Appearance tab. We get the options to modify the grid, cell, items, label, and field elements. For each of these components, we can change the text styles.
Let us look at each of these elements individually:
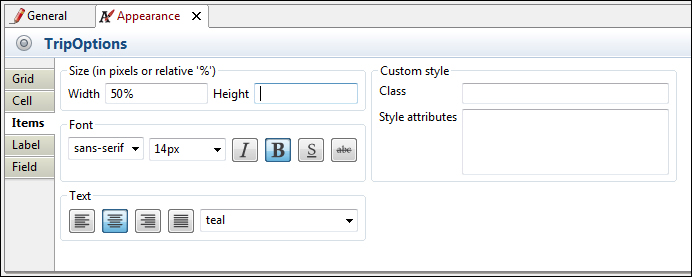
Figure 7.1: Customizing different fields of web forms
Grid: For the grid element, we can specify the height and width of the grid, either absolutely in pixels or relatively in percentage.
Cell: In the cell element, in addition to specifying the height and width of the cell, we can also enter the class of our custom css file. We have to include this custom file and mention the name of the class present in the css file. Also, we can specify the css style attributes.
Items: The items style indicates...
Click on any pool and navigate to the Application tab. Here, after selecting the Look'n'feel tab, we can click on Apply a look'n'feel. Bonita gives certain default templates for Look'n'feel. We can even import our own Look'n'feel here. The default Look'n'feel have a preview image that can help us gauge how the template might look like.
Figure 7.2: Applying a Look'n'feel resource
For a detailed view of the Look'n'feel, you can even apply it and run the application to check the various styling elements. Note that if you apply a new Look'n'feel, you lose all the information that you might have previously edited.
A Look'n'feel resource has five templates for various style elements:
Process container: This template is used to add styling elements and JavaScript around the process layout and related resources.
Process layout: This is the template used for laying out the process. The process layout includes the top header of the Web page and links for logging out, inbox navigation...
In addition to customizing the look and feel of the workflow, we can also add custom CSS and other resources, such as images, to enhance the styling of the Web forms. A Resources folder is created when a new workflow diagram is created. It contains an application folder, which in turn contains two folders: css and images. We can also add custom files and folders to the resources so that they are available for use throughout the applications.
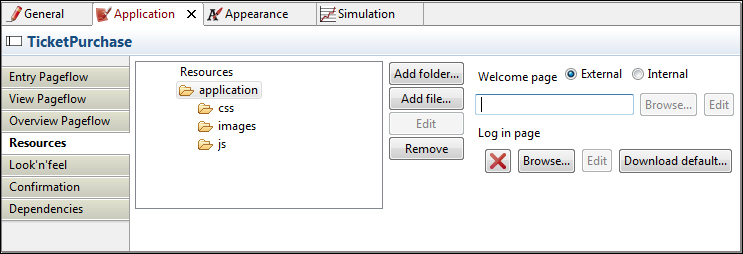
Figure 7.3: Adding Resources files
A good practice is to add all the JavaScript files in a separate js folder within the application folder. Similarly, we can add additional custom images and css files, too. We can also change the login page from this console. We can override the default Bonita login page or even make changes to it depending on our requirement.
The option of editing a particular Look'n'feel template is available only in the Subscription Pack version of Bonita Open Solution. Editing a Look'n'feel template is made pretty easy with the editor provided by Bonita. Let us have a look at the way to create a new Look'n'feel and edit it.
Click on the Look'n'feel menu button and select New. Here, we can define a new Look'n'feel by selecting existing elements as templates. We have much more options to choose from in the Subscription Pack compared to the Community Edition while applying Look'n'feel to a form.
Note that we can edit the Look'n'feel for forms as well as the User Experience. Select the white application template as it is a broad form that would be useful in displaying the elements of our form in a better manner. Name the new Look'n'feel and select Create. This opens up the Look'n'feel editor.
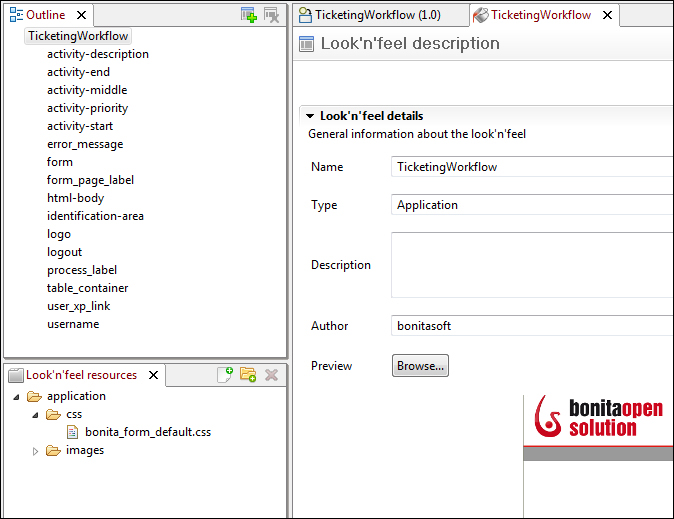
Figure 7.4: The Look'n'feel editor in Bonitasoft
Here, the left-hand panel has all the attributes of this particular...
In addition to changing the styling of the Web forms, we can also customize the User Experience Inbox view of Bonitasoft. This inbox view again has the HTML and CSS files that you can edit. You can also add certain JavaScript elements to the User Experience console. Let us have a look at the way to create a new User Experience Look'n'feel.
Similarly for creating a new Look'n'feel resource for the Web form, when we click on New in the Look'n'feel menu item, choose the default UserXP to edit. Here, in addition to the elements present in the left-hand panel for the various sections of the User Experience, there are two HTML pages, called BonitaConsole.html and admin.html. The BonitaConsole.html page contains the HTML code of the User Inbox page. The administration page code is contained in admin.html. In these two HTML pages, we can add our own HTML or menu items or buttons to customize the inbox.
The css files contain the styling elements for displaying the Bonita...
We have seen the way to customize the Look'n'feel resources in Bonita. We have created a new Look'n'feel resource for the application form as well as for the User Experience. In addition, we have also learned about the styling of various form elements. Thus, we have learned the various elements that can be customized to redesign our forms and the User Experience.
With this, we have finally come to the end of developing applications with Bonita Open Solution. Along the way, we have learned various functionalities that this tool provides us to develop a Business Process Model and also to develop a Workflow application. However, we will also learn how to deploy the application on a server in the Appendix, Deploying Bonita on a Server.
The rest of the chapter is locked
You have been reading a chapter from
Bonita Open Solution 5.x EssentialsPublished in: Nov 2013Publisher: PacktISBN-13: 9781782167082
Register for a free Packt account to unlock a world of extra content!
A free Packt account unlocks extra newsletters, articles, discounted offers, and much more. Start advancing your knowledge today.
undefined
Unlock this book and the full library FREE for 7 days
Get unlimited access to 7000+ expert-authored eBooks and videos courses covering every tech area you can think of
Renews at $15.99/month. Cancel anytime