Reader small image

You're reading from  Android Things Quick Start Guide

Product typeBook
Published inAug 2018
PublisherPackt
ISBN-139781789341799
Edition1st Edition
Right arrow
Author (1)
Raul Portales
Raul Portales
author image
Raul Portales

Raul Portales is a software engineer who has had a love for computers, electronics, and gadgets in general for as long as he remembers. He jumped into Android as soon as it was released. Raul has worked on social networks, education, healthcare, and even founded a gaming studio and a consultancy company. Specializing in mobile and UX, he speaks frequently at conferences and meetups. Raul's love for electronics reignited when Google announced Android Things. He started tinkering with it with the first Developer Preview, which lead to adding the IoT category on his Google Developer expert profile.
Read more about Raul Portales

Right arrow

The Rainbow HAT

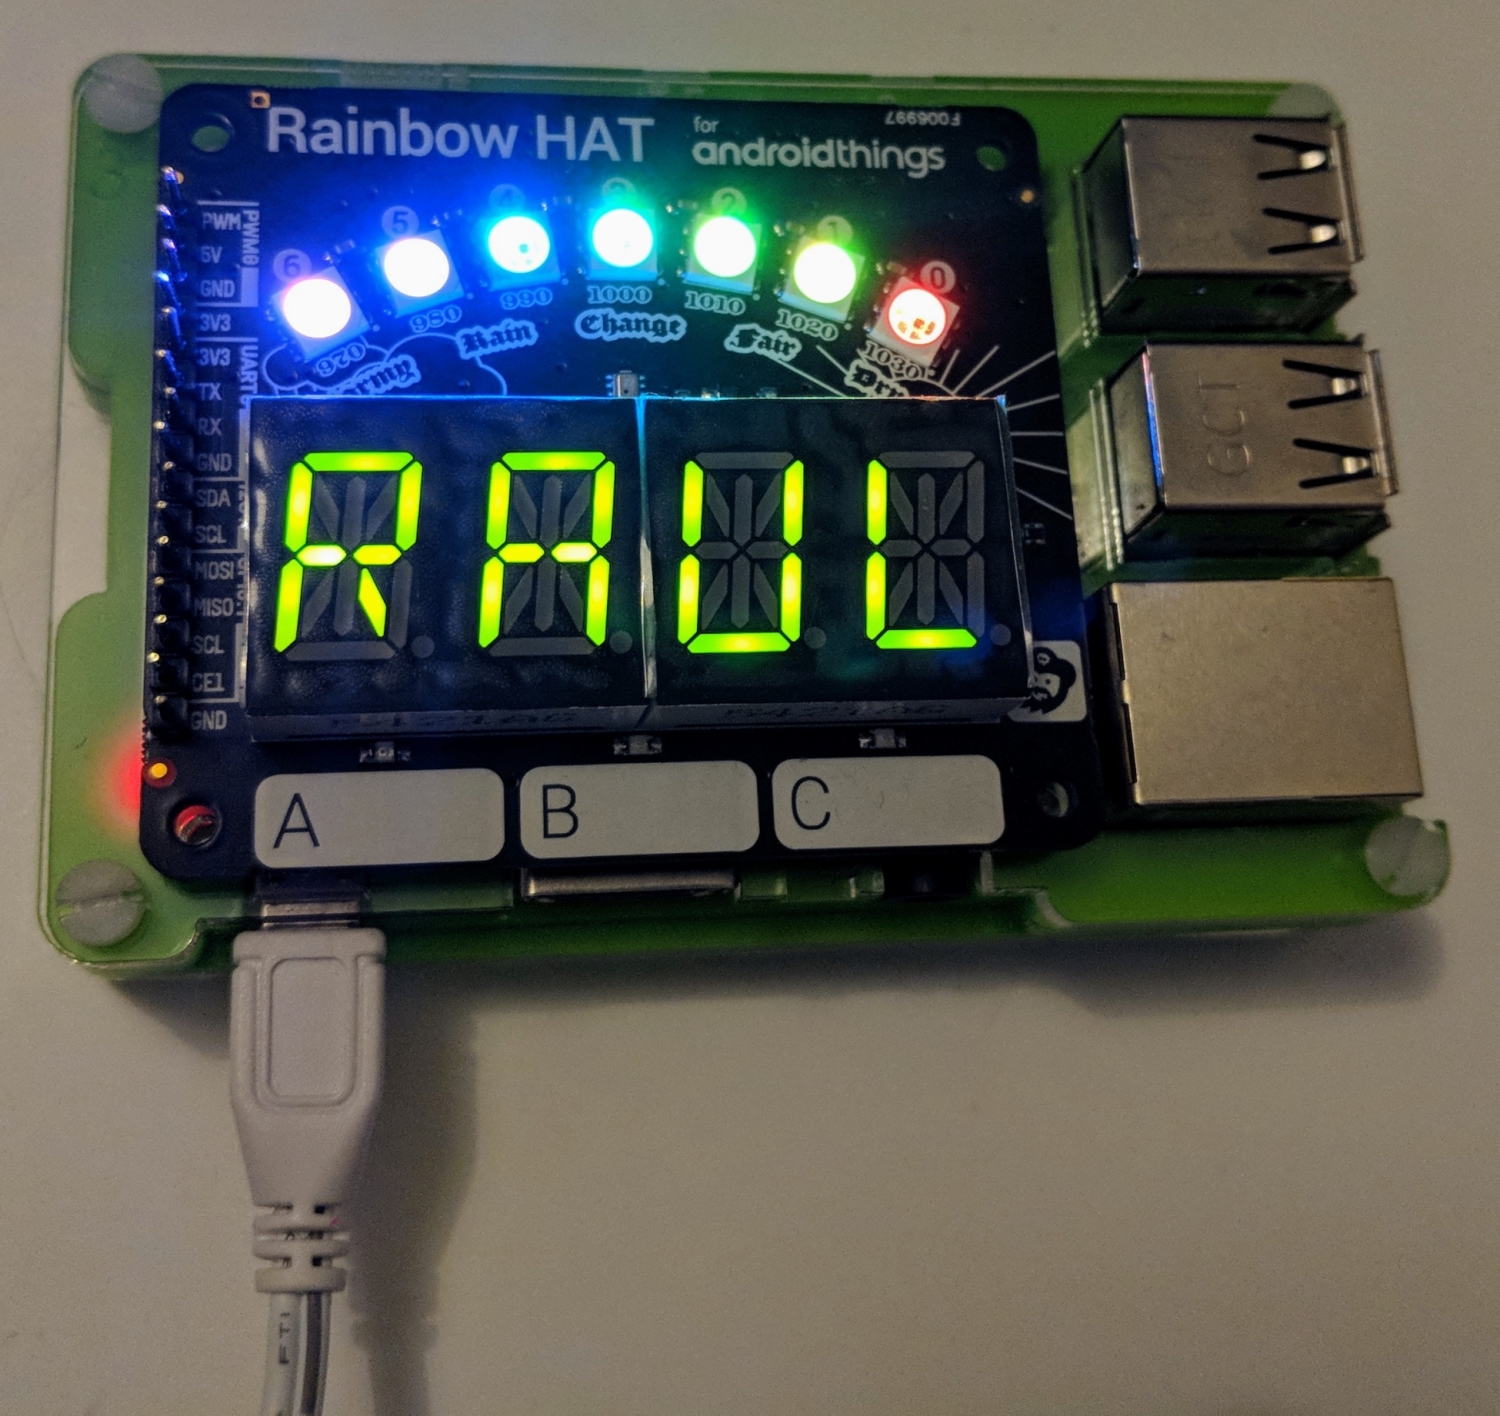
In this chapter, we will make use of the Rainbow HAT to learn how to interact with hardware. This HAT (Hardware on Top) is a selection of components that you can plug into a developer kit to start working with them without the need for any wiring. We will start with an overview of the architecture of Android Things—explaining peripheral lifecycle and user space drivers—and then work with each component of the Rainbow HAT (as shown in the following screenshot) including some best practices along the way.

The Rainbow HAT with all the LEDs and LCD on

For each part we will use a complete self-contained example and we will analyze how the code works. Along this chapter, we will be using the high-level abstraction drivers for the components that come from the contrib-drivers repository from Google.

We will also take advantage of the meta driver for the...

Technical requirements

You will be required to have Android Studio and Android Things installed on a developer kit. You also will require many hardware components to effectively perform the tasks given in this chapter. The components are very interesting to have, just to see them working, but the Rainbow HAT is particularly important. We go into details about the developer kits and how to pick the right one, as a part of Chapter 1, Introducing Android Things. Finally, to use the Git repository of this book, you need to install Git.

The code files of this chapter can be found on GitHub:
https://github.com/PacktPublishing/Android-Things-Quick-Start-Guide.

Check out the following video to see the code in action:

http://bit.ly/2NajYsI.

Android Things architecture

Before we get our hands on into the code, let's explore the overall architecture of Android Things and present a few concepts that we will be using throughout the chapter, such as the best practices to handle the peripheral lifecycle and the concept of user space drivers.

Peripheral lifecycle

Whenever we want to use a peripheral, we need to get access to it before we can do anything with it. This is done using the open method that all peripheral classes have. Opening a peripheral gives us exclusive control over it and therefore it can not be opened if it is already open by another app. The operating system will throw an Exception if the peripheral is already in use.

As you can imagine, this...

LEDs

If you are familiar with how Arduino code is structured, you may be expecting to have a setup and a loop methods. Android Things can work like that too. We will start with our methods named using that convention to provide a common ground if you have experience with Arduino. However, Android Things allows us to write code in a much more structured way. In this section we will start with something close to the Arduino way, explain its drawbacks, and show better alternatives, showing the different ways to blink an LED.

Blinking an LED is the IoT equivalent of Hello World.

Let's get into blinking an LED the Arduino way.

The Arduino way

The simplest way is to have a setup where we initialize the LED, followed by a loop...

Buttons

The next component we are going to work with are capacitive buttons. The Rainbow HAT has three of them, labeled A, B, and C. Buttons can be handled in two different ways, using Buttons and using InputDrivers.

While Buttons are similar in behavior to the ones we place on a traditional UI, InputDrivers are similar to HID keyboards; they allow us to integrate with the operating system and send key press events, letting us handle our button presses as standard keys.

We will look at both of them with the same example: we will turn the red LED on when button A is pressed and off when it is not.

Let's start with the button driver.

Button driver

The simplest way to interact with a button is to use the button driver. This...

Piezo buzzer

Let's make some noise. The buzzer also has its own driver. We can open it using the RainbowHat.openPiezo() method and it returns an object of type Speaker.

The Speaker class has two methods: play, which receives the frequency to play, and stop, which -unsurprisingly- makes the speaker stop.

To follow up from the previous section, let's build a three-tone piano where the buttons A, B, and C will play the frequencies of 1,000 Hz, 3,000 Hz, and 5,000 Hz, respectively. The buzzer will start sounding when the button is pressed and stop when the button is released.

For this example, we'll use button drivers for simplicity. The initialization and cleanup for PianoActivity looks like this:

class PianoActivity : Activity() {

private lateinit var buttonA: ButtonInputDriver
private lateinit var buttonB: ButtonInputDriver
private lateinit var buttonC:...

Alphanumeric display (Ht16k33)

The most prominent part of the Rainbow HAT is the four-digit, 15-segment alphanumeric display. It takes most of its surface and it is also very handy, since it can be used to display text.

contrib-drivers includes a class named AlphanumericDisplay, which extends from Ht16k33 (the controller chip) and it adds a few string manipulation utilities.

The simplest way to use the display is just five lines of code:

val alphanumericDisplay = RainbowHat.openDisplay()
alphanumericDisplay.setBrightness(Ht16k33.HT16K33_BRIGHTNESS_MAX)
alphanumericDisplay.setEnabled(true)
alphanumericDisplay.display("AHOY")
alphanumericDisplay.close()

As usual, we use the RainbowHat utility method to open the peripheral (in this case, RainbowHat.openDisplay), then we set the brightness (in our example, to the maximum value), and we also set it to enabled. Setting the display...

Temperature and pressure sensor (Bmx280)

The temperature and pressure sensor on the Rainbow HAT uses the BMP280 chip. A similar component—BME280—has an extra humidity sensor and the driver is designed to work with both chips (hence, the X in the name Bmx280) since both have the same internal protocol. Again, remember that the one in the Rainbow HAT does not include a humidity sensor.

Android Things offers two ways to read data from sensors. The first one is to proactively read a value from the component itself, and the second one is to configure a SensorDriver that will deliver readings via a listener whenever the values change. This is meant to use the same framework as the sensors on a phone (namely gyroscope, magnetometer, and accelerometer).

Querying the component directly is simpler; it gives all the control and also all the responsibility to us. On the other...

LED strip (Apa102)

For the last part, we have the RGB LED strip, which is the one that gives the Rainbow HAT its name. It has seven RGB LEDs that we can set to any combination of colors.

For this example, we will just use the color red, because we are going to build a moving LED like that of KITT from Knight Rider or, if you prefer, from a Cylon eye. Having such pop culture references at hand, our example could not be any other one.

For this example, we will use a timer and keep track of the current position that is lit up, and also check edge conditions to bounce and change direction.

Let's start with the initialization and cleanup code:

class KnightRiderSimpleActivity : Activity() {
private val timer: Timer = Timer()
private var goingUp = true
private var currentPos = 0
private val interval: Long = 100

val colors = IntArray(RainbowHat.LEDSTRIP_LENGTH)
...

Summary

In this chapter, we have learned about the Android Things architecture, and then worked with a lot of different hardware components: LEDs, buttons, buzzer, alphanumeric display, sensor reading, and LED strip, with lots of examples and coding guidelines.

Although all the components seemed identical, we have used four different communication protocols: GPIO, PWM, I2C, and SPI.

The Rainbow HAT meta driver has abstracted us from these differences, but as soon as we move away from it and into using other components, we will need to know which protocols they use to communicate and how to wire them, even if it is just to know which pin to connect them to.

If we flip the Rainbow HAT, we can see the specs of each of the components:

  • LED Red, Green, and Blue: BCM6, BCM19, and BCM26
  • Buttons A, B, and C: BCM21, BCM20, and BCM16
  • Piezo: PWM1
  • Alphanumeric display (HT16K33): I2C1 0x70...
lock icon
The rest of the chapter is locked
You have been reading a chapter from
Android Things Quick Start Guide
Published in: Aug 2018Publisher: PacktISBN-13: 9781789341799
Register for a free Packt account to unlock a world of extra content!
A free Packt account unlocks extra newsletters, articles, discounted offers, and much more. Start advancing your knowledge today.
undefined
Unlock this book and the full library FREE for 7 days
Get unlimited access to 7000+ expert-authored eBooks and videos courses covering every tech area you can think of
Renews at $15.99/month. Cancel anytime

Author (1)

author image
Raul Portales

Raul Portales is a software engineer who has had a love for computers, electronics, and gadgets in general for as long as he remembers. He jumped into Android as soon as it was released. Raul has worked on social networks, education, healthcare, and even founded a gaming studio and a consultancy company. Specializing in mobile and UX, he speaks frequently at conferences and meetups. Raul's love for electronics reignited when Google announced Android Things. He started tinkering with it with the first Developer Preview, which lead to adding the IoT category on his Google Developer expert profile.
Read more about Raul Portales