

Lab – setting up an IoT hub in Azure
By the end of this lab, you will be able to do the following:
- Navigate the Azure portal
- Set up a resource group
- Create an IoT hub
- Create a virtual device
- Send data from the device to the IoT hub
To do this, you will need to perform the following steps:
- Before you start the lab, you will need to create a unique ID. We will add this to the ends of your resource names to make them unique. This ID can be whatever you want. I find using my initials and then attaching the month and day I was born works well. So I would use
drc0830. - Open a Microsoft Edge browser window, and then navigate to the Azure portal (https://portal.azure.com).
- Sign in with the credentials you used to create the account. You should land on the home page. You can customize the look and feel by selecting the settings icon in the top-right corner:
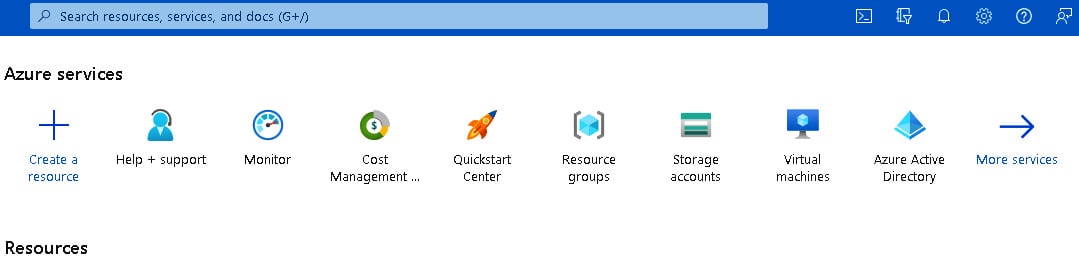
Figure 1.3 – Selecting the settings icon
- On the settings page, select the Appearance + startup views tab. Make sure the Menu behavior option is set to Docked (see Figure 1.4). Also, verify that the startup page is set to Home.
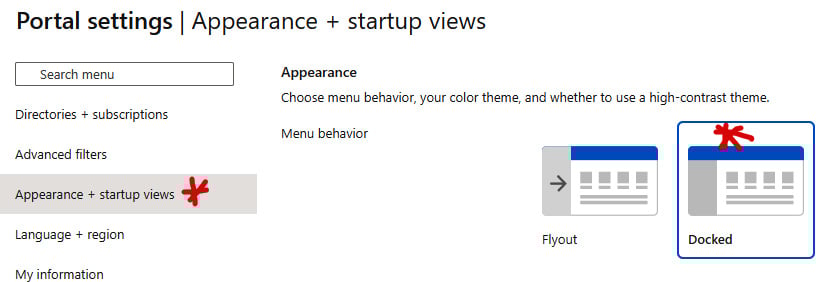
Figure 1.4 – Setting up the look and feel of the portal
- Via the left-side menu, go back to the Home page.
- At the top of the page, you should see a + icon that lets you create a resource. Click on it, and in the search bar that appears, enter
Resource group, then select Resource group from the results dropdown:
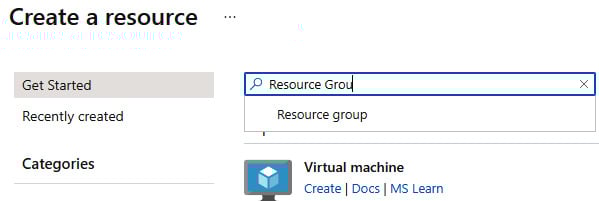
Figure 1.5 – Creating a resource group
- On the next page, click on the Create button to start the creation of the resource group.
- In the Basics tab, create a resource group named
rg-iot-training-{your-id}(replacing{your-id}with the one you created earlier). Select a region close to your location and then select Review + create at the bottom:

Figure 1.6 – Creating a resource group
- Once it passes validation, click on the Create button at the bottom of the page.
- After your new resource group has been created, select Resource groups in the menu on the left. You should see the resource group you just created in the list. Select your resource group from this list.
- At the top of the resource group page, select the + Create button. This brings you back to the Azure Marketplace. Search for and create an IoT hub. Name the hub
iothub-{your-id}. Select the same region as that of the resource group you created. - Select Review and create at the bottom of the page. Once it passes validation, select Create. Once it is created, click the Go to resource button.
- Investigate the features of the IoT hub using the left-side menu.
- From the menu on the left, select Devices. On the Devices page, select Add Device.
- Name the device
device01, leave the rest of the settings as the defaults, and select Save:
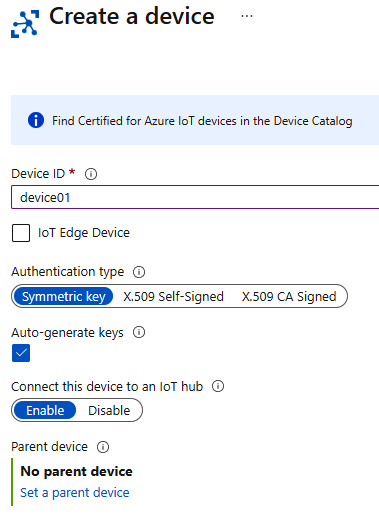
Figure 1.7 – Creating an IoT device
- You may have to refresh the page to see the device just created in the device list. Once the device has been created, select it from the list. Copy and save the Primary connection string value for the device.
- In order to simulate a device, we are going to use the Raspberry Pi Azure IoT simulator. You can get access to it by going to https://azure-samples.github.io/raspberry-pi-web-simulator/.
- Go to line 15 in the code and paste the device connection string you copied earlier:
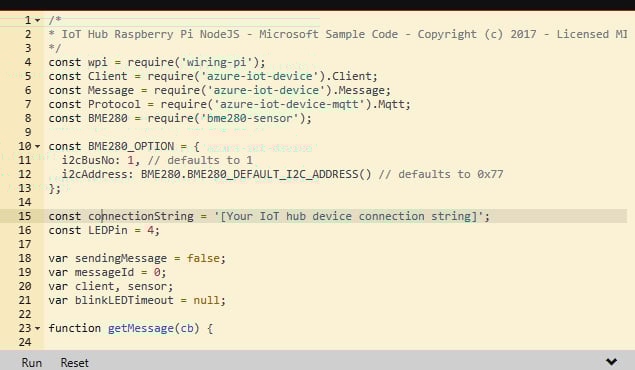
Figure 1.8 – Updating the connection string
- Select Run and verify messages are being sent.
- Go back to the Azure portal and navigate to your IoT hub. On the Overview page, verify that you are getting signals from the simulated device. From the list labeled Show data for last, select 1 Hour:
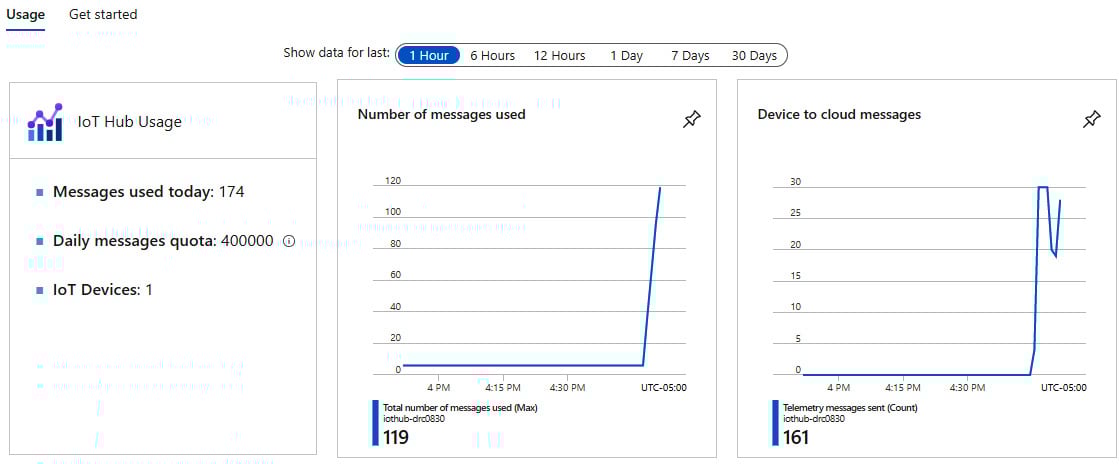
Figure 1.9 – Verifying messages in the IoT hub
Now that we are done with this chapter, let’s summarize what we have learned so far and where we are going next.