Search icon
Arrow left icon
All Products
Best Sellers
New Releases
Books
Videos
Audiobooks
Learning Hub
Newsletters
Free Learning
Arrow right icon
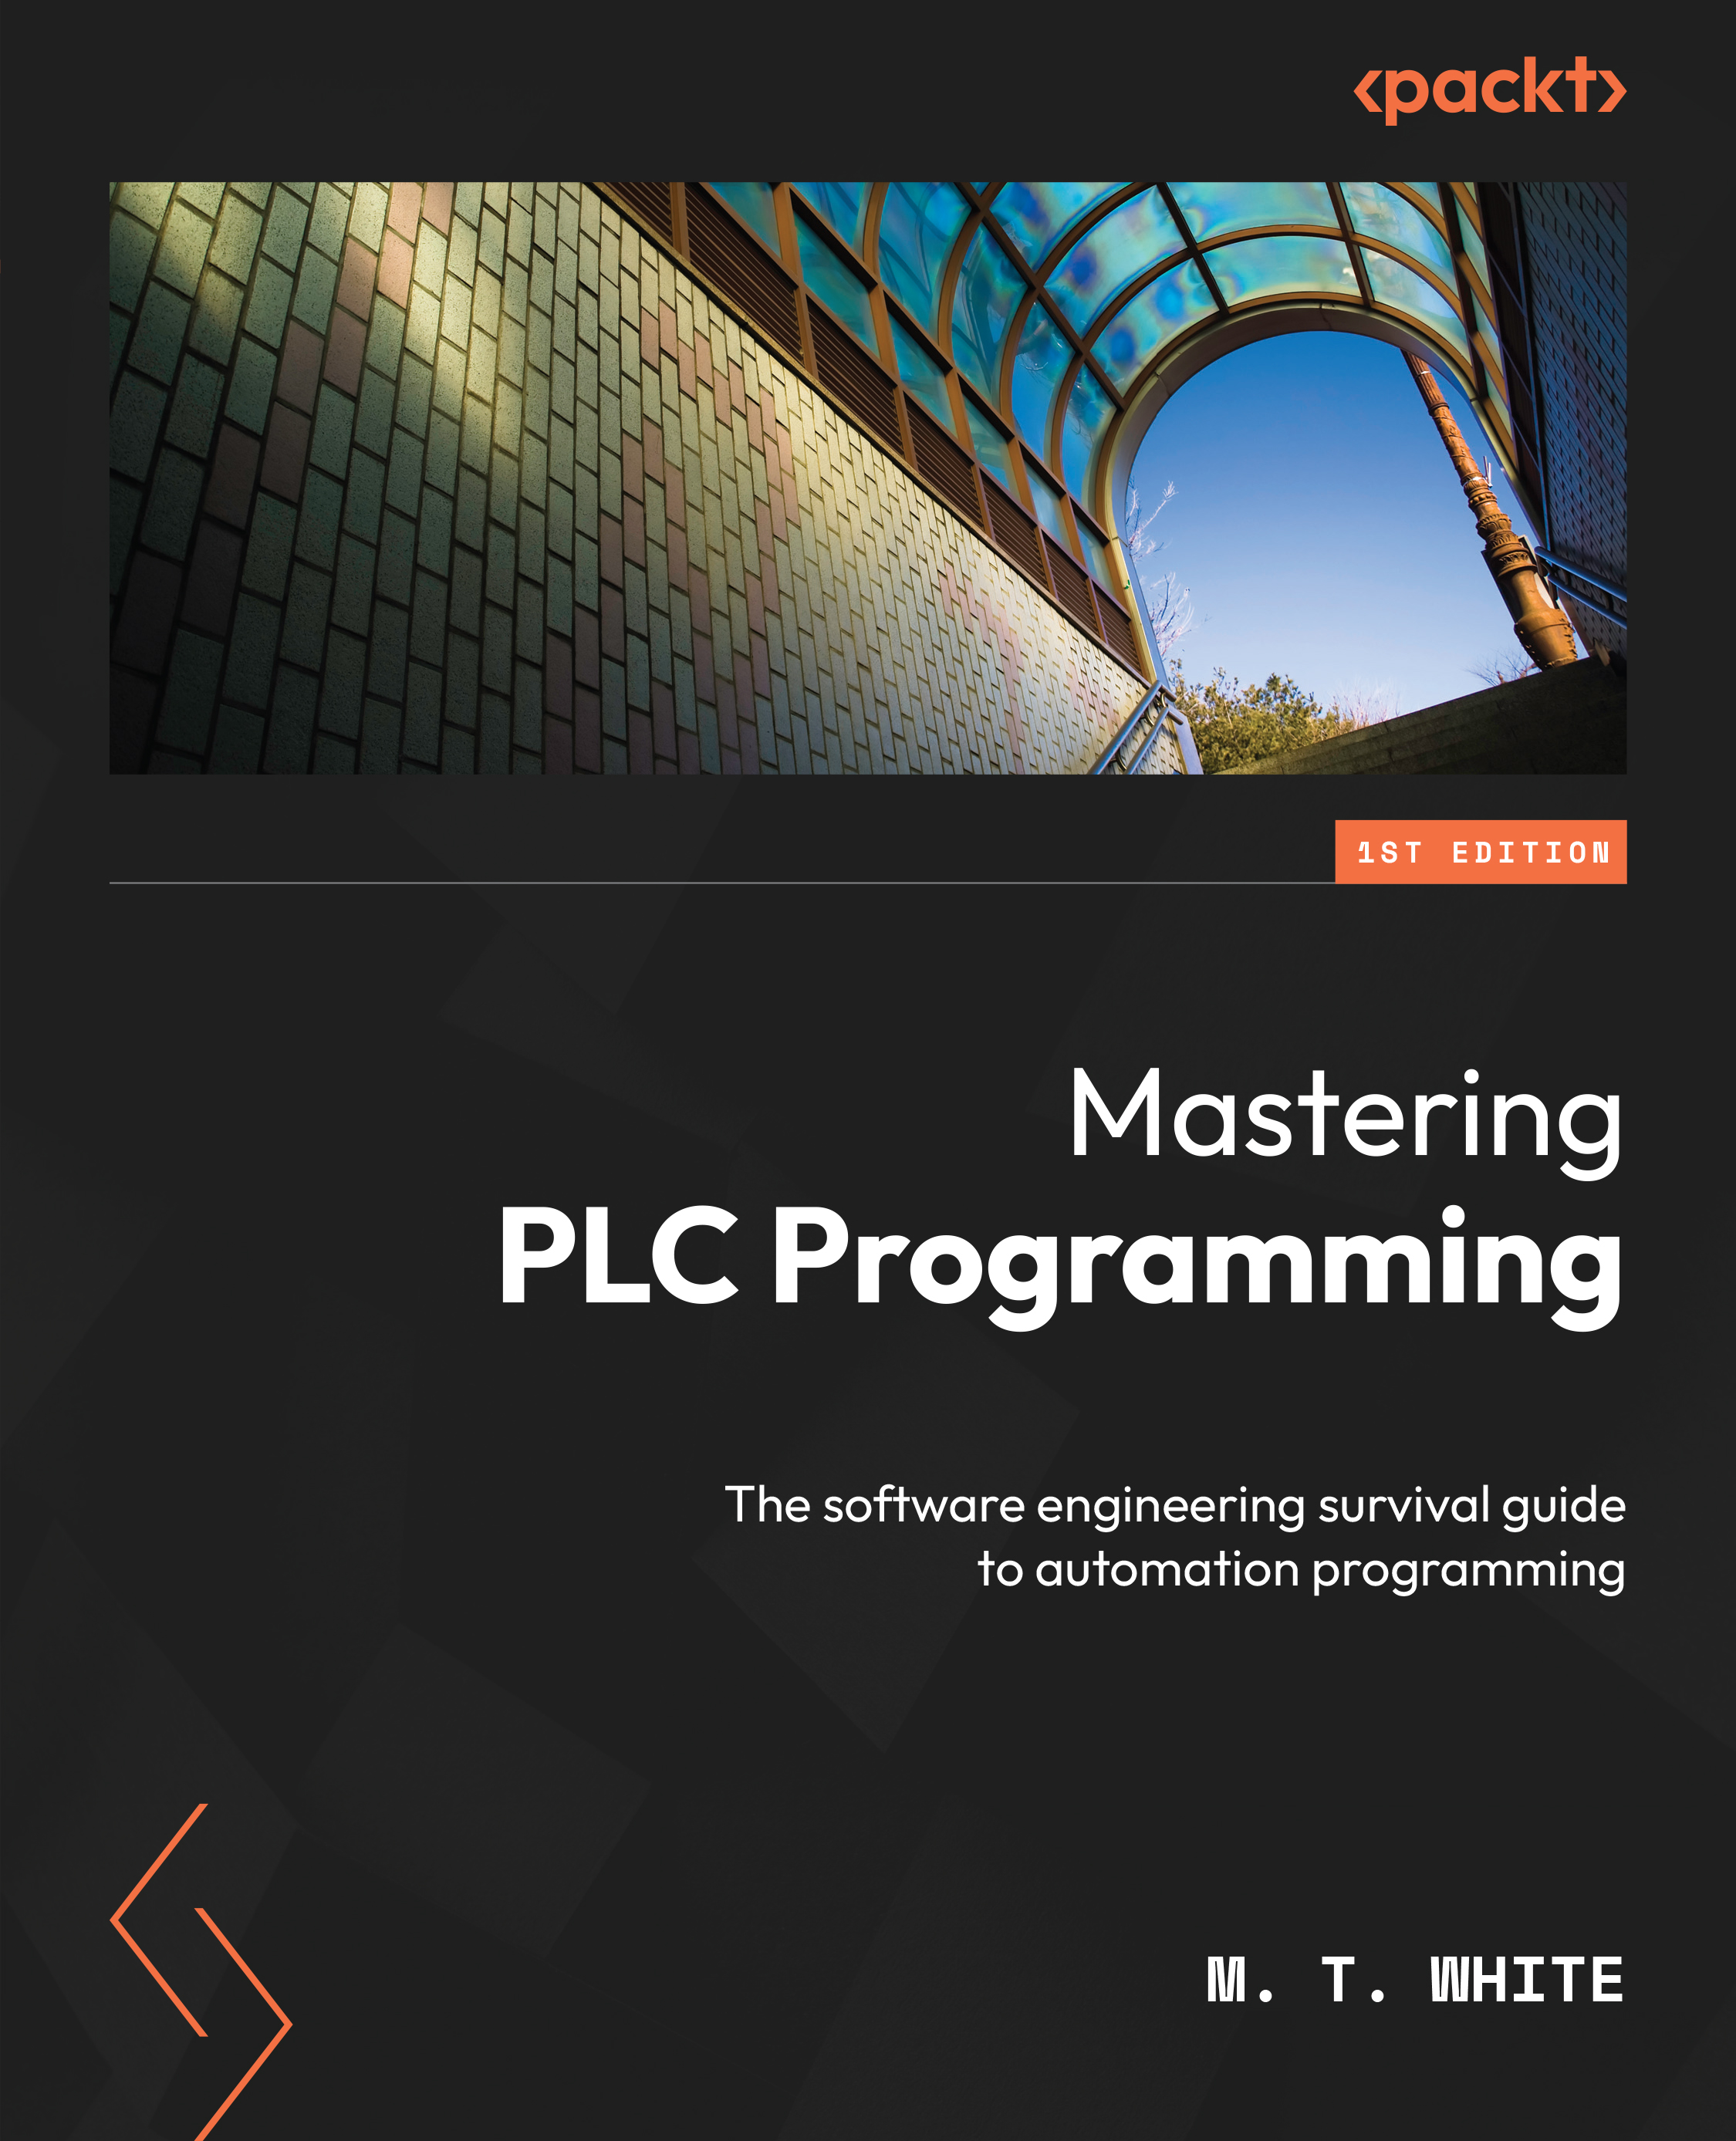
Mastering PLC Programming

Mastering PLC Programming: The software engineering survival guide to automation programming

By Mason White
€37.99
Book Mar 2023 386 pages 1st Edition
eBook
€29.99 €20.98
Print
€37.99
Subscription
€14.99 Monthly
eBook
€29.99 €20.98
Print
€37.99
Subscription
€14.99 Monthly

What do you get with Print?

Product feature icon Instant access to your digital eBook copy whilst your Print order is Shipped
Product feature icon Black & white paperback book shipped to your address
Product feature icon Download this book in EPUB and PDF formats
Product feature icon Access this title in our online reader with advanced features
Product feature icon DRM FREE - Read whenever, wherever and however you want
Buy Now

Product Details


Publication date : Mar 24, 2023
Length 386 pages
Edition : 1st Edition
Language : English
ISBN-13 : 9781804612880
Category :
Table of content icon View table of contents Preview book icon Preview Book

Mastering PLC Programming

Software Engineering for PLCs

Software engineering is a pivotal, yet often overlooked aspect of Programmable Logic Controller (PLC) programming. There is a core problem with automation engineering that stems from most PLC projects usually being viewed as hardware first. Many books, workshops, and so on are focused on PLC projects as hardware-first systems. Usually, programming is secondary to the overall hardware design of the system. In other words, the software is there to operate the hardware.

Many PLC programmers are not formally trained software developers and have backgrounds ranging from electricians to electrical and mechanical engineers. Though there is nothing wrong with a PLC developer not being a formally trained programmer, there are techniques that are usually taught in programming classes that are often lost when a non-formally trained programmer tries to program a PLC. This book aims to teach and apply software engineering practices to PLC programming. By learning these techniques, PLC developers can utilize the full gamut of the IEC 61131-3 standard and create advanced software faster and cleaner.

The hot topic in today’s fast-paced industrial world is Artificial Intelligence (AI) and automation. In short, machines are getting smart, and a major component of that is the software that controls the systems. The first PLC was introduced around the late 1960s and early 1970s; as such, PLCs (and by extension, automation) are nothing new. However, what has changed is the complexity of the systems that PLCs control. With the lower costs and rising computing power of PLCs, the applications that PLCs control are now becoming more complex seemingly by the day. The days of PLC programmers getting through the day with basic programming techniques and ladder logic are quickly becoming a thing of the past. To survive and be competitive in today’s market, a new way of thinking about PLC code is needed. Today’s world now needs PLC programmers that can function as software engineers.

In this chapter, we’re going to cover the following topics:

  • Software engineering for PLCs
  • The IEC 61131-3 standard
  • Ways of programming a PLC
  • CODESYS
  • A ladder logic Hello, World! program to test the installation of CODESYS

Technical requirements

This book is designed to have a very low bar to get started. The only items that are needed to get started on your journey to mastering advanced PLC programming are a Windows computer and a free program called CODESYS. CODESYS is an all-in-one PLC development environment that contains a built-in simulator that can run PLC code without the need for physical hardware. CODESYS can be downloaded for free here: https://www.codesys.com/download.htmlhttps://us.store.codesys.com/.

To get CODESYS up and running, it is recommended to have the following specs:

  • Windows 8 or later (32/64 bit)
  • 12 GB free hard drive space
  • 8 GB of RAM

Installation of CODESYS is quite simple. All you have to do is follow the link, create an account, and follow the installation wizard. We’ll explore CODESYS a bit more later, but for now, all you need to worry about is downloading and installing the software.

All code examples for this book will be housed on GitHub. Although you don’t need a GitHub account to get the code down, it is recommended that you do create an account and download the GitHub desktop tool. As you’re working on examples throughout this book, you will be encouraged to put your spin on them. As such, GitHub will allow you to commit the code without fear of losing past iterations of it. The source code for this project can be found here: https://github.com/PacktPublishing/Mastering-PLC-programming/tree/master/Chapter%201.

Software engineering for PLCs

Software engineering is more than just writing programs. Software engineering is the art of effectively solving problems. A major problem with the current industrial programming mindset is that software is often treated almost as a second-class citizen to the hardware. In other words, PLC software is treated as a complement to hardware. More often than not, the software is treated as a throwaway component. It is not uncommon for software practices to be thrown to the wind in automation programming. As such, code\bases that can be easily modified and last for years will often have to be discarded long before they should. Many books and training courses treat PLC software in this way, which, in turn, continues a cycle of treating PLC software as a complement to PLC hardware. Overall, this is a flawed philosophy. Software is every bit as important as (and to certain extents, more important than) hardware. In all, when properly written programs are implemented, machines will be more easily modifiable and correctable. Software can then be transferred to other machines, which will minimize coding defects and yield successful manufacturing operations.

For many non-traditional software developers, a very bad philosophy has taken root. Many of these developers feel that a working solution is a good solution. However, imagine that you’re a car mechanic. Would it be wise to weld the hood shut so that every time you needed an oil change, the hood would have to be cut off with a plasma cutter? Technically, the hood would function the same way as it would on your vehicle now. It would still protect the elements of your engine but at the cost of needing to cut it open for routine maintenance. Though welding your hood onto your vehicle would work, it would not be a wise engineering choice. Software development should be approached in the same way. Just because a solution works does not make it a good solution.

How should a software engineer approach a problem? The answer to that question is the same way any other type of engineer would approach a problem: by first understanding the issue and then developing an effective solution for it. When software engineers approach a problem, they need to try to implement a solution that solves the problem in a way that is simple, efficient, and as easy to maintain as possible. In much the same way as an electrical or mechanical engineer would design their product, a software developer will need to do the same. A software engineer will have to learn to develop solutions that fulfill the requirements of the original problem as well as concoct a solution that can be easily modified in the future. A software engineer must have the following in mind when developing software:

  • Does the solution solve the problem?
  • Is the solution overcomplicated?
  • Can the solution be easily modified if changes are needed?
  • Can the solution be verified to ensure it works (can it be easily tested)?

Often, this mentality is lost on PLC programmers. Many PLC programmers do not see themselves as software engineers; however, it must be understood that the moment a keyboard or mouse is touched with the intent of programming something to solve a problem, the programmer becomes a software engineer. When code is developed with this mentality, the same mentality that electrical engineers would use to implement their design, a codebase is created that is clean, easy to maintain, and easy to upgrade, and it will pass the test of time and allow for adaptation for the future.

A key feature of modern software and a key feature of a quality software developer is reusability. Quality code can be used for many different projects without rewriting it. In the automation realm, this can be a bit challenging, as every PLC producer has their own take on PLC development software. However, many PLCs follow what is known as the IEC 61131-3 standard, which provides some uniformity across PLC platforms.

Understanding the IEC 61131-3 standard

PLCs generally are not cross-compatible. Most PLC programming environments are vendor-specific, meaning that a program written for one device, and even from the same manufacturer, will not compile and run on a device produced by another manufacturer. This means that without standardization, this could lead to utter chaos in the field. Each PLC could easily have not only its unique programming environment but also its own set of rules that govern that environment. A developer migrating from one PLC brand to another may have to take extra time to learn the new programming system. However, the purpose of the 61131-3 is to provide a standard so a developer can easily switch from a PLC of one brand to a PLC of another without having to learn a whole new programming system. In short, the IEC 61131-3 standard makes migrating from one compliant PLC to another as simple as writing the code in a new environment.

This is where the IEC 61131-3 standard comes into play. The IEC 61131-3 is a vendor-neutral and hardware-independent PLC programming standard. The goal of the IEC 61131-3 is designed to provide uniformity across all compliant PLCs that follow the standard. The IEC 61131-3 standard is to PLCs what ECMAScript is to JavaScript. In other words, the best way to think of the standard is as a set of rules that govern the programming interfaces for PLCs from different vendors. As such, by learning the rules on one device, a developer can easily port their knowledge over to another compliant device with relative ease. As such, the overall cost and time it takes to develop a PLC program will drastically decrease, as the developer will not have to learn a new programming syntax.

It is important to understand that just because a PLC follows the IEC 61131-3 standard does not mean that the code is cross-compatible. As stated before, PLC code is generally not cross-compatible. A program written for an RSLogix device will not run on a Beckhoff device. This is mainly due to the hardware architecture, the compilation process, and so on. However, considering that the device is compliant, the code can be ported over by creating a new project, copying the code into the new file, and tweaking the code to meet the requirements of the new device.

The IEC 61131-3 standard is not a language, as inexperienced PLC developers sometimes confuse it with. The IEC 61131-3 is simply a set of rules that compliant PLCs use for developing software. Not every PLC is 61131-3 compliant nor does every 61131-3 compliant PLC utilize every feature of the standard. Common IEC 61131-3 compliant PLCs are as follows:

  • Beckhoff
  • Wago
  • Allen-Bradley
  • Omron
  • Siemens

This list is by no means an exhaustive list and the available features will vary from brand to brand. There are many more PLCs that are compliant. For the most part, all the major PLC manufacturers are 61131-3 compliant, especially for their newer devices. However, if you need to ensure that the device is compliant, all you have to do is simply check with the manufacturer. Usually, compliance is posted on the manufacturer’s website.

Adopting the standard is not a badge of quality, and non-compliant PLCs should not be viewed as inferior to PLCs that are compliant. There are many PLCs that do not follow the standards that are excellent and reliable devices to work with. Many non-compliant devices also share similarities with the standard at the basic level. However, due to the interoperability of IEC 61131-3 programming practices, using compliant devices will ultimately cut down the overhead cost of education. As such, compliant devices are usually favored for industrial automation projects. However, it should be noted that compliant PLCs will often cost more than non-compliant PLCs.

What does the IEC 61131-3 standardize?

Now that a little background on the IEC 61131-3 standard has been established, it is important to look at what is governed. The biggest aspect of PLC programming that IEC 61131-3 standardizes is language syntax, data types, and supported programming interfaces (programming languages). If you’ve ever programmed an RSLogix PLC in ladder logic, Structured Text, or another interface, and then programmed an Omron, Beckhoff, or other compliant PLC, you may have noticed that the general syntax, data types, and so on are very similar. Usually, the only programming components that vary are things like function blocks, as many function blocks are just canned functions that were built and included in the programming environment by the manufacturer. In other words, the gross similarities are the standard at work.

Recently, the IEC 61131-3 standard introduced what is known as object-oriented programming. It can be argued that the introduction of this concept is quite revolutionary as it means that the advanced techniques that are used to develop traditional programs can now be applied to the realm of automation. If you are familiar with a language such as C++, Java, C#, Python, or any of the modern traditional programming languages, you are most likely familiar with object-oriented programming. As such, understanding object-oriented programming for PLCs will be as easy as learning the syntax since the same rules apply to PLC programming. However, if your background does not include object-oriented programming, the principles that govern the paradigm will be explored in detail later, starting in Chapter 6.

Programming a PLC – The five IEC languages

The IEC 61131-3 standard includes several different types of language interfaces to program a PLC. In short, you can choose from multiple interfaces to program a PLC. These interfaces are akin to different languages, and each of the interfaces has its strengths. Some of the interfaces are graphically similar to what you would find in a system such as LabView, while others are text-based and akin to what you would find in a programming system such as C++ or BASIC. In the way the 61131-3 standard is set up, all the systems are compatible with each other, meaning that whatever can be done in one interface can also be done in another, and modules such as functions written in one interface can be used in another. The five IEC languages are described in the following sections. Let's take a look.

Ladder logic

If you are reading this book, chances are you know ladder logic and you know it well. Ladder logic is the unspoken standard for programming PLCs. Ladder logic was the programming interface that was developed to allow programmers to program in complex relay logic circuits without the need for bulky hardware or miles of wire. Of all the ways to program a PLC, ladder logic is probably the most common. To be a PLC programmer, a basic understanding of ladder logic is required.

Ladder logic is an excellent and very important PLC programming interface. However, ladder logic does have some drawbacks. Those of you that have had to program complex systems, such as systems for motion control, complex state machines, or the like, know that Ladder diagrams can easily become an unmaintainable nightmare. Ladder logic is an excellent tool for relatively simple applications or for beginners who are just starting their journey. However, as software becomes more complex and new features such as machine learning become more integrated into everyday automated systems, ladder logic is going to become an increasingly difficult tool to work with.

Sequential Flow Charts

Similar to ladder logic Sequential Flow Charts (SFCs) are another graphical tool for programming PLCs. However, instead of SFCs simulating relay logic, they allow programmers to essentially program a PLC using flow charts. SFC is best used to program processes that can be broken down into steps. SFC allows complex programs to be broken down into smaller modules and govern the flow between the modules. The big advantage of an SFC is that it graphically shows the flow of a program. This is a great advantage for developers who are working on process-driven projects.

Function Block Diagrams

The Function Block Diagrams (FBDs) interface is the final form of graphical programming language supported by the IEC 61131-3 standard. Much like SFCs and ladder logic programs, FBDs are a widely used language for programming PLCs. The core benefit of FBDs is that they can be used to simplify the programming of closed-feedback loops as they mostly work off of inputs and outputs and can provide feedback to themselves. For most IEC systems, the blocks are interconnected with lines that represent the flow of data from one block to another.

The FBD language is an excellent language choice for developers who are working on high-level projects. For example, suppose you’re working on a PLC program for a water treatment plant. You may have a process called water intake, water purifier, and collection process. As the developer, you may already have the functionality for these processes and as such, it is your job to string them together. For applications like these, it is very easy to employ FBDs to diagram out the process as a means of programming the PLC.

Instruction List

Instruction List, or as it is more commonly known, IL, is a text-based language that is governed by the IEC 61131-3 standard. IL is an offbeat language that is not used much in PLC programming. Users have to turn this on as a feature in CODESYS. The language itself is similar to the old Assembly language.

IL is arguably the most unpopular language in the IEC 61131-3 standard. It is complex to use and requires acute attention to detail. It is very easy to create an infinite loop, computational errors, and so on. It is also extremely difficult to debug. However, programs written in the IL language are generally considered quicker and require less memory. The language has all but fallen out of favor and should only be used if necessary.

Structured Text

Structured Text is arguably the second most popular programming language in the IEC standard. Structured Text is the closest to a traditional, text-based programming language that can be used to program a PLC. The syntax draws heavily from languages such as PASCAL and Ada. Many of the PLC programmers that I have encountered in the past have always seen Structured Text with a bit of fear. However, Structured Text is nothing to be afraid of. In fact, Structured Text can actually make things easier. Anyone that has ever had to sift through hundreds of rungs of ladder logic code will know that it is often difficult to figure out which rung does what and get a grasp on the overall flow of the program, especially when the code is poorly documented and there are many jumps used in the program.

In short, Structured Text will be the way of the future. As PLC technology progresses and applications become more advanced, Structured Text will gradually become the new standard in PLC programming. In other words, the days of simply turning machinery on and off at certain intervals are quickly coming to an end. The modern world is edging into complex machine learning and motion control, which means that it will be difficult, if not impossible, to fully implement these new, complex systems solely in ladder logic. Though it is possible to implement new concepts, such as object-oriented programming, in ladder logic, SFC, FDB, and so on, it can be awkward. Overall, due to the rising complexity of new automation systems, it is well worth the time to learn Structured Text and the advanced functionality that it provides.

Structured Text is the language that is going to be the focus of this book. To get the most out of this book, you should have a basic understanding of Structured Text. However, Structured Text is pretty easy to follow, as it is a simple, human-readable format. The examples in this book will be advanced Structured Text concepts but they will be easy enough to follow. If you feel that you do not have a great grasp of Structured Text, I recommend reviewing some basics such as loops, if statements, switch statements, and basic data types to get rolling. You will only need to have a loose grasp of these concepts to begin with.

As can be seen, there are many different ways to program a PLC. Now that a background in the different PLC programming languages has been established, we can begin experimenting with some basic code. To do this we will need a development environment. The development environment that we will use is called CODESYS.

Introducing CODESYS

The most common tool for learning the full gamut of the IEC 61131-3 standard is CODESYS. CODESYS is a free-to-download and free-to-use PLC programming environment that is developed by the German company CODESYS. The programming system has a built-in editor, syntax-checking tools, and a built-in simulator that will allow you to compile and run your code virtually. Not only that, but CODESYS also has a built-in HMI development tool that we’ll use in later sections of this book that can be used to develop fully working HMIs. As such, you can learn the full breadth of the IEC 61131-3 standard without having to spend a dime on expensive hardware or software and still be able to develop and watch your code in action.

CODESYS is much more than just a virtual development tool. Currently, it is set up to program a wide variety of PLCs and is the basis for other development environments. CODESYS can best be thought of as a true Integrated Development Environment (IDE) for PLCs. CODESYS comes with many advanced tools such as debuggers, library management tools, and so on that are used to speed up the development process. Those of you who are familiar with IDEs such as Visual Studio will already be somewhat familiar with the overall gist of CODESYS. Above all else, CODESYS supports the full spectrum of the IEC 61131-3 protocol, including object-oriented programming.

Systems such as Beckhoff’s TwinCat and Wago’s e!COCKPIT are all built on top of CODESYS. In short, CODESYS is a prime tool for learning PLC software development as well as creating production code for supported PLCs. So, upon completion of this book, you should not only have a pretty decent grasp of the IEC 61131-3 standard but should also have a good idea of how to use multiple other PLC development environments.

If you have not already installed CODESYS, it is important to install it now. The remainder of the book will require the software to be installed. The link for installation can be found in the Technical requirements section of this chapter. Installation is pretty straightforward. All you have to do is follow the provided link and follow the wizard. Since CODESYS is a German company, the download website will be in German. I suggest using Chrome to translate the text. At the time of writing this book, you will need to provide some information such as your email to create an account so that you can download the software. Outside of that, CODESYS is a pretty heavy software package, so downloading it may take a little while.

Testing CODESYS

Usually, the first program a person writes in a new language is called Hello, World!. It is a simple program that will display the words Hello and World on the screen. The PLC equivalent of this is turning a coil off and on. To get familiar with and test our CODESYS installation, we’re going to create that simple ladder logic program:

  1. Once CODESYS is installed, launch the program, and you should see a page on which you can create a new project. This page is called the Start page and it will have a New Project link.
  2. Click New Project and you should see a New Project window. Here, click Standard project, name the project Chapter1, and then click OK.
  3. Now, you should see a standard project box. This step is the step where you select the programming interface for the project. By default, it will be set to FBD. This will need to be changed to Ladder Logic Diagram. To do this, click the PLC_PRG drop-down box, select Ladder Logic Diagram (LD), and press OK.
  4. After the project is created, a file tree will appear in the device tab to the left of the screen. Double-click on PLC_PRG and you will see a ladder logic development screen.

Creating the program

The aforementioned steps will create a ladder logic project. The project that’s generated will have all the necessary files and dependencies you need to implement your code. As such, all you will need to focus on is implementing the program’s logic. The file that we are going to implement our logic in is labeled PLC_PRG.

The PLC_PRG file

This is the PLC_PRG file that serves as the main entry point for the PLC program:

Figure 1.1 – PLC_PRG ladder logic development

Figure 1.1 – PLC_PRG ladder logic development

This is the first file that will be called when a PLC program is run. This is the file in which we will develop our Hello, World! ladder logic program.

To break this area down, the bottom of Figure 1.1 is a rung. This is where the actual Ladder commands will go. Above that, in the text area, is where variables are declared. The ladder logic tools can be found to the right of the screen, as shown in Figure 1.2.

ToolBox

ToolBox is where all the ladder logic commands can be found for use in the rungs:

Figure 1.2 – Ladder logic ToolBox

Figure 1.2 – Ladder logic ToolBox

As can be seen in Figure 1.2, there are many drop-down menus. The menus contain many different ladder logic instructions. For our purposes, click Ladder Elements. Once you expand that menu, drag over both a contact to the Start here box and a coil to the Add output or jump here box and insert the instructions in the rung area. Also, add two Boolean variables to the variable area (see the following format).

Variable code

This is the full code that is needed to declare all the variables needed for the program:

PROGRAM PLC_PRG
VAR
   input : BOOL;
   output: BOOL:
END_VAR

This code creates two Boolean variables called input and output. Assign the input variable to the contact and the output variable to the coil by clicking on ???, then click on the three dots and select the appropriate variable. The name of the variable can also be typed in directly in place of ???. The input variable will be used to change the state of the output variable. In short, the purpose of our Hello, World! program will be for the output variable to mirror the state of the input variable.

Completed Hello, World! project

When you are finished setting up your project, it should reflect what is in Figure 1.3:

Figure 1.3 – Completed PLC Hello, World! program

Figure 1.3 – Completed PLC Hello, World! program

Figure 1.3 is the code needed to run a Hello, World! program. Essentially, this code will turn the output variable on when the input variable is on, and off when the input variable is off.

To test the simulator to see the program work, click Online on the ribbon at the top of the screen and select Simulation. This will tell CODESYS that there is no physical hardware, and that you want to run the program virtually. Click the button that is shown in Figure 1.4.

Login button

This button is the Login button that will log you into the virtual hardware. When the button has been pressed, the icon next to it will enable:

Figure 1.4 – The login button

Figure 1.4 – The login button

Login will activate the program; however, it may not always run the program. To run the program, you must press the Play button next to the grayed-out icon in Figure 1.4.

You should now have a development screen that resembles Figure 1.5.

A running ladder logic program

Figure 1.5 is the running PLC program with all of the variables in a FALSE or off state:

Figure 1.5 – Hello, World!

Figure 1.5 – Hello, World!

To turn the output variable on, you will need to change the false variable of the input variable to a true value. To do this, double-click the Prepared value field in the input row until it says TRUE. Once you have a blue box that says TRUE in the cell, right-click the cell and press Write All Values Of ‘Device. Application’. Once you do this, your program should resemble Figure 1.6.

Toggling input to true

This is the output when the input variable is set to TRUE:

Figure 1.6 – Hello, World! with a TRUE input

Figure 1.6 – Hello, World! with a TRUE input

When the input variable is set to TRUE, the whole line turns blue and the inner square in the output contact is also turned blue. This means that the rung is activated and is on. Essentially, when you see blue, that means that the rung is active and is doing whatever logic you have programmed in.

The input can also be toggled back to FALSE. The steps are the same for toggling the input variable to a FALSE state with the only exception being that you will set the prepared value to FALSE instead of TRUE.

Toggling input to false

This is the output when the input variable is set to FALSE:

Figure 1.7 – Hello, World! with a FALSE input

Figure 1.7 – Hello, World! with a FALSE input

As can be seen, setting the input variable to FALSE changes all the blue back to black. Blue meant the rung was running, and black means the rung is off.

Summary

As a PLC programmer, it is of absolute importance that you understand the IEC 61131-3 standard. It is also of absolute importance that PLC software is not treated as a throwaway component. The heart and soul of any PLC-based system is the software. Great diligence must be given to the software when it is first being developed. As we have seen, many languages can be used to develop a PLC program. However, for complex software, such as the software that will be explored in this book, Structured Text will be the primary language used. As such, the following chapter will be dedicated to the more advanced concept of Structured Text language.

At this point, you should have CODESYS installed and working. If everything went according to plan, you should be able to run the Hello, World! program that was explored previously. The program that was presented is by no means a significant program and its only real purpose is to test the CODESYS installation and get you familiar with logging into and running a program in the CODESYS environment. In all, the main takeaway for this chapter should be that a well-engineered PLC program will ultimately save time and money in the long run, as it will be flexible and stable enough to support any changes that may arise in the project.

Questions

Answer the following questions based on what you've learned in this chapter. Cross-check your answers with those provided at the end of the book, under Assessments.

  1. What PLC language is used as a replacement for relay logic?
    1. Structured Text
    2. Function Block Diagrams
    3. Ladder Logic
    4. Instruction List
    5. Sequential Flow Charts
  2. Which are IEC 61131-3 programming languages?
    1. Structured Text
    2. Ladder Logic
    3. Java
    4. C++
    5. Instruction List
  3. What is IEC61131-3?
    1. A PLC programming language
    2. A vendor-independent standard
    3. A vendor-specific standard
    4. An Allen-Bradley programming environment
    5. A CODESYS standard
  4. What PLC language is most like Assembly?
    1. Ladder Logic
    2. Ada
    3. Structured Text
    4. Instruction List
    5. C++
  5. What PLC language is most like a traditional language such as BASIC?
    1. Structured Text
    2. Ladder Logic
    3. Instruction List
    4. Function Block Diagram
    5. Sequential Flow Charts
  6. What is the most popular PLC programming language?
    1. Structured Text
    2. Instruction List
    3. Ladder Logic
    4. Function Block Diagram
    5. Java
Left arrow icon Right arrow icon
Download code icon Download Code

Key benefits

  • Take a deep dive into object-oriented PLC programming to gain hands-on knowledge
  • Explore software engineering concepts such as SDLC, debugging, and SOLID programming
  • Get a thorough grasp on HMI development to build various HMI projects

Description

Object-oriented programming (OOP) is a new feature of PLC programming that has taken the automation world by storm. This book provides you with the necessary skills to succeed in the modern automation programming environment. The book is designed in a way to take you through advanced topics such as OOP design, SOLID programming, the software development lifecycle (SDLC), library design, HMI development, general software engineering practices, and more. To hone your programming skills, each chapter has a simulated real-world project that’ll enable you to apply the skills you’ve learned. In all, this book not only covers complex PLC programming topics, but it also removes the financial barrier that comes with most books as all examples utilize free software. This means that to follow along, you DO NOT need to purchase any PLC hardware or software. By the end of this PLC book, you will have what it takes to create long-lasting codebases for any modern automation project.

What you will learn

Find out how to write PLC programs using advanced programming techniques Explore OOP concepts for PLC programming Delve into software engineering topics such as libraries and SOLID programming Explore HMIs, HMI controls, HMI layouts, and alarms Create an HMI project and attach it to a PLC in CODESYS Gain hands-on experience by building simulated PLC and HMI projects

What do you get with Print?

Product feature icon Instant access to your digital eBook copy whilst your Print order is Shipped
Product feature icon Black & white paperback book shipped to your address
Product feature icon Download this book in EPUB and PDF formats
Product feature icon Access this title in our online reader with advanced features
Product feature icon DRM FREE - Read whenever, wherever and however you want
Buy Now

Product Details


Publication date : Mar 24, 2023
Length 386 pages
Edition : 1st Edition
Language : English
ISBN-13 : 9781804612880
Category :

Table of Contents

25 Chapters
Preface Chevron down icon Chevron up icon
Part 1 – An Introduction to Advanced PLC Programming Chevron down icon Chevron up icon
Chapter 1: Software Engineering for PLCs Chevron down icon Chevron up icon
Chapter 2: Advanced Structured Text — Programming a PLC in Easy-to-Read English Chevron down icon Chevron up icon
Chapter 3: Debugging — Making Your Code Work Chevron down icon Chevron up icon
Chapter 4: Complex Variable Declaration — Using Variables to Their Fullest Chevron down icon Chevron up icon
Part 2 – Modularity and Objects Chevron down icon Chevron up icon
Chapter 5: Functions — Making Code Modular and Maintainable Chevron down icon Chevron up icon
Chapter 6: Object-Oriented Programming — Reducing, Reusing, and Recycling Code Chevron down icon Chevron up icon
Chapter 7: OOP — The Power of Objects Chevron down icon Chevron up icon
Part 3 – Software Engineering for PLCs Chevron down icon Chevron up icon
Chapter 8: Libraries — Write Once, Use Anywhere Chevron down icon Chevron up icon
Chapter 9: The SDLC — Navigating the SDLC to Create Great Code Chevron down icon Chevron up icon
Chapter 10: Advanced Coding — Using SOLID to Make Solid Code Chevron down icon Chevron up icon
Part 4 – HMIs and Alarms Chevron down icon Chevron up icon
Chapter 11: HMIs — UIs for PLCs Chevron down icon Chevron up icon
Chapter 12: Industrial Controls — User Inputs and Outputs Chevron down icon Chevron up icon
Chapter 13: Layouts — Making HMIs User-Friendly Chevron down icon Chevron up icon
Chapter 14: Alarms — Avoiding Catastrophic Issues with Alarms Chevron down icon Chevron up icon
Part 5 – Final Project and Thoughts Chevron down icon Chevron up icon
Chapter 15: Putting It All Together — The Final Project Chevron down icon Chevron up icon
Chapter 16: Distributed Control Systems, PLCs, and Networking Chevron down icon Chevron up icon
Assessments Chevron down icon Chevron up icon
Index Chevron down icon Chevron up icon
Other Books You May Enjoy Chevron down icon Chevron up icon

Customer reviews

Filter icon Filter
Top Reviews
Rating distribution
Empty star icon Empty star icon Empty star icon Empty star icon Empty star icon 0
(0 Ratings)
5 star 0%
4 star 0%
3 star 0%
2 star 0%
1 star 0%

Filter reviews by


No reviews found
Get free access to Packt library with over 7500+ books and video courses for 7 days!
Start Free Trial

FAQs

What is the delivery time and cost of print book? Chevron down icon Chevron up icon

Shipping Details

USA:

'

Economy: Delivery to most addresses in the US within 10-15 business days

Premium: Trackable Delivery to most addresses in the US within 3-8 business days

UK:

Economy: Delivery to most addresses in the U.K. within 7-9 business days.
Shipments are not trackable

Premium: Trackable delivery to most addresses in the U.K. within 3-4 business days!
Add one extra business day for deliveries to Northern Ireland and Scottish Highlands and islands

EU:

Premium: Trackable delivery to most EU destinations within 4-9 business days.

Australia:

Economy: Can deliver to P. O. Boxes and private residences.
Trackable service with delivery to addresses in Australia only.
Delivery time ranges from 7-9 business days for VIC and 8-10 business days for Interstate metro
Delivery time is up to 15 business days for remote areas of WA, NT & QLD.

Premium: Delivery to addresses in Australia only
Trackable delivery to most P. O. Boxes and private residences in Australia within 4-5 days based on the distance to a destination following dispatch.

India:

Premium: Delivery to most Indian addresses within 5-6 business days

Rest of the World:

Premium: Countries in the American continent: Trackable delivery to most countries within 4-7 business days

Asia:

Premium: Delivery to most Asian addresses within 5-9 business days

Disclaimer:
All orders received before 5 PM U.K time would start printing from the next business day. So the estimated delivery times start from the next day as well. Orders received after 5 PM U.K time (in our internal systems) on a business day or anytime on the weekend will begin printing the second to next business day. For example, an order placed at 11 AM today will begin printing tomorrow, whereas an order placed at 9 PM tonight will begin printing the day after tomorrow.


Unfortunately, due to several restrictions, we are unable to ship to the following countries:

  1. Afghanistan
  2. American Samoa
  3. Belarus
  4. Brunei Darussalam
  5. Central African Republic
  6. The Democratic Republic of Congo
  7. Eritrea
  8. Guinea-bissau
  9. Iran
  10. Lebanon
  11. Libiya Arab Jamahriya
  12. Somalia
  13. Sudan
  14. Russian Federation
  15. Syrian Arab Republic
  16. Ukraine
  17. Venezuela
What is custom duty/charge? Chevron down icon Chevron up icon

Customs duty are charges levied on goods when they cross international borders. It is a tax that is imposed on imported goods. These duties are charged by special authorities and bodies created by local governments and are meant to protect local industries, economies, and businesses.

Do I have to pay customs charges for the print book order? Chevron down icon Chevron up icon

The orders shipped to the countries that are listed under EU27 will not bear custom charges. They are paid by Packt as part of the order.

List of EU27 countries: www.gov.uk/eu-eea:

A custom duty or localized taxes may be applicable on the shipment and would be charged by the recipient country outside of the EU27 which should be paid by the customer and these duties are not included in the shipping charges been charged on the order.

How do I know my custom duty charges? Chevron down icon Chevron up icon

The amount of duty payable varies greatly depending on the imported goods, the country of origin and several other factors like the total invoice amount or dimensions like weight, and other such criteria applicable in your country.

For example:

  • If you live in Mexico, and the declared value of your ordered items is over $ 50, for you to receive a package, you will have to pay additional import tax of 19% which will be $ 9.50 to the courier service.
  • Whereas if you live in Turkey, and the declared value of your ordered items is over € 22, for you to receive a package, you will have to pay additional import tax of 18% which will be € 3.96 to the courier service.
How can I cancel my order? Chevron down icon Chevron up icon

Cancellation Policy for Published Printed Books:

You can cancel any order within 1 hour of placing the order. Simply contact customercare@packt.com with your order details or payment transaction id. If your order has already started the shipment process, we will do our best to stop it. However, if it is already on the way to you then when you receive it, you can contact us at customercare@packt.com using the returns and refund process.

Please understand that Packt Publishing cannot provide refunds or cancel any order except for the cases described in our Return Policy (i.e. Packt Publishing agrees to replace your printed book because it arrives damaged or material defect in book), Packt Publishing will not accept returns.

What is your returns and refunds policy? Chevron down icon Chevron up icon

Return Policy:

We want you to be happy with your purchase from Packtpub.com. We will not hassle you with returning print books to us. If the print book you receive from us is incorrect, damaged, doesn't work or is unacceptably late, please contact Customer Relations Team on customercare@packt.com with the order number and issue details as explained below:

  1. If you ordered (eBook, Video or Print Book) incorrectly or accidentally, please contact Customer Relations Team on customercare@packt.com within one hour of placing the order and we will replace/refund you the item cost.
  2. Sadly, if your eBook or Video file is faulty or a fault occurs during the eBook or Video being made available to you, i.e. during download then you should contact Customer Relations Team within 14 days of purchase on customercare@packt.com who will be able to resolve this issue for you.
  3. You will have a choice of replacement or refund of the problem items.(damaged, defective or incorrect)
  4. Once Customer Care Team confirms that you will be refunded, you should receive the refund within 10 to 12 working days.
  5. If you are only requesting a refund of one book from a multiple order, then we will refund you the appropriate single item.
  6. Where the items were shipped under a free shipping offer, there will be no shipping costs to refund.

On the off chance your printed book arrives damaged, with book material defect, contact our Customer Relation Team on customercare@packt.com within 14 days of receipt of the book with appropriate evidence of damage and we will work with you to secure a replacement copy, if necessary. Please note that each printed book you order from us is individually made by Packt's professional book-printing partner which is on a print-on-demand basis.

What tax is charged? Chevron down icon Chevron up icon

Currently, no tax is charged on the purchase of any print book (subject to change based on the laws and regulations). A localized VAT fee is charged only to our European and UK customers on eBooks, Video and subscriptions that they buy. GST is charged to Indian customers for eBooks and video purchases.

What payment methods can I use? Chevron down icon Chevron up icon

You can pay with the following card types:

  1. Visa Debit
  2. Visa Credit
  3. MasterCard
  4. PayPal
What is the delivery time and cost of print books? Chevron down icon Chevron up icon

Shipping Details

USA:

'

Economy: Delivery to most addresses in the US within 10-15 business days

Premium: Trackable Delivery to most addresses in the US within 3-8 business days

UK:

Economy: Delivery to most addresses in the U.K. within 7-9 business days.
Shipments are not trackable

Premium: Trackable delivery to most addresses in the U.K. within 3-4 business days!
Add one extra business day for deliveries to Northern Ireland and Scottish Highlands and islands

EU:

Premium: Trackable delivery to most EU destinations within 4-9 business days.

Australia:

Economy: Can deliver to P. O. Boxes and private residences.
Trackable service with delivery to addresses in Australia only.
Delivery time ranges from 7-9 business days for VIC and 8-10 business days for Interstate metro
Delivery time is up to 15 business days for remote areas of WA, NT & QLD.

Premium: Delivery to addresses in Australia only
Trackable delivery to most P. O. Boxes and private residences in Australia within 4-5 days based on the distance to a destination following dispatch.

India:

Premium: Delivery to most Indian addresses within 5-6 business days

Rest of the World:

Premium: Countries in the American continent: Trackable delivery to most countries within 4-7 business days

Asia:

Premium: Delivery to most Asian addresses within 5-9 business days

Disclaimer:
All orders received before 5 PM U.K time would start printing from the next business day. So the estimated delivery times start from the next day as well. Orders received after 5 PM U.K time (in our internal systems) on a business day or anytime on the weekend will begin printing the second to next business day. For example, an order placed at 11 AM today will begin printing tomorrow, whereas an order placed at 9 PM tonight will begin printing the day after tomorrow.


Unfortunately, due to several restrictions, we are unable to ship to the following countries:

  1. Afghanistan
  2. American Samoa
  3. Belarus
  4. Brunei Darussalam
  5. Central African Republic
  6. The Democratic Republic of Congo
  7. Eritrea
  8. Guinea-bissau
  9. Iran
  10. Lebanon
  11. Libiya Arab Jamahriya
  12. Somalia
  13. Sudan
  14. Russian Federation
  15. Syrian Arab Republic
  16. Ukraine
  17. Venezuela