

Setting up the preferences
In the preferences, you can set up how Live operates on its own or with external devices that you connect to the computer.
The first thing that we will have to set up is the audio preferences:
- Navigate to Live | Preferences... (Options | Preferences... on Windows) or use the key command, Cmd + , (Ctrl + , for Windows).
- Click on the Audio tab.
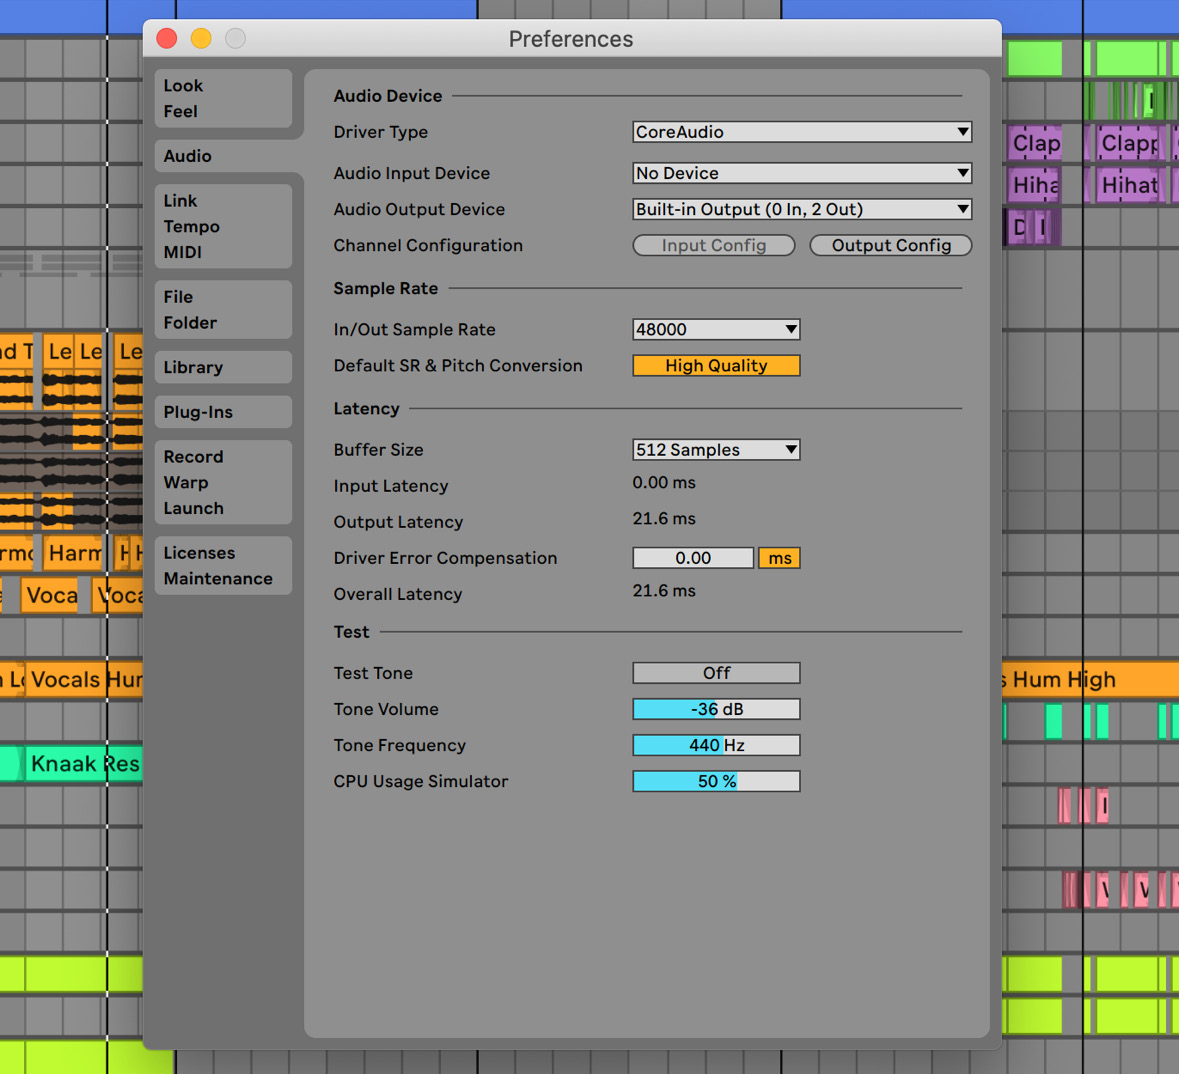
Figure 1.1 – Audio preferences
- For Audio Output Device, you should choose the device that you want to use to play sound through. This could be external headphones, your audio interface, or your computer’s built-in output.
- You can define the Sample Rate that you’d like to use (generally, for music, 44.1 kHz is fine. If you are working on audio for a motion picture or other multimedia, then choose 48 kHz, but this would be in your project brief anyway). We will revisit the sample rate in Chapter 2, Recording Audio in Ableton Live 11.
- Buffer Size is related to latency. The lower the buffer size, the more pressure you are putting on the CPU, so the sooner you will experience audio dropouts. However, the higher the buffer size, the more latency you are introducing. For now, we can set the buffer size to 256 Samples. We will come back to this again in Chapter 2, Recording Audio in Ableton Live 11.
You should now be set to hear sounds in Live.
Let’s just briefly look at what you can set in the other tabs within Preferences; however, don’t worry too much about remembering what these do as we will keep on coming back to Preferences throughout this book:
- Look Feel: You can set up different and customize functions such as playback head behavior, display zoom, track and clip color assignments, and change the theme of the software interface.
- Link Tempo MIDI: You can set up Ableton Link and Tempo Follower here. You can also find the MIDI preferences here.
- File Folder: Here, you will find file management functions related to things such as analysis files, the temporary audio recordings folder, and cache.
- Library: You can set browser behavior and library content locations here, both for Packs and User Library.
What are Packs?
Packs are curated content libraries, which can be one-shot samples, device presets, or loops. You can find many of them to purchase on the Ableton website. Alternatively, the ones that are part of Live Suite will show up in your browser to be downloaded directly from there.
- Plug-Ins: This is the place where you can manage your third-party plugins’ behavior and location.
If your third-party plugins are not showing up, you should check whether their folder is set properly here and then rescan them.
- Record Warp Launch: Under this tab, you can set up functions such as the recorded file type, the bit depth, count-in, Exclusive Arm and Solo (this function will define whether you are able to arm or solo multiple tracks at the same time. If you set them to Exclusive, you can still solo and arm multiple tracks while holding down the Cmd (Ctrl for Windows) key), how session automation is being recorded, warping behavior, fades, launch modes, and global quantize.
- Licenses Maintenance: Here, you can authorize Live, set automatic software updates, and send usage data.
Now that the preferences have been covered, we can take a look at the different elements of the interface so you will be able to navigate Live quickly.