Reader small image

You're reading from  Mastering Adobe Photoshop Elements 2023 - Fifth Edition

Product typeBook
Published inDec 2022
PublisherPackt
ISBN-139781803248455
Edition5th Edition
Right arrow
Author (1)
Robin Nichols
Robin Nichols
author image
Robin Nichols

Born in the UK, Robin Nichols has always had a great love for recording the world with a camera. After finishing school, he studied fine art, before moving on to study at Nottingham Trent University, where he gained a degree in creative photography. He subsequently worked in the advertising industry for several years, before emigrating to Australia in 1985. Robin has always worked in photography: as a black and white printer, a cameraman, a stock photographer, and a freelance photographer. During the 1990s, Robin contributed to several photo-centric publications in Australia, New Zealand, Singapore, and the UK.
Read more about Robin Nichols

Right arrow

The Basics of Image Editing

To many, image editing, or more specifically, the word Photoshop, conjures up ideas of fantastical landscapes, or of portraits of impossibly beautiful people retouched to the brink of plausibility and beyond.

If you are not interested in taking your creativity into the realm of photo illustration or image composites, you'll more than likely use photo editing to make your digital photos look exactly as they appeared when the shutter button was first pressed.

But why would we need this sort of artificial aid in the first place? It's a frequently asked question, and the simple answer is that what we see is not always what our camera records. This is because we have a brain that can be very flexible when it comes to processing the visual information it receives from any scene, whereas a camera simply responds to the light it is pointed at with essentially a rather limited ability to translate that information into a faithful, realistic reproduction...

The editing workflow and best practices

Nearly all digital camera images need some form of adjustment to make them appear as the scene did when the image was first captured. What many might not immediately appreciate is that there will always be a visual difference between a RAW file and a JPEG file once they are downloaded onto a computer.

This is because the former is neither compressed nor processed in-camera, while JPEG files are compressed and processed in-camera. JPEGs are also 8-bit files, which contain considerably less picture information than a 10-, 12-, or 14-bit RAW file.

Here are two working examples of how in-camera JPEG file processing can initially produce a significantly better-looking version of the same shot (on the right) when compared to the 14-bit (Canon) RAW file on the left. Because this was shot inside a poorly lit church, there's some underexposure present, but worse than that, there's overexposure in the highlights...

Overview: editing RAW files

RAW files produce the best photo-editing results because they contain about four times the image data of an 8-bit JPEG file. But this extra size can be annoying, as it uses up more hard drive space, so files can't be emailed, and initially, they look rather drab compared to a JPEG file. That being said, some quick editing in the Elements' native Camera RAW utility will usually produce an image that looks a lot better than most JPEGs.

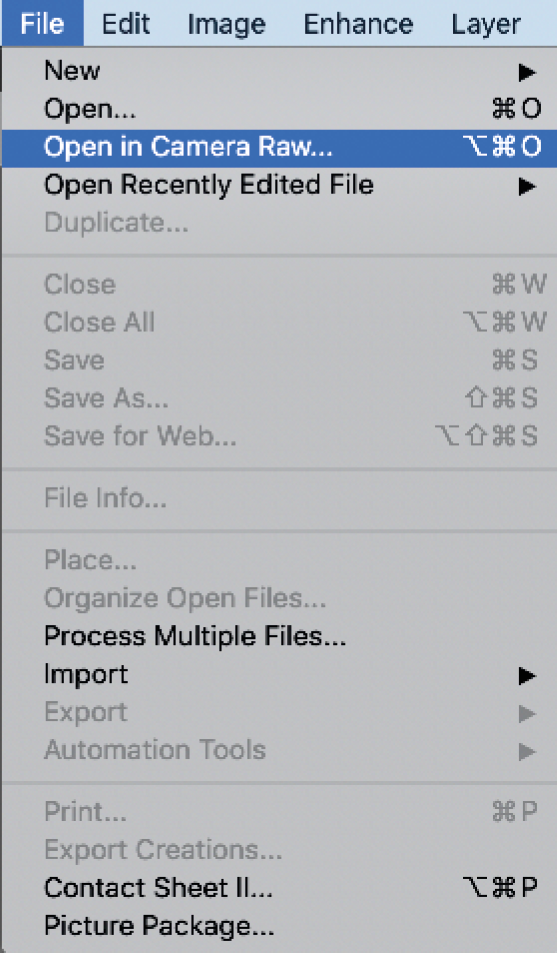
One aspect of RAW files that might confuse beginners is that they can only be opened/processed using the Camera RAW utility, which is quite separate from the Quick/Guided/Expert edit modes. It's a bit like having a specialist application within the parent application, which is Photoshop Elements Photo Editor. If you double-click any RAW file icon, it has to open in the Camera RAW window within Elements rather than opening inside the Quick, Guided, or Expert workspaces (double-clicking any JPEG, TIFF, PNG, or...

Editing Raw files: the Basic tab

This section includes a more detailed description of what the many Camera RAW tools offer the photographer. To achieve significant changes and improvements to your images, concentrate on the following:

  • White Balance: Using this, you can easily reset your white balance setting to whatever you need (that is, reset from Shady to Daylight, Tungsten, Flash, or even back to Auto). It also allows you to refine the color using the blue/yellow or magenta/green sliders.
  • Exposure: This is also called brightness. It's used to brighten/darken the initial exposure if needed. (Note: this does not recover tones if the file is grossly over or underexposed.)
  • Contrast: Quite different from Exposure, Contrast darkens the darker parts of the file while lightening the lighter parts of the image, resulting in fewer midtones.

Use it to add visual punch to your images. Too much contrast loses valuable details in the shadows and highlights—...

Editing RAW files: the Detail (sharpening) tab

Sharpening is all about contrast—and in particular, edge contrast. If you make the darks go darker and the lights go a bit lighter, you add contrast—and the image appears clearer and sharper. A little sharpening can even make a (slightly) shaky-looking shot appear a bit clearer, and it can make an already clear image look really stunning.

It's also very important to sharpen for specific output requirements. Sharpening for print is different from sharpening for social media. It's even slightly different for different types of paper stock (such as glossy or matte) because each has a varied absorbency characteristic.

The Detail (Sharpening, or more correctly, Unsharp Masking) tab offers some adjustments that don't make a lot of sense until you understand how a sharpening mask actually works:

  • Sharpening: Adds the amount of sharpening effect to the file. Set it to 100 and move on to refine...

Editing Raw files: Noise Reduction

Digital noise is the bane of any photographer's life. It's caused (mostly) by using high ISO settings while shooting in poor light. Ironically, high ISO in good lighting usually has negligible noise effects. Smaller sensor cameras are particularly prone to this horrible side effect. Sharpening can also increase the look of added graininess in the file, so we have to use a little Noise Reduction to keep the result looking clean and clear of noise.

There are two kinds of noise: Luminance and Color noise. Both are horrible to look at, but perhaps color noise is worse:

  • Luminance noise is just a graininess in the image, seen especially in the darker, underexposed parts of a scene. The higher the ISO rating, the more it appears. Underexposure will also show noise far more than if shooting in daylight. The Luminance noise slider softens the texture of the picture. Too much, and the image might take on a slightly surreal...

Editing Raw files: Other Features

Camera RAW is not just all about making your images lighter, darker, or more colorful. It's packed with an entire editing suite of tools, features, and processes all designed to make the job of editing images that much more streamlined and professional. Features include cropping, histogram adjustments, tonal information, over and underexposure control, as well as a sophisticated Profile Browser for applying some awesome color and mono looks:

Cropping: One of the many advantages of using RAW files is this: once the image has been cropped, the RAW file still retains all the original pixels—meaning it's easy to go back to it and re-crop. Pixels are never discarded. The nature of the edit is recorded either in the file itself or in a "sidecar .xmp" file (which is little more than a text file). Make another change to the image and a new set of instructions is recorded. If you delete the .xmp file and...

10 ways to open a photo for editing

You can choose any of several different ways to get an image from the Organizer into any of the three editing modes to start creating magic:

  • Right-click any thumbnail in Organizer and choose Edit with Photoshop Elements Editor (panel to the right).
  • Select a thumbnail in Organizer, then select the Photo Editor option from the Editor button pop-up at the base of the page (inset, on the right).
  • Click/select a thumbnail in Organizer, then drag it directly into the edit window (into Quick and Expert modes).
  • Click the Open tab (top left-hand side in Expert), then navigate to the image files. Double-click the file name/icon.
  • Choose File>Open recently edited file in the Quick, Guided, and Expert edit modes.
  • Drag an image (icon) from a Windows/Mac Finder window into the Quick or Expert edit window.
  • Use the File>Open menu command.
  • Use the Ctrl/Cmd + O keyboard shortcut.
  • Click/select a thumbnail in Organizer...

Understanding picture resolution

Resolution, and in particular, photo resolution, is a feature that confuses many. This shouldn't be an issue because the resolution of a camera is a fixed quantity and only changes when you physically choose a different picture size in the camera menu—or if you crop the file on a computer.

To be pedantic, resolution is not only about the number of pixels in the camera, although this is important. Resolution is also influenced by the quality of the glass elements in the lens, the camera's image stabilization technology (indirectly), and the shooting technique employed by the photographer.

The biggest point of confusion arises from the way the number of pixels per inch (ppi) can vary widely from camera to camera. In the printing world, dots per inch (dpi) is the same as ppi, which in turn is the same as lines per inch.

Different resolutions = different viewing sizes: Demonstrating resolution can be daunting...

Cropping for better composition

Cropping is an editing feature that allows you to trim off parts of the image that you don't like—it provides an opportunity to recompose the shot after it has been taken.

However, one vital point to remember is that cropping discards pixels and therefore lowers file resolution. I love photographing birds, but unfortunately, they always tend to be too far away, even with a 400 mm telephoto lens, so I have to crop the edges off the file to make the subject appear larger. If I crop 50% from a photo, it then looks as if I have shot the subject with an 800 mm lens, not my regular 400 mm lens. Cropping has saved me a lot of money so that I do not have to buy an even more powerful (and thus very expensive) lens. But the inevitable compromise is that, in that example, I have lost half the pixels in the file—no problem if I only ever post the image online, but will be a restriction if I hope to have it printed large.

...

The Straighten tool

Alongside the Crop tool, I rate the Straighten tool highly. Few photographers can shoot a landscape, for example, and get the horizon 100% level. Many photographers, myself included, also have serious problems getting verticals, well, 100% vertical. Here's how this tool works:

Step one: Open an image that needs its horizon leveled.

Step two: Choose the Straighten tool (cunningly, its toolbar icon is a builder's spirit level).

Step three: Click once on the horizon and, while holding down the mouse button, drag the elastic line that appears from that first click point across the horizon and let go. You do not have to stretch the line along the entire horizon—a few inches is enough. The program immediately rotates the image to make this line the new horizon. If you get it wrong, click Undo (Ctrl/Cmd + Z) and try again.

Trimming the rough bits: With the first option at the bottom left of the screen, if the image is...

Increasing or decreasing file size: Resampling

As we mentioned in the Cropping for better composition section, resampling is the process of adding or subtracting pixels to any file to make it larger or smaller.

Now, you might think, if this is the case, then your dreams of producing very high-resolution files have just been answered. But there's a catch. Resampling is a mathematical algorithm that can be used to upsample or downsample files effectively, provided that the original is of the highest quality.

In practice, this means that if you try to resample a 1 Mp file so it can be printed as a poster, it's not going to look very sharp. But if you start with a lot more image data—let's say, a 24 Mp file—this can be resampled to 30, 40, or 50 Mp with almost no loss of quality. It could go as high as 200 Mp before it really looks soft.

Further sharpening after the resampling process will help to reverse the softening that adding extra pixels might...

Instant photo-fixing in the Organizer

The Instant Fix feature found in Elements' Organizer is a good way to produce quick and highly visual effects without the need to transfer the file from the Organizer to the Quick, Guided, or Expert modes.

Here's how:

  1. Find an image in Organizer that you'd like to edit.
  2. Select it (click once).
  3. Click the Instant Fix button at the bottom of the page.
  4. Use one or more of the tool or process icons that appear on the right-hand side of the screen.

The tools available are Crop, Red Eye, Effects, Smart Fix, Light, Color, and Clarity. You'll find that not all of them are instant. The Crop tool, for example, requires you to choose a crop ratio first, then position it over the appropriate part of the image, then resize it, if needed, before clicking the green check mark to execute the process. But I'm being pedantic.

Once you are happy with the result, click the Save button at the base of the page to...

Using Auto Correction tools

If you don't like the Organizer's rather brief Instant Fixes, Elements has a stack of other automated editing tools located within the Quick and Expert modes. These effects are designed to make your picture editing go faster and with less stress. Some, I think, are nothing short of beautiful, while others might not be so impressive.

There are hundreds of visual possibilities achievable with these features and if some don't work, there will be many others that do. Some of these auto features have several processes wrapped up into the one tool, so while most work admirably, some might do little or nothing to your shot. If this happens, just undo the last action and try another auto tool.

Here's a screenshot of the tone correction tools in Quick edit mode, set to a warmer color temperature on the right. Use the slider to fine-tune the effect, or just hit one of the nine tone thumbnails to select a different...

Mastering contrast: using Levels

Contrast, or more specifically, a lack of contrast, is often the most noticeable fault in many pictures. This is partly because cameras are designed to capture images with a slightly lower contrast than what was actually present in reality—and in doing so, they capture a slightly wider range of tones than if they were recording higher contrast from the get-go.

JPEGs are processed in-camera—which is why, when compared with a RAW file, they will always appear slightly more colorful, but you can always extract more tonal range from a RAW file. It just needs a little more work.

The best tool to begin editing any non-RAW image (such as a JPEG, TIFF, PNG, or PSD file) is Levels (Ctrl/Cmd + L or Enhance>Adjust Contrast>Levels).

Levels is used to adjust the tonal distribution in any image. You'll recognize this when you see the histogram—this is the same display that you'd see on your camera's LCD screen...

Mastering contrast: Shadows/Highlights

You'll note that under the Enhance>Adjust Lighting menu, there are two other tools worth mentioning: Brightness/Contrast and Shadows/Highlights.

The former does exactly what Levels does, but without the benefit of being able to see that tone mountain, which for most photographers is enough encouragement not to use this feature. It's also regarded as being a destructive form of editing—too much use might damage the pixels irreparably, so I'd not recommend using it.

The Shadows/Highlights tool can be very useful for rescuing tones that might appear lost in the highlights and the shadow areas, for boosting details in the darkest parts of the file. Some care must be taken with this feature because too much will make the result appear fake.

Remember that if you are doing this on a JPEG file, it has already been processed in-camera, so if there appears to be no tone in the lighter parts of an...

Mastering color: using Hue/Saturation

Elements has several color adjusting tools—the most commonly used perhaps being Hue/Saturation (Ctrl/Cmd + U).

Hue describes the color values of the pixel. Use this slider to reassign different color values from what's in the file (that is, changing red to yellow). Used solo, it works globally, so not only do the red tones change to yellow, but all the other colors shift their hues as well, often producing wildly surreal and not very useful color results.

Saturation controls the intensity of the color value in the pixels. So, if you set the slider to a minus amount, it loses color, or desaturates, eventually turning black and white. Shifting it to the right increases the color values, making the picture richer in color. As it's a global change, everything in the file gets more or less colorful.

For me, Lightness isn't very useful. The slider adjusts the maximum and minimum black levels in the...

Simple retouching: Smooth skin feature

One effective retouching feature in Elements is the Smooth Skin feature (no guesses for what this does). It's one of those (quite) complex processes that have been simplified by the Adobe software designers to the point where it's dead easy to use—and yet still produces great results.

Here's how easy it is to add a significant improvement to your portraits. Open an image, apply the feature (Enhance>Smooth Skin), and make an adjustment in the (smallish) window that appears onscreen (see inset panel above). Smooth Skin works very well, provided that the artificial intelligence driving this feature can first identify a face in the picture. It doesn't work so well for profiles or shots where the subject isn't looking more or less directly at the camera. It does work, however, with pictures that feature multiple faces. The blue circle is the "active" face—in photos with...

Simple retouching: manual spot removal

I clearly remember when Spot Healing Brush was first announced by Adobe. It was at the launch of Adobe Photoshop 7.0 in 2002, and once the presentation was over, there was a stampede to the back of the auditorium to buy the product (which was the thing to do in those days), such was the impact it had on all those portraitists, wedding shooters, and retouching gurus. Overnight, their lives had changed because no longer did they have to make careful selections, feather that selection, then copy and paste the selected area from one part of the shot to another, then line it up directly over the skin blemish before blending the copied pixels into the background using Layer Opacity settings.

This before and after example took about three minutes to complete—that's how easy the Spot Healing Brush tool is to use. Set the brush diameter a little larger than the blemish area. Click it once, and the blemish disappears...

Additional resources

Using keyboard shortcuts has several significant benefits for photographic editors, regardless of their skill level. Firstly, they take the pressure off your mouse hand. If every function is performed using only the mouse, you will tire more easily. It can also lead to greater physical strain, which in turn could lead to all sorts of medical issues (such as stiffness, arthritis, and even carpal tunnel problems).

Therefore, using a few keyboard shortcuts will not only help to alleviate the physical stresses of just using one hand to edit images, but they'll also significantly speed up the editing process and make your actions more efficient. Elements has a huge range of possible keyboard shortcuts—far too many for most of us to remember, let alone to use effectively—so to keep things as simple and as practical as possible, here are a few of the most relevant shortcuts for this chapter.

The descriptions and their shortcuts are as follows...

Summary

In this chapter, we have looked at introducing you to the best editing practices in Elements so as to streamline your creative photographic workflow, which in turn will make your output more efficient, giving you more time to shoot pictures. It's also been a comprehensive introduction to the use of RAW files, and most importantly, how to edit them using Elements' Camera RAW utility—an important step if you are to develop and maintain a high level of professionalism in your creative careers. We should also now have a good understanding of image resolution and file resampling when it comes to reducing or enlarging image files.

We have also seen how easy it is to come up with a stunning look for your images by editing them using one of Elements' many instant preset special effects and image fixes, just as you might when applying an Instagram filter online. It's important for beginners to see how easy it is to produce beautiful effects with no previous...

lock icon
The rest of the chapter is locked
You have been reading a chapter from
Mastering Adobe Photoshop Elements 2023 - Fifth Edition
Published in: Dec 2022Publisher: PacktISBN-13: 9781803248455
Register for a free Packt account to unlock a world of extra content!
A free Packt account unlocks extra newsletters, articles, discounted offers, and much more. Start advancing your knowledge today.
undefined
Unlock this book and the full library FREE for 7 days
Get unlimited access to 7000+ expert-authored eBooks and videos courses covering every tech area you can think of
Renews at €14.99/month. Cancel anytime

Author (1)

author image
Robin Nichols

Born in the UK, Robin Nichols has always had a great love for recording the world with a camera. After finishing school, he studied fine art, before moving on to study at Nottingham Trent University, where he gained a degree in creative photography. He subsequently worked in the advertising industry for several years, before emigrating to Australia in 1985. Robin has always worked in photography: as a black and white printer, a cameraman, a stock photographer, and a freelance photographer. During the 1990s, Robin contributed to several photo-centric publications in Australia, New Zealand, Singapore, and the UK.
Read more about Robin Nichols