


Downloading and Installing Nginx
In this first chapter, we will proceed with the necessary steps towards establishing a functional setup of Nginx. This moment is crucial for the smooth functioning of your web server—there are some required libraries and tools for installing the web server, some parameters that you will have to decide upon when compiling the binaries, and there may also be some configuration changes to perform on your system.
This chapter covers the following:
- Installing via package managers
- Downloading and installing the prerequisites for compiling Nginx binaries
- Downloading a suitable version of the Nginx source code
- Configuring Nginx compile-time options
- Controlling the application with an init script
- Configuring the system to launch Nginx automatically on startup
- A quick overview of the possibilities offered by the Nginx Plus platform
Installing via package managers
The quickest, and easiest, way to install Nginx is to simply use your OS-provided version. Most of the time, these are kept fairly updated; however, for some Linux distributions focusing on stability, you may only have older versions of Nginx available. Sometimes, your Linux distribution may provide multiple versions of Nginx with different compile flags.
In general, before embarking on a more complex journey, we should check if we can use the easy solution. For a Debian-based operating system, we first find the Nginx compiles available then get the info for the one we want:
apt-cache search nginx
apt-cache show PACKAGE_NAME
apt-get install PACKAGE_NAME
For Red Hat Linux-based operating systems, we need to enable the EPEL repo first and then do the same:
yum install epel-release
yum search nginx
yum info PACKAGE_NAME
yum install PACKAGE_NAME
If the version provided is current enough, then you're ready to configure Nginx in the next chapter.
If the version provided by your distribution is too old, then Nginx provides packages for RHEL/CentOS distributions as well as Debian/Ubuntu distributions.
Nginx provided packages
To set up a yum repository for RHEL/CentOS, create a file named /etc/yum.repos.d/nginx.repo with the following contents:
[nginx]
name=nginx repo
baseurl=http://nginx.org/packages/OS/OSRELEASE/$basearch/
gpgcheck=0
enabled=1
Replace OS with rhel or centos, depending on the distribution used, and OSRELEASE with 6 or 7, for versions 6.x or 7.x, respectively. Afterwards, Nginx can now be installed with yum:
yum install nginx
For Debian-based distributions, we need to first use their signing key to authenticate the package signatures. Download the following file first from http://nginx.org/keys/nginx_signing.key.
Then run the following command:
sudo apt-key add nginx_signing.key
With the key added, we can now add the Nginx repository to our sources.list found in /etc/apt/sources.list. For Debian, we add the following lines:
deb http://nginx.org/packages/debian/ codename nginx
deb-src http://nginx.org/packages/debian/ codename nginx
Where codename is either jessie or stretch depending on your version of Debian. For Ubuntu, we use the following dependencies:
deb http://nginx.org/packages/ubuntu/ codename nginx
deb-src http://nginx.org/packages/ubuntu/ codename nginx
Where codename is one of trusty, xenial, or zesty depending on your version of Ubuntu. Finally, we can install Nginx with the apt-get command option:
apt-get update
apt-get install nginx
Compiling from source
There are situations where compiling Nginx from source is preferable. It gives us the most flexibility regarding modules, so we can customize better for our intended usage. For example, we could compile a very lean version for embedded hardware.
Additionally, we can make sure we use the latest version of Nginx and have all new features available to us. Keep in mind, though, that when installing software from source you are responsible for keeping it updated. Nginx, just like every other piece of software, sometimes finds security issues that it needs to address. An OS package is much easier to update than a source install, but so long as you're aware of the need to maintain it yourself, there is absolutely no problem.
Depending on the optional modules that you select at compile time, you will perhaps need different prerequisites. We will guide you through the process of installing the most common ones, such as GCC, PCRE, zlib, and OpenSSL.
GNU Compiler Collection
Nginx is a program written in C, so you will first need to install a compiler tool such as the GNU Compiler Collection (GCC) on your system. GCC may already be present on your system, but if that is not the case you will have to install it before going any further.
First, make sure it isn't already installed on your system:
[alex@example.com ~]$ gcc
If you get the following output, it means that GCC is correctly installed on your system and you can skip to the next section:
gcc: no input files
If you receive the following message, you will have to proceed with the installation of the compiler:
~bash: gcc: command not found
GCC can be installed using the default repositories of your package manager. Depending on your distribution, the package manager will be vary-yum for a Red Hat Linux-based distribution, apt for Debian and Ubuntu, yast for SuSE Linux, and so on. Here is the typical way to proceed with the download and installation of the GCC package:
[root@example.com ~]# yum groupinstall "Development Tools"
If you use apt-get, execute the following command:
[root@example.com ~]# apt-get install build-essentials
If you use another package manager with a different syntax, you will probably find the documentation with the man utility. Either way, your package manager should be able to download and install GCC correctly, after having resolved dependencies automatically. Note that this command will not only install GCC, it also proceeds with downloading and installing all common requirements for building applications from source, such as code headers and other compilation tools.
The PCRE library
The Perl Compatible Regular Expression (PCRE) library is required for compiling Nginx. The rewrite and HTTP core modules of Nginx use PCRE for the syntax of their regular expressions, as we will discover in later chapters. You will need to install two packages—pcre and pcre-devel. The first one provides the compiled version of the library, whereas the second one provides development headers and sources for compiling projects, which are required in our case.
Here are some example commands that you can run in order to install both the packages.
Using yum, execute the following command:
[root@example.com ~]# yum install pcre pcre-devel
Or you can install all PCRE-related packages using the following command:
[root@example.com ~]# yum install pcre*
If you use apt-get, use the following command:
[root@example.com ~]# apt-get install libpcre3 libpcre3-dev
If these packages are already installed on your system, you will receive a message saying something like nothing to do; in other words, the package manager did not install or update any component:

The zlib library
The zlib library provides developers with compression algorithms. It is required for the use of .gzip compression in various modules of Nginx. Again, you can use your package manager to install this component as it is part of the default repositories. Similar to PCRE, you will need both the library and its source-zlib and zlib-devel.
Using yum, execute the following command:
[root@example.com ~]# yum install zlib zlib-devel
Using apt-get, execute the following command:
[root@example.com ~]# apt-get install zlib1g zlib1g-dev
These packages install quickly and have no known dependency issues.
OpenSSL
The OpenSSL library will be used by Nginx to serve secure web pages. We thus need to install the library and its development package. The process remains the same here – you install openssl and openssl-devel:
[root@example.com ~]# yum install openssl openssl-devel
Using apt-get, execute the following command:
[root@example.com ~]# apt-get install openssl libssl-dev
Now that you have installed all of the prerequisites, you are ready to download and compile the Nginx source code.
Downloading Nginx
This approach to the download process will lead us to discover the various resources at the disposal of server administrators, websites, communities, and wikis all relating to Nginx. We will also quickly discuss the different version branches available to you, and eventually select the most appropriate one for your setup.
Websites and resources
Although Nginx is a relatively new and growing project, there are already a good number of resources available on the World Wide Web (WWW) and an active community of administrators and developers.
The official website, which is at http://nginx.org/, currently serves as an official documentation reference, and provides links from which to download the latest version of the application source code and binaries. A wiki is also available at https://www.nginx.com/resources/wiki/ and offers a wide selection of additional resources such as installation guides for various operating systems, tutorials related to the different modules of Nginx, and more.
There are several ways to get help if you should need it. If you have a specific question, try posting on the Nginx forum—https://forum.nginx.org/. An active community of users will answer your questions in no time. Additionally, the Nginx mailing list, which is relayed on the Nginx forum, will also prove to be an excellent resource for any question you may have. And if you need direct assistance, there is always a group of regulars helping each other out on the IRC channel #Nginx on irc.freenode.net.
Another interesting source of information is the blogosphere. A simple query on your favorite search engine should return a good number of blog articles documenting Nginx, its configuration, and modules:
It's now time to head over to the official website and get started with downloading the source code for compiling and installing Nginx. Before you do so, let us have a quick summary of the available versions and the features that come with them.
Version branches
Igor Sysoev, a talented Russian developer and server administrator, initiated this open source project back in 2002. Between the first release in 2004 and the current version, the market share of Nginx has been growing steadily. It now serves nearly 15% of websites on the internet, according to a June 2015 https://www.netcraft.com/ survey. The features are numerous and render the application both powerful and flexible at the same time.
There are currently three version branches on the project:
- Stable version: This version is usually recommended, as it is approved by both developers and users, but is usually a little behind the mainline version.
- Mainline version: This is the latest version available for download and comes with the newest developments and bug fixes. It was formerly known as the development version. Although it is generally solid enough to be installed on production servers, there is a small chance that you will run into the occasional bug. As such, if you favor stability over novelty, going for the stable version is recommended.
- Legacy version: If, for some reason, you are interested in looking at the older versions, you will find several of them.
A recurrent question regarding mainline versions is "Are they stable enough to be used on production servers?" Cliff Wells, the original founder and maintainer of the Nginx wiki https://www.nginx.com/resources/wiki/, believes so – "I generally use and recommend the latest development version. It's only bit me once!" Early adopters rarely report critical problems. It is up to you to select the version you will be using on your server, knowing that the instructions given in this book should be valid regardless of the release as the Nginx developers have decided to maintain overall backwards compatibility in new versions. You can find more information on version changes, new additions, and bug fixes in the dedicated change log page on the official website.
Features
As of the mainline version 1.13.8, Nginx offers an impressive variety of features, which, contrary to what the title of this book indicates, are not all related to serving HTTP content. Here is a list of the main features of the web branch, quoted from the official website http://nginx.org/:
- Serving static and index files, auto indexing; open file descriptor cache; accelerated reverse proxying with caching; load balancing and fault tolerance.
- Accelerated support with caching of FastCGI, uWSGI, SCGI, and memcached servers; load balancing and fault tolerance; modular architecture. Filters include gzipping, byte ranges, chunked responses, XSLT, SSI, and image transformation filter. Multiple SSI inclusions within a single page can be processed in parallel if they are handled by proxies or FastCGI/uWSGI/SCGI servers.
- SSL and TLS SNI support.
Nginx can also be used as a mail proxy server, although this aspect is not closely documented in the book:
- User redirection to IMAP/POP3 backend using an external HTTP authentication server
- User authentication using an external HTTP authentication server and connection redirection to an internal SMTP backend
- Authentication methods:
- POP3: USER/PASS, APOP, AUTH LOGIN/PLAIN/CRAM-MD5
- IMAP: LOGIN, AUTH LOGIN/PLAIN/CRAM-MD5
- SMTP: AUTH LOGIN/PLAIN/CRAM-MD5
- SSL support
- STARTTLS and STLS support
Nginx is compatible with most computer architectures and operating systems—Windows, Linux, Mac OS, FreeBSD, and Solaris. The application runs fine on 32- and 64-bit architectures.
Downloading and extracting
Once you have made your choice as to which version you will be using, head over to http://nginx.org/ and find the URL of the file you wish to download. Position yourself in your home directory, which will contain the source code to be compiled, and download the file using wget:
[alex@example.com ~]$ mkdir src && cd src
[alex@example.com src]$ wget http://nginx.org/download/nginx-1.13.8.tar.gz
We will be using version 1.13.8, the latest stable version as of February, 2018. Once downloaded, extract the archive contents in the current folder:
[alex@example.com src]$ tar zxf nginx-1.13.8.tar.gz
You have successfully downloaded and extracted Nginx. Now, the next step will be to configure the compilation process in order to obtain a binary that perfectly fits your operating system.
Configure options
There are usually three steps when building an application from source—configuration, compilation, and installation. The configuration step allows you to select a number of options that will not be editable after the program is built, as it has a direct impact on the project binaries. Consequently, it is a very important stage that you need to follow carefully if you want to avoid surprises later, such as the lack of a specific module or files being located in a random folder.
The process consists of appending certain switches to the configure script that comes with the source code. We will discover the three types of switches that you can activate; but let us first study the easiest way to proceed.
The easy way
If, for some reason, you do not want to bother with the configuration step, such as for testing purposes or simply because you will be recompiling the application in the future, you may simply use the configure command with no switches. Execute the following three commands to build and install a working version of Nginx:
[alex@example.com nginx-1.13.8]# ./configure
Running this command should initiate a long procedure of verifications to ensure that your system contains all of the necessary components. If the configuration process fails, please make sure you check the prerequisites section again, as it is the most common cause of errors. For information about why the command failed, you may also refer to the objs/autoconf.err file, which provides a more detailed report:
[alex@example.com nginx-1.13.8]# make
The make command will compile the application. This step should not cause any errors as long as the configuration went fine:
[root@example.com nginx-1.13.8]# make install
This last step will copy the compiled files as well as other resources to the installation directory, by default /usr/local/nginx. You may need to be logged in as root to perform this operation depending on permissions granted to the /usr/local directory.
Again, if you build the application without configuring it, you take the risk of missing out on a lot of features, such as the optional modules and others that we are about to discover.
Path options
When running the configure command, you are offered the chance to enable some switches that let you specify the directory or file paths for a variety of elements. Please note that the options offered by the configuration switches may change according to the version you downloaded. The following options listed are valid with the stable version, as of release 1.13.8. If you use another version, run the ./configure --help command to list the available switches for your setup.
Using a switch typically consists of appending some text to the command line. For instance, using the --conf-path switch:
[alex@example.com nginx-1.13.8]# ./configure --conf-path=/etc/nginx/nginx.conf
Here is an exhaustive list of the configuration switches for configuring paths:
|
Switch |
Usage |
Default value |
|
--prefix=... |
The base folder in which Nginx will be installed. |
/usr/local/nginx If you configure other switches using relative paths, they will connect to the base folder. For example; specifying --conf-path=conf/nginx.conf will result in your configuration file being found at /usr/local/nginx/conf/nginx.conf. |
|
--sbin-path=... |
The path where the Nginx binary file should be installed. |
<prefix>/sbin/nginx. |
|
--conf-path=... |
The path of the main configuration file. |
<prefix>/conf/nginx.conf. |
|
--error-log-path=... |
The location of your error log. Error logs can be configured very accurately in the configuration files. This path only applies in case you do not specify any error logging directive in your configuration. |
<prefix>/logs/error.log. |
|
--pid-path=... |
The path of the Nginx PID file. You can specify the PID file path in the configuration file. If that's not the case, the value you specify for this switch will be used. |
<prefix>/logs/nginx.pid. The PID file is a simple text file containing the process identifier. It is placed in a well-defined location so that other applications can easily find the PID of a running program. |
|
--lock-path=... |
The location of the lock file. Again, it can be specified in the configuration file, but if it isn't, this value will be used. |
<prefix>/logs/nginx.lock. The lock file allows other applications to determine whether or not the program is running. In the case of Nginx, it is used to make sure that the process is not started twice. |
|
--with-perl_modules_path=... |
Defines the path to the Perl modules. This switch must be defined if you want to include additional Perl modules. |
NA |
|
--with-perl=... |
Path to the Perl binary file; used for executing Perl scripts. This path must be set if you want to allow execution of Perl scripts. |
NA |
|
--http-log-path=... |
Defines the location of access logs. This path is used only if the access log directive is unspecified in the configuration files. |
<prefix>/logs/access.log. |
|
--http-client-body-temp-path=... |
Directory used for storing temporary files generated by client requests. |
<prefix>/client_body_temp. |
|
--http-proxy-temp-path=... |
Location of the temporary files used by the proxy. |
<prefix>/proxy_temp. |
|
--http-fastcgi-temp-path=... --http-uwsgi-temp-path=... --http-scgi-temp-path=... |
Location of the temporary files used by the HTTP FastCGI, uWSGI, and SCGI modules. |
Respectively <prefix>/fastcgi_temp,<prefix>/uwsgi_temp, and <prefix>/scgi_temp. |
|
--builddir=... |
Location of the application build. |
NA |
Prerequisite options
Prerequisites come in the form of libraries and binaries. You should by now have them all installed on your system. Yet, even though they are present on your system, there may be occasions where the configuration script cannot locate them. The reasons might be diverse, for example, if they were installed in non-standard directories. In order to solve such problems, you are given the option to specify the path for prerequisites using the following switches. Miscellaneous prerequisite-related options are grouped together.
|
Compiler options |
Usage |
|
--with-cc=... |
Specifies an alternate location for the C compiler. |
|
--with-cpp=... |
Specifies an alternate location for the C preprocessor. |
|
--with-cc-opt=... |
Defines additional options to be passed to the C compiler command line. |
|
--with-ld-opt=... |
Defines additional options to be passed to the C linker command line. |
|
--with-cpu-opt=... |
Specifies a different target processor architecture, from these values: pentium, pentiumpro, pentium3, pentium4, athlon, opteron, sparc32, sparc64, and ppc64. |
|
--with-compat |
Enables dynamic module compatibility. Should be enabled if planning to use dynamic modules. |
|
PCRE options |
Usage |
|
--without-pcre |
PCRE option disables usage of the PCRE library. This setting is not recommended, as it will remove support for regular expressions, consequently disabling the rewrite module. |
|
--with-pcre |
Forces usage of the PCRE library. |
|
--with-pcre=... |
Allows you to specify the path of the PCRE library source code. |
|
--with-pcre-opt=... |
Additional options for building the PCRE library. |
|
--with-pcre-jit=... |
Build PCRE with JIT compilation support. |
|
zlib options |
Usage |
|
--with-zlib=... |
Specifies the path to the zlib library sources. |
|
--with-zlib-opt=... |
Additional options for building the zlib library. |
|
--with-zlib-asm=... |
Uses assembler optimizations for these target architectures, pentium, pentiumpro. |
|
OpenSSL options |
Usage |
|
--with-openssl=... |
Specifies the path of OpenSSL library sources. |
|
--with-openssl-opt=... |
Additional options for building the OpenSSL library. |
|
Libatomic |
Usage |
|
--with-libatomic=... |
Forces usage of the libatomic_ops library on systems other than x86, amd64, and sparc. This library allows Nginx to perform atomic operations directly instead of resorting to lock files. Depending on your system, it may result in a decrease in SEGFAULT errors and possibly a higher request serving rate. |
|
--with-libatomic=... |
Specifies the path of the Libatomic library sources. |
Module options
Modules, which will be detailed in Chapter 3, HTTP Configuration, and further, need to be selected before compiling the application. Some are enabled by default and some need to be enabled manually, as you will see in the following table.
Modules enabled by default
The following switches allow you to disable modules that are enabled by default:
|
Modules enabled by default |
Description |
|
--without-http_charset_module |
Disables the charset module for re-encoding web pages. |
|
--without-http_gzip_module |
Disables the gzip compression module. |
|
--without-http_ssi_module |
Disables the server-side include module. |
|
--without-http_userid_module |
Disables the user ID module providing user identification via cookies. |
|
--without-http_access_module |
Disables the access module allowing access configuration for IP address ranges. |
|
--without-http_auth_basic_module |
Disables the basic authentication module. |
|
--without-mirror |
Disables the mirror module, used for creating mirror requests to alternative backends. |
|
--without-http_autoindex_module |
Disables the automatic index module. |
|
--without-http_geo_module |
Disables the geo module allowing you to define variables depending on IP address ranges. |
|
--without-http_map_module |
Disables the map module that allows you to declare map blocks. |
|
--without-http_split_clients_module |
Disables the split clients module, which can be used for A/B testing. |
|
--without-http_referer_module |
Disables the referer control module. |
|
--without-http_rewrite_module |
Disables the rewrite module. |
|
--without-http_proxy_module |
Disables the proxy module for transferring requests to other servers. |
|
--without-http_fastcgi_module --without-http_uwsgi_module --without-http_scgi_module |
Disables the FastCGI, uWSGI, or SCGI modules for interacting with respectively FastCGI, uWSGI, or SCGI processes. |
|
--without-http_memcached_module |
Disables the memcached module for interacting with the memcache daemon. |
|
--without-http_limit_conn_module |
Disables the limit connections module for restricting resource usage according to defined zones. |
|
--without-http_limit_req_module |
Disables the limit requests module allowing you to limit the amount of requests per user. |
|
--without-http_empty_gif_module |
Disables the empty gif module that serves a blank GIF image from memory. |
|
--without-http_browser_module |
Disables the browser module that interprets the user agent string. |
|
--without-http_upstream_hash_module |
Disables the upstream hash module providing the hash directive in upstream blocks. |
|
--without-http_upstream_ip_hash_module |
Disables the upstream IP hash module providing the ip_hash directive in upstream blocks. |
|
--without-http_upstream_least_conn_module |
Disables the upstream least—conn module providing the least_conn directive in upstream blocks. |
|
--without-http_upstream_keepalive_module |
Disables the upstream keepalive module. |
|
--without-http_upstream_zone_module |
Disables the upstream shared memory zone module. |
Modules disabled by default
The following switches allow you to enable modules that are disabled by default:
|
Modules disabled by default |
Description |
|
--with-http_ssl_module |
Enables the SSL module for serving pages using HTTPS. |
|
--with-http_v2 |
Enables support for HTTP/2. |
|
--with-http_realip_module |
Enables the realip module, for reading the real IP address from the request header data. |
|
--with-http_addition_module |
Enables the addition module which lets you append or prepend data to the response body. |
|
--with-http_xslt_module |
Enables the xslt module for applying XSL transformations to XML documents. You will need to install the libxml2 and libxslt libraries on your system if you wish to compile these modules. You can pass this setting to the dynamic flag to compile as a dynamic module. |
|
--with-http_image_filter_module |
Enables the image_filter module, which lets you apply modifications to images. You will need to install the libgd library on your system if you wish to compile this module. You can pass it the dynamic flag to compile as the dynamic module. |
|
--with-http_geoip_module |
Enables the geoip module for achieving geographic localization using MaxMind's GeoIP binary database. You will need to install the libgeoip library on your system if you wish to compile this module. You can pass it the dynamic flag to compile as dynamic module. |
|
--with-http_sub_module |
Enables the substitution (sub) module for replacing text in web pages. |
|
--with-http_dav_module |
Enables the WebDAV module (distributed authoring and versioning via the web). |
|
--with-http_flv_module |
Enables the FLV module for special handling of .flv (flash video) files. |
|
--with-http_mp4_module |
Enables the MP4 module for special handling of .mp4 video files. |
|
--with-http_gzip_static_module |
Enables the gzip static module for sending pre-compressed files. |
|
--with-http_auth_request_module |
Enables the auth_request module. This module allows you to delegate the HTTP authentication mechanism to a back-end server via a subrequest. The status code of the response can be stored in a variable. |
|
--with-http_random_index_module |
Enables the random_index module for picking a random file as the directory index. |
|
--with-http_secure_link_module |
Enables the secure_link module to check the presence of a keyword in the URL. |
|
--with-http_stub_status_module |
Enables the stub status module, which generates a server statistics and information page. |
|
--with-google_perftools_module |
Enables the Google performance tools module. |
|
--with-http_degradation_module |
Enables the degradation module, which controls the behavior of your server depending on current resource usage. |
|
--with-http_perl_module |
Enables the perl module allowing you to insert Perl code directly into your Nginx configuration files, and to make Perl calls from SSI. |
|
--with-http_gunzip_module |
Enables the gunzip module, which offers to decompress a gzip-encoded response from a back-end server before forwarding it to the client. |
Miscellaneous options
Other options are available in the configuration script, for example, regarding the streaming modules, the mail server proxy feature, or event management.
|
Streaming server options |
Usage |
|
--with-stream |
Enables the stream module for proxying data streams over TCP/UDP. |
|
--with-mail_ssl_module |
Enables SSL support for the mail server proxy. It is disabled by default. |
|
--without-mail_pop3_module |
Disables the POP3 module for the mail server proxy. It is enabled by default when the mail server proxy module is enabled. |
|
--without-mail_imap_module |
Disables the IMAP4 module for the mail server proxy. It is enabled by default when the mail server proxy module is enabled. |
|
--without-mail_smtp_module |
Disables the SMTP module for the mail server proxy. It is enabled by default when the mail server proxy module is enabled. |
|
Mail server options |
Usage |
|
--with-mail |
Mail server proxy option enables mail the server proxy module. Supports POP3, IMAP4, SMTP. It is disabled by default. |
|
--with-mail_ssl_module |
Enables SSL support for the mail server proxy. It is disabled by default. |
|
--without-mail_pop3_module |
Disables the POP3 module for the mail server proxy. It is enabled by default when the mail server proxy module is enabled. |
|
--without-mail_imap_module |
Disables the IMAP4 module for the mail server proxy. It is enabled by default when the mail server proxy module is enabled. |
|
--without-mail_smtp_module |
Disables the SMTP module for the mail server proxy. It is enabled by default when the mail server proxy module is enabled. |
|
Event management (allows you to select an event notification system for the Nginx sequencer. For advanced users only) |
Usage |
|
--with-rtsig_module |
Enables the rtsig module to use rtsig as the event notification mechanism. |
|
--with-select_module |
Enables the select module to use select as the event notification mechanism. By default, this module is enabled unless a better method is found on the system:kqueue, epoll, rtsig, or poll. |
|
--without-select_module |
Disables the select module. |
|
--with-poll_module |
Enables the poll module to use poll as the event notification mechanism. By default, this module is enabled if available, unless a better method is found on the system-kqueue, epoll, or rtsig. |
|
--without-poll_module |
Disables the poll module. |
|
User and group options |
Usage |
|
--user=... |
Default user account for starting the Nginx worker processes. This setting is used only if you omit to specify the user directive in the configuration file. |
|
--group=... |
Default user group for starting the Nginx worker processes. This setting is used only if you omit to specify the group directive in the configuration file. |
|
--without-http |
Disables the HTTP server. |
|
--without-http-cache |
Disables HTTP caching features. |
|
--add-module=PATH |
Adds a third-party module to the compile process by specifying its path. This switch can be repeated indefinitely if you wish to compile multiple modules. |
|
--with-debug |
Enables additional debugging information to be logged. |
|
--with-file-aio |
Enables support for Asynchronous IO Disk Operations or AIOs. |
|
--build=name |
Optionally set a name for this compile of Nginx. Can be used for internal identification. |
Configuration examples
Here are a few examples of configuration commands that may be used for various cases. In these examples, the path switches were omitted as they are specific to each system and leaving the default values may simply function correctly.
About the prefix switch
During the configuration, you should take particular care over the --prefix switch. Many of the future configuration directives (which we will cover in further chapters) will be based on the path you select at this point. While it is not a an insoluble problem since absolute paths can still be employed, you should know that the prefix cannot be changed once the binaries have been compiled.
There is also another issue that you may run into if you plan to keep up with the times and update Nginx as new versions are released. The default prefix (if you do not override the setting by using the --prefix switch) is /usr/local/nginx. This path does not include the version number. Consequently, when you upgrade Nginx, if you do not specify a different prefix, the new install files will override the previous ones, which, among other problems, could potentially erase your currently running binaries.
It is thus recommended you use a different prefix for each version you will be using:
./configure --prefix=/usr/local/nginx-1.13.8
Additionally, to make future changes simpler, you may create a symbolic link /usr/local/nginx pointing to /usr/local/nginx-1.13.8. Once you upgrade, you can update the link to make it point to /usr/local/nginx-newer.version. This will allow the init script to always make use of the latest installed version of Nginx.
Regular HTTP and HTTPS servers
The first example describes a situation where the most important features and modules for serving HTTP and HTTPS content are enabled, and mail-related options are disabled:
./configure --user=www-data --group=www-data --with-http_ssl_module --with-http_realip_module
As you can see, the command is rather simple and most switches were left out. The reason is that the default configuration is rather efficient and most of the important modules are enabled. You will only need to include the http_ssl module for serving HTTPS content and optionally, the realip module for retrieving your visitors' IP addresses in case you are running Nginx as a backend server.
All modules enabled
The next situation: the entire package. All modules are enabled and it is up to you whether you want to use them or not at runtime:
./configure --user=www-data --group=www-data --with-http_ssl_module --with-http_realip_module --with-http_addition_module --with-http_xslt_module --with-http_image_filter_module --with-http_geoip_module --with-http_sub_module --with-http_dav_module --with-http_flv_module --with-http_mp4_module --with-http_gzip_static_module --with-http_random_index_module --with-http_secure_link_module --with-http_stub_status_module --with-http_perl_module --with-http_degradation_module --with-http_gunzip_module --with-http_auth_request_module
This configuration opens up a wide range of possible configuration options. Chapter 3, HTTP Configuration, to Chapter 6, Apache and Nginx Together, provide more detailed information on module configuration.
With this setup, all optional modules are enabled, thus requiring additional libraries to be installed: libgeoip for the GeoIP module, libgd for the image filter module, libxml2, and libxslt for the XSLT module. You may install those prerequisites using your system package manager , for instance by running yum install libxml2 or apt-get install libxml2.
Mail server proxy
This last build configuration is somewhat special as it is dedicated to enabling mail server proxy features—a darker and less documented side of Nginx. The related features and modules are all enabled:
./configure --user=www-data --group=www-data --with-mail --with-mail_ssl_module
If you wish to completely disable the HTTP serving features and only dedicate Nginx to mail proxying, you may add the --without-http switch.
Build configuration issues
In some cases, the configure command may fail – after a long list of checks, you may receive a few error messages on your terminal. In most (if not all) cases, these errors are related to missing prerequisites or unspecified paths.
In such cases, proceed with the following verifications carefully to make sure you have all it takes to compile the application, and optionally consult the objs/autoconf.err file for more details about the compilation problem. This file is generated during the configure process and will tell you exactly which part of the process failed.
Make sure you installed the prerequisites
There are basically four main prerequisites: GCC, PCRE, zlib, and OpenSSL. The last three are libraries that must be installed in two packages: the library itself and its development sources. Make sure you have installed both for each of them. Please refer to the prerequisites section at the beginning of this chapter. Note that other prerequisites, such as LibXML2 or LibXSLT, might be required for enabling extra modules (for example, in the case of the HTTP XSLT module).
If you are positive that all of the prerequisites were installed correctly, perhaps the issue comes from the fact that the configure script is unable to locate the prerequisite files. In that case, make sure that you include the configuration switches related to file paths, as described earlier.
For example, the following switch allows you to specify the location of the OpenSSL library files:
./configure [...] --with-openssl=/usr/lib64
The OpenSSL library file will be looked for in the specified folder.
Directories exist and are writable
Always remember to check the obvious; everyone makes even the simplest of mistakes sooner or later. Make sure the directory you placed the Nginx files in has read and write permissions for the user running the configuration and compilation scripts. Also ensure that all paths specified in the configure script switches are existing, valid paths.
Compiling and installing
The configuration process is of the utmost importance—it generates a makefile for the application depending on the selected switches and performs a long list of requirement checks on your system. Once the configure script is successfully executed, you can proceed with compiling Nginx.
Compiling the project equates to executing the make command in the project source directory:
[alex@example.com nginx-1.13.8]$ make
A successful build should result in a final message appearing: make[1]: leaving directory followed by the project source path.
Again, problems might occur at compile time. Most of these problems can originate in missing prerequisites or invalid paths specified. If this occurs, run the configure command again and triple-check the switches and all of the prerequisite options. It may also occur that you downloaded a too recent version of the prerequisites that might not be backwards-compatible. In such cases, the best option is to visit the official website of the missing component and download an older version.
If the compilation process was successful, you are ready for the next step: installing the application. The following command must be executed with root privileges:
[root@example.com nginx-1.13.8]# make install
The make install command executes the install section of the makefile. In other words, it performs a few simple operations, such as copying binaries and configuration files to the specified install folder. It also creates directories for storing log and HTML files, if these do not already exist. The make install step is not generally a source of problems, unless your system encounters an exceptional error, such as a lack of storage space or memory.
Controlling the Nginx service
At this stage, you should have successfully built and installed Nginx. The default location for the output files is /usr/local/nginx, so we will be basing future examples on this.
Daemons and services
The next step is obviously to execute Nginx. However, before doing so, it's important to understand the nature of this application. There are two types of computer application—those that require immediate user input, thus running in the foreground, and those that do not, thus running in the background. Nginx is of the latter type, often referred to as daemon. Daemon names usually come with a trailing d and a couple of examples can be mentioned here—httpd the HTTP server daemon is the name given to Apache under several Linux distributions, named the nameserver daemon, or cron the task scheduler—although, as you will notice, it is not the case for Nginx. When started from the command line, a daemon immediately returns the prompt window, and in most cases, does not even bother outputting data to the terminal.
Consequently, when starting Nginx you will not see any text appear on the screen and the prompt will return immediately. While this might seem startling, it is on the contrary a good sign. It means the daemon was started correctly and the configuration did not contain any errors.
User and group
It is of the utmost importance to understand the process architecture of Nginx and particularly the user and groups its various processes run under. A very common source of troubles when setting up Nginx is invalid file access permissions—due to a user or group misconfiguration, you often end up getting 403 Forbidden HTTP errors because Nginx cannot access the requested files.
There are two levels of processes with possibly different permission sets:
- Nginx master process: This should be started as root. In most Unix-like systems, processes started with the root account are allowed to open TCP sockets on any port, whereas other users can only open listening sockets on a port above 1024. If you do not start Nginx as root, standard ports such as 80 or 443 will not be accessible.
- Nginx worker processes: These are automatically spawned by the master process under the account you specified in the configuration file with the user directive (detailed in Chapter 2, Basic Nginx Configuration). The configuration setting takes precedence over the configuration switch you may have specified at compile time. If you did not specify any of those, the worker processes will be started as user nobody, and the group will be nobody (or nogroup depending on your OS).
Nginx command-line switches
The Nginx binary accepts command-line arguments for performing various operations, among which is controlling background processes. To get a full list of commands, you may invoke the help screen using the following commands:
[alex@example.com ~]$ cd /usr/local/nginx/sbin
[alex@example.com sbin]$ ./nginx -h
The next few sections will describe the purpose of these switches. Some allow you to control the daemon, some let you perform various operations on the application configuration.
Starting and stopping the daemon
You can start Nginx by running the Nginx binary without any switches. If the daemon is already running, a message will show up indicating that a socket is already listening on the specified port:
[emerg]: bind() to 0.0.0.0:80 failed (98: Address already in use) [...] [emerg]: still could not bind().
Beyond this point, you may control the daemon by stopping it, restarting it, or simply reloading its configuration. Controlling is done by sending signals to the process using the nginx -s command:
|
Command |
Description |
|
nginx -s stop |
Stops the daemon immediately (using the TERM signal) |
|
nginx -s quit |
Stops the daemon gracefully (using the QUIT signal) |
|
nginx -s reopen |
Reopens log files |
|
nginx -s reload |
Reloads the configuration |
When starting the daemon, stopping it, or performing any of the preceding operations, the configuration file is first parsed and verified. If the configuration is invalid, whatever command you have submitted will fail, even when trying to stop the daemon. In other words, in some cases you will not be able to even stop Nginx if the configuration file is invalid.
An alternate way to terminate the process, in desperate cases only, is to use the kill or killall commands with root privileges:
[root@example.com ~]# killall nginx
Testing the configuration
As you can imagine, this tiny bit of detail might become an important issue if you constantly tweak your configuration. The slightest mistake in any of the configuration files can result in a loss of control over the service—you are then unable to stop it via regular init control commands, and obviously, it will refuse to start again.
In consequence, the following command will be useful to you in many occasions. It allows you to check the syntax, validity, and integrity of your configuration:
[alex@example.com ~]$ /usr/local/nginx/sbin/nginx -t
The -t switch stands for test configuration. Nginx will parse the configuration anew and let you know whether it is valid or not. A valid configuration file does not necessarily mean Nginx will start though as there might be additional problems such as socket issues, invalid paths, or incorrect access permissions.
Obviously, manipulating your configuration files while your server is in production is a dangerous thing to do and should be avoided when possible. The best practice, in this case, is to place your new configuration into a separate temporary file and run the test on that file. Nginx makes it possible by offering the -c switch:
[alex@example.com sbin]$ ./nginx -t -c /home/alex/test.conf
This command will parse /home/alex/test.conf and make sure it is a valid Nginx configuration file. When you are done, after making sure that your new file is valid, proceed to replacing your current configuration file and reload the server configuration:
[alex@example.com sbin]$ cp -i /home/alex/test.conf usr/local/nginx/conf/nginx.conf
cp: erase 'nginx.conf' ? yes
[alex@example.com sbin]$ ./nginx -s reload
Other switches
Another switch that might come in handy in many situations is -V. Not only does it tell you the current Nginx build version, but more importantly it also reminds you about the arguments that you used during the configuration step – in other words, the command switches that you passed to the configure script before compilation:
[alex@example.com sbin]$ ./nginx -V
nginx version: nginx/1.13.8 (Ubuntu)
built by gcc 4.8.4 (Ubuntu 4.8.4-2ubuntu1~14.04)
TLS SNI support enabled
configure arguments: --with-http_ssl_module
In this case, Nginx was configured with the --with-http_ssl_module switch only.
Why is this so important? Well, if you ever try to use a module that was not included with the configure script during the precompilation process, the directive enabling the module will result in a configuration error. Your first reaction will be to wonder where the syntax error comes from. Your second reaction will be to wonder if you even built the module in the first place! Running nginx -V will answer this question.
Additionally, the -g option lets you specify additional configuration directives, in case they were not included in the configuration file:
[alex@example.com sbin]$ ./nginx -g "timer_resolution 200ms";
Adding Nginx as a system service
In this section, we will create a script that will transform the Nginx daemon into an actual system service. This will result in mainly two outcomes—the daemon will be controllable using standard commands, and more importantly, it will automatically be launched on system startup and stopped on system shutdown.
System V scripts
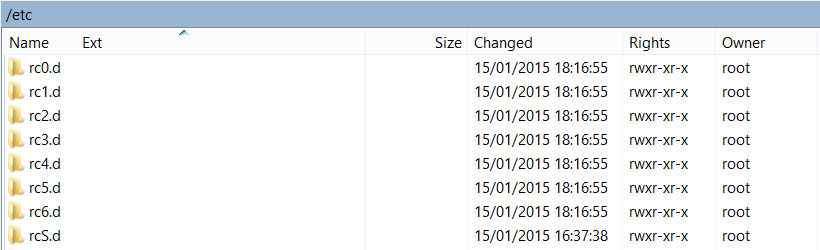
Most Linux-based operating systems to date use a System-V style init daemon. In other words, their start up process is managed by a daemon called init, which functions in a way that is inherited from the old System V Unix-based operating system.
This daemon functions on the principle of runlevels, which represent the state of the computer. Here is a table representing the various runlevels and their signification:
|
Runlevel |
State |
|
0 |
System is halted |
|
1 |
Single-user mode (rescue mode) |
|
2 |
Multiuser mode, without NFS support |
|
3 |
Full multiuser mode |
|
4 |
Not used |
|
5 |
Graphical interface mode |
|
6 |
System reboot |
You can manually initiate a runlevel transition: use the telinit 0 command to shut down your computer or telinit 6 to reboot it.
For each runlevel transition, a set of services are executed. This is the key concept to understand here: when your computer is stopped, its runlevel is 0. When you turn it on, there will be a transition from runlevel 0 to the default computer start up runlevel. The default start up runlevel is defined by your own system configuration (in the /etc/inittab file) and the default value depends on the distribution you are using: Debian and Ubuntu use runlevel 2, Red Hat and Fedora use runlevel 3 or 5, CentOS and Gentoo use runlevel 3, and so on, as the list is long.
So let us summarize. When you start your computer running CentOS, it operates a transition from runlevel 0 to runlevel 3. That transition consists of starting all services that are scheduled for runlevel 3. The question is—how to schedule a service to be started at a specific runlevel?
About init scripts
An init script, also known as the service start up script or even SysV script, is a shell script respecting a certain standard. The script will control a daemon application by responding to commands such as start, stop, and others, which are triggered at two levels. Firstly, when the computer starts, if the service is scheduled to be started for the system runlevel, the init daemon will run the script with the start argument. The other possibility for you is to manually execute the script by calling it from the shell:
[root@example.com ~]# service httpd start
Or if your system does not come with the service command:
[root@example.com ~]# /etc/init.d/httpd start
The script must accept at least the start, stop, restart, force-reload, and status commands as they will be used by the system to respectively start up, shut down, restart, forcefully reload the service, or inquire its status. However, for enlarging your field of action as a system administrator, it is often interesting to provide further options, such as a reload argument to reload the service configuration or a try-restart argument to stop and start the service again.
Init script for older Debian-based distributions
We will thus create a shell script for starting and stopping our Nginx daemon and also restarting and reloading it. The purpose here is not to discuss Linux shell script programming, so we will merely provide the source code of an existing init script, along with some comments to help you understand it.
Due to differences in the format of the init scripts from one distribution to another, we will here discover two separate scripts: this first one is meant for older Debian-based distributions before they were switched to Systemd.
First, create a file called nginx with the text editor of your choice, and save it in the /etc/init.d/ directory (on some systems, /etc/init.d/ is actually a symbolic link to /etc/rc.d/init.d/). In the file you just created, copy the following script carefully. Make sure that you change the paths to make them correspond to your actual setup.
You will need root permissions to save the script into the init.d directory.
Init script for SystemD-based distributions
Due to the system tools, shell programming functions, and specific formatting that it requires, the previously described script is only compatible with older Debian-based distributions. If your server is operated by a SystemD-based distribution such as CentOS, Fedora, newer Debian-based and many more, you will need an entirely different script.
Installing the script
Placing the file in the init.d directory does not complete our work. There are additional steps that will be required for enabling the service. First of all, you need to make the script executable. So far, it is only a piece of text that the system refuses to run. Granting executable permissions on the script is done with the chmod command:
[root@example.com ~]# chmod +x /etc/init.d/nginx
At this point, you should already be able to start the service using service nginx start or /etc/init.d/nginx start, as well as stopping, restarting, or reloading the service.
The last step here will be to make it so the script is automatically started at the proper runlevels. Unfortunately, doing this entirely depends on what operating system you are using. We will cover the two most popular families – Debian, Ubuntu, or other Debian-based distributions and Red Hat/Fedora/CentOS, or other Red Hat-derived systems.
Debian-based distributions
For the Debian based distribution, a simple command will enable the init script for the system runlevel:
[root@example.com ~]# update-rc.d -f nginx defaults
This command will create links in the default system runlevel folders. For the reboot and shutdown runlevels, the script will be executed with the stop argument; for all other runlevels, the script will be executed with start. You can now restart your system and see your Nginx service being launched during the boot sequence.
Red Hat-based distributions
For the Red Hat-based systems family, the command differs, but you get an additional tool for managing system startup. Adding the service can be done via the following command:
[root@example.com ~]# chkconfig nginx on
Once that is done, you can then verify the runlevels for the service:
[root@example.com ~]# chkconfig --list nginx
Nginx  0:off   1:off   2:on    3:off   4:on    5:on    6:off
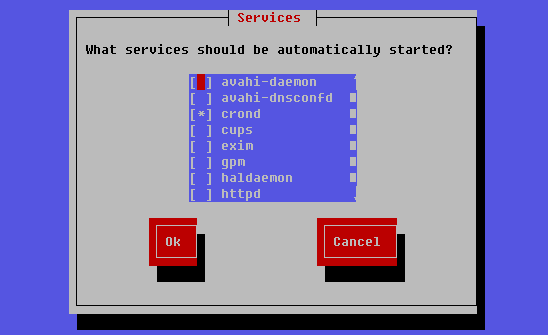
Another tool will be useful to you for managing system services, namely, ntsysv. It lists all services scheduled to be executed on system startup and allows you to enable or disable them at will:
Nginx Plus
As of mid-2013 NGINX, Inc. the company behind the Nginx project also offers a paid subscription called Nginx Plus. The announcement came as a surprise for the open source community but several companies quickly jumped on the bandwagon and reported amazing improvements in terms of performance and scalability.
As business requirements continue to evolve rapidly, such as the shift to mobile and the explosion of dynamic content on the Web, CIO's are continuously looking for opportunities to increase application performance and development agility, while reducing dependencies on their infrastructure. NGINX Plus provides a flexible, scalable, uniformly applicable solution that was purpose built for these modern, distributed application architectures.
Considering the pricing plans ($1,500 per year per instance) and the additional features made available, this platform is indeed clearly aimed at large corporations looking to integrate Nginx into their global architecture seamlessly and effortlessly. Professional support from the Nginx team is included and discounts can be offered for multiple-instance subscriptions. This book covers the open source version of Nginx only and does not detail advanced functionality offered by Nginx Plus. For more information about the paid subscription, take a look at https://www.nginx.com/.
Summary
This chapter covered a number of critical steps. We first made sure that your system contained all the required components for compiling Nginx. We then proceeded to select the proper version branch for your usage – will you be using the stable version or a more advanced yet potentially less stable one? After downloading the source and configuring the compilation process by enabling or disabling features and modules such as SSL, GeoIP, and more, we compiled the application and installed it on the system in the directory of your choice. We created an init script and modified the system boot sequence to schedule for the service to be started.
From this point on, Nginx is installed on your server and automatically starts with the system. Your web server is functional, though it does not yet answer the most basic functionality – serving a website. The first step towards hosting a website will be to prepare a suitable configuration file. The next chapter will cover the basic configuration of Nginx and will teach you how to optimize performance based on the expected audience and system resources.


