

About the Book
Every day, businesses operate around the clock and a huge amount of data is generated at a rapid pace. Hidden in this data are key patterns and behaviors that can help you and your business understand your customers at a deep, fundamental level. Are you ready to enter the exciting world of data analytics and unlock these useful insights?
Written by a team of expert data scientists who have used their data analytics skills to transform businesses of all shapes and sizes, The Applied SQL Data Analytics Workshop, Second Edition is a great way to get started with data analysis, showing you how to effectively sieve and process information from raw data, even without any prior experience.
The book begins by showing you how to form hypotheses and generate descriptive statistics that can provide key insights into your existing data. As you progress, you'll learn how to write SQL queries to aggregate, calculate and combine SQL data from sources outside of your current dataset. You'll also discover how to work with different data types, like JSON. By exploring advanced techniques, such as geospatial analysis and text analysis, you'll finally be able to understand your business at a deeper level. Finally, the book lets you in on the secret to getting information faster and more effectively by using advanced techniques like profiling and automation.
By the end of The Applied SQL Data Analytics Workshop, Second Edition, you'll have the skills you need to start identifying patterns and unlocking insights in your own data. You will be capable of looking and assessing data with the critical eye of a skilled data analyst.
Audience
If you are a database engineer who is looking to transition into analytics or someone who knows SQL basics but doesn't know how to use it to create business insights, then this book is for you.
About the Chapters
Chapter 1, Introduction to SQL for Analytics, helps you learn the basics of data analytics and SQL. You will learn how to use mathematical and graphical techniques to analyze data using Excel. You will then learn the role of SQL in the world of data and how to use basic SQL to manipulate data in a relational database.
Chapter 2, SQL for Data Preparation, shows you how to clean and prepare data for analysis using SQL techniques. You will begin by first learning how to combine multiple tables and queries together into a dataset, before moving on to more advanced material.
Chapter 3, Aggregate and Window Functions, covers SQL's aggregate and window functions, which are powerful techniques for summarizing data. You will be able to apply these functions to gain new insights into data and understand the properties of datasets, such as data quality.
Chapter 4, Importing and Exporting Data, provides you with the necessary skills to interact with your database from other software tools (such as Excel, R, and Python).
Chapter 5, Analytics Using Complex Data Types, gives you a rich understanding of the various data types available in SQL and shows you how to extract insights from datetime data, geospatial data, arrays, JSON, and text.
Chapter 6, Performant SQL, helps you optimize your queries so that they run faster. In addition to learning how to analyze query performance, you will also learn how you can use additional SQL functionality, such as functions and triggers, to expand the default functionality.
Chapter 7, The Scientific Method and Applied Problem Solving, reinforces your acquired skills to help you solve real-world problems outside of those described in this book. Using the scientific method and critical thinking, you will be able to analyze your data and convert it into actionable tasks and information.
Conventions
Code words in text, database table names, folder names, filenames, file extensions, pathnames, dummy URLs, user input, and Twitter handles are shown as follows: "Three of the columns, Year of Birth, Height, and Number of Doctor Visits, are quantitative because they are represented by numbers."
Words that you see on the screen (for example, in menus or dialog boxes) also appear in the text like this: "Choose the Delimited option in the Text Import Wizard dialog box, and make sure that you start the import at row 1."
A block of code is set as follows:
SELECT *
FROM products
WHERE production_end_date IS NULL;
New terms and important words are shown like this: "Statistics can be further divided into two subcategories: descriptive statistics and inferential statistics."
Setting up Your Environment
Before we explore the book in detail, we need to set up specific software and tools. In the following section, we shall see how to do that.
Installing PostgreSQL 12
The following sections list the instructions for installing and setting up PostgreSQL 12 on Windows, Linux, and MacOS.
Downloading and Installing PostgreSQL on Windows
First, let's download and install PostgreSQL on Windows.
- Navigate to https://www.postgresql.org/download/. Select
Windowsfrom the list ofPackages and Installers.
Figure 0.1: PostgreSQL Downloads page
- Click
Download the Installer.
Figure 0.2: PostgreSQL Interactive Installer Download
- Select version 12.x as this is the version we will be using in the course.

Figure 0.3: PostgreSQL Downloads page
- Click
Nextfor most of the installation steps. You will be asked to specify a data directory. It is recommended that you specify a path that you will easily remember in the future.
Figure 0.4: PostgreSQL Installation - Windows
- Specify a password for the
postgressuperuser.
Figure 0.5: Setting the superuser password
- Do not change the port number that is specified by default, unless it conflicts with an application that is already installed on your system.

Figure 0.6: PostgreSQL Port Settings
- Click
Nextto proceed through the rest of the steps and wait for the installation to finish.
Setting the PATH Variable
To validate if the PATH variable has been set correctly, open the command line, type or paste the following command, and press the return key:
psql -U postgres
If you get the following error, you need to add the PostgreSQL binaries directory to the PATH.

Figure 0.7: Error – Path Variable Not Set
The following steps will help you do that:
- Search for the term environment variables in Windows Search.

Figure 0.8: Windows Search for Environment Variables
- Click
Environment Variables:
Figure 0.9: Windows System Properties
- Click
Pathand then clickEdit.
Figure 0.10: Setting the PATH Variable
- Click
New.
Figure 0.11: Setting the PATH Variable
- Using Windows Explorer, locate the path where PostgreSQL is installed. Add the path to the
binfolder of the PostgreSQL installation.
Figure 0.12: Entering the path
Click
OKand restart the system. - Now, open the command line where you can either type or paste the following command. Press the
returnkey to execute it:psql -U postgres
Enter the password you set in Step 5 of the Downloading and Installing PostgreSQL on Windows section. Then, press the
returnkey. You should be able to login to the PostgreSQL console:
Figure 0.13: PostgreSQL shell
- Type
\qand press thereturnkey to exit the shell:
Figure 0.14: Exiting the PostgreSQL shell
Installation on Linux
The following steps will help you install PostgreSQL on Ubuntu or a Debian-based Linux system.
- Open the Terminal. Then, type or paste the following command on a new line and press the return key:
sudo apt-get install postgresql-12
- Upon installation, PostgreSQL will create a user called postgres. You'll need to login as that user to access the PostgreSQL shell:
sudo su postgres
You should see your shell prompt change as follows:

Figure 0.15: Accessing the PostgreSQL shell on Linux
- Typing the following command will take you to the PostgreSQL shell:
psql
You can type \l (that's a backslash and a lowercase L) to see a list of all the databases that are loaded by default:
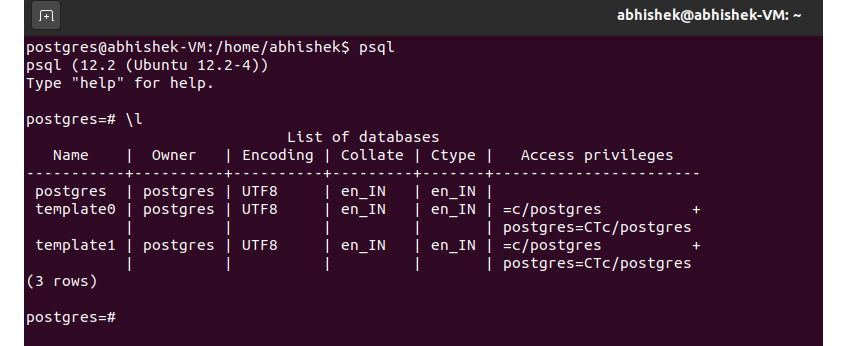
Figure 0.16: List of databases on Linux
Note
We've covered how to install PostgreSQL on Ubuntu and Debian-based systems here. For instructions to install it on other distributions, please refer to your distribution's documentation. The PostgreSQL download page for Linux can be found at: https://www.postgresql.org/download/linux/.
Installation on MacOS
This section will help you install PostgreSQL on MacOS. Before you start installing the software, make sure you have the Homebrew package manager installed on your system. If you don't, head over to https://brew.sh/ and paste the script provided on the webpage in a MacOS Terminal (the Terminal app) and press the return key. Follow the prompts that appear and wait for the script to finish installation.
Note
The following instructions are written based on MacOS Catalina version 10.15.6, which was the latest version at the time of writing. For more help on using Terminal, refer to the following link: https://support.apple.com/en-in/guide/terminal/apd5265185d-f365-44cb-8b09-71a064a42125/mac.
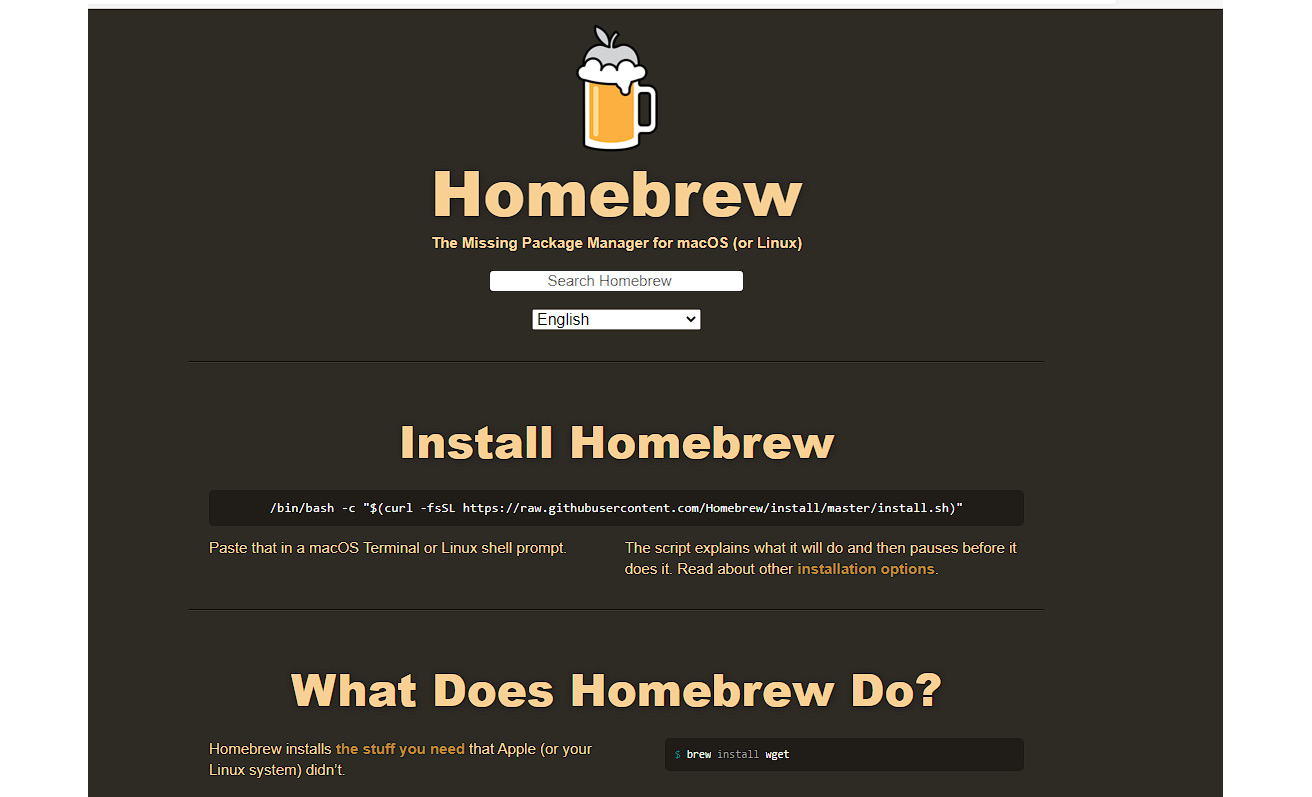
Figure 0.17: Installing Homebrew
Once Homebrew is installed, follow these steps to install PostgreSQL:
- Open a new Terminal window. Type in the following three commands in succession followed by the
returnkey to install the PostgreSQL package:brew doctor brew update brew install postgres
Wait for the installation to complete. Depending on your local setup and connection speed, you will see messages similar to those shown below (note that only the partial installation log is shown here):

Figure 0.18: Installation Progress (partially shown) – PostgreSQL
- Once the installation completes, start the PostgreSQL process by typing the following command in Terminal and pressing the
returnkey:pg_ctl -D /usr/local/var/postgres start
You should see an output similar to the following:

Figure 0.19: Starting the PostgreSQL process
- Once the process is started, login to the PostgreSQL shell using the default superuser called
postgresas follows (press thereturnkey to execute the command):psql postgres
- You can type \l (that's a backslash and a lowercase L) followed by the
returnkey to see a list of all the databases that are loaded by default:
Figure 0.20: List of databases loaded by default
Enter \q and then press the return key to quit the PostgreSQL shell.
Note
pgAdmin will get installed automatically along with PostgreSQL 12.
Installing Python
Installing Python on Windows:
- Find your desired version of Python on the official installation page at https://www.anaconda.com/distribution/#windows.
- Ensure that you select Python 3.7 from the download page.
- Ensure that you install the correct architecture for your computer system—that is, either 32-bit or 64-bit. You can find out this information in the System Properties window of your OS.
- After you download the installer, simply double-click on the file and follow the user-friendly prompts on-screen.
Installing Python on Linux:
To install Python on Linux, you have a couple of good options:
- Open Command Prompt and verify that
p\Python 3is not already installed by runningpython3 --version. - To install Python 3, run this:
sudo apt-get update
sudo apt-get install python3.7
- If you encounter problems, there are numerous sources online that can help you troubleshoot the issue.
- You can also install Python by downloading the Anaconda Linux installer from https://www.anaconda.com/distribution/#linux and following the instructions.
Installing Python on macOS:
Similar to Linux, you have a couple of methods for installing Python on a Mac. To install Python on macOS, do the following:
- Open the Terminal for Mac by pressing CMD + Spacebar, type
terminalin the open search box, and hit Enter. - Install Xcode through the command line by running
xcode-select --install. - The easiest way to install Python 3 is using Homebrew, which is installed through the command line by running
ruby -e "$(curl -fsSL https://raw.githubusercontent.com/Homebrew/install/master/install)". - Add Homebrew to your
$PATHenvironment variable. Open your profile in the command line by runningsudo nano ~/.profileand insertingexport PATH="/usr/local/opt/python/libexec/bin:$PATH" at the bottom. - The final step is to install Python. In the command line, run
brew install python. - Again, you can also install Python via the Anaconda installer available from https://www.anaconda.com/distribution/#macos.
Installing Git
Installing Git on Windows or macOS X:
Git for Windows/Mac can be downloaded and installed via https://git-scm.com/. However, for improved user experience, it is recommended that you install Git through an advanced client such as GitKraken (https://www.gitkraken.com/).
Installing Git on Linux:
Git can be easily installed via the command line:
sudo apt-get install git
If you prefer a graphical user interface, GitKraken (https://www.gitkraken.com/) is also available for Linux.
Loading the Sample Datasets - Windows
Most exercises in this course use a sample database, sqlda, which contains fabricated data for a fictional electric vehicle company called ZoomZoom. Let's set it up by performing the following steps:
- First, let's create a database titled sqlda. Open the command line and type or paste the following command. Then, press the return key to execute it.
createdb -U postgres sqlda
You will be prompted to enter the password that you set for the postgres superuser during installation.

Figure 0.21: PostgreSQL shell password request
To check if the database has been successfully created, login to the shell by typing or pasting the following command and pressing the return key:
psql -U postgres
Enter your password when prompted. Press the return key to proceed.
Type \l (that's a backslash and a lowercase L) and then press the return key to check if the database is created. The sqlda database should appear along with a list of the default databases.
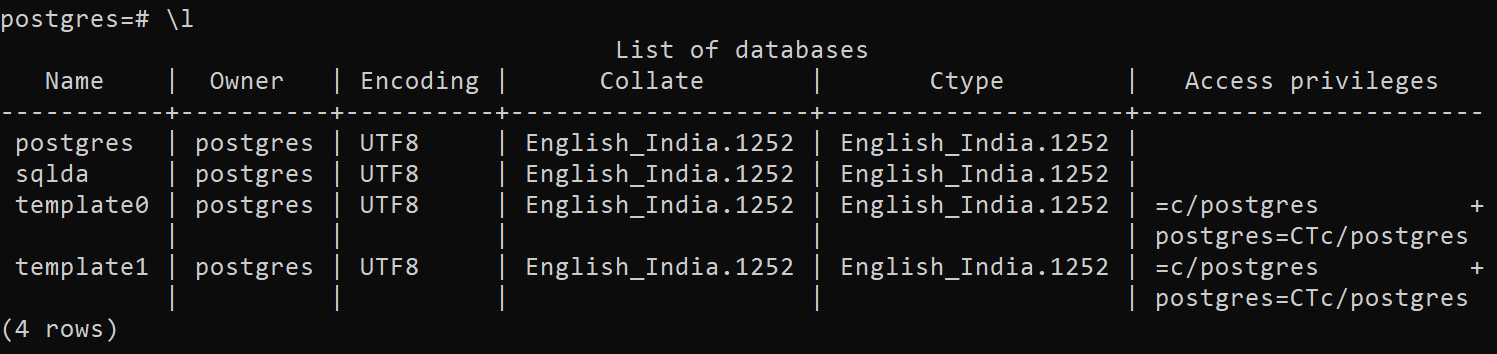
Figure 0.22: PostgreSQL list of databases
Download the data.dump file from the Datasets folder in the GitHub repository of this course by clicking this link: https://packt.live/30UhcfI. Modify the highlighted path in the following command based on where the file is located on your system. Type or paste the command into the command line and press the return key to execute it.
psql -U postgres -d sqlda -f C:\<path>\data.dump
Note
Alternatively, you can use the command line and navigate to the local folder where you have downloaded the file using the cd command. For example, if you have downloaded it in the Downloads folders of your computer, you can navigate to it using cd C:\Users\<your username>\Downloads. In such a case, remove the highlighted path prefix in the step. The command should look like this: psql -U postgres -d sqlda -f data.dump
You should get an output similar to the one that follows:
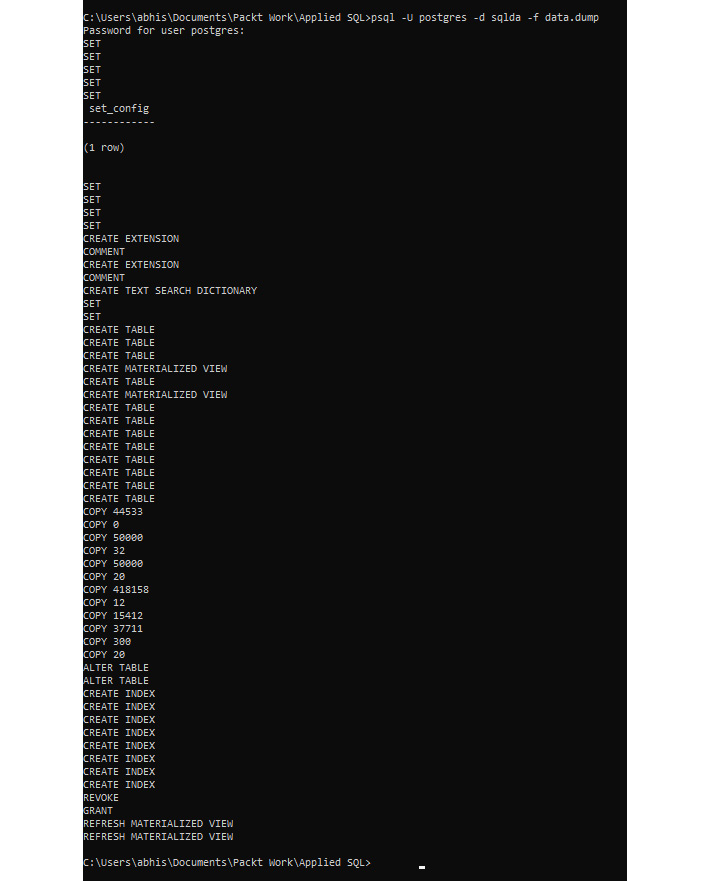
Figure 0.23: PostgreSQL database import
Let's check if the database has been loaded correctly. Login to the PostgreSQL console by typing or pasting the following command. Press the return key to execute it.
psql –U postgres
In the shell, type the following command to connect to the sqlda database:
\c sqlda
Then type \dt. This command should list all the tables in the database, as follows:
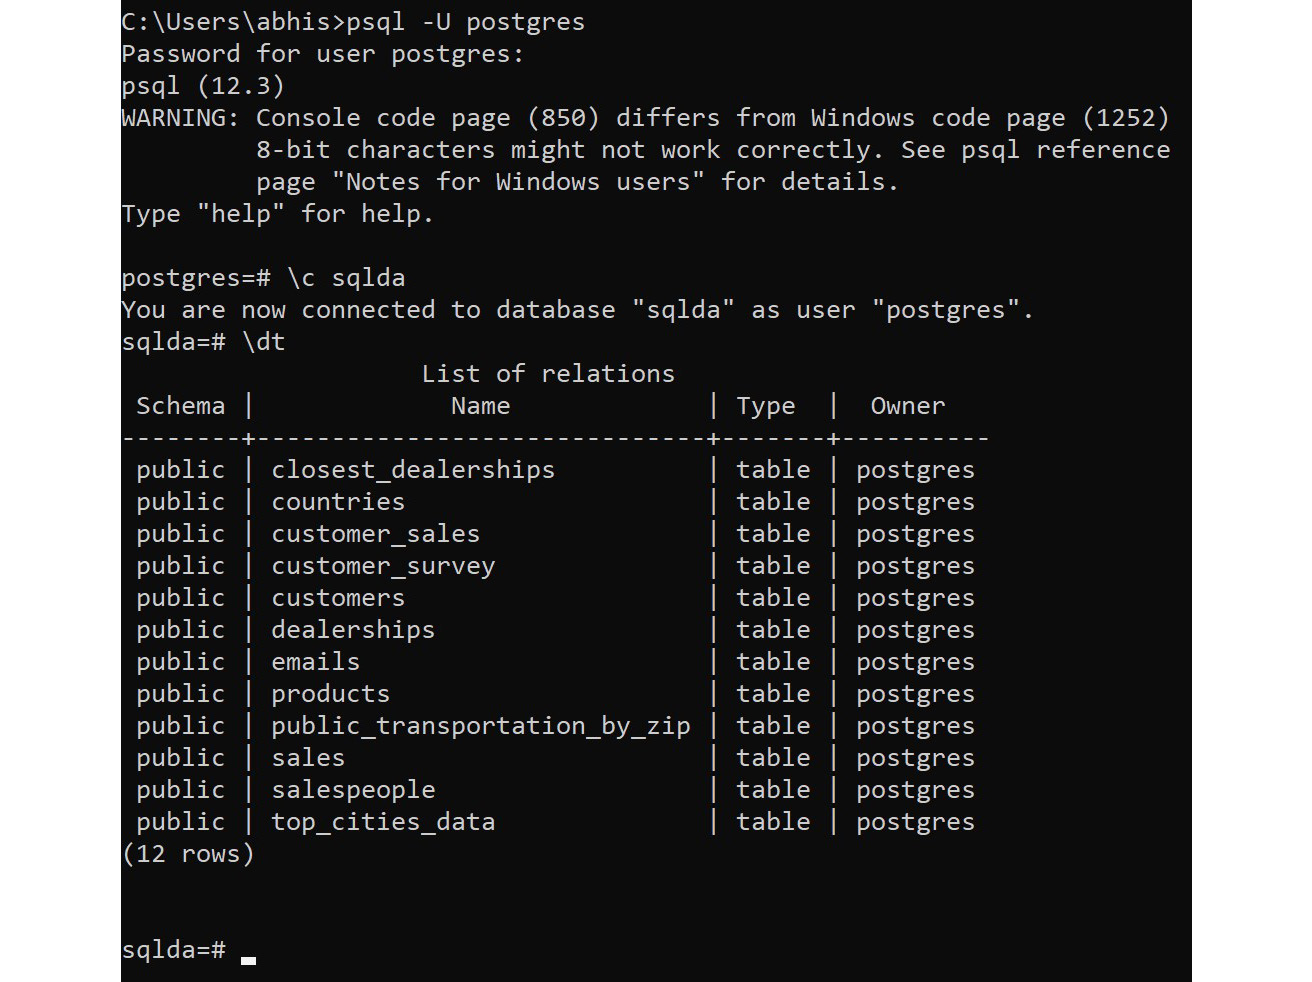
Figure 0.24: Validating that the database has been imported
Note
We are importing the database using the superuser postgres for demonstration purposes only. It is advised in production environments to use a separate account.
Loading the Sample Datasets – Linux
Most exercises in this course use a sample database, sqlda, which contains fabricated data for a fictional electric vehicle company called ZoomZoom. Let's set it up by performing the following steps:
- Switch to the
postgresuser by typing the following command in the terminal. Press thereturnkey to execute it.sudo su postgres
You should see your shell change as follows:

Figure 0.25: Loading the sample datasets on Linux
- Type or paste the following command to create a new database called
sqlda. Press thereturnkey to execute it.createdb sqlda
You can then type the
psqlcommand to enter the PostgreSQL shell, followed by\l(that's a backslash followed by lowercase L) to check if the database was successfully created.
Figure 0.26: Accessing the PostgreSQL shell on Linux
Enter
\qand then press thereturnkey to quit the PostgreSQL shell. - Download the
data.dumpfile from theDatasetsfolder in the GitHub repository of this course by clicking this link: https://packt.live/30UhcfI. Navigate to the folder where you have downloaded the file using thecdcommand. Then, type the following command:psql -d sqlda data.dump
- Then wait for the dataset to be imported:

Figure 0.27: Importing the dataset on Linux
- To test if the dataset was imported correctly, type
psqland then press thereturnkey to enter the PostgreSQL shell. Then, run\c sqldafollowed by\dtto see the list of tables within the database.
Figure 0.28: Validating the import on Linux
Note
We are importing the database using the superuser postgres for demonstration purposes only. It is advised in production environments to use a separate account.
Loading the Sample Datasets – MacOS
Most exercises in this course use a sample database, sqlda, which contains fabricated data for a fictional electric vehicle company called ZoomZoom. Let's set it up by performing the following steps:
- Enter the PostgreSQL shell by typing the following command in Terminal. Press the return key to execute it:
psql postgres
- Now, create a new database called
sqldaby typing the following command and pressingreturn. (Don't forget the semicolon at the end.)create database sqlda;
- You should see the following output. Type
\l(that's a backslash followed by lowercase L) in Terminal and press thereturnkey to check if the database was successfully created (you should see thesqldadatabase listed there).
Figure 0.29: Checking if a new database is successfully created
- Type or paste
\qin the PostgreSQL shell and press thereturnkey to exit. - Download the
data.dumpfile from theDatasetsfolder in the GitHub repository of this course by clicking this link: https://packt.live/30UhcfI. Navigate to the folder where you have downloaded the file using thecdcommand. Then, type the following command:psql sqlda < ~/Downloads/data.dump
Note
The preceding command assumes that the file is saved in the
Downloadsdirectory. Make sure you change the highlighted path based on the location of thedata.dumpfile on your system.Then, wait for the dataset to be imported:

Figure 0.30: Importing the dataset
- To test if the dataset was imported correctly, type
psqland then press thereturnkey to enter the PostgreSQL shell again. Then, run\c sqldafollowed by\dtto see the list of tables within the database.
Figure 0.31: List of tables within the sqlda database
Running SQL Files
Commands and statements can be executed via a *.sql file from the command line using the following command:
psql -d your_database_name -U your_username < commands.sql
Alternatively, they can be executed via the SQL interpreter:
database=#
To get to the interactive interpreter, type the following command:
psql -d your_database_name -U your_username
Installing Libraries
pip comes pre-installed with Anaconda. Once Anaconda is installed on your machine, all the required libraries can be installed using pip, for example, pip install numpy. Alternatively, you can install all the required libraries using pip install –r requirements.txt. You can find the requirements.txt file at https://packt.live/330I2FI.
The exercises and activities will be executed in Jupyter Notebooks. Jupyter is a Python library and can be installed in the same way as the other Python libraries – that is, with pip install jupyter, but fortunately, it comes pre-installed with Anaconda. To open a notebook, simply run the command jupyter notebook in the Terminal or Command Prompt.
Accessing the Code Files
You can find the complete code files of this book at https://packt.live/2UCHVer.
The high-quality color images used in this book can be found at https://packt.live/2HZVdLs.
If you have any issues or questions about installation, please email us at workshops@packt.com.