Chapter 4. Building a Robotic Fish
Now you've built an R2D2 and a Wall-E robot. Let's turn your attention to the great deep. Let's build a robot that can swim in water. This will use your knowledge of how to control servos, and you'll want a webcam to see what your fish is seeing, but this project can't be controlled using a wireless connection, as that doesn't work well in water. So you'll control your fish using a LAN cable so that you can control your fish from the surface.
In this chapter, we'll cover these topics:
Creating a swimming robot using servos and Raspberry Pi
Connecting an IMU unit to help the robot stay upright, and also a compass to know which direction the robot fish is going
Since it is much more difficult to buy an existing toy to use as a platform, you will be creating your own model of robotic fish. You can either use a 3D printed model or use acrylic to cut your own. This will provide the basic swimming mechanism; the rest is up to you.
Creating the hardware platform
There are two possible ways to create the plastic shell of your swimming robot. One is to use a 3D printer to print a simple model. Here is a link to such a fish robot:
http://www.thingiverse.com/thing:305039.
If you don't have access to a 3D printer, you can also cut the model out of quarter inch acrylic, it's available at many home improvement stores. For this, get two squares of 12 by 12 inch acrylic. Now cut out the fish using this pattern:
You can choose different dimensions if you like; these were chosen to make sure the fish could hold a Raspberry Pi 3, a Raspberry Pi camera, an IMU unit, a servo controller, and a battery.
Now you'll need some hardware to bolt the two pieces together. Any smaller size screw will work; make sure it is slightly longer than 1.25 inches, 1.5 inches should work. Also, purchase some locking nuts as these will lock in place and won't become loose over time. These are also easy to find at most home hardware stores. You can drill...
Adding the electronics to your fish
The first step in adding the electronics is to add a servo controller; you'll use the same controller that was introduced in Chapter 3, Building a Wall-E Robot. First, you'll hook the three servos up to the servo controller, like this:
Now you can connect the servo controller to the battery. This is a bit complicated, as you'll need to connect the battery to the servo controller and to the Raspberry Pi. For the connection to the Raspberry Pi, you'll want to use a voltage regulator to convert your LiPo battery voltage to the 5V required by the Raspberry Pi. Here is an image of such a regulator:
These are available at most online electronics retailers. And you'll want to make sure you have a power switch so that you can turn your entire system on and off. These are also available at most online electronics retailers. Here is a diagram of the entire power system:
Once you have the servo controller connected to the servos and battery, you'll want to connect...
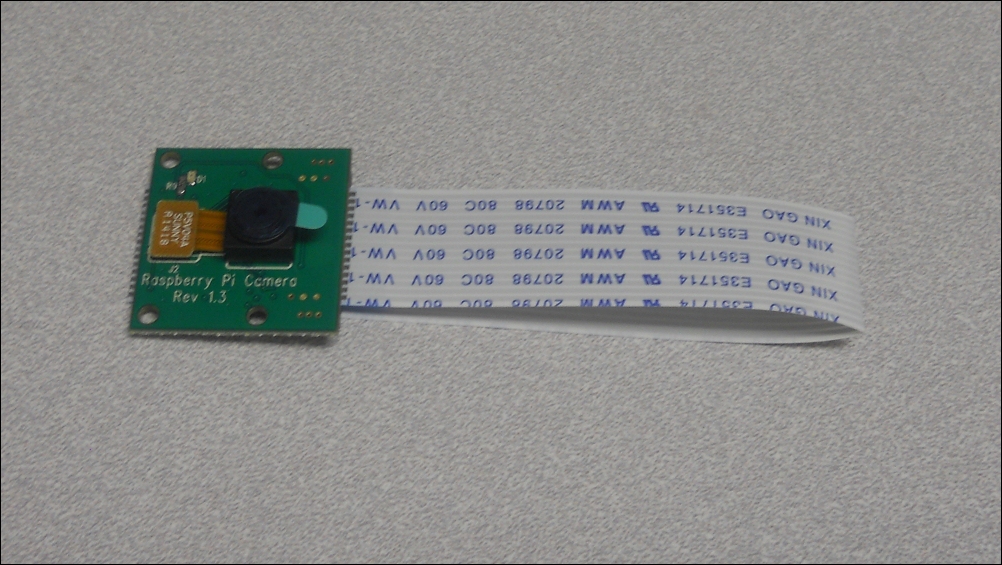
There is a simple yet small way to capture images and video that is perfect for this application, the Raspberry Pi camera board. Here is an image of this product:
The camera connects to the Raspberry Pi by installing it into the connector marked camera on the Raspberry Pi. To see how this is done, watch the video at
http://www.raspberrypi.org/help/camera-module-setup/.
Once the device is connected, you can access the device by enabling it through the configuration utility. To enable the camera, perform the following steps:
Run the configuration utility by typing sudo raspi-config.
Select the Enable Camera option, as shown in the following screenshot:
Select the Enable Camera, then exit the utility and reboot the device.
To take a picture with the camera, simply type raspistill -o image.jpg. This will take a picture with the camera, and then store the image in a image.jpg file. Once you have the picture, you can view it by opening the Raspberry Pi image viewer by selecting...
Controlling your fish remotely
You can, via vncserver, access the video feed and control the servos on your fish. However, you won't be able to access your fish underwater using a wireless connection. You'll need a wired LAN cable, which will represent a bit of a challenge. First, purchase an adapter that can provide a waterproof seal for the LAN cable. These are available as Black Plastic PG16 Waterproof Cable Connectors at many online retailers. Here is an image of such a device:
You'll need to drill a hole in the top of your fish, toward the back, and mount this connector. You can then feed your LAN cable through this connector and connect one end to the Raspberry Pi on your fish, and the other end to your host computer. This will allow you to both control your fish and view the video. You'll need a long length of LAN cable, preferably mounted to a reel, like this:
Now you can place all of the electronics in your fish and seal it. You'll want to make sure you put the charging port for...
You can now explore the underwater world with your fish robot. Your next robot will offer a completely different set of challenges. You'll be building a robot hand that can move along with your hand.