Search icon
Arrow left icon
All Products
Best Sellers
New Releases
Books
Videos
Audiobooks
Learning Hub
Newsletters
Free Learning
Arrow right icon
OpenCV with Python By Example

You're reading from  OpenCV with Python By Example

Product type Book
Published in Sep 2015
Publisher Packt
ISBN-13 9781785283932
Pages 296 pages
Edition 1st Edition
Languages
Author (1):
Prateek Joshi Prateek Joshi
Profile icon Prateek Joshi

Table of Contents (19) Chapters

OpenCV with Python By Example
Credits
About the Author
About the Reviewers
www.PacktPub.com
Preface
Applying Geometric Transformations to Images Detecting Edges and Applying Image Filters Cartoonizing an Image Detecting and Tracking Different Body Parts Extracting Features from an Image Creating a Panoramic Image Seam Carving Detecting Shapes and Segmenting an Image Object Tracking Object Recognition Stereo Vision and 3D Reconstruction Augmented Reality Index

Chapter 4. Detecting and Tracking Different Body Parts

In this chapter, we are going to learn how to detect and track different body parts in a live video stream. We will start by discussing the face detection pipeline and how it's built from the ground up. We will learn how to use this framework to detect and track other body parts, such as eyes, ears, mouth, and nose.

By the end of this chapter, you will know:

  • How to use Haar cascades

  • What are integral images

  • What is adaptive boosting

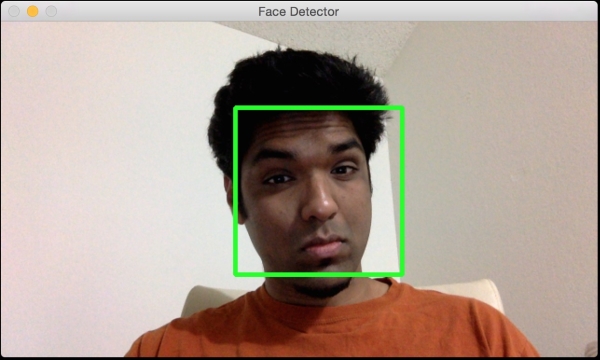
  • How to detect and track faces in a live video stream

  • How to detect and track eyes in a live video stream

  • How to automatically overlay sunglasses on top of a person's face

  • How to detect ears, nose, and mouth

  • How to detect pupils using shape analysis

Using Haar cascades to detect things


When we say Haar cascades, we are actually talking about cascade classifiers based on Haar features. To understand what this means, we need to take a step back and understand why we need this in the first place. Back in 2001, Paul Viola and Michael Jones came up with a very effective object detection method in their seminal paper. It has become one of the major landmarks in the field of machine learning.

In their paper, they have described a machine learning technique where a boosted cascade of simple classifiers is used to get an overall classifier that performs really well. This way, we can circumvent the process of building a single complex classifier that performs with high accuracy. The reason this is so amazing is because building a robust single-step classifier is a computationally intensive process. Besides, we need a lot of training data to build such a classifier. The model ends up becoming complex and the performance might not be up to the mark...

What are integral images?


If we want to compute Haar features, we will have to compute the summations of many different rectangular regions within the image. If we want to effectively build the feature set, we need to compute these summations at multiple scales. This is a very expensive process! If we want to build a real time system, we cannot spend so many cycles in computing these sums. So we use something called integral images.

To compute the sum of any rectangle in the image, we don't need to go through all the elements in that rectangular area. Let's say AP indicates the sum of all the elements in the rectangle formed by the top left point and the point P in the image as the two diagonally opposite corners. So now, if we want to compute the area of the rectangle ABCD, we can use the following formula:

Area of the rectangle ABCD = AC – (AB + AD - AA)

Why do we care about this particular formula? As we discussed earlier, extracting Haar features includes computing the areas of a large...

Detecting and tracking faces


OpenCV provides a nice face detection framework. We just need to load the cascade file and use it to detect the faces in an image. Let's see how to do it:

import cv2
import numpy as np

face_cascade = cv2.CascadeClassifier('./cascade_files/haarcascade_frontalface_alt.xml')

cap = cv2.VideoCapture(0)
scaling_factor = 0.5

while True:
    ret, frame = cap.read()
    frame = cv2.resize(frame, None, fx=scaling_factor, fy=scaling_factor, interpolation=cv2.INTER_AREA)
    gray = cv2.cvtColor(frame, cv2.COLOR_BGR2GRAY)

    face_rects = face_cascade.detectMultiScale(gray, 1.3, 5)
    for (x,y,w,h) in face_rects:
        cv2.rectangle(frame, (x,y), (x+w,y+h), (0,255,0), 3)

    cv2.imshow('Face Detector', frame)

    c = cv2.waitKey(1)
    if c == 27:
        break

cap.release()
cv2.destroyAllWindows()

If you run the above code, it will look something like the following image:

Understanding it better

We need a classifier model that can be used to detect the faces in an...

Fun with faces


Now that we know how to detect and track faces, let's have some fun with it. When we capture a video stream from the webcam, we can overlay funny masks on top of our faces. It will look something like this next image:

If you are a fan of Hannibal, you can try this next one:

Let's look at the code to see how to overlay the skull mask on top of the face in the input video stream:

import cv2
import numpy as np

face_cascade = cv2.CascadeClassifier('./cascade_files/haarcascade_frontalface_alt.xml')

face_mask = cv2.imread('mask_hannibal.png')
h_mask, w_mask = face_mask.shape[:2]

if face_cascade.empty():
    raise IOError('Unable to load the face cascade classifier xml file')

cap = cv2.VideoCapture(0)
scaling_factor = 0.5

while True:
    ret, frame = cap.read()
    frame = cv2.resize(frame, None, fx=scaling_factor, fy=scaling_factor, interpolation=cv2.INTER_AREA)
    gray = cv2.cvtColor(frame, cv2.COLOR_BGR2GRAY)

    face_rects = face_cascade.detectMultiScale(gray, 1.3, 5)
  ...

Detecting eyes


Now that we understand how to detect faces, we can generalize the concept to detect other body parts too. It's important to understand that Viola-Jones framework can be applied to any object. The accuracy and robustness will depend on the uniqueness of the object. For example, a human face has very unique characteristics, so it's easy to train our system to be robust. On the other hand, an object like towel is too generic, and there are no distinguishing characteristics as such; so it's more difficult to build a robust towel detector.

Let's see how to build an eye detector:

import cv2
import numpy as np

face_cascade = cv2.CascadeClassifier('./cascade_files/haarcascade_frontalface_alt.xml')
eye_cascade = cv2.CascadeClassifier('./cascade_files/haarcascade_eye.xml')
if face_cascade.empty():
  raise IOError('Unable to load the face cascade classifier xml file')

if eye_cascade.empty():
  raise IOError('Unable to load the eye cascade classifier xml file')

cap = cv2.VideoCapture...

Fun with eyes


Now that we know how to detect eyes in an image, let's see if we can do something fun with it. We can do something like what is shown in the following screenshot:

Let's look at the code to see how to do something like this:

import cv2
import numpy as np

face_cascade = cv2.CascadeClassifier('./cascade_files/haarcascade_frontalface_alt.xml')
eye_cascade = cv2.CascadeClassifier('./cascade_files/haarcascade_eye.xml')

if face_cascade.empty():
  raise IOError('Unable to load the face cascade classifier xml file')

if eye_cascade.empty():
  raise IOError('Unable to load the eye cascade classifier xml file')

img = cv2.imread('input.jpg')
sunglasses_img = cv2.imread('sunglasses.jpg')

gray = cv2.cvtColor(img, cv2.COLOR_BGR2GRAY)

centers = []
faces = face_cascade.detectMultiScale(gray, 1.3, 5)

for (x,y,w,h) in faces:
    roi_gray = gray[y:y+h, x:x+w]
    roi_color = img[y:y+h, x:x+w]
    eyes = eye_cascade.detectMultiScale(roi_gray)
    for (x_eye,y_eye,w_eye,h_eye) in eyes:
    ...

Detecting ears


Since we know how the pipeline works, let's just jump into the code:

import cv2
import numpy as np

left_ear_cascade = cv2.CascadeClassifier('./cascade_files/haarcascade_mcs_leftear.xml')
right_ear_cascade = cv2.CascadeClassifier('./cascade_files/haarcascade_mcs_rightear.xml')

if left_ear_cascade.empty():
  raise IOError('Unable to load the left ear cascade classifier xml file')

if right_ear_cascade.empty():
  raise IOError('Unable to load the right ear cascade classifier xml file')

img = cv2.imread('input.jpg')

gray = cv2.cvtColor(img, cv2.COLOR_BGR2GRAY)

left_ear = left_ear_cascade.detectMultiScale(gray, 1.3, 5)
right_ear = right_ear_cascade.detectMultiScale(gray, 1.3, 5)

for (x,y,w,h) in left_ear:
    cv2.rectangle(img, (x,y), (x+w,y+h), (0,255,0), 3)

for (x,y,w,h) in right_ear:
    cv2.rectangle(img, (x,y), (x+w,y+h), (255,0,0), 3)

cv2.imshow('Ear Detector', img)
cv2.waitKey()
cv2.destroyAllWindows()

If you run the above code on an image, you should see something...

Detecting a mouth


Following is the code:

import cv2
import numpy as np

mouth_cascade = cv2.CascadeClassifier('./cascade_files/haarcascade_mcs_mouth.xml')

if mouth_cascade.empty():
  raise IOError('Unable to load the mouth cascade classifier xml file')

cap = cv2.VideoCapture(0)
ds_factor = 0.5

while True:
    ret, frame = cap.read()
    frame = cv2.resize(frame, None, fx=ds_factor, fy=ds_factor, interpolation=cv2.INTER_AREA)
    gray = cv2.cvtColor(frame, cv2.COLOR_BGR2GRAY)

    mouth_rects = mouth_cascade.detectMultiScale(gray, 1.7, 11)
    for (x,y,w,h) in mouth_rects:
        y = int(y - 0.15*h)
        cv2.rectangle(frame, (x,y), (x+w,y+h), (0,255,0), 3)
        break

    cv2.imshow('Mouth Detector', frame)

    c = cv2.waitKey(1)
    if c == 27:
        break

cap.release()
cv2.destroyAllWindows()

Following is what the output looks like:

It's time for a moustache


Let's overlay a moustache on top:

import cv2
import numpy as np

mouth_cascade = cv2.CascadeClassifier('./cascade_files/haarcascade_mcs_mouth.xml')

moustache_mask = cv2.imread('../images/moustache.png')
h_mask, w_mask = moustache_mask.shape[:2]

if mouth_cascade.empty():
  raise IOError('Unable to load the mouth cascade classifier xml file')

cap = cv2.VideoCapture(0)
scaling_factor = 0.5

while True:
    ret, frame = cap.read()
    frame = cv2.resize(frame, None, fx=scaling_factor, fy=scaling_factor, interpolation=cv2.INTER_AREA)
    gray = cv2.cvtColor(frame, cv2.COLOR_BGR2GRAY)

    mouth_rects = mouth_cascade.detectMultiScale(gray, 1.3, 5)
    if len(mouth_rects) > 0:
        (x,y,w,h) = mouth_rects[0]
        h, w = int(0.6*h), int(1.2*w)
        x -= 0.05*w
        y -= 0.55*h
        frame_roi = frame[y:y+h, x:x+w]
        moustache_mask_small = cv2.resize(moustache_mask, (w, h), interpolation=cv2.INTER_AREA)

        gray_mask = cv2.cvtColor(moustache_mask_small...

Detecting a nose


The following program shows how you detect a nose:

import cv2
import numpy as np

nose_cascade = cv2.CascadeClassifier('./cascade_files/haarcascade_mcs_nose.xml')

if nose_cascade.empty():
  raise IOError('Unable to load the nose cascade classifier xml file')

cap = cv2.VideoCapture(0)
ds_factor = 0.5

while True:
    ret, frame = cap.read()
    frame = cv2.resize(frame, None, fx=ds_factor, fy=ds_factor, interpolation=cv2.INTER_AREA)
    gray = cv2.cvtColor(frame, cv2.COLOR_BGR2GRAY)

    nose_rects = nose_cascade.detectMultiScale(gray, 1.3, 5)
    for (x,y,w,h) in nose_rects:
        cv2.rectangle(frame, (x,y), (x+w,y+h), (0,255,0), 3)
        break

    cv2.imshow('Nose Detector', frame)

    c = cv2.waitKey(1)
    if c == 27:
        break

cap.release()
cv2.destroyAllWindows()

The output looks something like the following image:

Detecting pupils


We are going to take a different approach here. Pupils are too generic to take the Haar cascade approach. We will also get a sense of how to detect things based on their shape. Following is what the output will look like:

Let's see how to build the pupil detector:

import math

import cv2
import numpy as np

img = cv2.imread('input.jpg')
scaling_factor = 0.7

img = cv2.resize(img, None, fx=scaling_factor, fy=scaling_factor, interpolation=cv2.INTER_AREA)
cv2.imshow('Input', img)
gray = cv2.cvtColor(~img, cv2.COLOR_BGR2GRAY)

ret, thresh_gray = cv2.threshold(gray, 220, 255, cv2.THRESH_BINARY)
contours, hierarchy = cv2.findContours(thresh_gray, cv2.RETR_EXTERNAL, cv2.CHAIN_APPROX_NONE)

for contour in contours:
    area = cv2.contourArea(contour)
    rect = cv2.boundingRect(contour)
    x, y, width, height = rect
    radius = 0.25 * (width + height)

    area_condition = (100 <= area <= 200)
    symmetry_condition = (abs(1 - float(width)/float(height)) <= 0.2)
    fill_condition = (abs(1 - (area / (math.pi * math.pow(radius, 2.0)))) <= 0.3)

    if area_condition and symmetry_condition and fill_condition:
        cv2.circle(img, (int(x + radius), int(y + radius)), int(1.3*radius), (0,180,0), -1)

cv2.imshow('Pupil Detector', img)

c = cv2.waitKey()
cv2.destroyAllWindows()

If you run this program, you will see the output as shown earlier.

Deconstructing the code

As we discussed earlier, we are not going to use Haar cascade to detect pupils. If we can't use a pre-trained classifier, then how are we going to detect the pupils? Well, we can use shape analysis to detect the pupils. We know that pupils are circular, so we can use this information to detect them in the image. We invert the input image and then convert it into grayscale image as shown in the following line:

gray = cv2.cvtColor(~img, cv2.COLOR_BGR2GRAY)

As we can see here, we can invert an image using the tilde operator. Inverting the image is helpful in our case because the pupil is black in color, and black corresponds to a low pixel value. We then threshold the image to make sure that there are only black and white pixels. Now, we have to find out the boundaries of all the shapes. OpenCV provides a nice function to achieve this, that is findContours. We will discuss more about this in the upcoming chapters. But for now, all we need to know is that this function returns the set of boundaries of all the shapes that are found in the image.

The next step is to identify the shape of the pupil and discard the rest. We will use certain properties of the circle to zero-in on this shape. Let's consider the ratio of width to height of the bounding rectangle. If the shape is a circle, this ratio will be 1. We can use the function boundingRect to obtain the coordinates of the bounding rectangle. Let's consider the area of this shape. If we roughly compute the radius of this shape and use the formula for the area of the circle, then it should be close to the area of this contour. We can use the function contourArea to compute the area of any contour in the image. So we can use these conditions and filter out the shapes. After we do that, we are left with two pupils in the image. We can refine it further by limiting the search region to the face or the eyes. Since you know how to detect faces and eyes, you can give it a try and see if you can get it working for a live video stream.

Summary


In this chapter, we discussed Haar cascades and integral images. We understood how the face detection pipeline is built. We learnt how to detect and track faces in a live video stream. We discussed how to use the face detection pipeline to detect various body parts like eyes, ears, nose, and mouth. We learnt how to overlay masks on top on the input image using the results of body parts detection. We used the principles of shape analysis to detect the pupils.

In the next chapter, we are going to discuss feature detection and how it can be used to understand the image content.

lock icon The rest of the chapter is locked
You have been reading a chapter from
OpenCV with Python By Example
Published in: Sep 2015 Publisher: Packt ISBN-13: 9781785283932
Register for a free Packt account to unlock a world of extra content!
A free Packt account unlocks extra newsletters, articles, discounted offers, and much more. Start advancing your knowledge today.
Unlock this book and the full library FREE for 7 days
Get unlimited access to 7000+ expert-authored eBooks and videos courses covering every tech area you can think of
Renews at $15.99/month. Cancel anytime}