

Understanding how to log in to the application
In the previous chapter, covering how to get started with Keycloak, you learned how to run Keycloak, as well as how to create your first realm. Prior to continuing this section, you should have Keycloak running with the realm created, as covered in the previous chapter. In summary, what you require before continuing is the following:
- Keycloak up and running
- A realm named
myrealm - A global role named
myrole - A user with the preceding role
Before an application can log in with Keycloak, it has to be registered as a client with Keycloak.
Before registering the frontend, let’s see what happens if an unregistered application tries to authenticate with Keycloak. Open http://localhost:8000 and then click on the Login button.
You will see an error page from Keycloak with the message Client not found. This error is telling you that the application is not registered with Keycloak.
To register the frontend with Keycloak, open the Keycloak admin console. At the top of the menu on the left-hand side, there is an option to select what realm you are working with. Make sure you have selected the realm named myrealm. In the menu on the left-hand side, click on Clients, and then click on Create client.
Fill in the form with the following values:
- Client ID:
myclient
After filling in the Client ID field, click on Next. On the following screen, it is possible to enable and disable various capabilities required by an application. For now, you can simply ignore this step and click on Save.
Before the client can be used by the frontend application to authenticate with Keycloak, you have to register the URL for the application. Under Access settings, fill in the following values:
- Valid redirect URIs:
http://localhost:8000/ - Valid post redirect URIs:
http://localhost:8000/ - Web origins:
http://localhost:8000
Once you have filled in the form, click on Save. Before we continue to try to log in with the frontend application, let’s look a bit more at what the last configuration values you entered mean:
- Valid redirect URIs: This value is very important in an OpenID Connect authorization code flow when a client-side application is used. A client-side application is not able to have any credentials as they would be visible to end users of the application. To prevent any malicious applications from being able to masquerade as the real application, the valid redirect URIs instruct Keycloak to only redirect the user to a URL that matches a valid redirect URI. In this case, since the value is set to
http://localhost:8000/, an application hosted on http://attacker.com would not be able to authenticate. - Valid post redirect URIs: This is the same as the previous value, but for logout requests rather than login requests, as it is fairly common for an application to have different redirect URIs for login and logout. Keycloak supports adding a special post redirect URI with the value +, which results in permitting all valid redirect URIs as post redirect URIs.
- Web origins: This option registers the valid web origins of the application for Cross-Origin Resource Sharing (CORS) requests. To obtain tokens from Keycloak, the frontend application has to send an AJAX request to Keycloak, and browsers do not permit an AJAX request from one web origin to another, unless CORS is used. Keycloak supports adding a special web origin with the value +, which results in permitting all valid redirect URIs as web origins.
The following screenshot shows the created client in the Keycloak admin console.
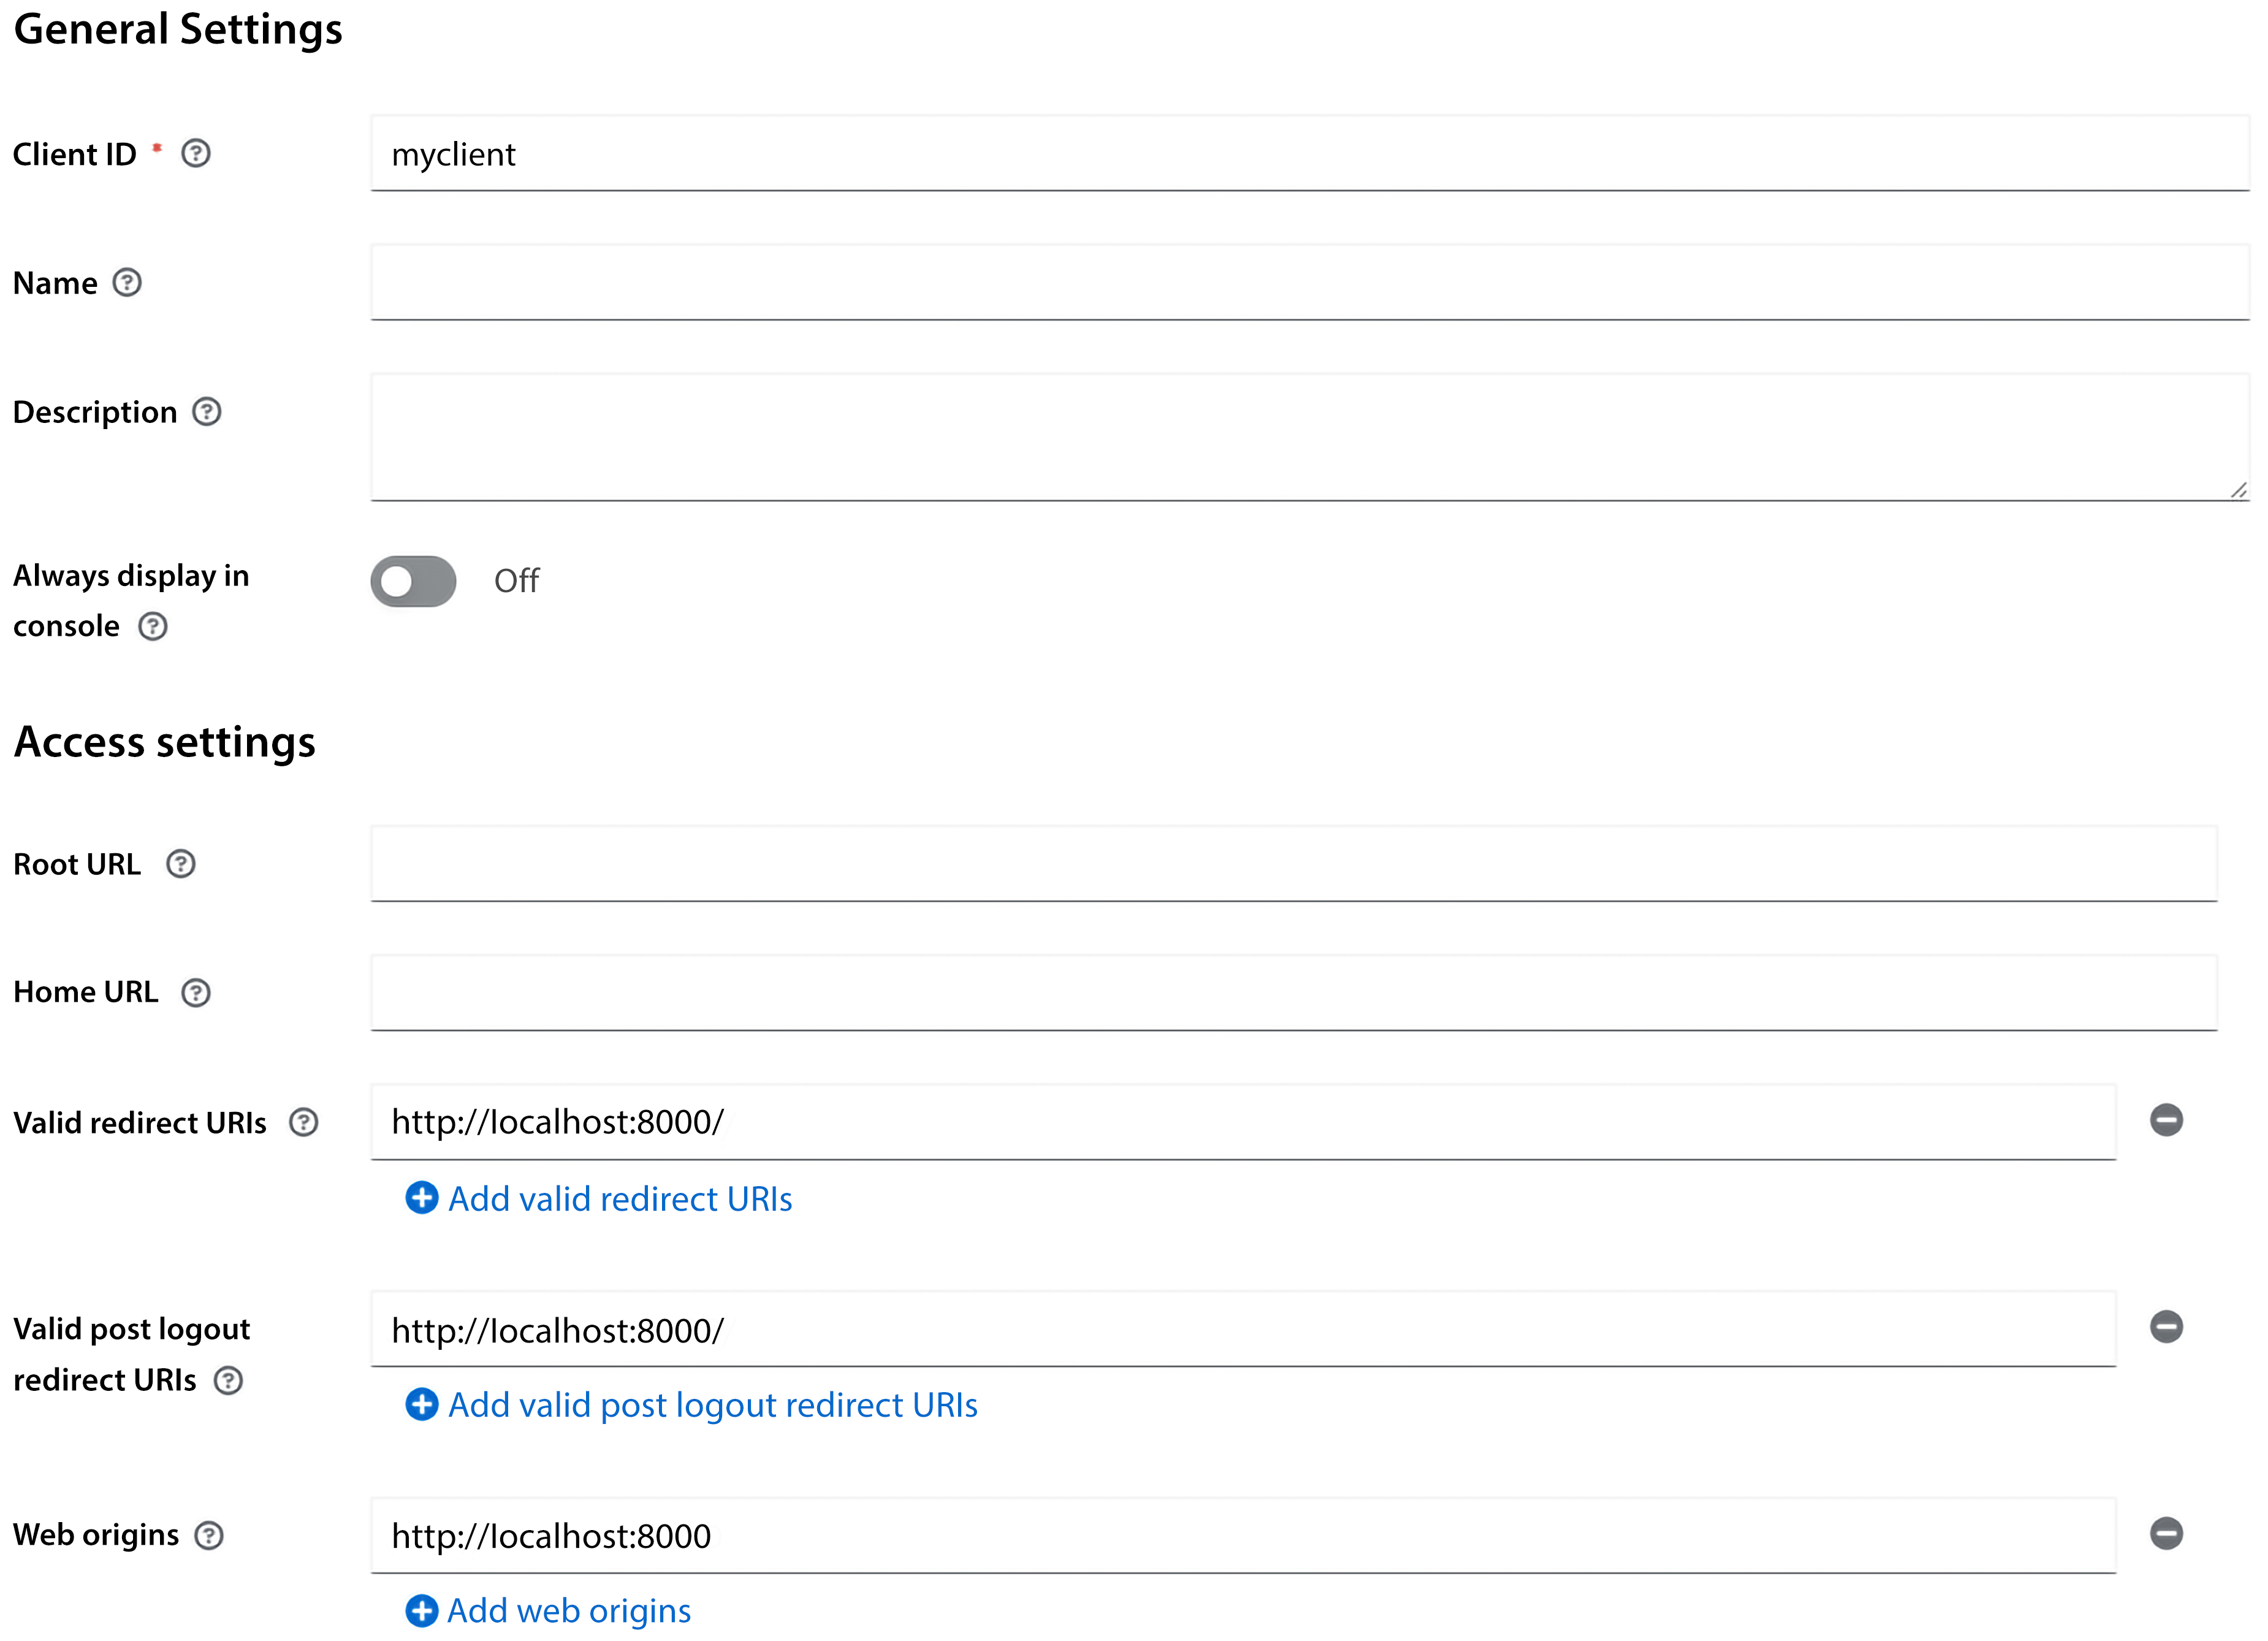
Figure 2.4: Client settings in the admin console
Now you can go back to the frontend by opening http://localhost:8000. This time, when you click on the Login button, you will see the Keycloak login page. Log in with the username and password you created during the previous chapter.
Let’s take a look at the ID token that Keycloak issued. Click on the Show ID Token button. The ID token that is displayed will look something like the following:
{
  "exp": 1664300152,
  "iat": 1664299852,
  "auth_time": 1664298915,
  "jti": "21bb9f32-98ce-49aa-896d-796cb716be59",
  "iss": "http://localhost:8080/realms/myrealm",
  "aud": "myclient",
  "sub": "eb14ea82-45e2-4413-8997-129fd0fc865b",
  "typ": "ID",
  "azp": "myclient",
  "nonce": "ccf5f374-aa07-4280-b63a-efdba9c355c9",
  "session_state": "22884115-55cb-4285-ba92-26c4bf74f74b",
  "at_hash": "ngdMORpXQcEQJ6d9s3uHvw",
  "acr": "0",
  "sid": "22884115-55cb-4285-ba92-26c4bf74f74b",
  "email_verified": true,
  "name": "Stian Thorgersen",
  "preferred_username": "st",
  "given_name": "Stian",
  "family_name": "Thorgersen",
  "email": "st@localdomain.localhost"
}}
Here is a list of some of the more interesting values within the ID token:
exp: This is the date and time the token expires in seconds since 01/01/1970 00:00:00 UTC (often referred to as Unix or Epoch time).iss: This is the issuer of the token, which you may notice is the URL of the Keycloak realm.sub: This is the unique identifier of the authenticated user.name: This is the first name and last name of the authenticated user.preferred_username: This is the username of the authenticated user. You should avoid this as a key for the user as it may be changed, and may even refer to a different user in the future. Instead, always use the sub field for the user key.
The ID token is used by the application to establish the identity of the authenticated user.
Next, let’s take a look at the access token. Click on the Show Access Token button. Let’s also take a look at some fields in this token:
allowed-origins: This is a list of permitted web origins for the application. The backend service can use this field when deciding whether web origins should be permitted for CORS requests.realm_access: This contains a list of global realm roles. It is the intersection between the roles granted to the user, and the roles the client has access to.resource_access: This contains a list of client roles.scope: Scopes can be used both to decide what fields (or claims) to include in the token and by backends to decide what APIs the token can access.
Currently, the information within the tokens is the default fields available in Keycloak. If you want to add additional information, Keycloak is very flexible in allowing you to customize the content within the tokens.
Let’s give this a go by adding a picture for the user. Leave the tab with the frontend open, and then open a new tab with the Keycloak admin console. In the menu on the left-hand side, click on Users, and select the user you created previously. Now let’s add a custom attribute to the user. Click on Attributes. In the table, there will be two empty input fields at the bottom. In the Key column, set the value to picture, and in the Value column, set the value to the URL of a profile picture (in the following screenshot, I’ve used my GitHub avatar). Then, click on Save.
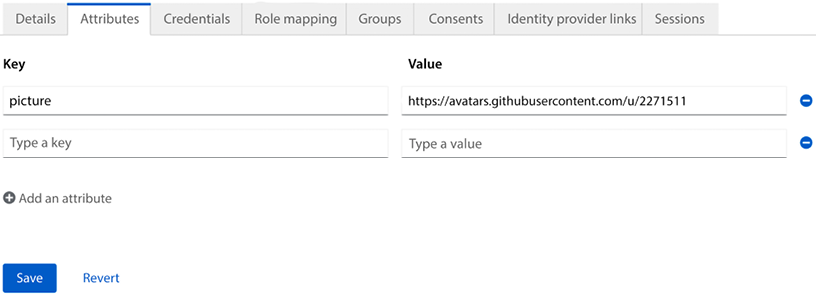
Figure 2.5: Adding a custom attribute to a user
Now, go back to the tab where you have the frontend open. To display the profile picture, you can click on the Refresh button. When you click on this button, the tokens will be refreshed, and the new ID token will now contain the picture attribute you just added, which allows the application to display a profile picture for the user.
Next, you will learn how to securely invoke the backend from the frontend.