

Running your app on an iOS device
Although you’ll be able to go through most of the exercises in this book using Simulator, it is recommended to build and test your apps on an actual iOS device, as Simulator will not be able to simulate some hardware components and software APIs.
For a comprehensive look at all the differences between Simulator and an actual device, see this link: https://help.apple.com/simulator/mac/current/#/devb0244142d.
In addition to your device, you’ll need an Apple ID (used to automatically create a free Apple developer account) or a paid Apple developer account to build and run your app on your device. You can use the same Apple ID that you used to download Xcode from the App Store. To run your app on an iOS device, follow these steps:
- Use the cable that came with your iOS device to connect your device to your Mac, and make sure the iOS device is unlocked.
- Your iOS device will display a Trust This Computer alert. Tap Trust and key in your device passcode when prompted.
- Your Mac will display an Allow Accessory to Connect alert. Click Allow. Your iOS device is now connected to your Mac and will appear in Xcode’s Destination menu.
You can view connected devices by choosing Window | Devices and Simulators in the Xcode menu bar.
- In the Destination menu, note that your iOS device has Developer Mode disabled by default:

Figure 1.19: Xcode Destination menu showing iPhone with Developer Mode disabled
Developer Mode was introduced by Apple during their World Wide Developer Conference in 2022 (WWDC 2022), and is required to install, run, and debug your apps on devices running iOS 16 or greater.
To watch a WWDC 2022 video on Developer Mode, click this link: https://developer.apple.com/videos/play/wwdc2022/110344/.
- If you attempt to build and run your app on your iOS device, you will see the following alert:
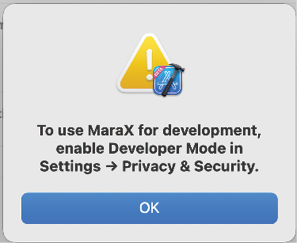
Figure 1.20: Alert showing Developer Mode is not turned on
- To enable Developer Mode on your iOS device, go to Settings | Privacy & Security, scroll down to the Developer Mode item, and tap it.
- Turn the Developer Mode switch on:
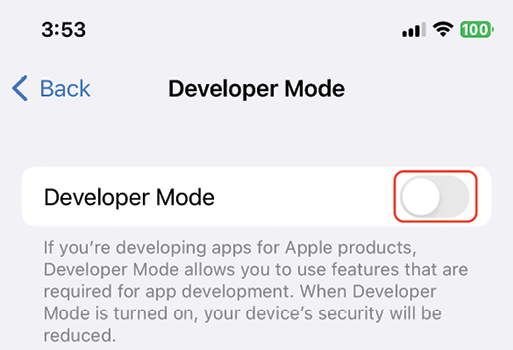
Figure 1.21: Developer Mode switch
- An alert will appear to warn you that Developer Mode reduces the security of your iOS device. Tap the alert’s Restart button.
- After your iOS device restarts and you unlock it, confirm that you want to enable Developer Mode by tapping Turn On and entering your iOS device’s passcode.
- Verify that the (Developer Mode disabled) text no longer appears next to your iOS device in the Destination menu:
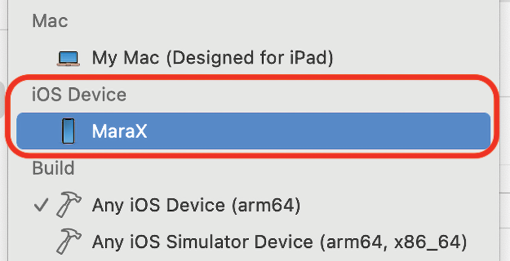
Figure 1.22: Xcode Destination menu with an actual iOS device selected
- Wait for Xcode to finish indexing and processing, which will take a while. Once complete, Ready will be displayed in the status window. Your iOS device is now ready to install and run apps from Xcode.
- Run the project by clicking the Run button (or use Command + R). You will get the following error in Xcode’s Signing & Capabilities pane, Signing for “JRNL” requires a development team:

Figure 1.23: Xcode Signing & Capabilities panel
This is because a digital certificate is required to run the app on an iOS device, and you need to add a free or paid Apple Developer account to Xcode so the digital certificate can be generated.
Using an Apple ID to create a free developer account will allow you to test your app on an iOS device, but it will only be valid for 7 days. Also, you will need a paid Apple Developer account to distribute apps on the App Store. You’ll learn more about this in Chapter 27, Testing and Submitting Your App to the App Store.
Certificates ensure that the only apps that run on your device are the ones you authorize. This helps to protect against malware. You can also learn more about them at this link: https://help.apple.com/xcode/mac/current/#/dev60b6fbbc7.
- Click the Add Account... button:
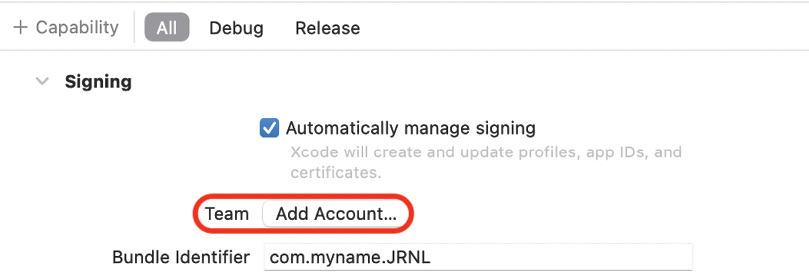
Figure 1.24: Xcode Signing & Capabilities pane with Add Account… button selected
- The Xcode Settings window appears with the Accounts pane selected. Enter your Apple ID and click Next:

Figure 1.25: Apple ID creation dialog box
Note that you can create a different Apple ID if you wish using the Create Apple ID button.
You can also access the Xcode settings by choosing Settings in the Xcode menu.
- Enter your password when prompted. After a few minutes, the Accounts pane will display your account settings:
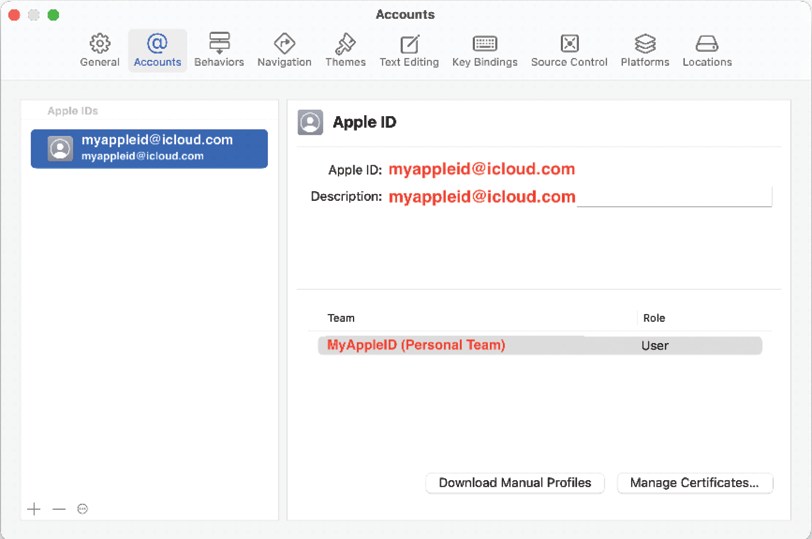
Figure 1.26: Accounts pane in Xcode preferences
- Close the Settings window when you’re done by clicking the red close button in the top-left corner.
- In Xcode’s Editor area, click Signing & Capabilities. Make sure Automatically manage signing is ticked and Personal Team is selected from the Team pop-up menu:
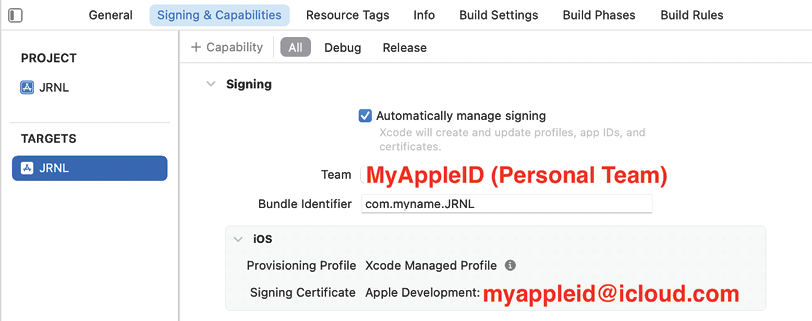
Figure 1.27: Xcode Signing & Capabilities pane with account set
- If you still see errors on this screen, try changing your Bundle Identifier by typing some random characters into it, for example,
com.myname4352.JRNL. - Everything should work now when you build and run, and your app will be installed on your iOS device. However, it will not launch, and you will see the following message:
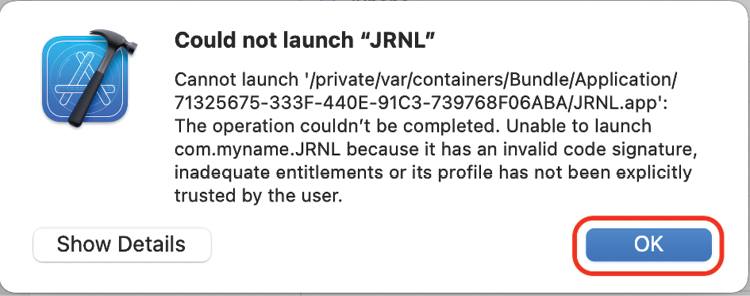
Figure 1.28: Could not launch “JRNL” dialog box
- This means you need to trust the certificate that has been installed on your device. You’ll learn how to do this in the next section.
Trusting the Developer App certificate on your iOS device
A Developer App certificate is a special file that gets installed on your iOS device along with your app. Before your app can run, you need to trust it. Follow these steps:
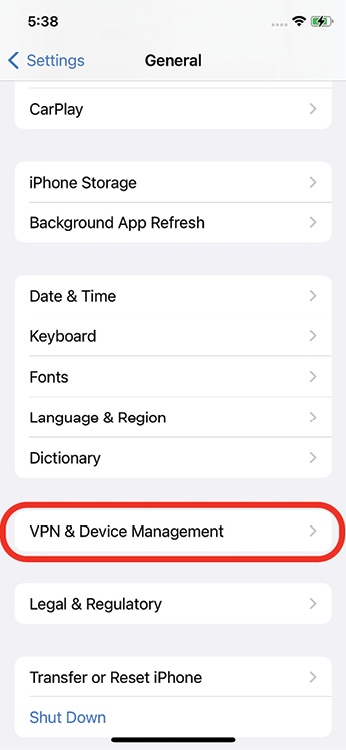
Figure 1.29: VPN & Device Management setting in iOS Settings
- Tap Apple Development:
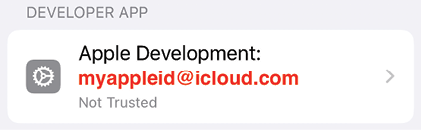
Figure 1.30: Apple Development section in Device Management settings
- Tap Trust “Apple Development:

Figure 1.31: Trust button
- Tap Trust:

Figure 1.32: Trust dialog box
You should see the following text, which shows the app is now trusted:

Figure 1.33: Apple Development section with trusted certificate
- Click the Run button in Xcode to build and run again. You’ll see your app launch and run on your iOS device.
Congratulations! You have successfully run your app on an actual iOS device!