Reader small image

You're reading from  Hands-On Data Visualization with Bokeh

Product typeBook
Published inJun 2018
Reading LevelIntermediate
PublisherPackt
ISBN-139781789135404
Edition1st Edition
Languages
Tools
Right arrow
Author (1)
Kevin Jolly
Kevin Jolly
author image
Kevin Jolly

Kevin Jolly is a formally educated data scientist with a master's degree in data science from the prestigious King's College London. Kevin works as a statistical analyst with a digital healthcare start-up, Connido Limited, in London, where he is primarily involved in leading the data science projects that the company undertakes. He has built machine learning pipelines for small and big data, with a focus on scaling such pipelines into production for the products that the company has built. Kevin is also the author of a book titled Hands-On Data Visualization with Bokeh, published by Packt. He is the editor-in-chief of Linear, a weekly online publication on data science software and products.
Read more about Kevin Jolly

Right arrow

Bokeh Installation and Key Concepts

Welcome to the world of interactive data visualization using the popular Bokeh library in Python. As you go through the chapter, you will learn about the following topics:

  • What exactly Bokeh is and how it differs from other plotting libraries
  • How you can install Bokeh on your local machine
  • How to verify your Bokeh installation
  • Where you can go for help should things go wrong
  • Some key concepts regarding Bokeh's internal workings

Bokeh is an interactive data visualization library in Python that helps users across all levels visualize both simple and complex data from datasets ranging from small to big. You can use Bokeh to create both interactive plots and applications that speak to the general public, statisticians, and even business leaders!

Technical requirements

The difference between static and interactive plotting

In the world of data visualization, there are three main libraries using Python that dominate the market, and these are as follows:

  • Matplotlib
  • Seaborn
  • Bokeh

The first two, Matplotlib and Seaborn, let you plot static plots—plots that do not change and plots that cannot be interacted with. These plots are useful and add value when performing exploratory data analysis, as they are quick and easy to implement and very fast to execute.

The third plotting library, Bokeh, lets you plot interactive plots—plots that change when the user interacts with them. These plots are useful when you want to give your audience a wide range of options and tools for inferring and looking at data from various angles.

Installing the Bokeh library

Bokeh has a few dependencies. In order to use Bokeh, ensure that the following packages are already installed:

  • NumPy
  • Jinja2
  • Six
  • Requests
  • Tornado >= 4.0
  • PyYaml
  • DateUtil

If you're using Python 2.7, ensure that you have all the afore mentioned packages along with:

  • Futures

Installing Bokeh using a Python distribution

If you have all of your Python packages installed and managed using a distribution such as Anaconda, you can install Bokeh using your Bash Terminal or a Windows Prompt using the following code:

conda install bokeh

You can also install Bokeh using PyPi for Python 2 via the following code:

pip install bokeh

You can install Bokeh using PyPi for Python 3 via the following code:

pip3 install bokeh

For the purposes of this book, all plots will be rendered using Bokeh Version 0.12.15. If you already have Bokeh installed and require an update, simply enter the following code in your terminal or shell:

sudo pip3 install bokeh --upgrade

Verifying your installation

Once you have installed Bokeh, you will want to verify that it is correctly installed. In order to verify the installation and create all your Bokeh plots, you'll need a Jupyter Notebook. If you are not familiar with working with a Jupyter Notebook before or have installed, the following link will provide you with a step-by-step tutorial on how to install and work with Jupyter Notebook: http://jupyter.org/install.

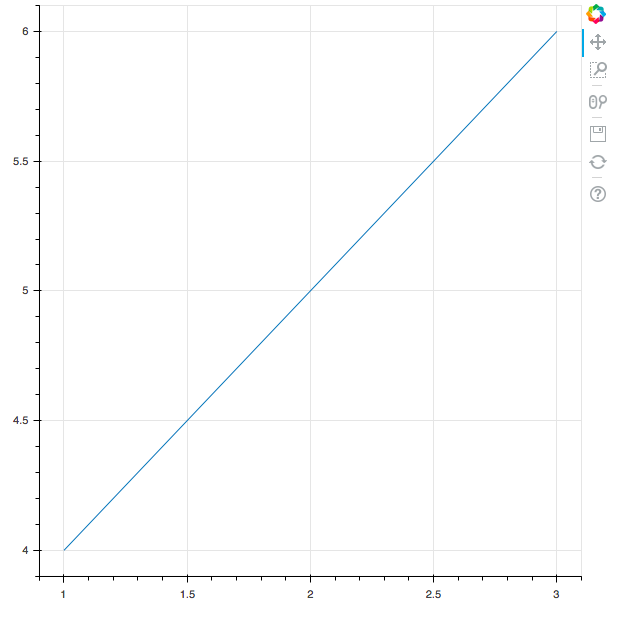
You can verify your installation of Bokeh by generating a simple line plot using a Jupyter Notebook with the following code:

from bokeh.plotting import figure, output_file, show

#HTML file to output your plot into
output_file("bokeh.html")

#Constructing a basic line plot

x = [1,2,3]
y = [4,5,6]

p = figure()

p.line(x,y)

show(p)

This should open up a new tab on your browser with a plot illustrated as follows:

Don't worry too much about what the code does for now. If you have got the preceding plot, you should be satisfied that Bokeh has been successfully installed on your local machine.

When things go wrong

In the event that things go wrong with your installation, you have the following two options:

  • The Bokeh mailing list (https://groups.google.com/a/anaconda.com/forum/#!forum/bokeh) is a group on Google that posts questions and queries related to Bokeh, which are then answered by experts who use the package on a regular basis. Joining this group or looking through its frequently asked questions should help you find the answer to your solution.
  • You can also submit an issue on the Bokeh GitHub issue tracker (https://github.com/bokeh/bokeh/issues); your issue will usually be solved in within a matter of a few hours, up to a few days.

Key concepts and the building blocks of Bokeh

While going through this book, you will come across some terms that are fundamental to understanding the Bokeh package. This section will take you through them.

The following are some key definitions related to Bokeh:

  • Application: The Bokeh application is a rendered Bokeh document that runs in the browser
  • Glyphs: Glyphs are the building blocks of Bokeh, and they are the lines, circles, rectangles, and other shapes that you see on a Bokeh plot
  • Server: The Bokeh server is used to share and publish interactive plots and apps to an audience of your choice
  • Widgets: Widgets in Bokeh are the sliders, drop-down menus, and other small tools that you can embed into your plot to add some interactivity

Plot outputs

There are two methods you can use to render your plot:

  • output_file: This method is used to output your plot as an HTML file and can be used as illustrated in the following code:
output_file('plot.html')
  • output_notebook: This is used to output your plot in the Jupyter Notebook you are presently working on and can be used as illustrated in the following code:
output_notebook()

Interfaces:

The first step to understanding interfaces is to understand what a class and a method are. Think of a class as a vessel that holds different types of cookie together. The vessel in this case is the class and the cookies are the methods that give the vessel some functionality, in our case, as a container for the cookies.

Since Python is an object-oriented programming language, it uses classes to group different objects that it creates together.

A class by itself is useless unless it has some functionality associated with it. These functionalities are provided to classes by methods.

Bokeh provides a mid-level plotting interface, similar to that of matplotlib , which is known as bokeh.plotting. The main class in the bokeh.plotting interface is the Figure class, which includes methods for adding different kinds of glyphs to a plot.

A user can create a Figure object by using the figure function, as illustrated in the following code:

from bokeh.plotting import figure

# create a Figure object
p = figure(plot_width=500, plot_height=400, tools="pan,hover")

In Bokeh, the figure function, as illustrated in the preceding code, is used to initialize and store the contents of your plot. The variable p in the preceding code now holds information about the plot, including its height, width, and the kind of tools the plot will use. Since figure is our main class, methods such as line, circle, and so on can be added to our diagram in order to create the plot.

Summary

This chapter has given you the exact set of steps required for installing Bokeh on your local machine. It has also given you a glimpse of the key terms that you'll run into as you work your way through this book.

Now that Bokeh has been successfully installed on your local machine, you can open up a new Jupyter Notebook to work on your first plots with Bokeh!

In the next chapter, you will learn how to create your very first plot using glyphs; you'll see how it lays the foundation for plotting using Bokeh.

You have been reading a chapter from
Hands-On Data Visualization with Bokeh
Published in: Jun 2018Publisher: PacktISBN-13: 9781789135404
Register for a free Packt account to unlock a world of extra content!
A free Packt account unlocks extra newsletters, articles, discounted offers, and much more. Start advancing your knowledge today.
undefined
Unlock this book and the full library FREE for 7 days
Get unlimited access to 7000+ expert-authored eBooks and videos courses covering every tech area you can think of
Renews at $15.99/month. Cancel anytime

Author (1)

author image
Kevin Jolly

Kevin Jolly is a formally educated data scientist with a master's degree in data science from the prestigious King's College London. Kevin works as a statistical analyst with a digital healthcare start-up, Connido Limited, in London, where he is primarily involved in leading the data science projects that the company undertakes. He has built machine learning pipelines for small and big data, with a focus on scaling such pipelines into production for the products that the company has built. Kevin is also the author of a book titled Hands-On Data Visualization with Bokeh, published by Packt. He is the editor-in-chief of Linear, a weekly online publication on data science software and products.
Read more about Kevin Jolly