


Python is a high-level programming language that is easy to learn, easy to read, and powerful. To learn more about the Python programming language, go to www.python.org.
FreeCAD's use of Python as its scripting language makes it extremely flexible for modeling parts. With Python in control, a user can do things that would be hard to do manually.
With this recipe, a model of a servo motor is rendered.
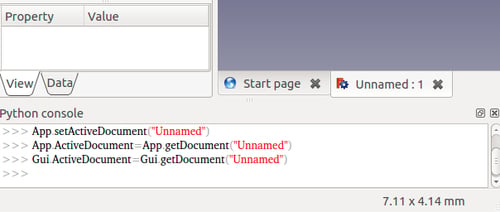
For this recipe the Python console is needed. Make sure it's open. In the menu bar, click on View | Views and then make sure Python console is checked. The Python console will be located in the bottommost panel in FreeCAD. It looks similar to the following screenshot:
You will also need to have a document open in order for the Python scripted solid model to have a place to appear.
Enter the following text into the Python console:
import Part
from FreeCAD import Vector

plate = Part.makeBox(40,40,5,Vector(-20,-20,0))
hole1= Part.makeCylinder(1.5,5,Vector(-15,-15,0))
hole2= Part.makeCylinder(1.5,5,Vector(-15,15,0))
hole3= Part.makeCylinder(1.5,5,Vector(15,15,0))
hole4= Part.makeCylinder(1.5,5,Vector(15,-15,0))
faceplate = plate.cut(hole1)
faceplate = faceplate.cut(hole2)
faceplate = faceplate.cut(hole3)
faceplate = faceplate.cut(hole4)
motorbody=Part.makeCylinder(17.5,60,Vector(0,0,5))
shaft = Part.makeCylinder(3.175,15,Vector(0,0,-15))
servo = motorbody.fuse(faceplate)
servo = servo.fuse(shaft)
servo.translate(Vector(-20,-20,0))
servo.rotate(Vector(0,0,0),Vector(0,1,0),-90)
Part.show(servo)
Make sure to press the Enter key after the last line.
You should see a 3D solid in the graphics screen of FreeCAD that looks similar to the following graphic:

At the start of the script, FreeCAD needs some of its modules imported:
import Part
from FreeCAD import Vector
Without importing these, the script could not do anything beyond what is already in the standard Python library. The Part module gives access to geometric objects in FreeCAD. The Vector module is related to translating and rotating objects.
In lines like plate = Part.makeBox(40,40,5,Vector(-20,-20,0)) the Part module gives us a way of creating a solid box that is 40 mm x 40 mm x 5 mm big, which will be the face plate for our servo motor model. It is moved along a vector; 20 mm in the x direction; 20 mm in the y direction; and 0 mm in the z direction. FreeCAD allows us to create many types of solids in Python such as cylinders with Part.makeCylinder, spheres with Part.makeSphere, cones with Part.makeCone, and toruses with Part.makeTorus.
FreeCAD can cut
3D objects and fuse them to each other. In Python code that looks like this: faceplate = plate.cut(hole1), we are cutting the plate with hole1. Fusing objects together can be seen in a line like servo = motorbody.fuse(faceplate), where motor body is fused to faceplate.
At the end of the script, we make our servo motor visible by showing it using the following code:
Part.show(servo)
You can use the Python console in FreeCAD to help you explore the depths of the the Part module. Just start typing Part. into the console and FreeCAD's auto-completion feature will show you what classes are available and give you tips. The . is what causes the console to auto complete.
Here is what the auto completion feature looks like in action:

Notice how it gives you a helpful tip on the makeBox class.
Go to https://sourceforge.net/apps/mediawiki/free-cad/index.php?title=Topological_data_scripting for more info and examples of how to work with Python in FreeCAD. More examples can also be found by searching http://www.thingiverse.com/ with the keyword freecad.


