

Now that your hardware is ready, you need to download and image an operating system to a microSD card. The Raspberry Pi Zero provides a lot of different choices. You'll stick with Linux, an open-source version of Unix, on your Raspberry Pi Zero. Linux, unlike Windows, Android, or iOS, is not tightly controlled by a single company. It is a grassroots effort from a wide community, mostly open-source and, while it is available for free, it grows and develops a bit more chaotically.
A number of different versions of Linux have emerged, each built on a core set of similar capabilities referred to as the Linux kernel. These core capabilities are all based on the Linux specification. However, they are packaged slightly differently, and developed, supported, and packaged by different organizations. The Raspberry Pi community has become standardized on Raspbian, a Debian distribution of Linux for the Raspberry Pi. So, you are going to install and run Raspbian on your Raspberry Pi Zero.
The newest version of Debian is called Jessie, after the cowgirl in Toy Story®. This is the naming convention for Debian and you need to download this version of Raspbian.
You can purchase a card that has Raspbian installed or you can download it onto your personal computer and then install it on the card. To download a distribution, you need to decide if you are going to use a Windows computer to download and create an SD card, a MAC OS X, or a Linux machine. I'll give brief instructions for Windows and Linux machines here.
Note
For directions on the MAC OS X, go to: http://www.raspberrypi.org/documentation/installation/installing-images/mac.md.
Firstly, you need to download an image. This part of the process is similar for both Windows and Linux. Open a browser window. Go to the Raspberry Pi organization's website, https://www.raspberrypi.org/ and select the Downloads selection at the top of the page. This will give you a variety of download choices. Go to the Raspbian section, and select the .zip file just to the right of the image identifier. You need the latest version, but not the lite one. This will download an archived file that has the image for your Raspbian operating system. Note the default username and password; you'll need them later.
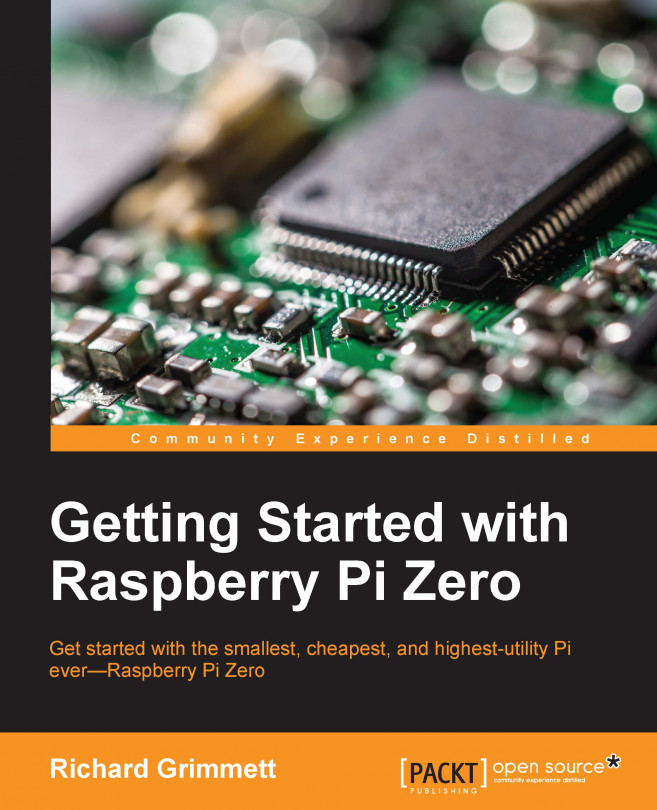
If you're using Windows, you'll need to unzip the file using an archiving program like 7-Zip available at http://www.7-zip.org/. This will leave you with a file that has the .img extension, a file that can be imaged onto your card. Next, you need a program that can write the image to the card. I use Image Writer for Windows. You can find a link to this program at the top of the download section on the https://www.raspberrypi.org/ website. Plug your card into the PC, run this program, and you should see this:
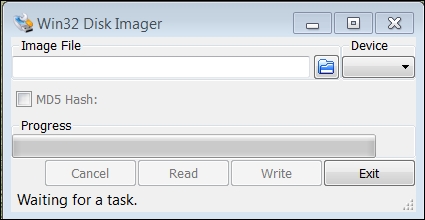
Select the device card and download the image; it should look something like this:
Then, click on the Write button. This will take some time, perhaps as long as 15 minutes but, when it is complete, exit the program and you'll have your microSD card with the image.
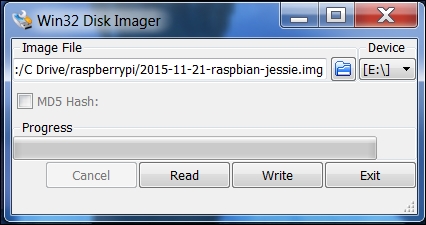
If you are using Linux, you need to un-archive the file and then write it to the card. You can do all of this with one command. However, you do need to find the /dev device label for your card. You can do this with the ls -la /dev/sd* command. If you run this before you plug in your card, you might see something like the following screenshot:
After plugging in your card, you might see something like the following screenshot:
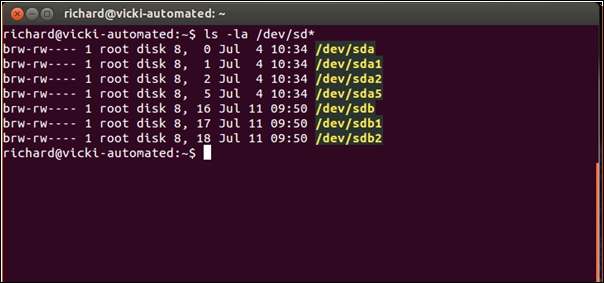
Note that your card is at sdb. Now go to the directory in which you downloaded the archived image file and use the following command:
sudo dd if=2015-11-21-raspbian-jessie.img of=/dev/sdX
The 2015-11-21-raspbian-jessie.img command will be replaced by the image file that you downloaded and /dev/sdX will be replaced by your card ID, in this example /dev/sdb. Be careful to specify the correct device as this can overwrite the data on any of your drives. Also, this may take a few minutes. Once the file is written, eject the card and you are ready to plug it into the board and apply the power.
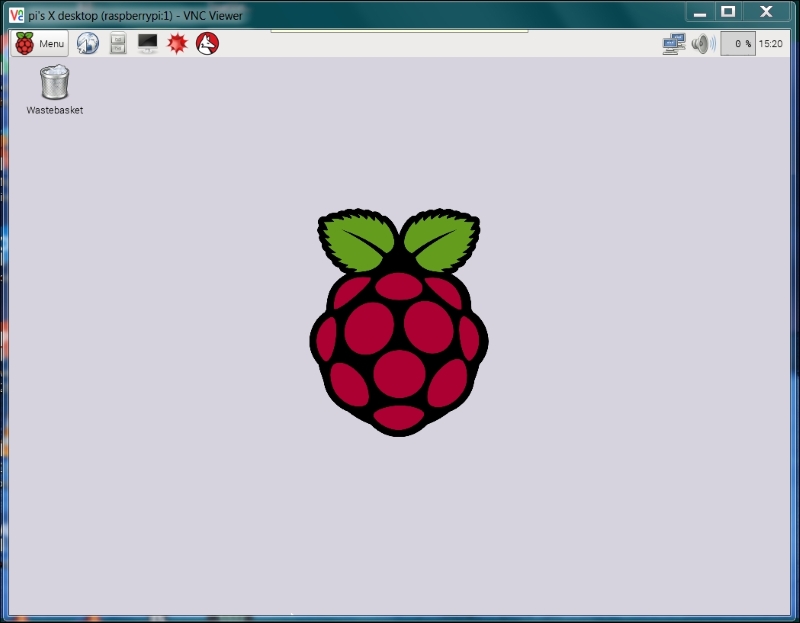
Make sure that your Raspberry Pi Zero is unplugged and install the SD card into the slot. Then power the device. After the device boots, you should get the following screen:
Note
Note that, if you use a powered USB hub, it might provide enough power to your Raspberry Pi, however, in some circumstances it might not be able to provide all the power you need. I strongly suggest you use different power sources, one for your Raspberry Pi Zero and one for your hub.
You are going to do one more thing to finalize your configuration. To do this you need to go into the raspi-config application. So, open a terminal window by clicking the icon in the upper left corner that looks like a small computer screen.
Now, type in sudo raspi-config. You should see this application on your screen:
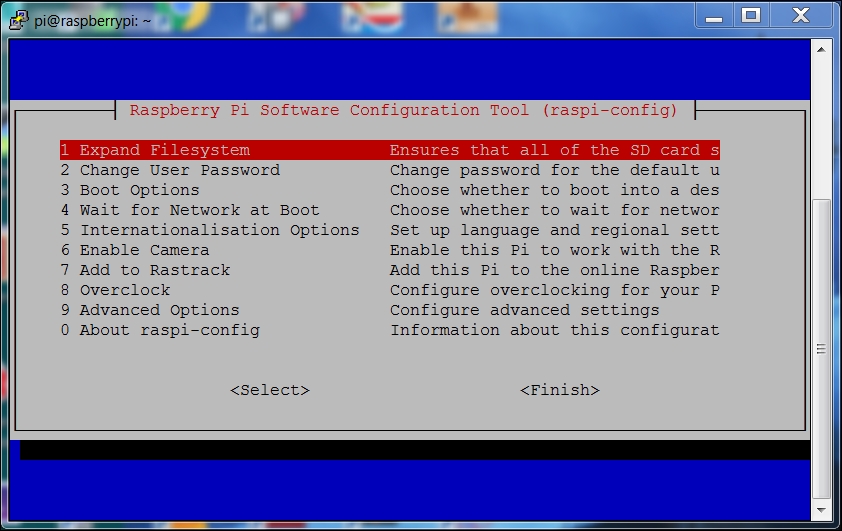
You need to expand the filesystem to take up the entire card. Select 1 Expand Filesystem, hit the Enter key and you'll see the following screen:
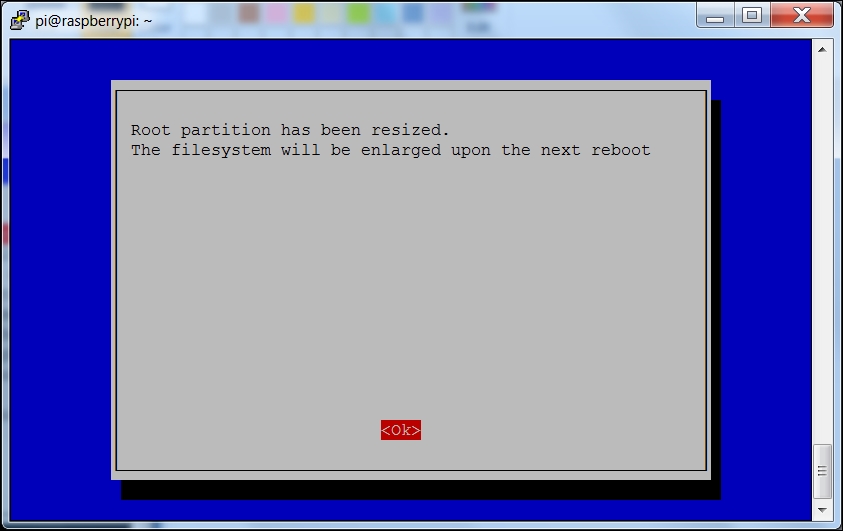
Hit Enter once again and you'll go back to the main configuration screen. Now, hit the Tab key until you are positioned over the <Finish> selection and then hit Enter. Then hit Enter again so that you can reboot your Raspberry Pi Zero.
Note
If you are using a US keyboard, you may need to edit the keyboard file for your keyboard to use nano effectively. To do this, use the dropdown menu in the upper left hand corner of the screen, choose Preferences | Mouse and Keyboard Settings and then select the Keyboard tab. You can then choose the correct keyboard for your configuration.
Now you are ready to start interacting with the system! You can bring up a terminal window and start typing commands.