Azure Databricks provides options for data engineers, data scientists, and data analysts to read and write data from and to various sources such as different file formats, databases, NoSQL databases, Azure Storage, and so on. Users get a lot of flexibility in ingesting and storing data in various formats as per business requirements, using Databricks. It also provides libraries to ingest data from streaming systems such as Events Hub and Kafka.
In this chapter, we will learn how we can read data from different file formats, such as comma-separated values (CSV), Parquet, and JavaScript Object Notation (JSON), and how to use native connectors to read and write data from and to Azure SQL Database and Azure Synapse Analytics. We will also learn how to read and store data in Azure Cosmos DB.
By the end of this chapter, you will have built a foundation for reading data from various sources that are required to work on the end-to-end (E2E) scenarios of a data ingestion pipeline. You will learn how and when to use JavaScript Database Connectivity (JDBC) drivers and Apache Spark connectors to ingest into the Azure SQL Database.
We're going to cover the following recipes in this chapter:
To follow along with the examples shown in the recipe, you will need to have the following:
https://docs.microsoft.com/en-us/azure/storage/common/storage-account-create?tabs=azure-portal https://docs.microsoft.com/en-us/azure/storage/common/storage-account-create?tabs=azure-portal
https://docs.microsoft.com/en-us/azure/azure-sql/database/single-database-create-quickstart?tabs=azure-portal
https://docs.microsoft.com/en-us/azure/synapse-analytics/quickstart-create-sql-pool-studio
Chapter02
folder contains all the notebooks for this chapter.Important note
You can create resources based on the recipe you are working on—for example, if you are on the first recipe, then you need to create Azure Blob storage and ADLS Gen2 resources only.
Azure Databricks uses DBFS, which is a distributed file system that is mounted into an Azure Databricks workspace and that can be made available on Azure Databricks clusters. DBFS is an abstraction that is built on top of Azure Blob storage and ADLS Gen2. It mainly offers the following benefits:
By the end of this recipe, you will have learned how to mount Azure Blob and ADLS Gen2 storage to Azure DBFS. You will learn how to access files and folders in Blob storage and ADLS Gen2 by doing the following:
Create ADLS Gen2 and Azure Blob storage resources by following the links provided in the Technical requirements section. In this recipe, the names of the storage resources we are using will be the following:
cookbookadlsgen2storage
for ADLS Gen2 storagecookbookblobstorage
for Azure Blob storage
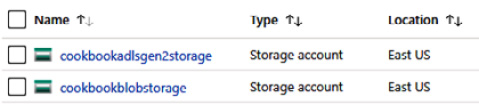
You can see the Storage Accounts we created in the following screenshot:
Before you get started, you will need to create a service principal that will be used to mount the ADLS Gen2 account to DBFS. Here are the steps that need to be followed to create a service principal from the Azure portal:
Once the application is created, we need to provide Blob storage contributor access to ADLSGen2App
on the ADLS Gen2 storage account. The following steps demonstrate how to provide access to the ADLS Gen2 storage account:
CookbookRG
resource group and select the cookbookadlsgenstorage
(ADLS Gen2 storage) account you have created. Click Access Control (IAM) then click on + Add, and select the Add role assignment option. On the Add role assignment blade, assign the Storage Blob Data Contributor role to our service principal (that is, ADLSAccess
):ADLSGen2App
, as shown in the following screenshot, and click on the Save button:We require a storage key so that we can mount the Azure Blob storage account to DBFS. The following steps show how to get a storage key for the Azure Blob storage account (cookbookblobstorage
) we have already created.
CookbookRG
resource group and select the cookbookblobstorage
(ADLS Blob storage) account you have created. Click on Access keys under Settings and click on the Show keys button. The value you see for the key1
key is the storage key we will use to mount the Azure Blob storage account to DBFS:key1
, which you will see when you click on Show keys. The process of getting a storage key is the same for an Azure Blob storage account and an ADLS Gen2 storage account. Chapter02
folder of your local cloned Git repository. (a) 2-1.1.Mounting ADLS Gen-2 Storage FileSystem to DBFS.ipynb
(b) 2-1.2.Mounting Azure Blob Storage Container to DBFS.ipynb
rawdata
in both the cookbookadlsgen2storage
and cookbookblobstorage
accounts you have already created, and upload the Orders.csv
file, which you will find in the Chapter02
folder of your cloned Git repository.Note
We have tested the steps mentioned in this recipe on Azure Databricks Runtime version 6.4 which includes Spark 2.4.5 and on Runtime version 7.3 LTS which includes Spark 3.0.1.
The following steps show how to mount an ADLS Gen2 storage account to DBFS and view the files and folders in the rawdata
folder:
2_1.1.Mounting ADLS Gen-2 Storage FileSystem to DBFS.ipynb
notebook, and execute the first cell in the notebook, which contains the code shown next. Follow the steps mentioned in the Getting ready section to get the application ID, tenant ID, and secret, and replace the values for the variables used in the following code snippet for clientID
, tenantID
, and clientSecret
:#ClientId, TenantId and Secret is for the Application(ADLSGen2App) was have created as part of this recipe clientID =" XXXXXb3dd-4f6e-4XXXX-b6fa-aXXXXXXX00db" tenantID ="xxx-xxx-XXXc-xx-eXXXXXXXXXX" clientSecret ="xxxxxx-xxxxxxxxxx-XXXXXX" oauth2Endpoint = "https://login.microsoftonline.com/{}/oauth2/token".format(tenantID) configs = {"fs.azure.account.auth.type": "OAuth", "fs.azure.account.oauth.provider.type": "org.apache.hadoop.fs.azurebfs.oauth2.ClientCredsTokenProvider", "fs.azure.account.oauth2.client.id": clientID, "fs.azure.account.oauth2.client.secret": clientSecret, "fs.azure.account.oauth2.client.endpoint": oauth2Endpoint} try: dbutils.fs.mount( source = storageEndPoint, mount_point = mountpoint, extra_configs = configs) except: print("Already mounted...."+mountpoint)
/mnt/Gen2
in DBFS. We can check the folders and files in the storage account by executing the following code:%fs ls /mnt/Gen2
dbutils
command, as shown in the following code snippet:display(dbutils.fs.ls("/mnt/Gen2"))
orders.csv
file from the mounted path, we will execute the following code:df_ord= spark.read.format("csv").option("header",True).load("dbfs:/mnt/Gen2/Orders.csv")
display(df_ord)
Up to now, we have learned how to mount ADLS Gen2 to DBFS. Now, the following steps show us how to mount an Azure Blob storage account to DBFS and list all files and folders created in the Blob storage account:
2-1.2.Mounting Azure Blob Storage Container to DBFS.ipynb
notebook, and execute the first cell in the notebook, which contains the following code:#Storage account and key you will get it from the portal as shown in the Cookbook Recipe. storageAccount="cookbookblobstorage" storageKey ="xxxxxxxxxxxxxxxxxxxxxxxxxxxxxxxxx==" mountpoint = "/mnt/Blob" storageEndpoint = "wasbs://rawdata@{}.blob.core.windows.net".format(storageAccount) storageConnSting = "fs.azure.account.key.{}.blob.core.windows.net".format(storageAccount) try: dbutils.fs.mount( source = storageEndpoint, mount_point = mountpoint, extra_configs = {storageConnSting:storageKey}) except: print("Already mounted...."+mountpoint)
/mnt/Gen2
in DBFS. We can check the folders and files available in the storage account by executing the following code:%fs ls /mnt/Blob
dbutils
, as shown in the following code snippet:display(dbutils.fs.ls("/mnt/Blob"))
df_ord= spark.read.format("csv").option("header",True).load("dbfs:/mnt/Blob/Orders.csv")
display(df_ord.limit(10))
The preceding code will display 10
records from the DataFrame.
The preferred way of accessing an ADLS Gen2 storage account is by mounting the storage account file system using a service principal and Open Authentication 2.0 (OAuth 2.0). There are other ways of accessing a storage account from a Databricks notebook. These are listed here:
We will learn about the preceding options in the next recipes. For Azure Blob storage, you have learned how to mount a storage account by using a storage key, but there are other options as well to access an Azure Blob storage account from a Databricks notebook. These are listed here:
To view files in the mount points, Databricks has provided utilities to interact with the file system, called dbutils
. You can perform file system operations such as listing files/folders, copying files, creating directories, and so on. You can find an entire list of operations you can perform by running the following command:
dbutils.fs.help()
The preceding command will list all the operations that can be performed on a file system in Databricks.
You can also authenticate to ADLS Gen-2 storage accounts using storage account access key as well, but it is less secure and only preferred in non-production environments. You can get the storage account access key using the same method you have learnt for Azure Blob storage account in the Getting ready section of this recipe. You can run the following steps to Authenticate ADLS Gen-2 using access keys and read Orders.csv
data.
Run the following to set the storage account and access key details in variables.
#This is ADLS Gen-2 accountname and access key details storageaccount="demostoragegen2" acct_info=f"fs.azure.account.key.{storageaccount}.dfs.core.windows.net" accesskey="xxx-xxx-xxx-xxx" print(acct_info)
To authenticate using access key we need to set the notebook session configs by running the following code.
#Setting account credentials in notebook session configs spark.conf.set( acct_info, accesskey)
Run the following code to verify we can authenticate using access
key and list the Orders.csv
file information.
dbutils.fs.ls("abfss://rawdata@demostoragegen2.dfs.core.windows.net/Orders.csv")
Let's read the Orders.csv
file by running through the following code.
ordersDF =spark.read.format("csv").option("header",True).load("abfss://rawdata@demostoragegen2.dfs.core.windows.net/Orders.csv")
In this section you have learnt how to authenticate and read data from ADLS Gen-2 using Storage Account access keys.
In this recipe, you will learn how to read and write data from and to Azure Blob storage from Azure Databricks. You will learn how to access an Azure Blob storage account by doing the following:
By the end of this recipe, you will know multiple ways to read/write files from and to an Azure Blob storage account.
You will need to ensure that the Azure Blob storage account is mounted by following the steps mentioned in the previous recipe. Get the storage key by following the steps mentioned in the Mounting ADLS Gen2 and Azure Blob storage to Azure DBFS recipe of this chapter. You can follow along by running the steps in the 2-2.Reading and Writing Data from and to Azure Blob Storage.ipynb
notebook in your local cloned repository in the Chapter02
folder.
Upload the csvFiles
folder in the Chapter02/Customer
folder to the Azure Blob storage account in the rawdata
container.
Note
We have tested the steps mentioned in this recipe on Azure Databricks Runtime version 6.4 which includes Spark 2.4.5 and on Runtime version 7.3 LTS which includes Spark 3.0.1
We will learn how to read the csv
files under the Customer
folder from the mount point and the Blob storage account directly. We will also learn how to save the DataFrame results as Parquet files in the mount point and directly to the Azure Blob storage without using the mount point:
csv
files we are trying to read by using the following code:display(dbutils.fs.ls("/mnt/Blob/Customer/csvFiles/"))
csv
files in a DataFrame directly from the mount point without specifying any schema options:df_cust= spark.read.format("csv").option("header",True).load("/mnt/Blob/Customer/csvFiles/")
df_cust.printSchema()
, you will find that the datatypes for all columns are strings.csv
files by using option("header","true")
:df_cust= spark.read.format("csv").option("header",True).option("inferSchema", True).load("/mnt/Blob/Customer/csvFiles/")
df_cust.printSchema()
code, and you will find the datatype has changed for a few columns, such as CustKey
, where the datatype is now being shown as an integer instead of a String.cust_schema = StructType([ StructField("C_CUSTKEY", IntegerType()), StructField("C_NAME", StringType()), StructField("C_ADDRESS", StringType()), StructField("C_NATIONKEY", ShortType()), StructField("C_PHONE", StringType()), StructField("C_ACCTBAL", DoubleType()), StructField("C_MKTSEGMENT", StringType()), StructField("C_COMMENT", StringType()) ])
NationKey
, where we are using ShortType
as the datatype instead of IntegerType
:df_cust= spark.read.format("csv").option("header",True).schema(cust_schema).load("/mnt/Blob/Customer/csvFiles/")
10
so that we are sure 10
Parquet files are created in the mount point:Mountpoint= "/mnt/Blob" parquetCustomerDestMount = "{}/Customer/parquetFiles".format(mountpoint)"{}/Customer/parquetFiles".format(mountpoint) df_cust_partitioned=df_cust.repartition(10) df_cust_partitioned.write.mode("overwrite").option("header", "true").parquet(parquetCustomerDestMount)
storageEndpoint
variable that stores the full URL for the storage account; this is used to write the data directly to Azure Blob storage without using the mount point and is declared in the second cell of the notebook:storageEndpoint ="wasbs://rawdata@{}.blob.core.windows.net".format(storageAccount)
spark.conf.set(storageConnSting,storageKey)
df_cust= spark.read.format("csv").option("header",True).schema(cust_schema).load("wasbs://rawdata@cookbookblobstorage.blob.core.windows.net/Customer/csvFiles/")
display(df_cust.limit(10))
csv
data in Parquet format in Azure Blob storage directly without using the mount point. We can do this by executing the following code. We are repartitioning the DataFrame to ensure we are creating 10 Parquet files:parquetCustomerDestDirect = "wasbs://rawdata@cookbookblobstorage.blob.core.windows.net/Customer/csvFiles/parquetFilesDirect" df_cust_partitioned_direct=df_cust.repartition(10) df_cust_partitioned_direct.write.mode("overwrite").option("header", "true").parquet(parquetCustomerDestDirect)
display(dbutils.fs.ls(parquetCustomerDestDirect))
We have seen both ways to read and write data from and to Azure Blob storage, but in most scenarios, the preferred method is to mount the storage. This way, users don't have to worry about the source or destination storage account names and URLs.
The following code is used to directly access the Blob storage without mounting it to DBFS. Without running the following code, you will not be able to access the storage account and will encounter access errors while attempting to access the data:
spark.conf.set(storageConnSting,storageKey)
You can only mount block blobs to DBFS, and there are other blob types that Azure Blob storage supports—these are page
and append
. Once the blob storage is mounted, all users would have read and write access to the blob that is mounted to DBFS.
Instead of a storage key, we can also access the Blob storage directly using the SAS of a container. You first need to create a SAS from the Azure portal:
CookBookRG
resource group, open the cookbookblobstorage
Azure Blob storage account. Select the Shared access signature option under Settings:spark.conf.set
code. storageConnSting = "fs.azure.sas.rawdata.{}.blob.core.windows.net".format(storageAccount) spark.conf.set( storageConnSting, "?sv=2019-12-12&ss=bfqt&srt=sco&sp=rwdlacupx&se=2021-02-01T02:33:49Z&st=2021-01-31T18:33:49Z&spr=https&sig=zzzzzzzzzzzzzz")
rawdata
in the preceding code snippet is the name of the container we created in the Azure Blob storage account. After executing the preceding code, we are authenticating to the Azure blob using a SAS token.display(dbutils.fs.ls(storageEndpointFolders))
.In this recipe, you will learn how to read and write data to ADLS Gen2 from Databricks. We can do this by following these two methods:
ADLS Gen2 provides file system semantics, which provides security to folders and files, and the hierarchical directory structure provides efficient access to the data in the storage.
By the end of this recipe, you will know multiple ways to read/write files from and to an ADLS Gen2 account.
You will need to ensure you have the following items before starting to work on this recipe:
You can follow along by running the steps in the 2-3.Reading and Writing Data from and to ADLS Gen-2.ipynb
notebook in your local cloned repository in the Chapter02
folder.
Upload the csvFiles
folder in the Chapter02/Customer
folder to the ADLS Gen2 account in the rawdata
file system.
Note
We have tested the steps mentioned in this recipe on Azure Databricks Runtime version 6.4 which includes Spark 2.4.5 and on Runtime version 7.3 LTS which includes Spark 3.0.1
We will learn how to read CSV files from the mount point and the ADLS Gen2 storage directly. We will perform basic aggregation on the DataFrame, such as counting and storing the result in another csv
file.
Working with the mount point, we'll proceed as follows:
display(dbutils.fs.ls("/mnt/Gen2/Customer/csvFiles/"))
csv
files directly from the mount point without specifying any schema options:df_cust= spark.read.format("csv").option("header",True).load("/mnt/Gen2/Customer/csvFiles/")
df_cust.printSchema()
, you will find that the datatypes for all columns are strings.csv
files by using option("header","true")
:df_cust= spark.read.format("csv").option("header",True).option("inferSchema", True).load("/mnt/Gen2/Customer/csvFiles/")
df_cust.printSchema()
, and you will find the datatype has changed for a few columns such as CustKey
, where the datatype now being shown is an integer instead of a string.csv
files using a DataFrame:cust_schema = StructType([ StructField("C_CUSTKEY", IntegerType()), StructField("C_NAME", StringType()), StructField("C_ADDRESS", StringType()), StructField("C_NATIONKEY", ShortType()), StructField("C_PHONE", StringType()), StructField("C_ACCTBAL", DoubleType()), StructField("C_MKTSEGMENT", StringType()), StructField("C_COMMENT", StringType()) ])
df_cust= spark.read.format("csv").option("header",True).schema(cust_schema).load("/mnt/Gen2/Customer/csvFiles/")
df_cust_agg = df_cust.groupBy("C_MKTSEGMENT") .agg(sum("C_ACCTBAL").cast('decimal(20,3)').alias("sum_acctbal"), avg("C_ACCTBAL").alias("avg_acctbal"), max("C_ACCTBAL").alias("max_bonus")).orderBy("avg_acctbal",ascending=False)
df_cust_agg.write.mode("overwrite").option("header", "true").csv("/mnt/Gen-2/CustMarketSegmentAgg/"))
(dbutils.fs.ls("/mnt/Gen-2/CustMarketSegmentAgg/"))
We'll now work with an ADLS Gen2 storage account without mounting it to DBFS:
clientID
and clientSecret
are the variables defined in the notebook:spark.conf.set("fs.azure.account.auth.type.cookbookadlsgen2storage.dfs.core.windows.net", "OAuth") spark.conf.set("fs.azure.account.oauth.provider.type.cookobookadlsgen2storage.dfs.core.windows.net", "org.apache.hadoop.fs.azurebfs.oauth2.ClientCredsTokenProvider") spark.conf.set("fs.azure.account.oauth2.client.id.cookbookadlsgen2storage.dfs.core.windows.net", clientID) spark.conf.set("fs.azure.account.oauth2.client.secret.cookbookadlsgen2storage.dfs.core.windows.net", clientSecret) spark.conf.set("fs.azure.account.oauth2.client.endpoint.cookbookadlsgen2storage.dfs.core.windows.net", oauth2Endpoint)
csv
files from the ADLS Gen2 storage account without mounting it:df_direct = spark.read.format("csv").option("header",True).schema(cust_schema).load("abfss://rawdata@cookbookadlsgen2storage.dfs.core.windows.net/Customer/csvFiles")
display(df_direct.limit(10))
10
Parquet files:parquetCustomerDestDirect = "abfss://rawdata@cookbookadlsgen2storage.dfs.core.windows.net/Customer/parquetFiles" df_direct_repart=df_direct.repartition(10) df_direct_repart.write.mode("overwrite").option("header", "true").parquet(parquetCustomerDestDirect)
df_parquet = spark.read.format("parquet").option("header",True).schema(cust_schema).load("abfss://rawdata@cookbookadlsgen2storage.dfs.core.windows.net/Customer/parquetFiles")
display(dbutils.fs.ls(parquetCustomerDestDirect))
The following code is set to directly access the ADL Gen2 storage account without mounting to DBFS. These settings are applicable when we are using DataFrame or dataset APIs:
spark.conf.set("fs.azure.account.auth.type.cookbookadlsgen2storage.dfs.core.windows.net", "OAuth") spark.conf.set("fs.azure.account.oauth.provider.type.cookbookadlsgen2storage.dfs.core.windows.net", "org.apache.hadoop.fs.azurebfs.oauth2.ClientCredsTokenProvider") spark.conf.set("fs.azure.account.oauth2.client.id.cookbookadlsgen2storage.dfs.core.windows.net", clientID) spark.conf.set("fs.azure.account.oauth2.client.secret.cookbookadlsgen2storage.dfs.core.windows.net", clientSecret) spark.conf.set("fs.azure.account.oauth2.client.endpoint.cookbookadlsgen2storage.dfs.core.windows.net", oauth2Endpoint)
You should set the preceding values in your notebook session if you want the users to directly access the ADLS Gen2 storage account without mounting to DBFS. This method is useful when you are doing some ad hoc analysis and don't want users to create multiple mount points when you are trying to access data from various ADLS Gen2 storage accounts.
Reading and writing data from and to an Azure SQL database is the most important step in most data ingestion pipelines. You will have a step in your data ingestion pipeline where you will load the transformed data into Azure SQL or read raw data from Azure SQL to perform some transformations.
In this recipe, you will learn how to read and write data using SQL Server JDBC Driver and the Apache Spark connector for Azure SQL.
The Apache Spark connector for Azure SQL only supports Spark 2.4.x and 3.0.x clusters as of now and might change in future. SQL Server JDBC Driver supports both Spark 2.4.x and 3.0.x clusters. Before we start working on the recipe, we need to create a Spark 2.4.x or 3.0.x cluster. You can follow the steps mentioned in the Creating a cluster from the UI to create 2.x clusters recipe from Chapter 1, Creating an Azure Databricks Service.
We have used Databricks Runtime Version 7.3 LTS with Spark 3.0.1 having Scala version as 2.12 for this recipe. The code is tested with Databricks Runtime Version 6.4 that includes Spark 2.4.5 and Scala 2.11 as well
You need to create an Azure SQL database—to do so, follow the steps at this link:
After your Azure SQL database is created, connect to the database and create the following table in the newly created database:
CREATE TABLE [dbo].[CUSTOMER]( [C_CUSTKEY] [int] NULL, [C_NAME] [varchar](25) NULL, [C_ADDRESS] [varchar](40) NULL, [C_NATIONKEY] [smallint] NULL, [C_PHONE] [char](15) NULL, [C_ACCTBAL] [decimal](18, 0) NULL, [C_MKTSEGMENT] [char](10) NULL, [C_COMMENT] [varchar](117) NULL ) ON [PRIMARY] GO
Once the table is created, you can proceed with the steps mentioned in the How to do it… section. You can follow along the steps mentioned in the notebook 2_4.Reading and Writing from and to Azure SQL Database.ipynb.
You will learn how to use SQL Server JDBC Driver and the Apache Spark connector for Azure SQL to read and write data to and from an Azure SQL database. You will learn how to install the Spark connector for Azure SQL in a Databricks cluster.
Here are the steps to read data from an Azure SQL database using SQL Server JDBC Driver:
csv
files from ADLS Gen2 that we saw in the Reading and writing data from and to ADLS Gen2 recipe:# Details about connection string logicalServername = "demologicalserver.database.windows.net" databaseName = "demoDB" tableName = "CUSTOMER" userName = "sqladmin" password = "Password@Strong12345" # Please specify password here jdbcUrl = "jdbc:sqlserver://{0}:{1};database={2}".format(logicalServername, 1433, databaseName) connectionProperties = { "user" : userName, "password" : password, "driver" : "com.microsoft.sqlserver.jdbc.SQLServerDriver" }
SQLServerDriver
, which comes installed as part of Databricks Runtime.csv
files, store this in ADLS Gen-2, and mount the storage to DBFS. Follow the steps mentioned in the third recipe, Reading and writing data from and to ADLS Gen2, to learn how to mount storage to DBFS:#Creating a schema which can be passed while creating the DataFrame cust_schema = StructType([ StructField("C_CUSTKEY", IntegerType()), StructField("C_NAME", StringType()), StructField("C_ADDRESS", StringType()), StructField("C_NATIONKEY", ShortType()), StructField("C_PHONE", StringType()), StructField("C_ACCTBAL", DecimalType(18,2)), StructField("C_MKTSEGMENT", StringType()), StructField("C_COMMENT", StringType()) ])
csv
files in a DataFrame:# Reading customer csv files in a DataFrame. This Dataframe will be written to Customer table in Azure SQL DB df_cust= spark.read.format("csv").option("header",True).schema(cust_schema).load("dbfs:/mnt/Gen2/Customer/csvFiles")
dbo.CUSTOMER
table that we have already created as part of the Getting ready section:df_cust.write.jdbc(jdbcUrl, mode ="append", table=tableName, properties=connectionProperties)
df_jdbcRead= spark.read.jdbc(jdbcUrl, table=tableName, properties=connectionProperties) # Counting number of rows df_jdbcRead.count()
Here are the steps to read data from an Azure SQL database using Apache Spark Connector for Azure SQL Database.
You can also download the connector from https://search.maven.org/search?q=spark-mssql-connector.
spark-mssql-connector
:spark-mssql-connector
and select the version with artifact id spark-mssql-connector_2.12
with Releases as 1.1.0 as we are using Spark 3.0.1 cluster and click on Select. You can use any latest version which is available when you are going through the recipe. If you are using Spark 2.4.x cluster then you must use the version with Artifact Id as spark-mssql-connector
with Releases version 1.0.2.server_name = f"jdbc:sqlserver://{logicalServername}" database_name = "demoDB" url = server_name + ";" + "databaseName=" + database_name + ";" table_name = "dbo.Customer" username = "sqladmin" password = "xxxxxx" # Please specify password here
dbo.CUSTOMER
table using the newly installed Spark connector for Azure SQL:sparkconnectorDF = spark.read \ .format("com.microsoft.sqlserver.jdbc.spark") \ .option("url", url) \ .option("dbtable", table_name) \ .option("user", username) \ .option("password", password).load()
display(sparkconnectorDF.printSchema())
display(sparkconnectorDF.limit(10))
csv
files, store this in ADLS Gen-2, and mount it to DBFS. Follow the steps mentioned in the Reading and writing data from and to ADLS Gen2 recipe to learn how to mount ADLS Gen-2 Storage Account to DBFS:#Creating a schema which can be passed while creating the DataFrame cust_schema = StructType([ StructField("C_CUSTKEY", IntegerType()), StructField("C_NAME", StringType()), StructField("C_ADDRESS", StringType()), StructField("C_NATIONKEY", ShortType()), StructField("C_PHONE", StringType()), StructField("C_ACCTBAL", DecimalType(18,2)), StructField("C_MKTSEGMENT", StringType()), StructField("C_COMMENT", StringType()) ])
csv
files in a DataFrame by running the following code:df_cust= spark.read.format("csv").option("header",True).schema(cust_schema).load("dbfs:/mnt/Gen2/Customer/csvFiles")
append
method:#Appending records to the existing table try: df_cust.write \ .format("com.microsoft.sqlserver.jdbc.spark") \ .mode("append") \ .option("url", url) \ .option("dbtable", tableName) \ .option("user", userName) \ .option("password", password) \ .save() except ValueError as error : print("Connector write failed", error)
try: df_cust.write \ .format("com.microsoft.sqlserver.jdbc.spark") \ .mode("overwrite") \ .option("truncate",True) \ .option("url", url) \ .option("dbtable", tableName) \ .option("user", userName) \ .option("password", password) \ .save() except ValueError as error : print("Connector write failed", error)
#Read the data from the table sparkconnectorDF = spark.read \ .format("com.microsoft.sqlserver.jdbc.spark") \ .option("url", url) \ .option("dbtable", table_name) \ .option("user", username) \ .option("password", password).load()
The Apache Spark connector works the latest version of Spark 2.4.x and Spark 3.0.x. It can be used for both SQL Server and Azure SQL Database and is customized for SQL Server and Azure SQL Database for performing big data analytics efficiently. The following document outlines the benefits of using the Spark connector and provides a performance comparison between the JDBC connector and the Spark connector:
https://docs.microsoft.com/en-us/sql/connect/spark/connector?view=sql-server-ver15
To overwrite the data using the Spark connector, we are in overwrite
mode, which will drop and recreate the table with the scheme based on the source DataFrame schema, and none of the indexes that were present on that table will be added after the table is recreated. If we want to recreate the indexes with overwrite
mode, then we need to include the True
option (truncate
). This option will ensure that after a table is dropped and created, the required index will be created as well.
Just to append data to an existing table, we will use append
mode, whereby the existing table will not be dropped or recreated. If the table is not found, it throws an error. This option is used when we are just inserting data into a raw table. If it's a staging table where we want to truncate before load, then we need to use overwrite mode with the truncate
option.
In this recipe, you will learn how to read and write data to Azure Synapse Analytics using Azure Databricks.
Azure Synapse Analytics is a data warehouse hosted in the cloud that leverages massively parallel processing (MPP) to run complex queries across large volumes of data.
Azure Synapse can be accessed from Databricks using the Azure Synapse connector. DataFrames can be directly loaded as a table in a Synapse Spark pool. Azure Blob storage is used as temporary storage to upload data between Azure Databricks and Azure Synapse with the Azure Synapse connector.
You will need to ensure you have the following items before starting to work on this recipe:
https://docs.microsoft.com/en-in/azure/synapse-analytics/get-started-create-workspace
CREATE MASTER KEY
csvFiles
that was used in the Reading and writing data from and to Azure Blob recipe. You can follow the steps by running the steps in the 2_5.Reading and Writing Data from and to Azure Synapse.ipynb
notebook in your local cloned repository in the Chapter02
folder.
Upload the csvFiles
folder in the Chapter02/Customer
folder to the ADLS Gen2 account in the rawdata
file system. We have mounted the rawdata
container as /mnt/Gen2Source
.
In this section, you will see the steps for reading data from an ADLS Gen2 storage account and writing data to Azure Synapse Analytics using the Azure Synapse connector:
storageAccount="teststoragegen2" mountpoint = "/mnt/Gen2Source" storageEndPoint ="abfss://rawdata@{}.dfs.core.windows.net/".format(storageAccount) print ('Mount Point ='+mountpoint) #ClientId, TenantId and Secret is for the Application(ADLSGen2App) was have created as part of this recipe clientID ="xxx-xxx-xx-xxx" tenantID ="xx-xxx-xxx-xxx" clientSecret ="xx-xxx-xxx-xxx" oauth2Endpoint = "https://login.microsoftonline.com/{}/oauth2/token".format(tenantID) configs = {"fs.azure.account.auth.type": "OAuth", "fs.azure.account.oauth.provider.type": "org.apache.hadoop.fs.azurebfs.oauth2.ClientCredsTokenProvider", "fs.azure.account.oauth2.client.id": clientID, "fs.azure.account.oauth2.client.secret": clientSecret, "fs.azure.account.oauth2.client.endpoint": oauth2Endpoint} dbutils.fs.mount( source = storageEndPoint, mount_point = mountpoint, extra_configs = configs)
csv
files in the ADLS Gen-2 account:display(dbutils.fs.ls("/mnt/Gen2Source/Customer/csvFiles "))
blobStorage = "stgcccookbook.blob.core.windows.net" blobContainer = "synapse" blobAccessKey = "xxxxxxxxxxxxxxxxxxxxxxxxx"
tempDir = "wasbs://" + blobContainer + "@" + blobStorage +"/tempDirs"
acntInfo = "fs.azure.account.key."+ blobStorage spark.conf.set( acntInfo, blobAccessKey)
csv
files in the ADLS Gen-2 Storage Account:customerDF = spark.read.format("csv").option("header",True).option("inferSchema", True).load("dbfs:/mnt/Gen2Source/Customer/csvFiles")
# We have changed trustServerCertificate=true from trustServerCertificate=false. In certain cases, you might get errors like ''' The driver could not establish a secure connection to SQL Server by using Secure Sockets Layer (SSL) encryption. Error: "Failed to validate the server name in a certificate during Secure Sockets Layer (SSL) initialization.". ClientConnectionId:sadasd-asds-asdasd [ErrorCode = 0] [SQLState = 08S ''' sqlDwUrl="jdbc:sqlserver://synapsetestdemoworkspace.sql.azuresynapse.net:1433;database=sqldwpool1;user=sqladminuser@synapsetestdemoworkspace;password=xxxxxxx;encrypt=true;trustServerCertificate=true;hostNameInCertificate=*.sql.azuresynapse.net;loginTimeout=30;" db_table = "dbo.customer"
customerDF
DataFrame as a table into Azure Synapse Dedicated SQL Pool. This creates a table named CustomerTable
in the SQL database. You can query the table using SQL Server Management Studio (SSMS) or from Synapse Studio. This is the default save mode where when writing a DataFrame to Dedicated SQL Pool, if table already exists then an exception is thrown else it will create a table and populated the data in the table:customerDF.write \ .format("com.databricks.spark.sqldw")\ .option("url", sqlDwUrl)\ .option("forwardSparkAzureStorageCredentials", "true")\ .option("dbTable", db_table)\ .option("tempDir", tempDir)\ .save()
CustomerTable
table:dbo.Customer
table.# This code is writing to data into SQL Pool with append save option. In append save option data is appended to existing table. customerDF.write \ .format("com.databricks.spark.sqldw")\ .option("url", sqlDwUrl)\ .option("forwardSparkAzureStorageCredentials", "true")\ .option("dbTable", db_table)\ .option("tempDir", tempDir)\ .mode("append")\ .save()
dbo.Customer
table.customerDF.write \ .format("com.databricks.spark.sqldw")\ .option("url", sqlDwUrl)\ .option("forwardSparkAzureStorageCredentials", "true")\ .option("dbTable", db_table)\ .option("tempDir", tempDir)\ .mode("overwrite")\ .save()
customerTabledf = spark.read \ .format("com.databricks.spark.sqldw") \ .option("url", sqlDwUrl) \ .option("tempDir", tempDir) \ .option("forwardSparkAzureStorageCredentials", "true") \ .option("dbTable", db_table) \ .load()
customerTabledf.show()
option("query",query)
to run a query on the database.query= " select C_MKTSEGMENT, count(*) as Cnt from [dbo].[customer] group by C_MKTSEGMENT" df_query = spark.read \ .format("com.databricks.spark.sqldw") \ .option("url", sqlDwUrl) \ .option("tempDir", tempDir) \ .option("forwardSparkAzureStorageCredentials", "true") \ .option("query", query) \ .load()
display(df_query.limit(5))
By the end of this recipe, you have learnt how to read and write data from and to Synapse Dedicated SQL Pool using the Azure Synapse Connector from Azure Databricks.
In Azure Synapse, data loading and unloading operations are performed by PolyBase and are triggered by the Azure Synapse connector through JDBC.
For Databricks Runtime 7.0 and above, the Azure Synapse connector through JDBC uses COPY
to load data into Azure Synapse.
The Azure Synapse connector triggers Apache Spark jobs to read and write data to the Blob storage container.
We are using spark.conf.set
(acntInfo, blobAccessKey) so that Spark connects to the Storage Blob container using the built-in connectors. We can use ADLS Gen-2 as well to the store the data read from Synapse or data written to Synapse Dedicated SQL Pool.
Spark connects to Synapse using the JDBC drivers with username and password. Azure Synapse connects to Azure Storage Blob account using account key and it can use Managed Service Identity as well to connect.
Following is the JDBC connection string used in the Notebook. In this case we have changed trustServerCertificate value to true
from false
(which is default value) and by doing so, Microsoft JDBC Driver for SQL Server won't validate the SQL Server TLS certificate. This change must be done only in test environments and not in production.
sqlDwUrl="jdbc:sqlserver://synapsetestdemoworkspace.sql.azuresynapse.net:1433;database=sqldwpool1;user=sqladminuser@synapsetestdemoworkspace;password=xxxxxxx;encrypt=true;trustServerCertificate=true;hostNameInCertificate=*.sql.azuresynapse.net;loginTimeout=30;"
If you are not creating the Master Key in the Synapse Dedicated SQL Pool you will be getting the following error while reading the data from the Dedicated SQL Pool from Azure Databricks Notebook.
Underlying SQLException(s): - com.microsoft.sqlserver.jdbc.SQLServerException: Please create a master key in the database or open the master key in the session before performing this operation. [ErrorCode = 15581] [SQLState = S0006]
When you are writing the data to Dedicated SQL Pools you will see the following messages while code is getting executed n the Notebook.
Waiting for Azure Synapse Analytics to load intermediate data from wasbs://synapse@stgacccookbook.blob.core.windows.net/tempDirs/2021-08-07/04-19-43-514/cb6dd9a2-da6b-4748-a34d-0961d2df981f/ into "dbo"."customer" using COPY.
Spark is writing the csv
files to the common Blob Storage as parquet files and then Synapse uses COPY
statement to load the parquet files to the final tables. You can check in Blob Storage Account, and you will find the parquet files created. When you look at the DAG for the execution (you will learn more about DAG in upcoming recipes) you will find that Spark is reading the CSV files and writing to Blob Storage as parquet format.
When you are reading data from Synapse Dedicated SQL Pool tables you will see the following messages in the Notebook while the code is getting executed.
Waiting for Azure Synapse Analytics to unload intermediate data under wasbs://synapse@stgacccookbook.blob.core.windows.net/tempDirs/2021-08-07/04-24-56-781/esds43c1-bc9e-4dc4-bc07-c4368d20c467/ using Polybase
Azure Synapse is writing the data from Dedicated SQL Pool to common Blob storage as parquet files first with snappy compression and then its is read by Spark and displayed to the end user when customerTabledf.show()
is executed.
We are setting up the account key and secret for the common Blob Storage in the session configuration associated with the Notebook using spark.conf.set
and setting the value forwardSparkAzureStorageCredentials as true
. By setting the value as true
, Azure Synapse connector will forward the Storage Account access key to the Azure Synapse Dedicated Pool by creating a temporary Azure Database Scoped Credentials.
Azure Cosmos DB is Microsoft's globally distributed multi-model database service. Azure Cosmos DB enables you to manage your data scattered around different data centers across the world and also provides a mechanism to scale data distribution patterns and computational resources. It supports multiple data models, which means it can be used for storing documents and relational, key-value, and graph models. It is more or less a NoSQL database as it doesn't have any schema. Azure Cosmos DB provides APIs for the following data models, and their software development kits (SDKs) are available in multiple languages:
The Cosmos DB Spark connector is used for accessing Azure Cosmos DB. It is used for batch and streaming data processing and as a serving layer for the required data. It supports both the Scala and Python languages. The Cosmos DB Spark connector supports the core (SQL) API of Azure Cosmos DB.
This recipe explains how to read and write data to and from Azure Cosmos DB using Azure Databricks.
You will need to ensure you have the following items before starting to work on this recipe:
You can follow the steps mentioned in the following link to create Azure Cosmos DB account from Azure Portal.
Once the Azure Cosmos DB account is created create a database with name Sales and container with name Customer and use the Partition key as /C_MKTSEGMENT
while creating the new container as shown in the following screenshot.
You can follow the steps by running the steps in the 2_6.Reading and Writing Data from and to Azure Cosmos DB.ipynb
notebook in your local cloned repository in the Chapter02
folder.
Upload the csvFiles
folder in the Chapter02/Customer
folder to the ADLS Gen2 account in the rawdata
file system.
Note
At the time of writing this recipe Cosmos DB connector for Spark 3.0 is not available.
You can download the latest Cosmos DB Spark uber-jar
file from following link. Latest one at the time of writing this recipe was 3.6.14.
https://search.maven.org/artifact/com.microsoft.azure/azure-cosmosdb-spark_2.4.0_2.11/3.6.14/jar
If you want to work with 3.6.14 version then you can download the jar
file from following GitHub URL as well.
You need to get the Endpoint and MasterKey for the Azure Cosmos DB which will be used to authenticate to Azure Cosmos DB account from Azure Databricks. To get the Endpoint and MasterKey, go to Azure Cosmos DB account and click on Keys under the Settings section and copy the values for URI and PRIMARY KEY under Read-write Keys tab.
Let's get started with this section.
The following screenshot shows the configuration of the cluster:
jar
file to install the library. This is the uber jar
file which is mentioned in the Getting ready section:csv
files in the storage account:display(dbutils.fs.ls("/mnt/Gen2/ Customer/csvFiles/"))
csv
files from mount point into a DataFrame.customerDF = spark.read.format("csv").option("header",True).option("inferSchema", True).load("dbfs:/mnt/Gen2Source/Customer/csvFiles")
Collection
is the Container that you have created in the Sales Database in Cosmos DB.writeConfig = ( "Endpoint" : "https://testcosmosdb.documents.azure.com:443/", "Masterkey" : "xxxxx-xxxx-xxx" "Database" : "Sales", "Collection" :"Customer", "preferredRegions" : "East US")
csv
files loaded in customerDF DataFrame to Cosmos DB. We are using save mode as append
.#Writing DataFrame to Cosmos DB. If the Comos DB RU's are less then it will take quite some time to write 150K records. We are using save mode as append. customerDF.write.format("com.microsoft.azure.cosmosdb.spark") \ .options(**writeConfig)\ .mode("append")\ .save()
#Writing DataFrame to Cosmos DB. If the Comos DB RU's are less then it will take quite some time to write 150K records. We are using save mode as overwrite. customerDF.write.format("com.microsoft.azure.cosmosdb.spark") \ .options(**writeConfig)\ .mode("overwrite")\ .save()
config
values by running the following code. readConfig = { "Endpoint" : "https://testcosmosdb.documents.azure.com:443/", "Masterkey" : "xxx-xxx-xxx", "Database" : "Sales", "Collection" : "Customer", "preferredRegions" : "Central US;East US2", "SamplingRatio" : "1.0", "schema_samplesize" : "1000", "query_pagesize" : "2147483647", "query_custom" : "SELECT * FROM c where c.C_MKTSEGMENT ='AUTOMOBILE'" # }
config
values, run the following code to read the data from Cosmos DB. In the query_custom
we are filtering the data for AUTOMOBILE
market segments.df_Customer = spark.read.format("com.microsoft.azure.cosmosdb.spark").options(**readConfig).load() df_Customer.count()
display(df_Customer.limit(5))
By the end of this section, you have learnt how to load and read the data into and from Cosmos DB using Azure Cosmos DB Connector for Apache Spark.
azure-cosmosdb-spark
is the official connector for Azure Cosmos DB and Apache Spark. This connector allows you to easily read to and write from Azure Cosmos DB via Apache Spark DataFrames in Python and Scala. It also allows you to easily create a lambda architecture for batch processing, stream processing, and a serving layer while being globally replicated and minimizing the latency involved in working with big data.
Azure Cosmos DB Connector is a client library that allows Azure Cosmos DB to act as an input source or output sink for Spark jobs. Fast connectivity between Apache Spark and Azure Cosmos DB provides the ability to process data in a performant way. Data can be quickly persisted and retrieved using Azure Cosmos DB with the Spark to Cosmos DB connector. This also helps to solve scenarios, including blazing fast Internet of Things (IoT) scenarios, and while performing analytics, push-down predicate filtering, and advanced analytics.
We can use query_pagesize
as a parameter to control number of documents that each query page should hold. Larger the value for query_pagesize
, lesser is the network roundtrip which is required to fetch the data and thus leading to better throughput.
Azure Databricks supports multiple file formats, including sequence files, Record Columnar files, and Optimized Row Columnar files. It also provides native support for CSV, JSON, and Parquet file formats.
Parquet is the most widely used file format in the Databricks Cloud for the following reasons:
Parquet files also support predicate push-down, column filtering, static, and dynamic partition pruning.
In this recipe, you will learn how to read from and write to CSV and Parquet files using Azure Databricks.
You can follow the steps by running the steps in the 2_7.Reading and Writing data from and to CSV, Parquet.ipynb
notebook in your local cloned repository in the Chapter02
folder.
Upload the csvFiles
folder in the Chapter02/Customer
folder to the ADLS Gen2 storage account in the rawdata
file system and in Customer/csvFiles
folder.
Here are the steps and code samples for reading from and writing to CSV and Parquet files using Azure Databricks. You will find a separate section for processing CSV and Parquet file formats.
Go through the following steps for reading CSV files and saving data in CSV format.
#Listing CSV Files dbutils.fs.ls("/mnt/Gen2Source/Customer/csvFiles")
csv
files in the ADLS Gen2 storage account by running the following code:customerDF = spark.read.format("csv").option("header",True).option("inferSchema", True).load("/mnt/Gen2Source/Customer/csvFiles")
customerDF.show()
customerDF
DataFrame data to the location /mnt/Gen2Source/Customer/WriteCsvFiles
in CSV format. customerDF.write.mode("overwrite").option("header", "true").csv("/mnt/Gen2Source/Customer/WriteCsvFiles")
csv
format, let's read the csv
files from target
folder by running the following code.targetDF = spark.read.format("csv").option("header",True).option("inferSchema", True).load("/mnt/Gen2Source/Customer/WriteCsvFiles") targetDF.show()
In the following section we will learn how to read data from and write data to parquet files.
parquet
format by running the following code. We are using save mode as overwrite
in the following code. Using overwrite
save option, existing data is overwritten in the target or destination folder mentioned.#Writing the targetDF data which has the CSV data read as parquet File using append mode targetDF.write.mode("overwrite").option("header", "true").parquet("/mnt/Gen2Source/Customer/csvasParquetFiles/")
csvasParquetFiles
folder to confirm the data in parquet format:df_parquetfiles=spark.read.format("parquet").option("header",True).load("/mnt/Gen2Source/Customer/csvasParquetFiles/") display(df_parquetfiles.limit(5))
overwrite
to append
by running the following code. Using save mode as append
, new data will be inserted, and existing data is preserved in the target or destination folder:#Using overwrite as option for save mode targetDF.write.mode("append").option("header", "true").parquet("/mnt/Gen2Source/Customer/csvasParquetFiles/")
df_parquetfiles=spark.read.format("parquet").option("header",True).load("/mnt/Gen2Source/Customer/csvasParquetFiles/") df_parquetfiles.count()
By the end of this recipe, you have learnt how to read from and write to CSV and Parquet files.
The CSV file format is a widely used format by many tools, and it's also a default format for processing data. There are many disadvantages when you compare it in terms of cost, query processing time, and size of the data files. The CSV format is not that effective compared with what you will find in the Parquet file format. Also, it doesn't support partition pruning, which directly impacts the cost of storing and processing data in CSV format.
Conversely, Parquet is a columnar format that supports compression and partition pruning. It is widely used for processing data in big data projects for both reading and writing data. A Parquet file stores data and metadata, which makes it self-describing.
Parquet also supports schema evolution, which means you can change the schema of the data as required. This helps in developing systems that can accommodate changes in the schema as it matures. In such cases, you may end up with multiple Parquet files that have different schemas but are compatible.
Spark SQL automatically detects the JSON dataset schema from the files and loads it as a DataFrame. It also provides an option to query JSON data for reading and writing data. Nested JSON can also be parsed, and fields can be directly accessed without any explicit transformations.
You can follow the steps by running the steps in the 2_8.Reading and Writing data from and to Json including nested json.iynpb
notebook in your local cloned repository in the Chapter02
folder.
Upload the folder JsonData
from Chapter02/sensordata
folder to ADLS Gen-2 account having sensordata
as file system . We are mounting ADLS Gen-2 Storage Account with sensordata file system to /mnt/SensorData
.
The JsonData
has two folders, SimpleJsonData
which has files simple JSON structure and JsonData
folder which has files with nested JSON structure.
Note
The code was tested on Databricks Runtime Version 7.3 LTS having Spark 3.0.1.
In the upcoming section we will learn how to process simple and complex JSON datafile. We will use sensordata files with simple and nested schema.
In this section, you will see how you can read and write the simple JSON data files:
df_json = spark.read.option("multiline","true").json("/mnt/SensorData/JsonData/SimpleJsonData/") display(df_json)
multilinejsondf.write.format("json").mode("overwrite).save("/mnt/SensorData/JsonData/SimpleJsonData/")
Very often, you will come across scenarios where you need to process complex datatypes such as arrays, maps, and structs while processing data.
To encode a struct type as a string and to read the struct type as a complex type, Spark provides functions such as to_json()
and from_json()
. If you are receiving data from the streaming source in nested JSON format, then you can use the from_json()
function to process the input data before sending it downstream.
Similarly you can use to_json()
method to encode or convert columns in DataFrame to JSON string and send the dataset to various destination like EventHub, Data Lake storage, Cosmos database, RDBMS systems like SQL server, Oracle etc. You can follow along the steps required to process simple and nested Json in the following steps.
df_json = spark.read.option("multiline","true").json("dbfs:/mnt/SensorData/JsonData/")
explode()
function. Execute the following command for performing this operation. Here you can see using explode()
function the elements of Array has been converted into two columns named name and phone.to_json()
method can be used. In this example we will create new DataFrame with json
column from the existing DataFrame data_df
in preceding step. Execute the following code to create the new DataFrame with json
column.jsonDF = data_df.withColumn("jsonCol", to_json(struct([data_df[x] for x in data_df.columns]))) .select("jsonCol") display(jsonDF)
jsonCol
.to_json()
method you have converted _id
, name
and phone
column
to a new json
column.Spark provides you with options to process data from multiple sources and in multiple formats. You can process the data and enrich it before sending it to downstream applications. Data can be sent to a downstream application with low latency on streaming data or high throughput on historical data.
Where there is an eBook version of a title available, you can buy it from the book details for that title. Add either the standalone eBook or the eBook and print book bundle to your shopping cart. Your eBook will show in your cart as a product on its own. After completing checkout and payment in the normal way, you will receive your receipt on the screen containing a link to a personalised PDF download file. This link will remain active for 30 days. You can download backup copies of the file by logging in to your account at any time.
If you already have Adobe reader installed, then clicking on the link will download and open the PDF file directly. If you don't, then save the PDF file on your machine and download the Reader to view it.
Please Note: Packt eBooks are non-returnable and non-refundable.
Packt eBook and Licensing When you buy an eBook from Packt Publishing, completing your purchase means you accept the terms of our licence agreement. Please read the full text of the agreement. In it we have tried to balance the need for the ebook to be usable for you the reader with our needs to protect the rights of us as Publishers and of our authors. In summary, the agreement says:
If you want to purchase a video course, eBook or Bundle (Print+eBook) please follow below steps:
Our eBooks are currently available in a variety of formats such as PDF and ePubs. In the future, this may well change with trends and development in technology, but please note that our PDFs are not Adobe eBook Reader format, which has greater restrictions on security.
You will need to use Adobe Reader v9 or later in order to read Packt's PDF eBooks.
Packt eBooks are a complete electronic version of the print edition, available in PDF and ePub formats. Every piece of content down to the page numbering is the same. Because we save the costs of printing and shipping the book to you, we are able to offer eBooks at a lower cost than print editions.
When you have purchased an eBook, simply login to your account and click on the link in Your Download Area. We recommend you saving the file to your hard drive before opening it.
For optimal viewing of our eBooks, we recommend you download and install the free Adobe Reader version 9.