


Setting up Wi-Fi on the Raspberry Pi and enabling SSH
We’ve selected an image and storage but have not yet written it to the SD card. The Raspberry Pi Imager lets us configure more before we do so:
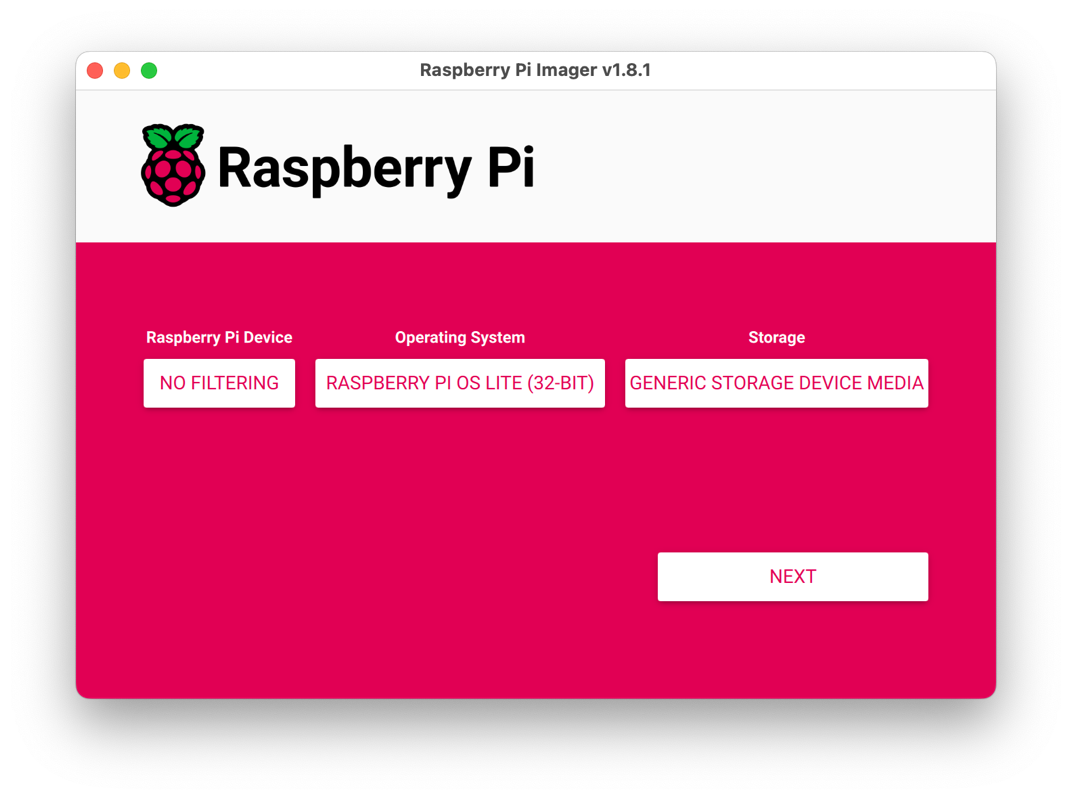
The preceding screenshot shows the Raspberry Pi Imager, with the OS and storage chosen. There is now a NEXT button illuminated at the bottom right. Click NEXT to start configuring Wi-Fi and SSH. The following screen will appear:
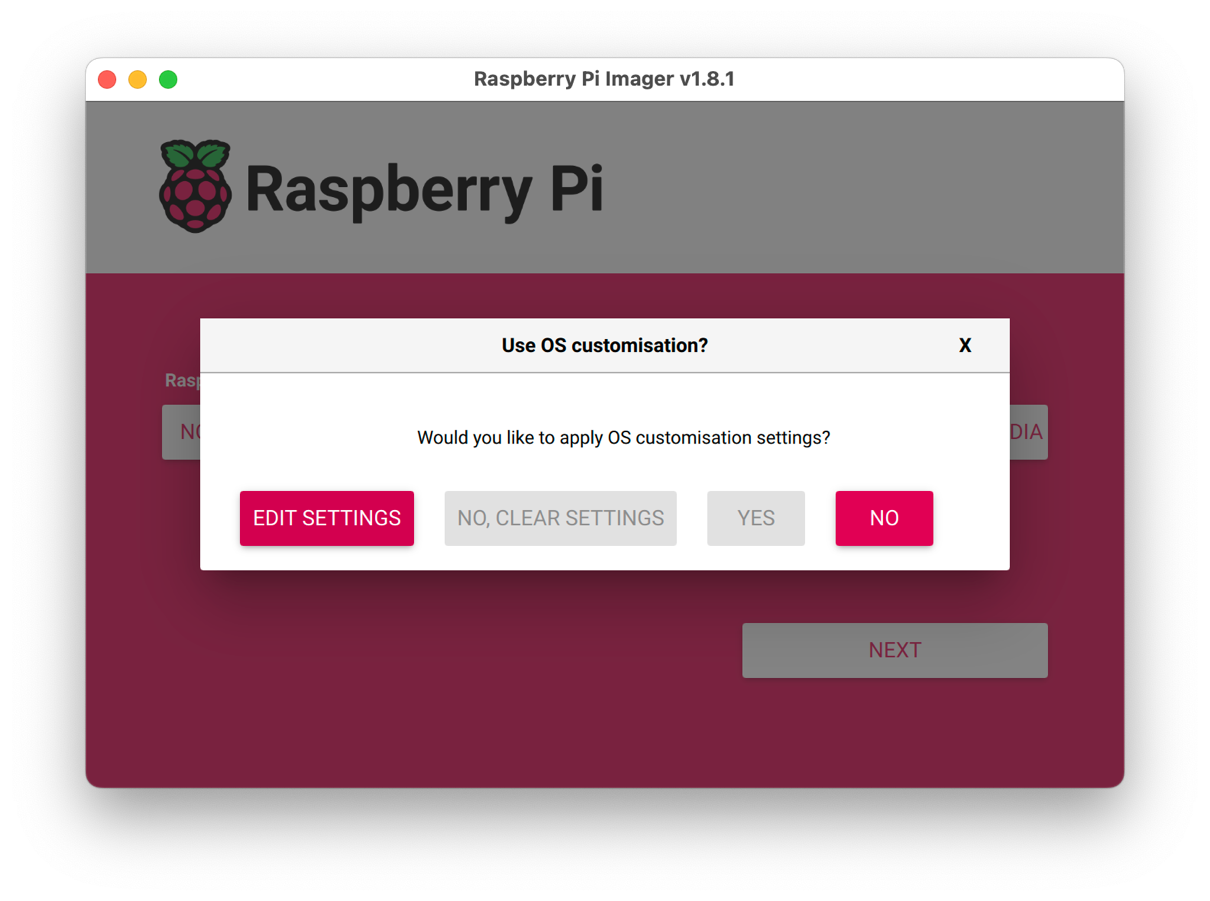
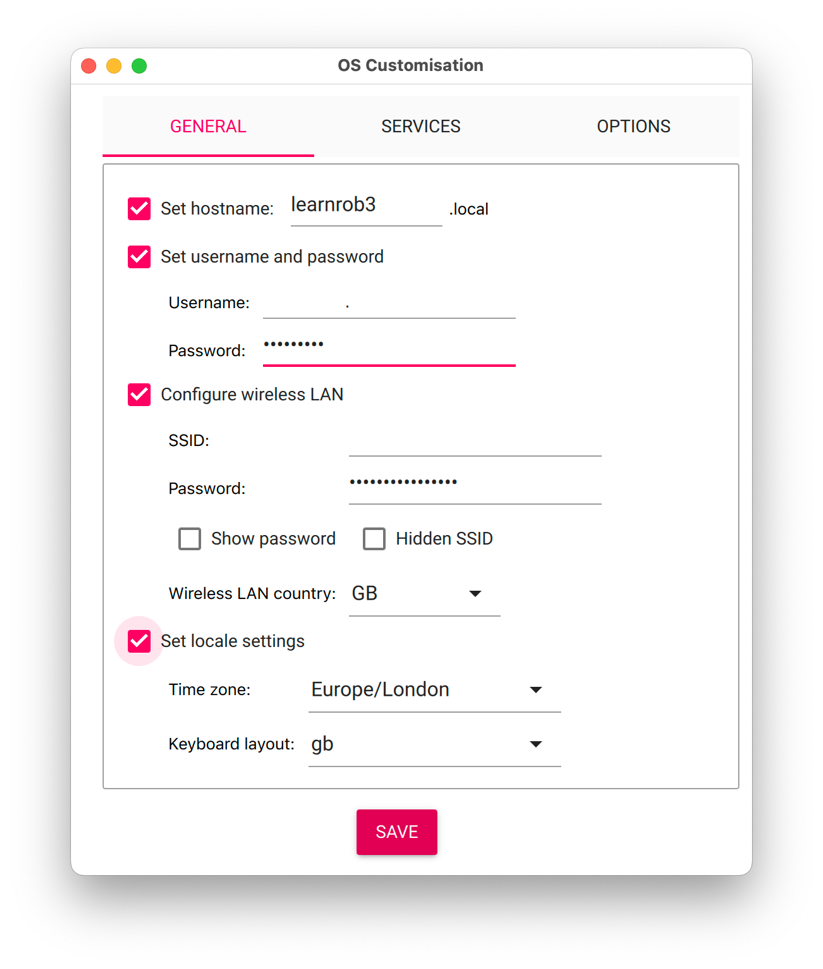
This screen asks if you want to customize your image by applying OS customisation settings. We will use these to connect our Raspberry Pi to Wi-Fi and SSH. Select EDIT SETTINGS to make the customizations.It may ask if you would like to prefill the wifi password. If so, click Yes, and then you can skip that part later.The following advanced settings screen should appear:
The preceding screenshot shows the...


