


So, you want to get into iOS development? I was in your shoes on January 27th, 2010, when Apple first announced the iPad. Literally as soon as the conference was over, I knew that I wanted to learn how to create apps for the iPad. I signed up to the Apple Developer website and paid my $99 annual fee. But then, I realized that I did not know where to begin. A large variety of instructional books or videos did not exist, especially since the iPad had not yet been released. I had previous programming experience; however, I had no idea how to write Objective-C (the original programming language for iOS). Therefore, I had to teach myself the basics. In this book, we will learn what it takes to become an iOS developer together.
If you are new to programming, take your time. You should understand the lessons in one chapter before moving on to the next chapter. These important skills will set you up with a solid foundation in iOS development. If you have previous programming experience, you should still review the earlier chapters, as they will be a refresher for you.
Throughout this book, we will work in Xcode, specifically Xcode 9 (and Swift 4, which we will tackle later in the book). Xcode is known as an Integrated Development Environment (IDE). Using Xcode gives us everything we will need in order to build apps for iOS, tvOS, macOS (formerly, OS X), and watchOS. In this chapter, we will explore Xcode in order to help you get more comfortable using it. If you are not on Xcode 9, make sure to update Xcode, as the code in this book will not run properly otherwise.
Our focus in this book will be on creating a universal iOS app (an app for both the iPhone and iPad). The best way to do this is to create a project to familiarize yourself with where everything is and how to find what you need. So, let's first download and install Xcode.
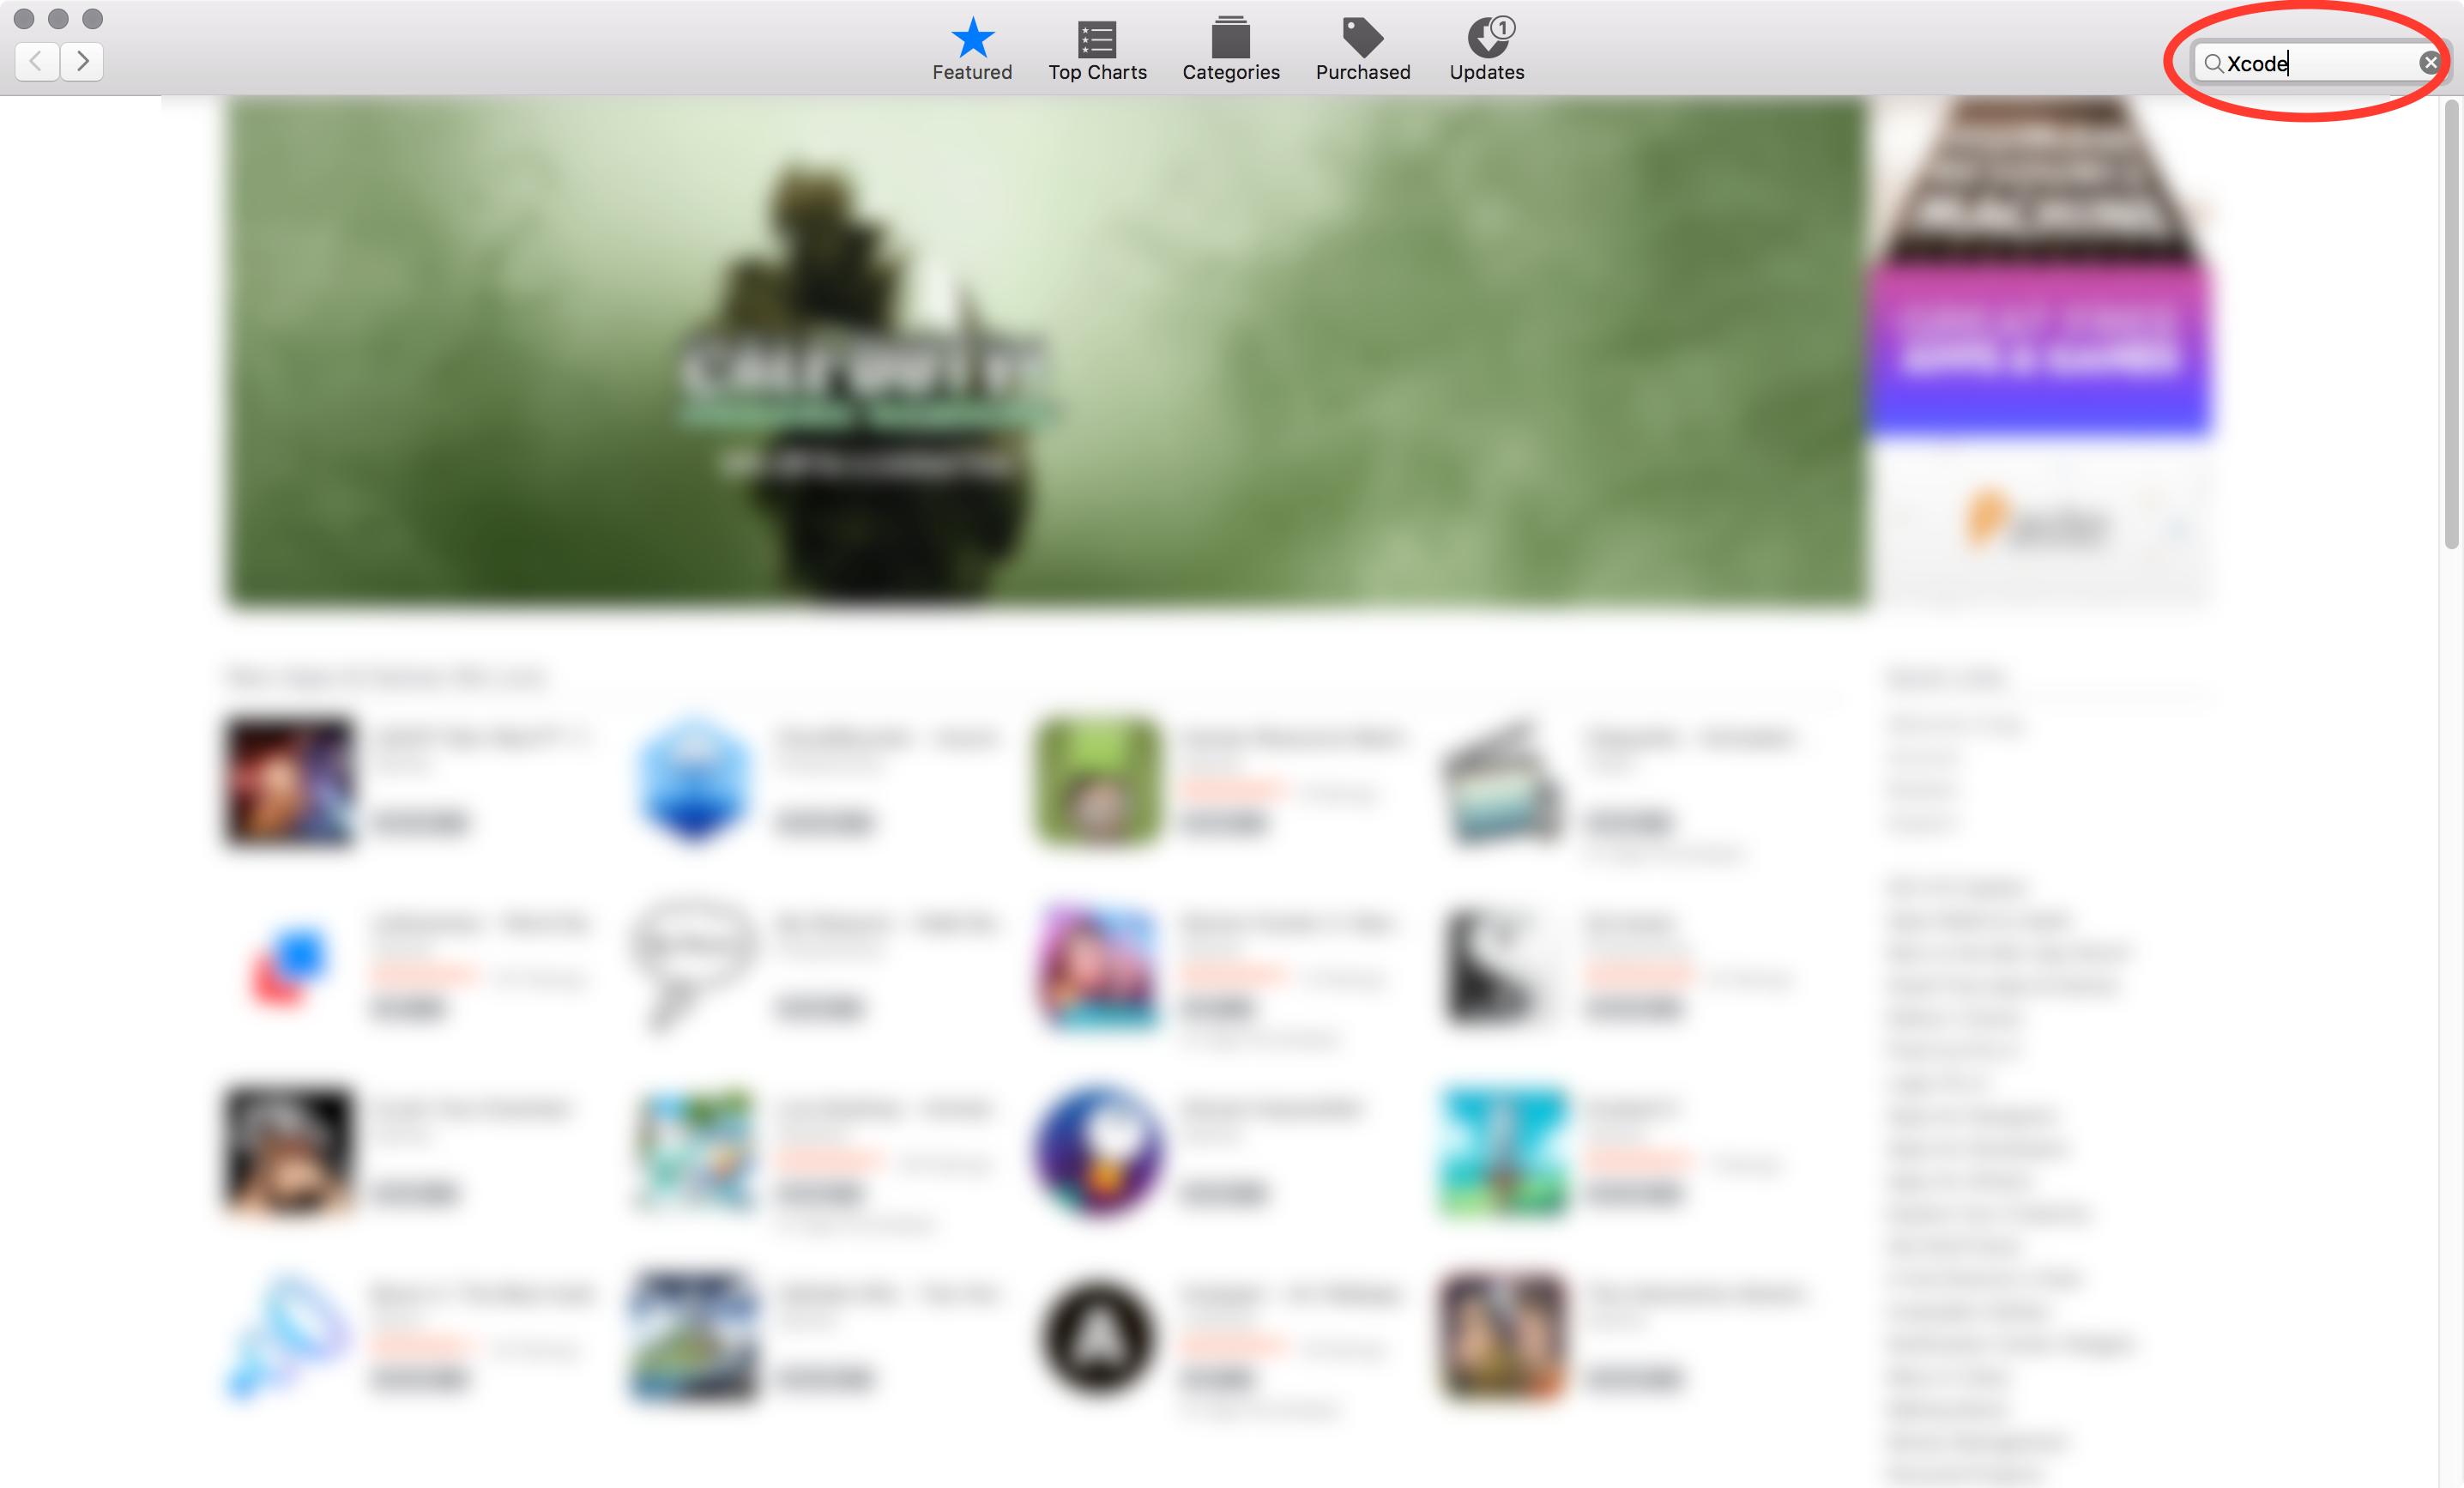
In order to download Xcode, launch the App Store on your Mac and then type Xcode into the search bar in the upper-right corner:
Note
For better quality of images, download the graphics bundle from https://www.packtpub.com/sites/default/files/downloads/LearniOS11ProgrammingwithSwift4SecondEdition_ColorImages.pdf.
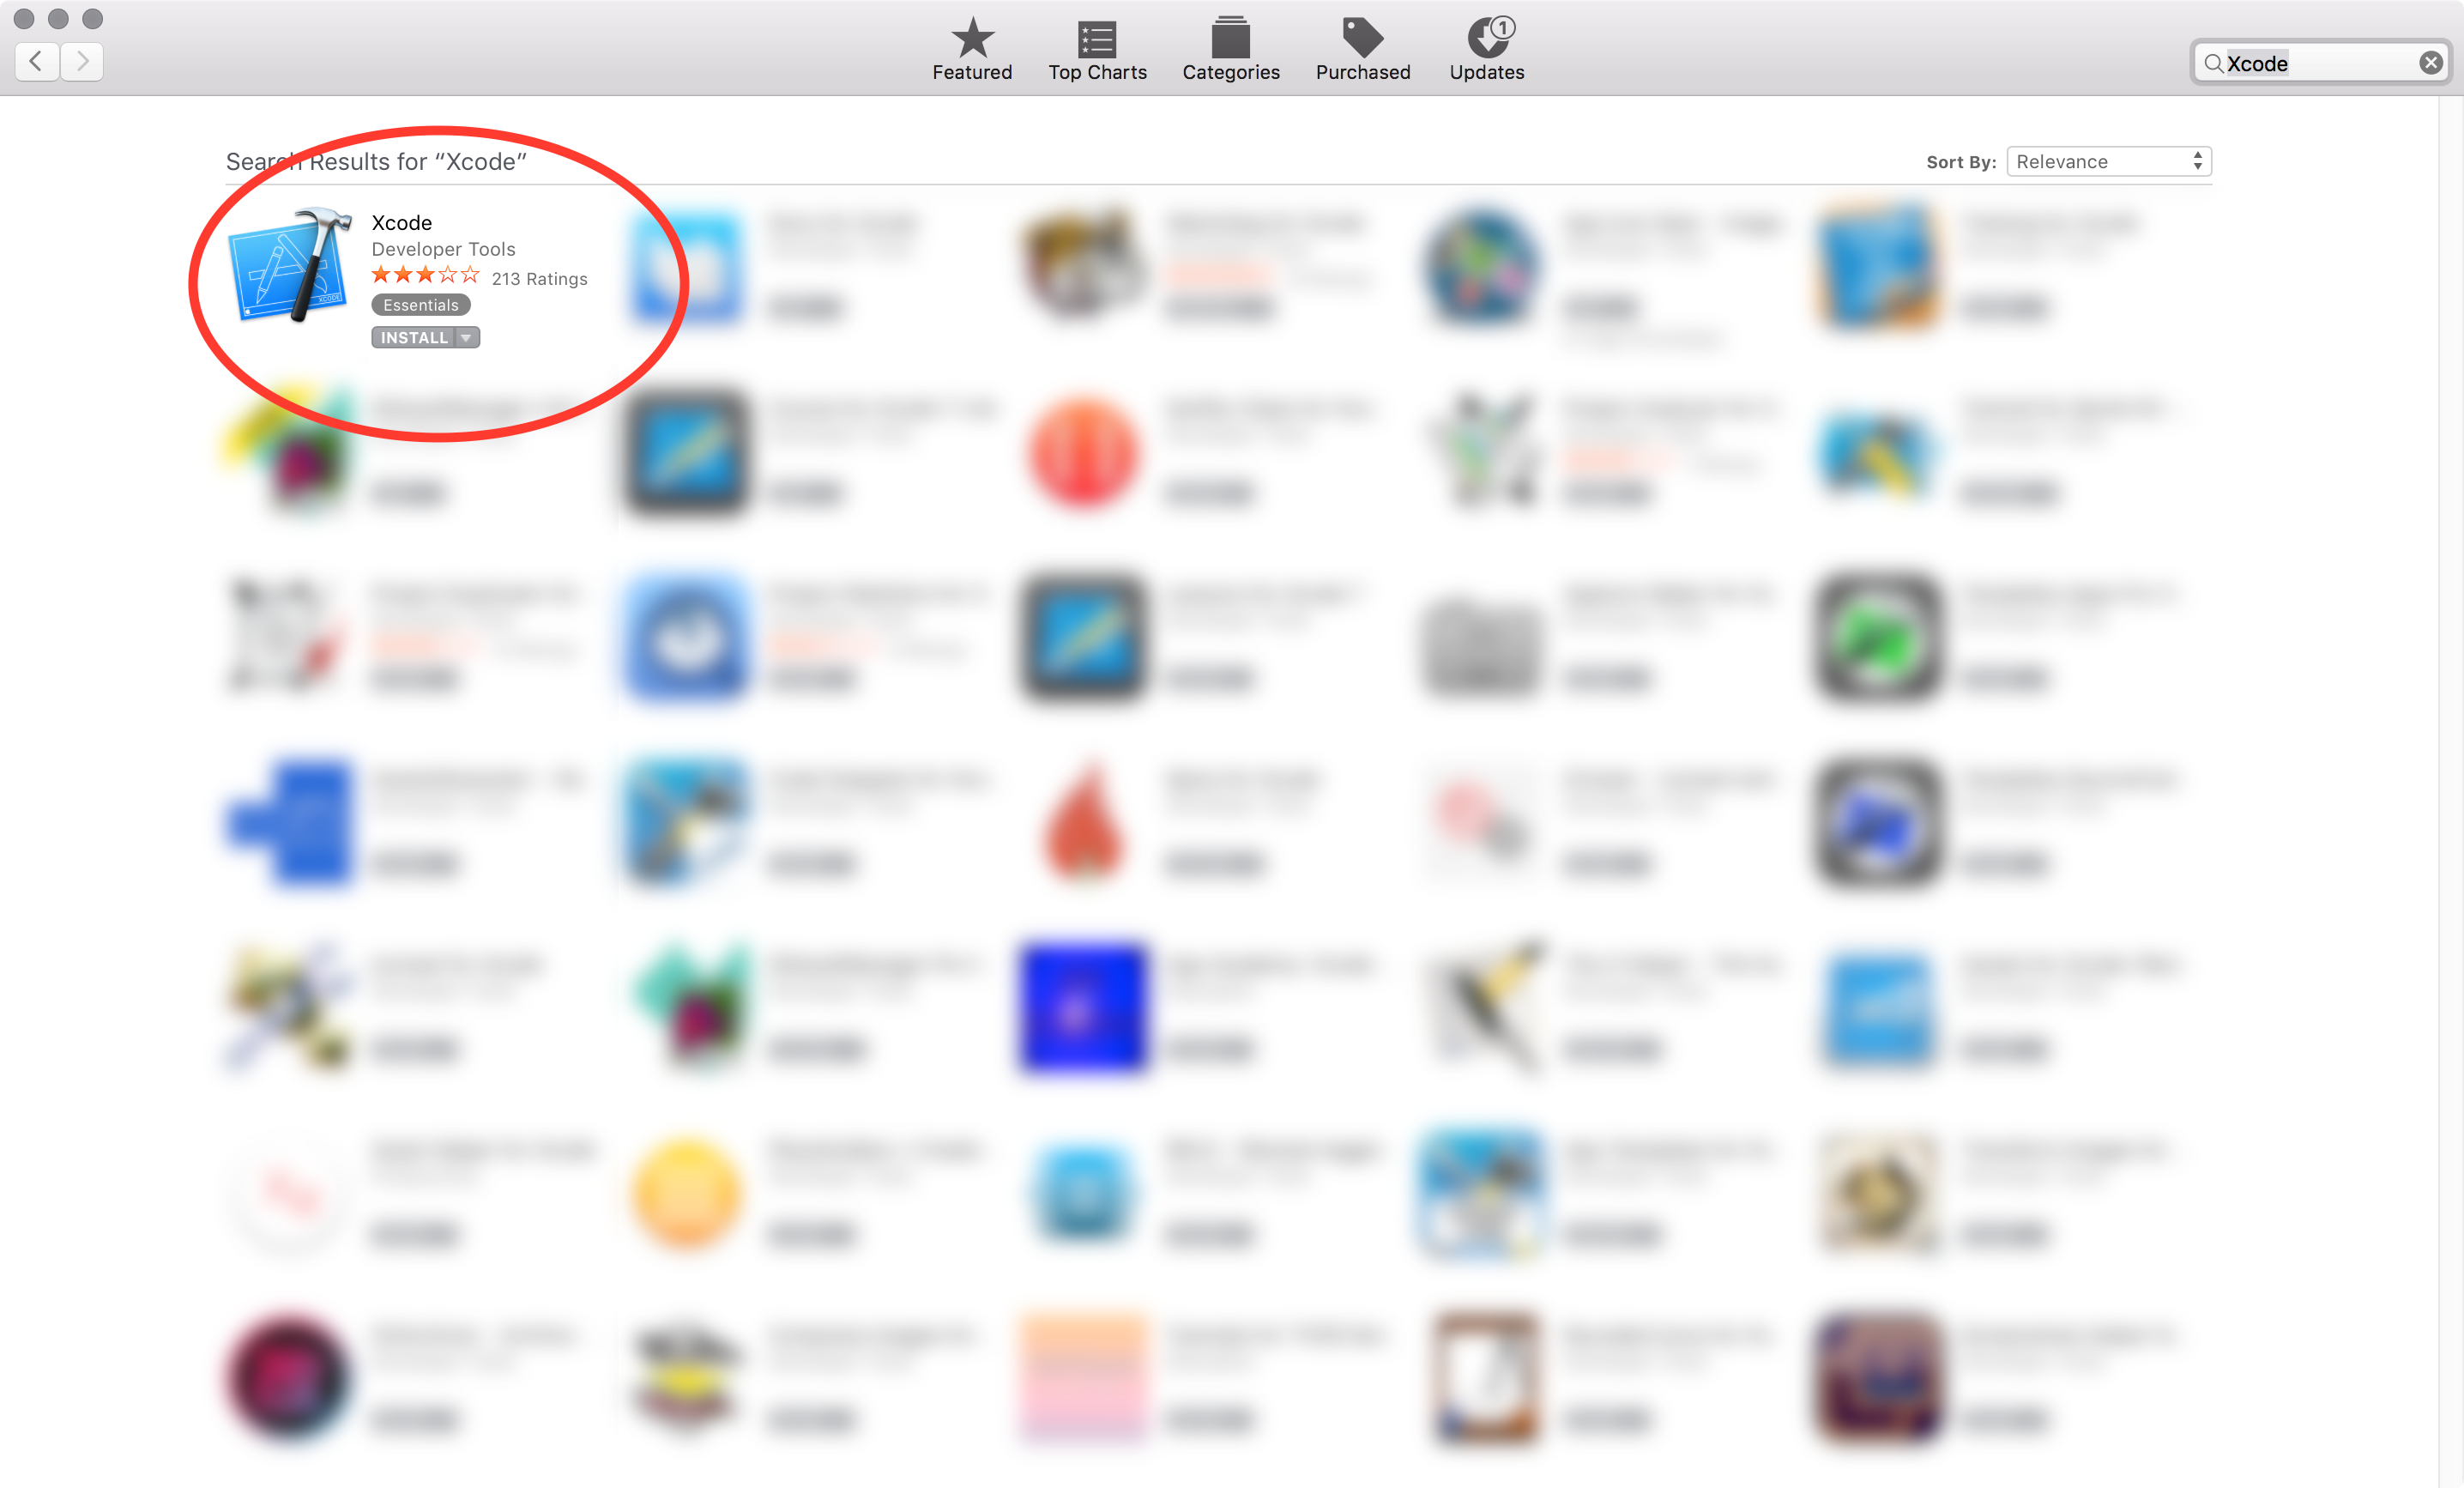
Next, click on INSTALL:
Once installed, launch Xcode and you should see the following Welcome to Xcode screen:
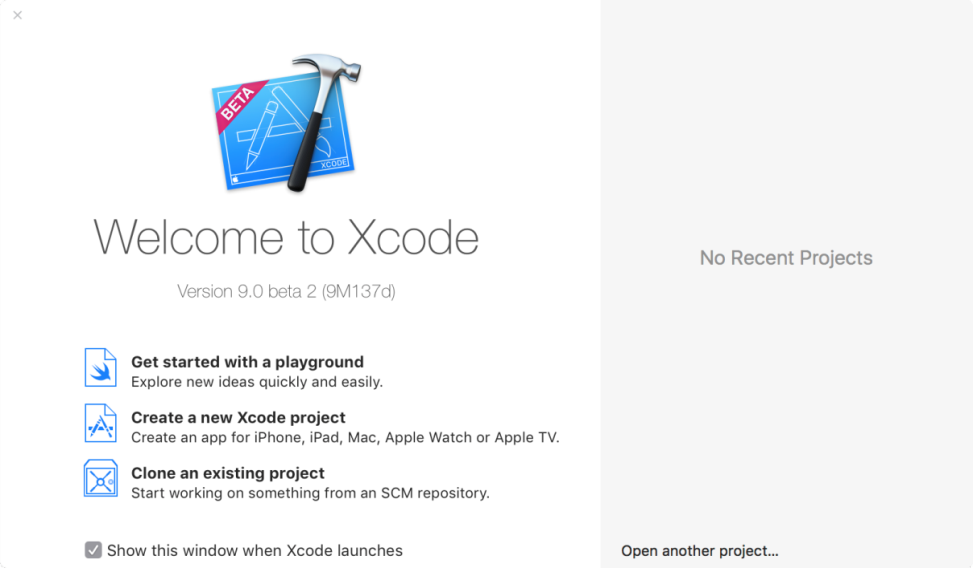
If this is the first time you have launched Xcode, then you will see No Recent Projects in the right panel. If you have previously created projects, then you will see those listed to the right. To get started, we are going to click on Create a new Xcode project in the left panel of the welcome screen. This will take us to the new project screen:
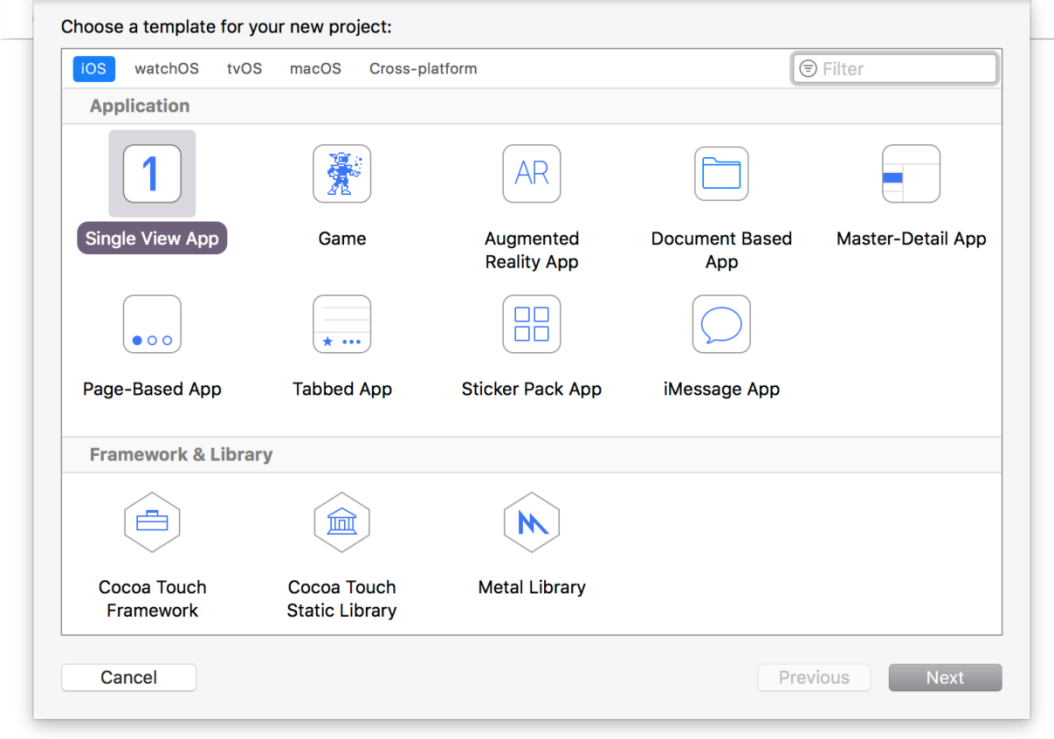
Across the top of this screen, you can select one of the following items: iOS, watchOS, tvOS, macOS, and Cross-platform. Since we are creating apps for iOS, make sure that you have iOS selected. Then, select Single View App and click on Next. Now, you will see an options screen for a new project:
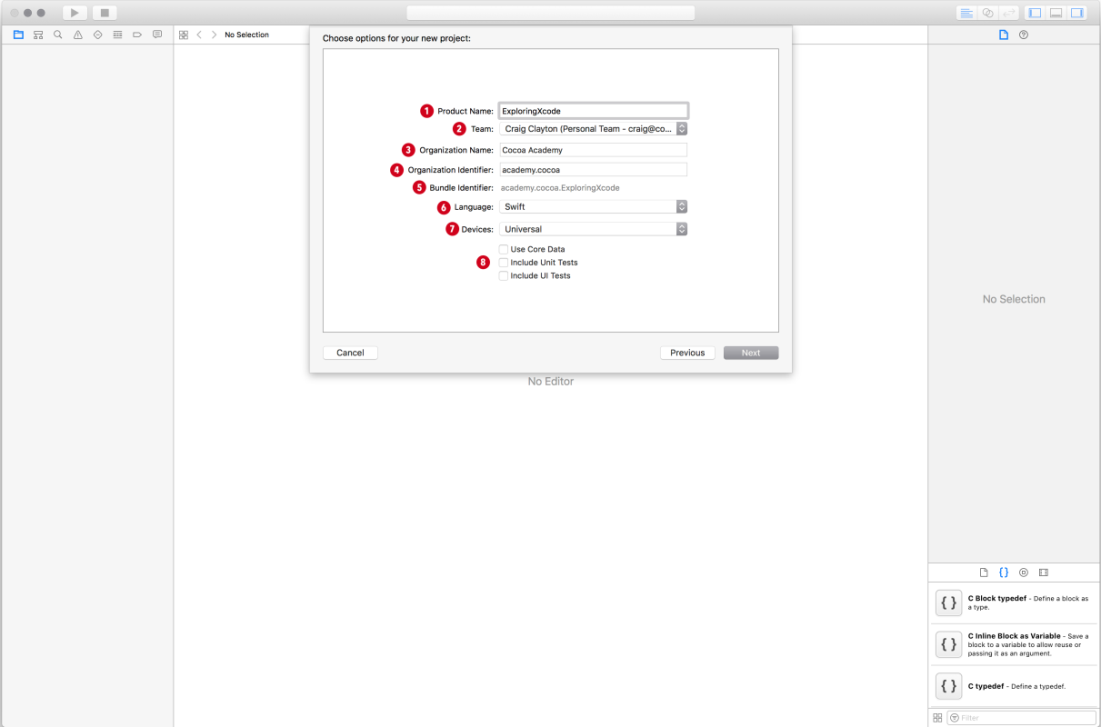
This option screen has the following seven items to complete or choose:
ProductName: The product name is your app. We are going to set ours asExploringXcode.Team: The team is connected to your Apple account. We are going to ignore this for now, because it is not needed for this chapter. If you have a team set up, just leave it as is. We will cover this in greater detail later in the book.OrganizationName: You can set the organization name to your company name or just your name.
Organizer Identifier: You will set the organizer identifier to be your domain name in reverse. For example, my website URL iscocoa.academy, and therefore, my identifier isacademy.cocoa. Since URLs are unique, it will ensure that no one else will have your identifier. If you do not have a domain, then just use your first and last name for now. You will eventually have to purchase a domain if you want to submit your app to the Apple Store.Bundle Identifier: When you create a new project, Apple will combine yourProduct Namewith yourOrganizer Identifierto create your unique bundle identifier. So, even if 10,000 people create this project, each person will have a different bundle identifier.Language: Make sure your language is set to Swift.Checkboxes: You can uncheckUse Core Data,Include Unit Tests, andInclude UI Tests, as these are things we will not be using in this chapter.
Now, select Next, and Xcode will prompt us to save our project. I have a dedicated folder for all my projects, but you can save it on your desktop for easy access.
Your project is now open and it is time for us to get familiar with all of the panels. If this is your first time in Xcode, then it will probably be a bit overwhelming for you. Therefore, we will break it down into five parts:
- NAVIGATOR PANEL
- STANDARD EDITOR
- UTILITIES PANEL
- DEBUG PANEL
- TOOLBAR
- WINDOW PANE CONTROLS
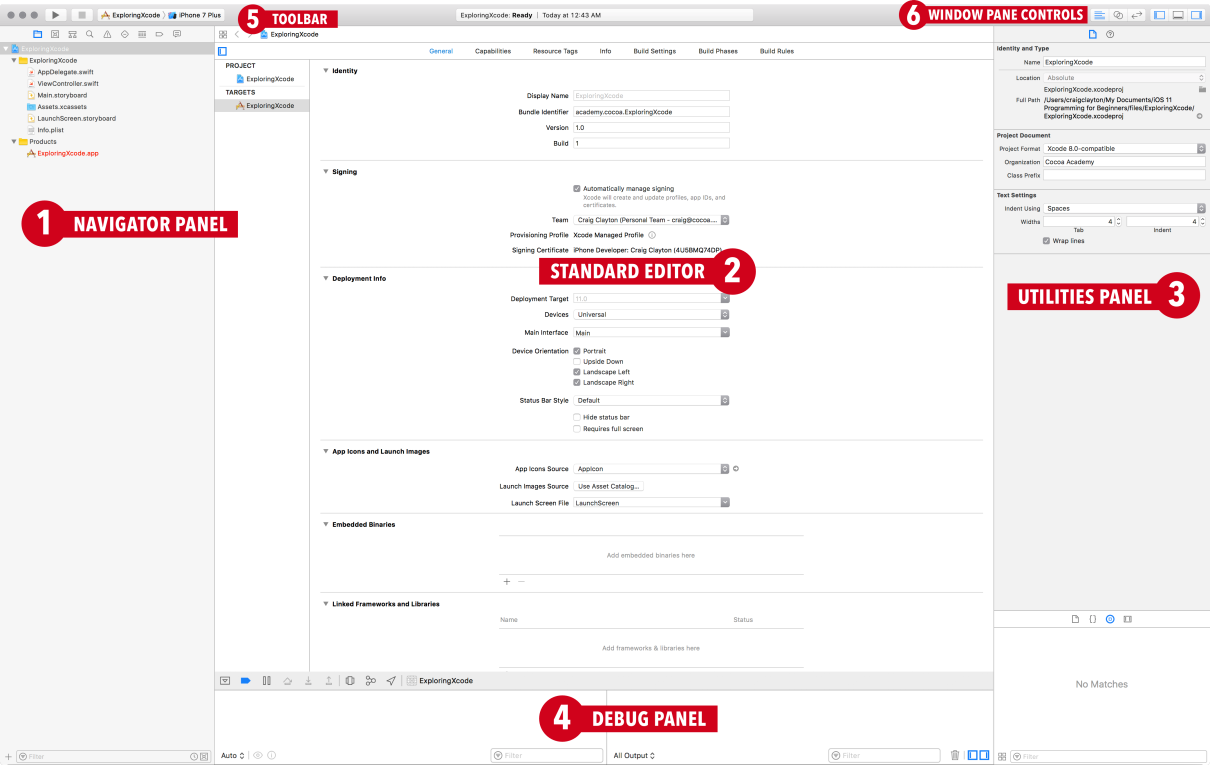
The primary use for the navigator panel is to add new files and/or select existing files. The other icons are used from time to time; we will cover them as we need them.
The standard editor is a single panel view used to edit files. The standard editor area is the primary area in which you will work. In this area, we can view storyboard files, see our Swift files, or view our project settings.
The utilities panel can be a bit confusing when you first use Xcode, because this menu changes based on what you have selected in the standard editor. When we start building an app, we will dig deeper into this. For now, just know that the utilities panel is made up of the inspector pane at the top and the library pane at the bottom. The inspector pane allows you to change the attributes or properties of things you put in your storyboard-the library pane allows you to insert objects, image assets, and code snippets into your app.
The debug panel will allow us to see log messages from our app. You will become very familiar with this panel by the time you finish this book. The debug panel is one of the greatest tools for getting feedback on what your app is doing or not doing.
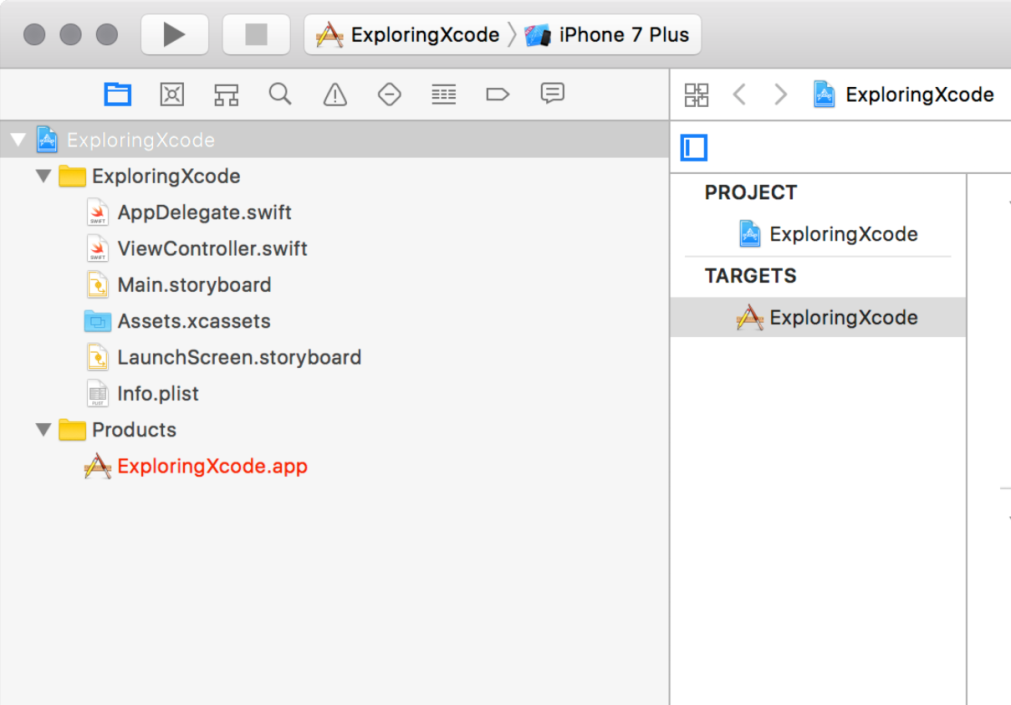
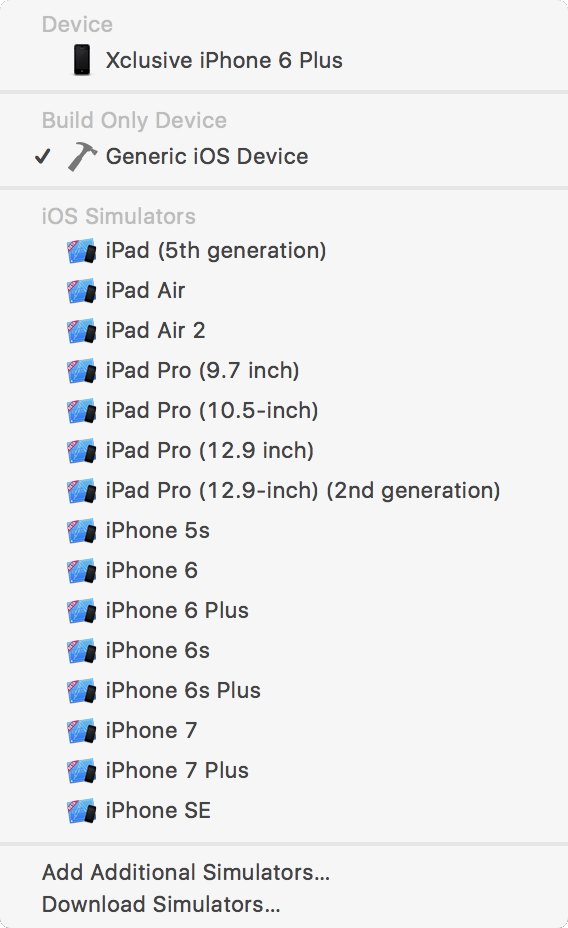
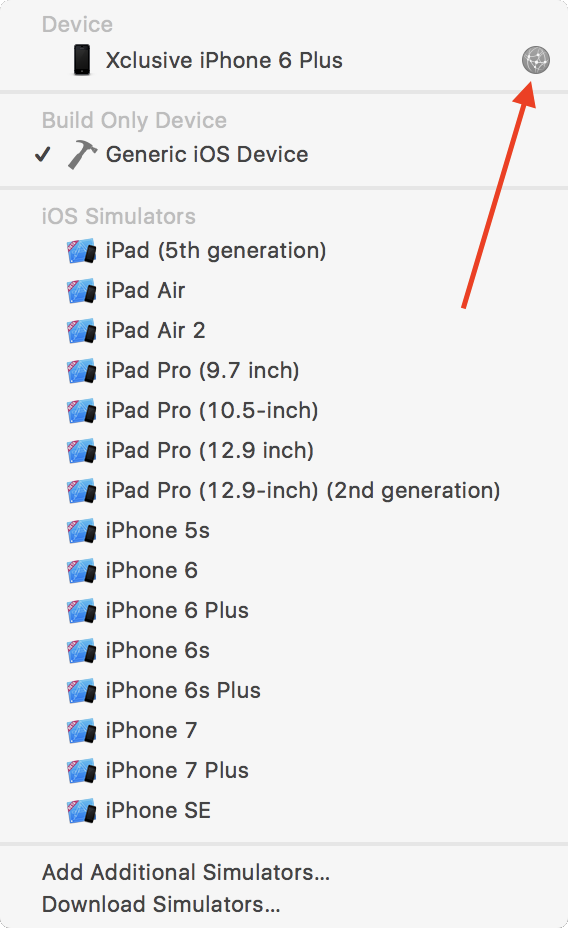
First, we have a play button, which is how we launch our app (or use cmd + R). Next, you will see a stop button, which will not be active until you run your app. This stop button (or cmd + .) is used to stop your app from running. To the right of the stop button, you will see your target (your project name) along with the current Simulator selected. If you click on your project name, you will see a screen similar to this:
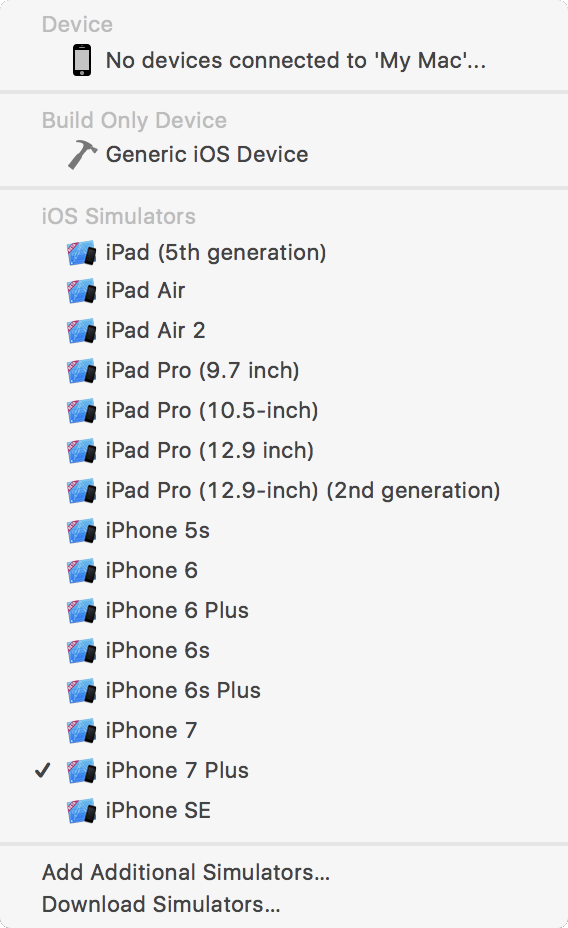
This drop-down menu, which we will call the Device and iOS Simulators drop-down menu, allows you to change your Simulator type. For the purposes of our project, select iPhone7 Plus as your Simulator and then click on the play icon (or use cmd + R) to run your app. Your app will be blank and will most likely not fit the entire screen (unless you are on a large screen).
In order to see the entire screen, you can scroll right and left; however, doing this gets harder once you have elements in your app. So, an alternative to scrolling is to resize your app to fit the screen. We can do this by going to your Simulator menu and navigating to Window | Scale:
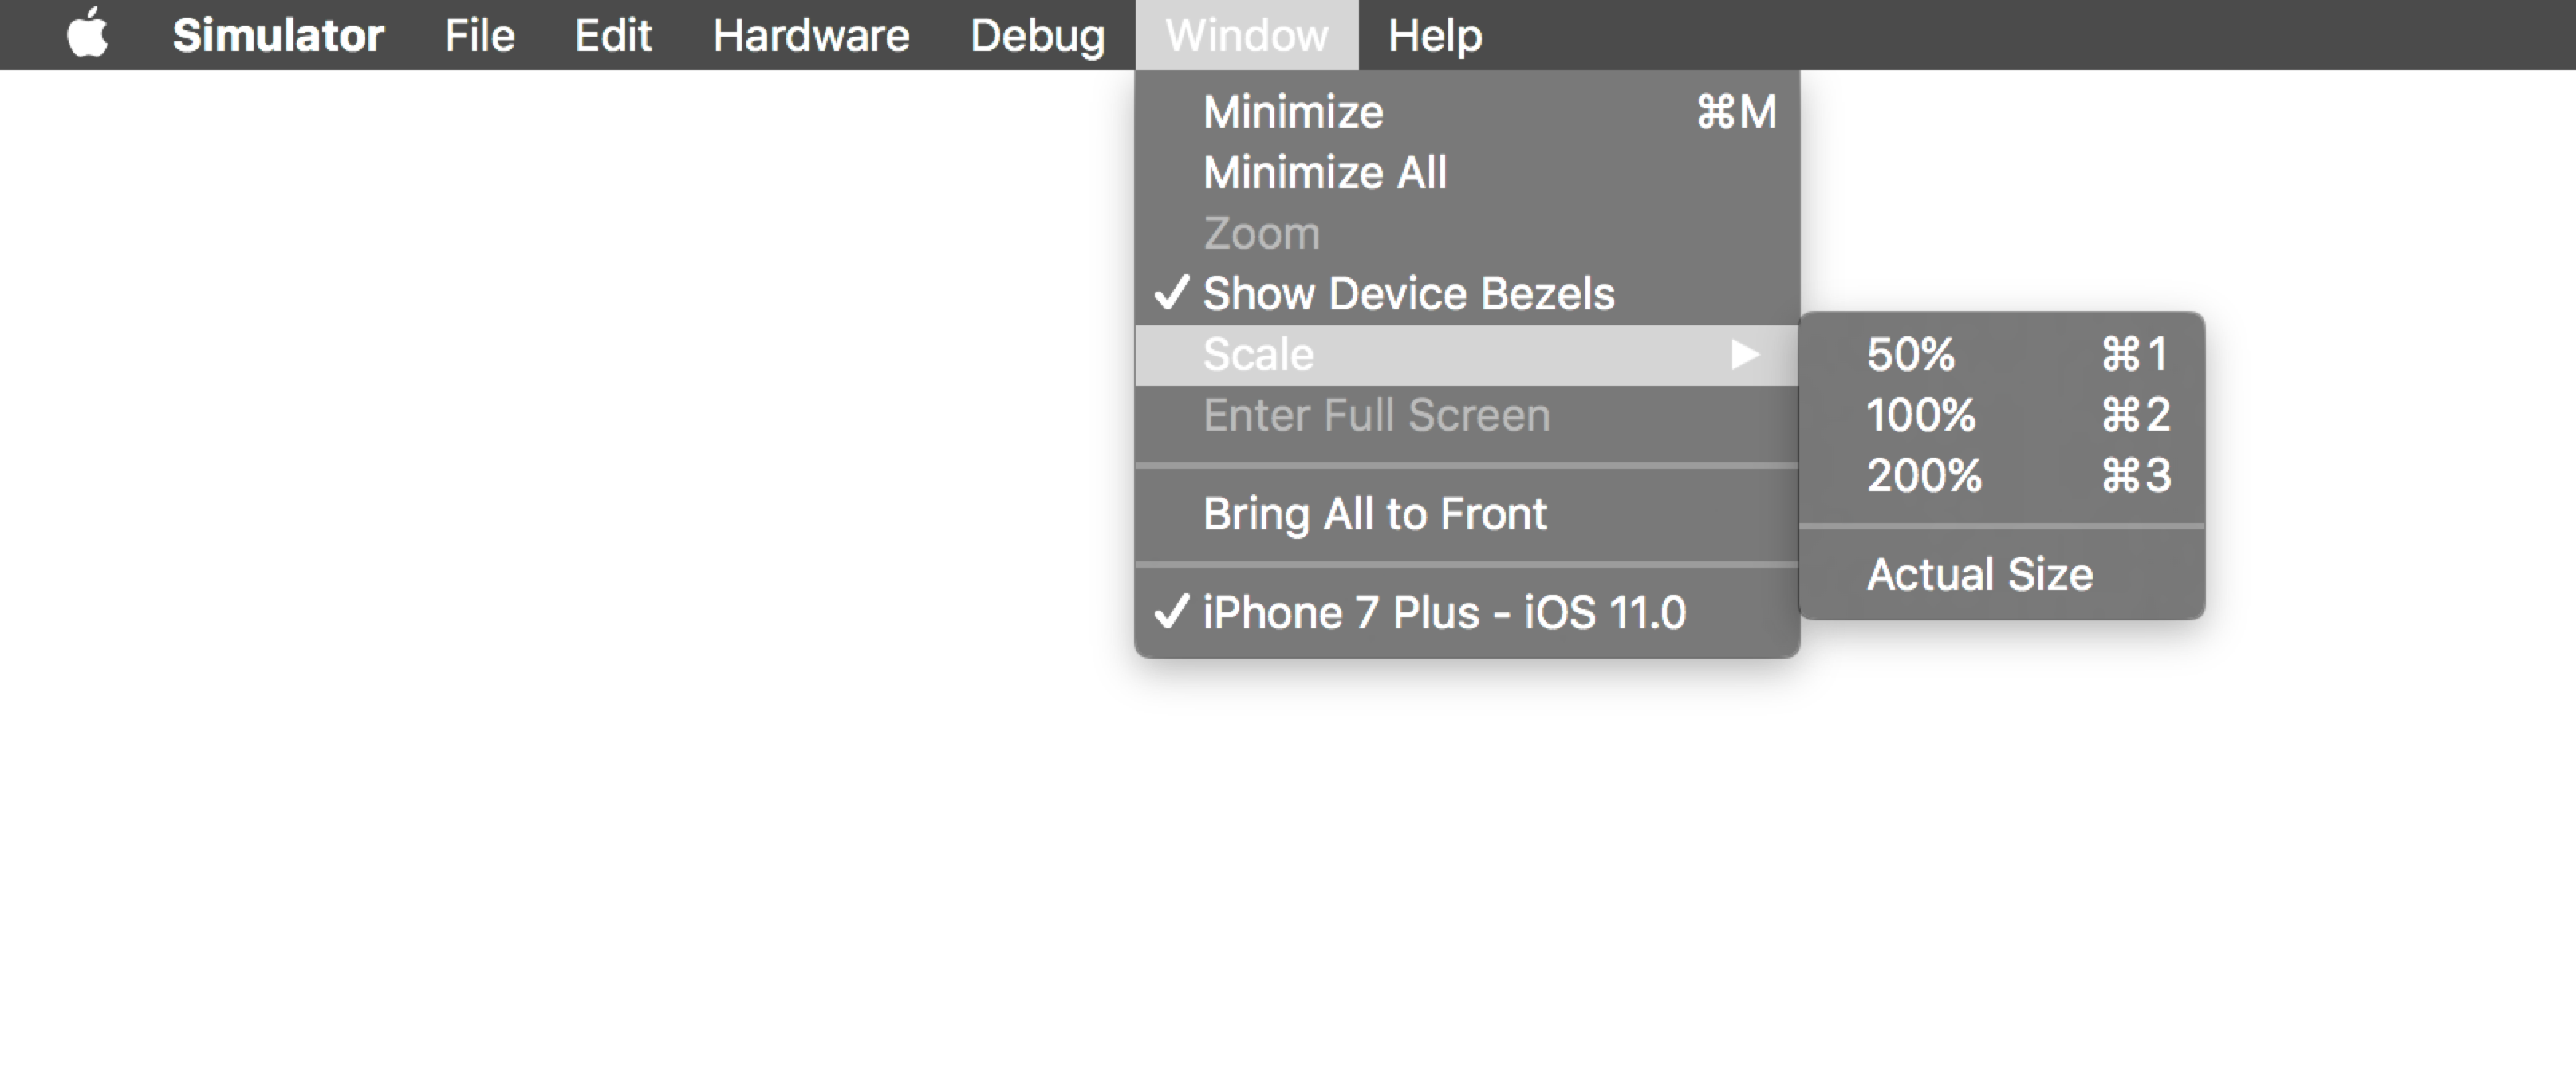
Here, you will be able to scale from 200% to 100%, or 50% (select whichever percentage allows the app to best fit your screen size).
Now, let's return to Xcode and select the stop button (or use cmd + .).
If you use the keyboard shortcut, make sure Xcode is in focus; otherwise, this shortcut will not work. I work on a 15-inch MacBook Pro Retina - therefore, when I am working on an app, I will use the iPhone 6 or iPad Air 2 simulator in landscape. They both fit nicely on my screen without having to resize either.
In addition to the Simulator, there is a Build Only Device as well as a Device section, both at the top of the Device and Simulator drop-down menu that was shown earlier in this chapter. Note that, for our purposes, you will only need a Simulator while we are building the app; however, you can add an iOS device if you would like (see under iOS Device).
The Generic iOS Device, under the Build Only Device section of the Device and Simulator drop-down menu, is used for when you need to archive your app, which means that you are preparing your app for submission to Apple (either to the App Store or to Test Flight). If you try to select Generic iOS Device now and run the app, you will get the following message:

Therefore, change Generic iOS Device to an actual Simulator, and then you will be able to continue.
If you do not have a device connected to the computer, you will see No devices connected... under the Device section of the Device and Simulator drop-down menu.
As noted earlier, when we start building the Let's Eat app, you will have the option of using the Simulator or connecting a device to Xcode. Using a device is slower; however, the simulator will not perform in the same way as a device will.
In the past, you needed to have a paid account to build your app on a device. Now, you do not need a developer account in order to run the app on your device. Note that, if you decide to connect your device instead of using a Simulator, you will need iOS 11 installed on it. Introduced in Xcode 9 is the ability to connect your phone wirelessly. We will look at the traditional way first and then we will go over how you connect your phone wirelessly.
The following steps are only for those who do not want to pay for the Apple Developer Program at this time:
- Connect your iOS device via USB
- In the drop-down menu, select your device (here,
Xclusive iPhone 6 Plus):
- Wait for Xcode 9 to finish indexing and processing. This may take a bit of time. Once complete, the status will say
Ready. - Run the project by hitting the Play button (or use cmd + R).
You will get two errors that state the following:
- Signing for
ExploringXcoderequires a development team. Select a development team in the project editor. - Code signing is required for product type application in SDK iOS 10.0.
- Signing for
Ignore the specifics of these errors as they basically indicate that we need to create an account and add our device to that account:
- Now, in the standard editor, you will see under
Signingthat you need to add an account:
- Click on
Add Account. If aSign in to Xcode with your Apple IDdialog box does not pop up, inside of theAccountsscreen on the bottom left, click on the+and selectApple ID:

- Then, you will click on
Create Apple ID. You will be asked to enter your birth date, name, email, and password, along with security questions. Make sure that you verify your email before you answer the security questions; otherwise, you will have to come back to this screen and addApple IDagain.
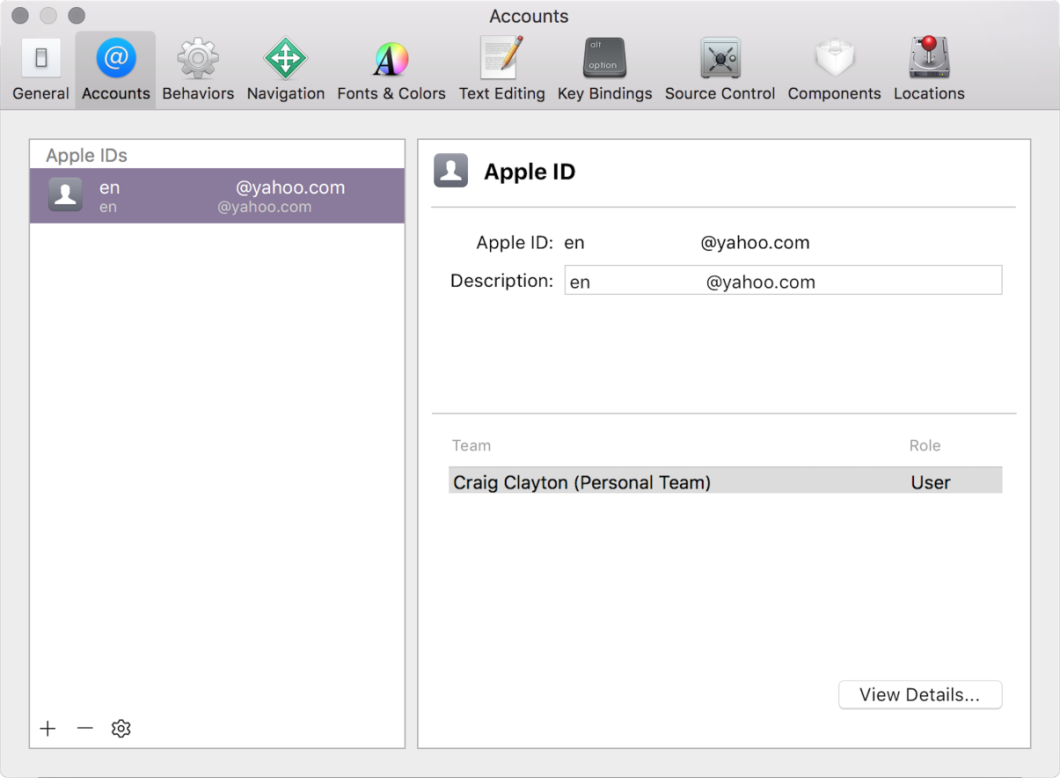
If you already have an account, then, instead of seeing Add Account, you will see a drop-down menu with your account listed. If your device is not connected to this account, you might see a message asking if you would like to add your device to your account.
Now that you have your phone and account connected it is easy to get your phone set up to run it wirelessly. With your device already connected via USB, go to Window | Devices and Simulators. Click on the Checkbox marked Connect via network:

Make sure that your phone and your computer are connected to the same Wi-Fi network.
When I first connected to my device, I saw a globe icon in Xcode that lets you know that you are connected via the network.
After a short time, the globe went away. Even if you do not see the icon you can disconnect the USB and your device should still be connected to Xcode (as long as you are connected to the same Wi-Fi network).
You will not need to use a device for the majority of this book; however, depending on the type of MacBook you have, you might need to use a device.
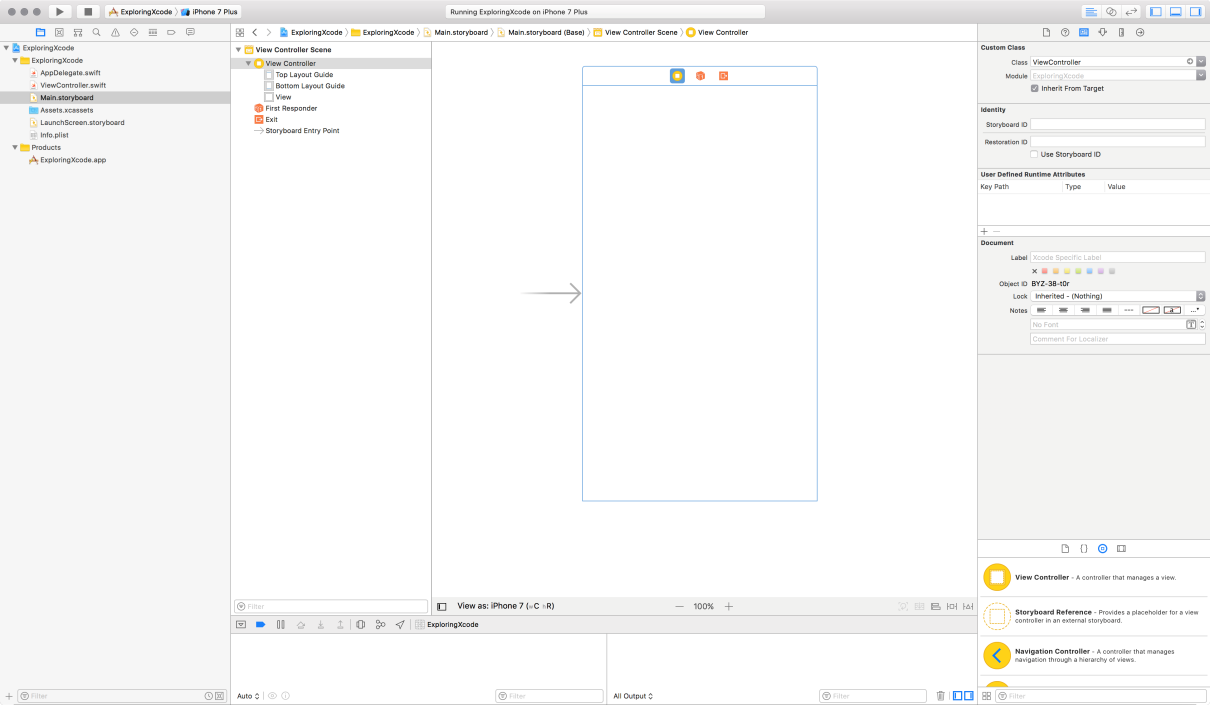
Before we get to the right side of the Toolbar, select the Main.storyboard file in your navigator panel. This file is used to do all of your visual setup for your entire app. We will cover this in detail later in the book. After you select the file, you should see the following:
The following screenshot shows the window pane controls:

Moving onto the window pane controls, you will see two groups of icons. The first group is called the Editor Mode, and the second group is called the View. Let's look at the functions of the Editor Mode icons:

This icon controls the standard editor (which is the center panel in the earlier screenshot of the Main.storyboard file in the navigator panel).

This icon splits the Standard editor into two panels, where you will see the ViewController.swift file on the right. We will use this split screen throughout the book.

This icon is the Version editor. We will not address the Version editor in this book, since it is a more advanced feature.
At this point, you might be thinking that there are way too many panels open, and I would agree with you. This is where the last group of View icons in the toolbar comes in handy.
Let's look at these icons and their functions in the following table:

This icon will toggle (hide or show) the navigator panel (or use cmd + 0).

This icon will toggle (hide or show) the debug panel (or use cmd + shift + Y).
>

This icon will toggle (hide or show) the utilities panel (or use cmd + alt + 0).

