Search icon
Arrow left icon
All Products
Best Sellers
New Releases
Books
Videos
Audiobooks
Learning Hub
Newsletters
Free Learning
Arrow right icon
Raspberry Pi 3 Projects for Java Programmers

You're reading from  Raspberry Pi 3 Projects for Java Programmers

Product type Book
Published in May 2017
Publisher Packt
ISBN-13 9781786462121
Pages 286 pages
Edition 1st Edition
Languages
Authors (3):
Rajdeep Chandra Rajdeep Chandra
John Sirach John Sirach
Profile icon John Sirach
Pradeeka Seneviratne Pradeeka Seneviratne
Profile icon Pradeeka Seneviratne
View More author details

Table of Contents (8) Chapters

Preface Setting up Your Raspberry Pi Automatic Light Switch Using Presence Detection A Social and Personal Digital Photo Frame Integrating a Real-Time IoT Dashboard Wireless Controlled Robot Building a Multipurpose IoT Controller Security Camera with Face Recognition

Our first remote Java application

Now that we have added a remote platform, we will be writing a very simple little Java application to check that it works and have the output from the application executed on the Raspberry Pi and output its information in the editor. We start with a simple Hello World Java application and run it on the Raspberry Pi. The following steps will be needed every time we start a new project.

Click File in the menu bar and click New Project. You will be presented with the New Project wizard, as shown in the following screenshot:

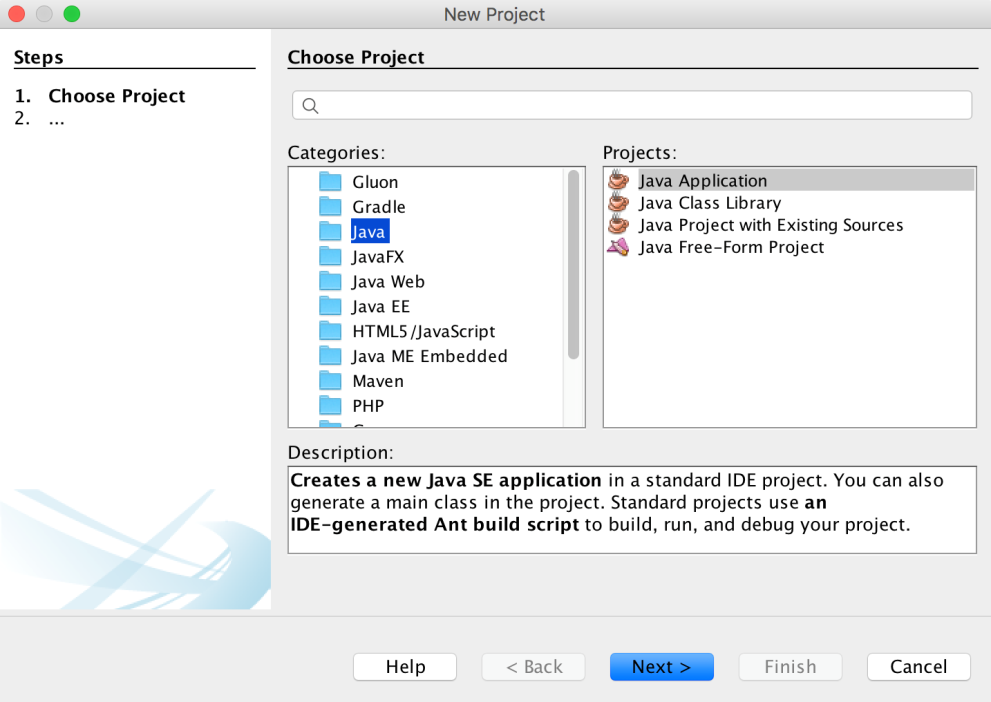
On the left side are the project categories. Here we click on Java, and on the right side we select the Java Application option and press Next to create a Java application. To be able to start with a Java application we need to enter some details so we can begin with our development. The following screenshot shows the details we need to enter to begin:

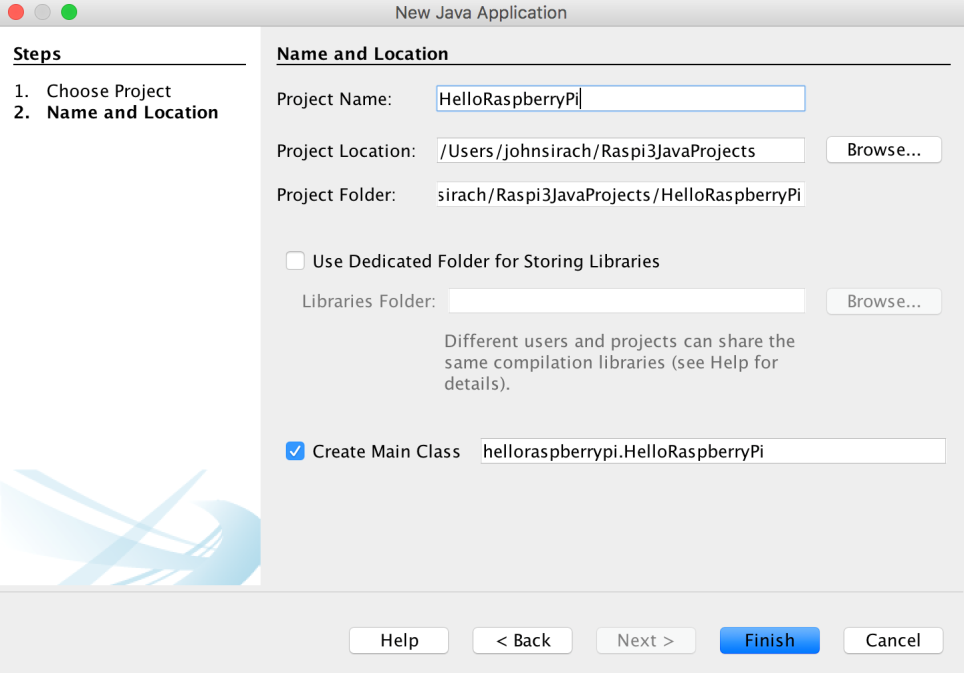
In this screen we give the project the name, HelloRaspberryPi, and browse to the local directory where we will be putting our project. Make sure you put no spaces in the name of the project! We supply a base path where this project is being placed. In my case, I will place my project in my home directory with the subdirector Raspi3JavaProjects. Other projects that we will be creating later on will also be placed in this directory. NetBeans will automatically create a directory based on the project name in this base directory. Click Finish and the project will be created.

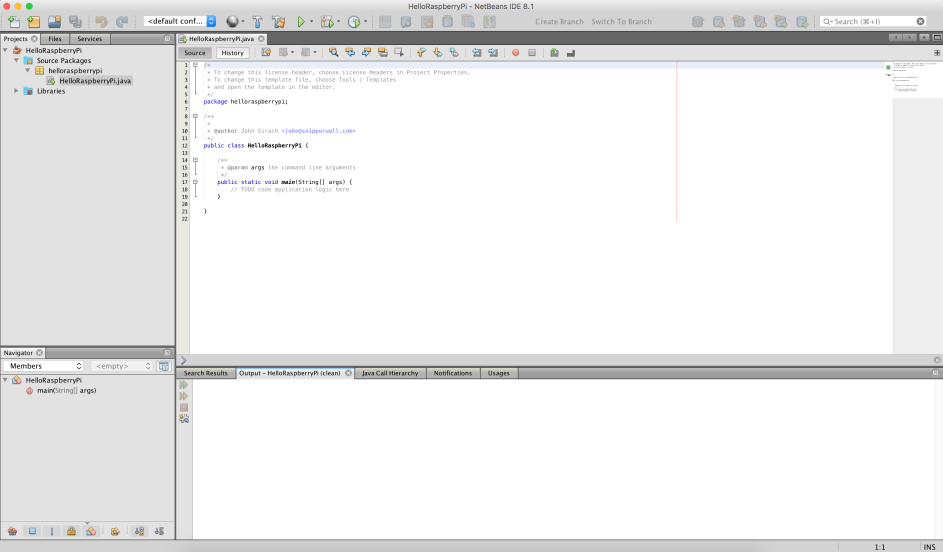
On the left side we have our project structure tree where all our Java packages are, and on the left side we have the editor. This window will be our main projects screen throughout the book, as shown in the following screenshot. This window is the same on all platforms, such as Windows, Linux, and Mac:

Now that we have a new project, we will configure it to run on the remote Raspberry Pi platform. To do this we open the project properties by clicking on the project name in the left side of the window. This opens up a context menu where the bottom option is Properties. When clicked, it opens the Properties window, as shown in the following screenshot:

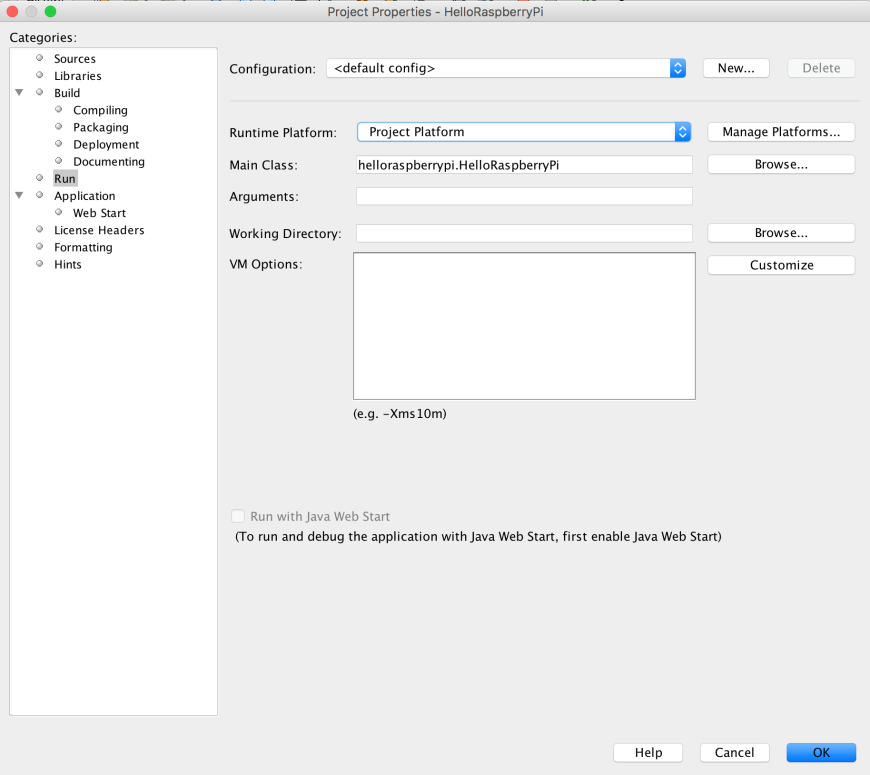
We click on the Run configuration in the left option tree. We now see the possible run options. We want to run our Java application on the Raspberry Pi, so we change the Runtime Platform to RASPI3JAVA remote or the name you have set in the remote platform configuration. We are asked to save this as a configuration, and we enter a name such as remote Raspberry Pi configuration. Press OK to save our run configuration.

Running our application on the Raspberry Pi

Now we are ready to write a line of code and have it run on a fully prepared Raspberry Pi with Java and a fully prepared NetBeans Java editor. We will change the main run function of our Java application to have it print out Hello from the Raspberry Pi!. Change the code in the main function so that we have what is shown in the following snippet:

    /** 
* @param args the command line arguments
*/
public static void main(String[] args) {
System.out.println("Hello from the Raspberry
Pi!");
}

For now, this is enough. This will print out the line stated previously. To run this on the Raspberry Pi we have three options. One is to click on the Run button in the button bar below the Menu bar; the second is to right-click on the project name and select Run from the context menu; and the third is to press F6. Pick the one easiest for you.

Now the application is compiling and will be executed on the Raspberry Pi. The output should look same as following screenshot:

This is one of the many reasons why NetBeans is my personal favorite editor. When we look at the output we can see NetBeans building the application and logging in to the remote platform, which in our case is the Raspberry Pi. When logged in it creates a directory called /home/pi/RASPI3JAVA/HelloRaspberryPi/dist. This is the directory the jar file is placed, so it can be executed on the Raspberry Pi. We can see this application being executed by the CLI command: cd '/home/pi/RASPI3JAVA//HelloRaspberryPi'; '/opt/java/jdk1.8.0_91//bin/java' -Dfile.encoding=UTF-8 -jar /home/pi/RASPI3JAVA//HelloRaspberryPi/dist/HelloRaspberryPi.jar

What this does is cd '/home/pi/RASPI3JAVA//HelloRaspberryPi', which makes sure the directory is the correct one. This is followed by the '/opt/java/jdk1.8.0_91//bin/java' -Dfile.encoding=UTF-8 -jar /home/pi/RASPI3JAVA//HelloRaspberryPi/dist/HelloRaspberryPi.jar command, which runs the Java executable with our jar file as input. All the directories we have created and the installed java version is used. Our result is shown with: Hello from the Raspberry Pi!. We can now start with our projects, well done!

You have been reading a chapter from
Raspberry Pi 3 Projects for Java Programmers
Published in: May 2017 Publisher: Packt ISBN-13: 9781786462121
Register for a free Packt account to unlock a world of extra content!
A free Packt account unlocks extra newsletters, articles, discounted offers, and much more. Start advancing your knowledge today.
Unlock this book and the full library FREE for 7 days
Get unlimited access to 7000+ expert-authored eBooks and videos courses covering every tech area you can think of
Renews at $15.99/month. Cancel anytime}