In this section, we will be installing a file transfer application, installing Java, and preparing the NetBeans editor.
We will be using the Oracle JDK to run our Java applications. At the time of writing, the latest version is JDK 1.8, which all our projects will be using as a minimal version:
- To get the Oracle JDK, go to http://www.oracle.com/technetwork/java/javase/downloads/index.html and select the Download JDK button.
- On the following page you need to select the ARM version to be downloaded. Although the version you will be seeing now may differ from the version mentioned in the book, the naming scheme for the download is the same in all these versions. Even though the Raspberry Pi is now based on a 64-bit architecture the OS is still 32-bit at the time of writing. This also means the version you will need to download is: jdk-8u[buildnumber]-linux-arm32-vfp-hflt.tar.gz, which is the 32-bit version. The [buildnumber] indicates the release build of the JDK. All projects are targeted to work on JDK8, so any build number that is at least 91 or higher should be working. At the time of writing, the JDK version used is jdk-8u91-linux-arm32-vfp-hflt.tar.gz.
- To be able to use this Java version we will be using an application to upload the downloaded version to the Raspberry Pi. The application we will be using is called FileZilla and it is available for Windows, Linux, and Mac. To download this application go to https://filezilla-project.org/ and by clicking the Download FileZilla Client link, the application will be downloaded.
- To install FileZilla open the downloaded installer and follow the instructions on the screen. We will now upload this Java version to the Raspberry Pi. Open FileZilla, and you will be presented with the window shown in the following screenshot:

- To connect we need to enter the credentials that we have set during the installation of the Raspberry Pi. In the most upper part below the icons we will enter the credentials, which are as follows:
- Only the IP address in the Host field
- The username pi in the Username field
- The password we have changed during preparation in the Password field
- We enter port number 22 in the Port field, which is the secured connection
- Press the Quickconnect button, and when all the credentials are entered correctly we are logged in to the Raspberry Pi. On the left side in FileZilla we see the structure of our local computer, and on the right side we see the directory structure of the Raspberry Pi.
- Browse to the downloaded Java version on the left side of the application. When you see the Java version that we downloaded click and move this file from the left to the right side. The file will now be uploaded to the Raspberry Pi.
- In the most bottom part of FileZilla we see the upload progressing. When the upload is finished, the progress is removed from this list and the upload is done.
We can now close FileZilla and do the final steps required to install this Java version.
- For this, we will use the CLI on the Raspberry Pi. There are different ways to get to this command line. On Windows, we can use PuTTY. This is a small application that allows us to log in from the Windows PC onto the Raspberry Pi. On a Mac we can use the terminal application to log in. When we have our keyboard and display connected to the Raspberry Pi we are already logged in. As we will be using the Raspberry Pi as a remote device, we will be using PuTTY on Windows and the terminal on Mac. When you use Mac, you can skip the paragraph where we will be using the terminal.
- On Windows, we use PuTTY to connect to the Raspberry Pi. To use PuTTY we need to download it from http://www.chiark.greenend.org.uk/~sgtatham/putty/download.html.
- On the second half of this page, we see a list of files ready to be downloaded below the Binaries header.
- Click the putty.exe file to download. This file does not need to be installed, so we can save this file in any location that we can easily reach. When PuTTY is downloaded, double-click it to open it so that you see something similar to the following screenshot:
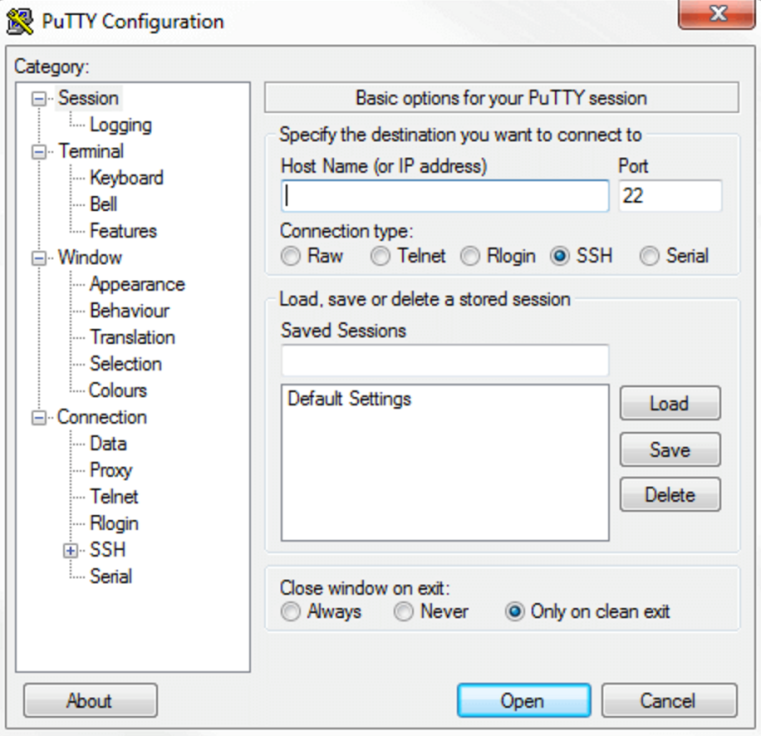
- With this window open we can enter the IP address of the Raspberry Pi in the Host Name field.
- We would like to save this IP address with a recognizable name, so we enter RASPI3JAVA without the quotes in the Saved Sessions field and press Save.
- We now have saved this session for future usage. When we now press Open we are prompted with Login as, where we enter the username pi and press Enter.
- The next step is to enter the password we have set during the preparation. When the credentials are entered correctly we are logged in.
- To log in on the Mac we use the terminal application, which is preinstalled on the Mac. We open this application by pressing command + space bar at the same time. This will open Spotlight Search, where we can type terminal without quotes and press return or Enter on the keyboard to open the terminal. Hold the option button while clicking on the green circle in the top-left corner to maximize the terminal window.
- We are now in the CLI on the Mac. To log in on the Raspberry Pi we need to enter the following command:
ssh pi@192.168.1.20
The connection we make is done with ssh, which is a small terminal application that creates a secure connection with the Raspberry Pi. We use pi as the username where the @ character literally means at because we log in as this user at the specified IP address. In the preceding command-line example, I have used the 192.168.1.20 IP address of my Raspberry Pi. You should replace this with the IP address you have set for yours. We are now asked to enter the password; enter the password that has been set for the user pi during the preparation.
From this point on it does not matter how we are logged in on the Raspberry Pi as the following steps are the same via Windows with PuTTY, Mac with terminal, or using the keyboard with a display attached to the Raspberry Pi. We are now presented with the CLI on the Raspberry Pi, which gives us the opportunity to unpack and install the Java package we have uploaded to the Raspberry Pi. We will place this installation in the /opt/ directory. To make this possible we first create the java directory inside the /opt/ directory by entering the following command:
sudo mkdir /opt/java
We use the sudo command because this directory is owned by the root user, which is the administrator on the Raspberry Pi. The sudo command temporarily leverages our privileges to be an administrator for the duration of the command. With mkdir /opt/java we created the java directory inside the /opt/ directory. Now that we have the /opt/java directory we are going to unpack the downloaded Java archive file. We do this by entering the following command:
       sudo tar -C /opt/java -xf jdk-8u91-linux-
       arm32-vfp-
       hflt.tar.gz
Again we have used the sudo command to leverage our permissions. With the tar utility we unpack the Java archive into the /opt/java directory with the help of the -C parameter line switch. The command line parameters -xf tells the tar utility that we want to unpack the jdk-8u91-linux-arm32-vfp-hflt.tar.gz file. The filename in the preceding example is the version downloaded at the time of writing. Replace 91 with the version you have downloaded.
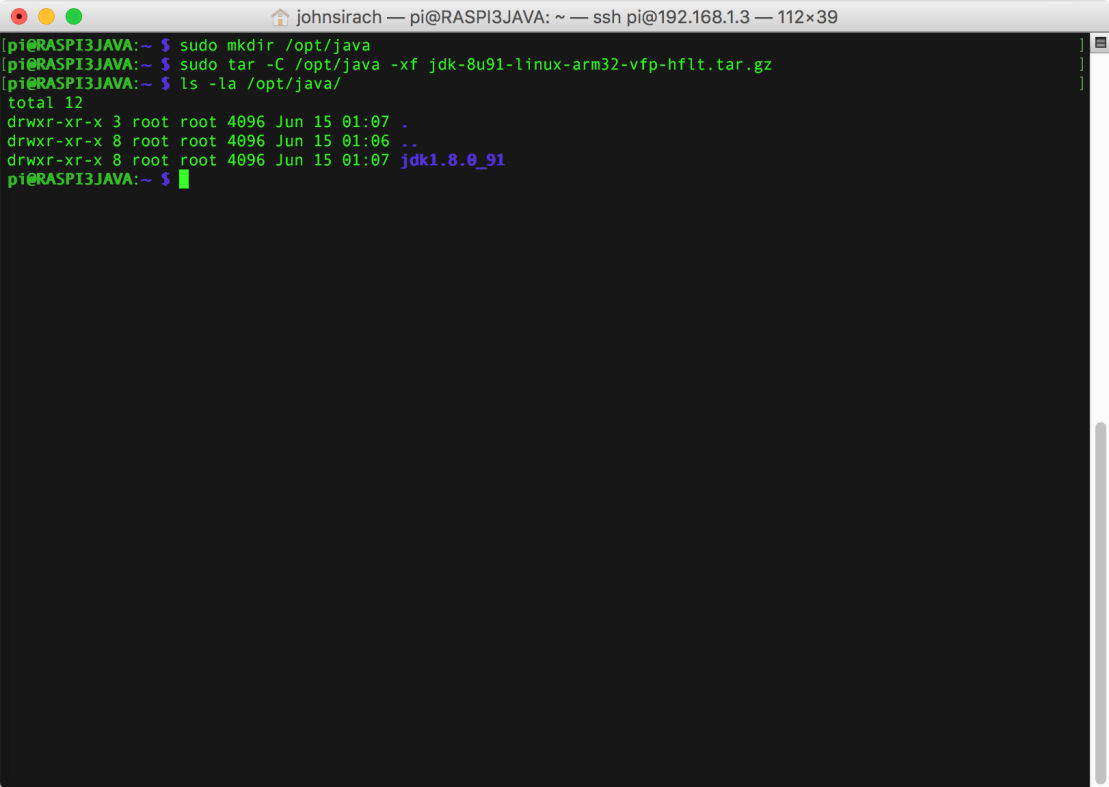
We can now check if the files have been extracted correctly from the downloaded Java archive. By entering the following command we should see the directory extracted from the archive:
ls -la /opt/java/
If you see the jdk1.8.0_91 directory, as shown the following screenshot, we have successfully unpacked Java. If you have a different version of the JDK, you will see a different number than 91 at the end: