Reader small image

You're reading from  Learning Raspbian

Product typeBook
Published inFeb 2015
Reading LevelBeginner
Publisher
ISBN-139781784392192
Edition1st Edition
Languages
Right arrow
Author (1)
William Harrington
William Harrington
author image
William Harrington

William Harrington lives and works at his family's cattle station, Olga Downs, in northwest Queensland, Australia. He attended university at James Cook University, Townsville. At the age of 20, he established his own company, Harrington Systems Electronics, which sells the NLIS RFID tag reader The Pipe Reader that he designed and manufactures. He also received the AgForce President's Innovation Award in 2005. In 2006, he graduated with honors as a computer systems engineer and received the Queensland Primary Industries Young Achiever Award. Since then, he has gone on to design the uSee remote monitoring system, a revolutionary and low-cost remote monitoring solution. Having a home-based company has become part of a unique diversification strategy for the family and has provided them the opportunity to stay on the land. Due to a never-ending passion for technology, William speaks regularly on many topics, so he will bring a futuristic version of the technology that is possible in the next decade. Since 2011, he has also been a director and programmer for Farm Apps Pty Ltd, developing smartphone and tablet apps that increase farming efficiency. He enjoys travelling and brewing beer at home. William works alongside his wife Hollie, having recently welcomed their young son, Jack, into the world.
Read more about William Harrington

Right arrow

Chapter 3. Starting Raspbian

This chapter will run you through how to set up your Raspberry Pi, start Raspbian for the first time, and configure your camera if you have one.

In this chapter, we will cover the following topics:

  • The different types of Raspberry Pi

  • Plugging in your Raspberry Pi

  • Booting your Raspberry Pi for the first time

  • The Raspberry Pi Software Configuration Tool

  • Finishing up

  • Troubleshooting common problems

By the end of this chapter, you should have your Raspberry Pi up and running.

Raspberry Pi Model A and Raspberry Pi Model B


The Raspberry Pi A and Raspberry Pi B models are the original versions of Raspberry Pi:

Raspberry Pi A+


Raspberry Pi A+ is the latest version of Raspberry Pi. Raspberry Pi A+ has a couple of differences from the previous version of Model A. The following are the major differences:

  • Raspberry Pi A+ uses a micro SD card

  • It has a larger, 40-pin I/O connector

  • You now need an adaptor cable if you want to use the AV output to connect your Raspberry Pi A+ to a TV.

The Raspberry Pi A+ is shown below:

Raspberry Pi B+


The Raspberry Pi B+ is the other latest update of Raspberry Pi. Raspberry Pi B+ has a couple of differences from previous versions. These are the major differences:

  • Raspberry Pi B+ uses a micro SD card

  • It has a larger, 40-pin I/O connector

  • You now need an adaptor cable if you want to use the AV output to connect your Raspberry Pi B+ to a TV

  • Raspberry Pi B+ has a total of four USB ports instead of two

The Raspberry Pi B+ is shown below:

Plugging in your Raspberry Pi


It is really easy to plug in your Raspberry Pi and get it up and running. You will need a couple of things, as follows:

  • Power supply

  • Monitor

  • Keyboard and mouse

  • SD card

  • Network connection

Let's go through these in detail.

Power supply

Raspberry Pi is really easy to power. It runs on a standard 5V micro USB supply. If you have a mobile phone charger with micro USB, then you should be able to use this in order to run your Raspberry Pi. You can also use a micro USB cable that is plugged into a USB phone charger.

We recommend that you use a dedicated micro USB power supply rather than a USB cable for maximum reliability. These will be available at the retailer from who you bought your Raspberry Pi.

It is important that the power supply be capable of supplying at least 1 amp. Anything less than this and you might run into intermittent resets and other problems.

Monitor

To make the most of your Raspberry Pi, you need a monitor. Raspberry Pi supports two different types of monitors...

Booting your Raspberry Pi for the first time


Now that you have everything ready, it is time to turn on your Raspberry Pi. The first thing that you need to do is make sure that your monitor is set to the correct input. This is important if you want to use HDMI, because if your Raspberry Pi doesn't detect an HDMI monitor during the boot process, it will automatically use the default AV out.

The bootloader

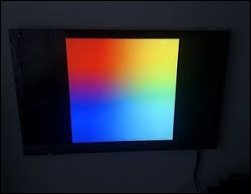
When you power on your Raspberry Pi, you will see the Raspberry Pi boot screen.

The Raspberry Pi bootloader

If you see this, it means that all the bootloader files on your SD card have been found and the appropriate monitor has successfully been detected. If you don't see this, then make sure that all the cables are plugged in, your monitor or TV is on the correct input, and you have imaged the SD card correctly.

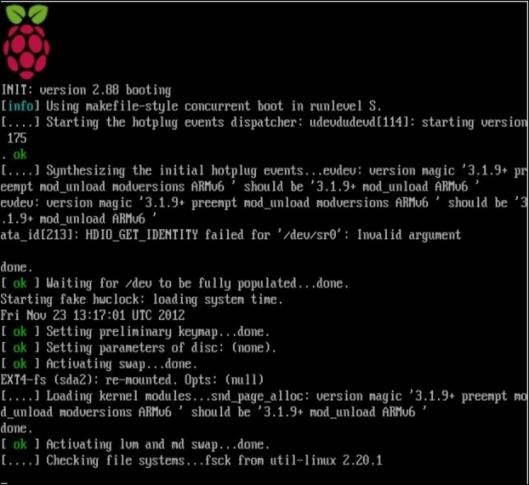
The Linux kernel

The next step in the boot process is the initialization of the Linux kernel. The Linux kernel is contained inside the kernel.img file on your SD card.

Booting Raspbian

You...

The Raspberry Pi Software Configuration Tool


The Raspberry Pi Soft ware Configuration Tool is designed to be an easy and intuitive way to set up your Raspberry Pi. It is automatically launched when your Raspberry Pi is powered on for the first time.

The Raspberry Pi Software Configuration Tool

The Raspberry Pi Software Configuration Tool is extremely easy to use. To move between menus, use the arrow keys and the Tab button. To select a menu, simply press the Enter key.

You can run the Raspberry Pi Software Configuration Tool whenever you want by running the following command:

raspi-config

Setting up the Raspberry Pi

Now that your Raspberry Pi has launched the Raspberry Pi Software Configuration Tool, it is time to use it to get your Raspberry Pi up and running.

Resizing the root filesystem of your Raspberry Pi

The first thing that you need to do is expand the filesystem of your Raspberry Pi to the full size of your SD card. If you don't do this, you won't be able to use the rest of the storage...

Finishing up


Now that you have customized your Raspberry Pi, it is time to start using your Raspberry Pi. To do this, you need to exit the Raspberry Pi Software Configuration Tool by selecting Finish. You will be asked to reboot your Raspberry Pi. Select Yes and your Raspberry Pi will reboot and load the graphical interface, which is ready to go. Remember that you can always rerun the Raspberry Pi Software Configuration Tool by running the following command:

sudo raspi-config

Common problems


The most common problems that people face with their Raspberry Pi come down to the power supply they are using. If your Raspberry Pi is behaving strangely, then we recommend that you try a different power supply. A good quality supply is recommended as the Raspberry Pi is susceptible to electrical noise.

It is also a good idea to check whether you have imaged your SD card correctly. It is OK to image the SD card again.

Another common problem that people have when they are setting up their Raspberry Pi for the first time is they select the wrong input on their monitor. When a Raspberry Pi boots, if it cannot find an HDMI monitor attached, it will automatically use the component output. The easiest way to stop this from happening is to make sure that the input on your monitor or TV is set to the correct input before your Raspberry Pi is turned on.

Summary


This chapter walked you through how to set up your Raspberry Pi and configure Raspbian for your region and keyboard. You also learned some of the potential problems that you might experience when you are setting up your Raspberry Pi.

In the next chapter, we will cover the Raspbian desktop environment.

lock icon
The rest of the chapter is locked
You have been reading a chapter from
Learning Raspbian
Published in: Feb 2015Publisher: ISBN-13: 9781784392192
Register for a free Packt account to unlock a world of extra content!
A free Packt account unlocks extra newsletters, articles, discounted offers, and much more. Start advancing your knowledge today.
undefined
Unlock this book and the full library FREE for 7 days
Get unlimited access to 7000+ expert-authored eBooks and videos courses covering every tech area you can think of
Renews at $15.99/month. Cancel anytime

Author (1)

author image
William Harrington

William Harrington lives and works at his family's cattle station, Olga Downs, in northwest Queensland, Australia. He attended university at James Cook University, Townsville. At the age of 20, he established his own company, Harrington Systems Electronics, which sells the NLIS RFID tag reader The Pipe Reader that he designed and manufactures. He also received the AgForce President's Innovation Award in 2005. In 2006, he graduated with honors as a computer systems engineer and received the Queensland Primary Industries Young Achiever Award. Since then, he has gone on to design the uSee remote monitoring system, a revolutionary and low-cost remote monitoring solution. Having a home-based company has become part of a unique diversification strategy for the family and has provided them the opportunity to stay on the land. Due to a never-ending passion for technology, William speaks regularly on many topics, so he will bring a futuristic version of the technology that is possible in the next decade. Since 2011, he has also been a director and programmer for Farm Apps Pty Ltd, developing smartphone and tablet apps that increase farming efficiency. He enjoys travelling and brewing beer at home. William works alongside his wife Hollie, having recently welcomed their young son, Jack, into the world.
Read more about William Harrington