

In this chapter, we are going to learn a lot of things. We will learn Object Oriented Programming (OOP), its characteristics, benefits, and using OOP with our Arduino programming. We will learn some keywords and uses of C++. We will also learn how to use a GSM module. We will use this module to make a call, send an SMS, and receive an SMS. So, let's get started.
Before talking about the more complex concepts within OOPs, we need to know what an Object Oriented Programming language is.
The C programming language is not an Object Oriented Programming language. In Arduino we use a modified version of C which can be compared to C++ programming. And, since C++ is an Object Oriented Programming language, we can implement the benefits of OOP in our Arduino projects.
An Object Oriented Programming language must have a few characteristics (inheritance, encapsulation, polymorphism, and so on) in order to be defined as an Object Oriented Programming language. C is an implementation language. In short, in C, we write a long code. But in OOPs, the code can be shortened using a number of techniques. These techniques are the OOPs's characters.
When we declare a class, we need to start defining by class.
Class members can be of three types:
Public
Private
Protected
Don't worry about these classifications for now. We will get into the types later.
Let's look at an example first.
A box has three dimensions-length, width, and height. We can define the Box class as follows:
class Box{
double lengthOfBox;
double heightOfBox;
double widthOfBox;
}
lengthOfBox, heightOfBox, and widthOfBox are the members of the Box class. If we want to make the class Public, Private, or Protected, we can declare them as follows:
class Box1 {
  Public:
    double lengthOfBox1;
    double heightOfBox1;
    double widthOfBox1;
};

class Box2 {
  Private:
    double lengthOfBox2;
    double heightOfBox2;
    double widthOfBox2;
};

class Box3 {
  Protected:
    double lengthOfBox3;
    double heightOfBox3;
...I know you've probably got a little bit of a headache if you are not familiar with the concept of OOP. Don't worry-keep reading and the idea of OOP will be clear to you soon. Let's start clarifying the situation by looking at an example involving functions.
Imagine a situation where you need to write the following print statements:
Serial.println("My name is John, I am 24 years old and my height 6.1 feet");
Serial.println("My name is Tom, I am 26 years old and my height 6.5 feet");
Serial.println("My name is Curl, I am 21 years old and my height 5.9 feet");
Have you noticed something in this code? The lines are almost similar. The only differences are the names, the age, and the height.
I know what you are thinking: We can make a function with three parameters like the following:
void myFunction(String name, int age, float height) {
  Serial.println("My name is ");
  Serial.print(name);
  Serial.print(", I am ");
Serial.print...An OOPs Language has a few essential characteristics. Without these characteristics, we cannot call a programming language an OOPs language. These characteristics are also called the principles of Objective Oriented Programming. The characteristics are as follows:
Encapsulation
Data Abstraction
Polymorphism
Inheritance
Let's look at the characteristics in detail.
Encapsulation is an information hiding mechanism. It combines both code and data together. Encapsulation is used to hide the values of an object inside a class. It prevents an unauthorized section of code from accessing the code directly. Before discussing encapsulation any further, let's look at a simple example. Look at the following code:
class AddNumbers {
  public:
    int addNumbersFunction(void) {
      return num1 + num2;
    }

  private:
    int num1 = 4;
    int num2 = 5 ;
};
The AddNumbers class has two sections-public and private...
GSM stands for Global System for Mobile communication. It was introduced in 1991. Using GSM and other technology, we can make phone calls, send SMS (Short Message Service), and connect to the Internet. About 82.4% of the global mobile communication is represented by GSM. In this section of the chapter, we will learn how to choose a perfect GSM module for our Arduino, connect it to the Arduino, make a call using the GSM module, and send SMS. So, let's get started.
There are three types of GSM (not GSM modules), each with a different frequency. They are GSM, EGSM, and DCS. We will stick to GSM in this section. For Arduino we will use a GSM shield. There are a number of GSM shields in the market. Look at the following images:
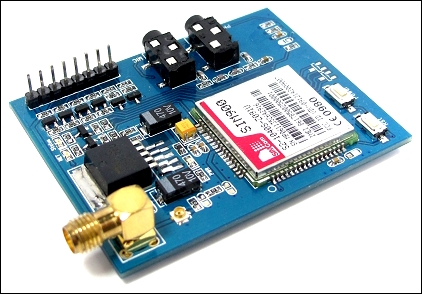
This shield can be used with almost any Arduino:

This shield can be used with any Arduino board:
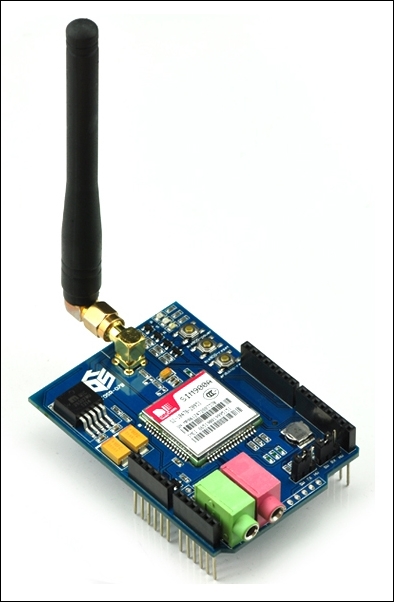
This board requires an Arduino Uno and 5V external power:
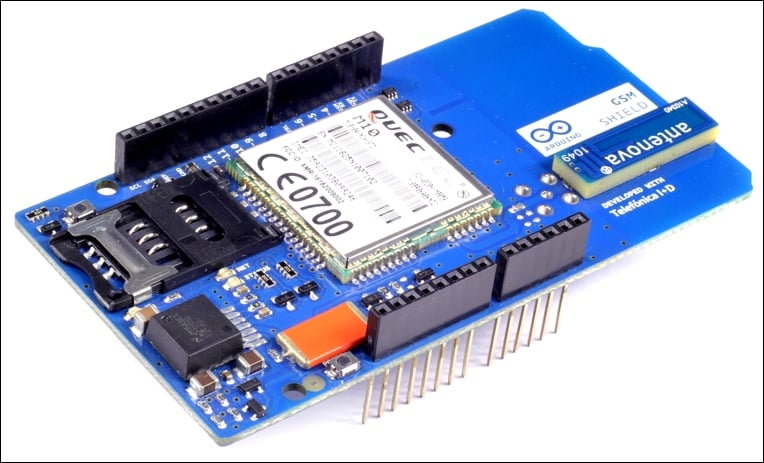
This board requires an Arduino Mega and 5V external power.
Before buying any GSM...
We already used a SD.h library in our previous chapter. By the term library, we usually mean collection of books or files. It can be a collection of anything. In programming, a library can be defined as the routines of precompiled code and programs. The routine may contain a number of necessary methods, classes, and other definitions. In a nutshell, a library is a collection of code written previously to be used when necessary. When you installed the Arduino IDE, a number of famous Arduino libraries had been installed to the Arduino directory. You can find them in the library folder. In my case, I found the following libraries installed when I installed Arduino IDE on my machine:
Adafruit_CircuitPlaygroundBridgeEsploraEthernetFirmataGSMKeyboardLiquidCrystalMouseRobot_ControlRobot_MotorRobotIRremoteSDServoSpacebrewYunStepperTembooTFTWiFi
In the Chapter 8, Working with Arduino Libraries, we will learn about a few famous libraries and their...
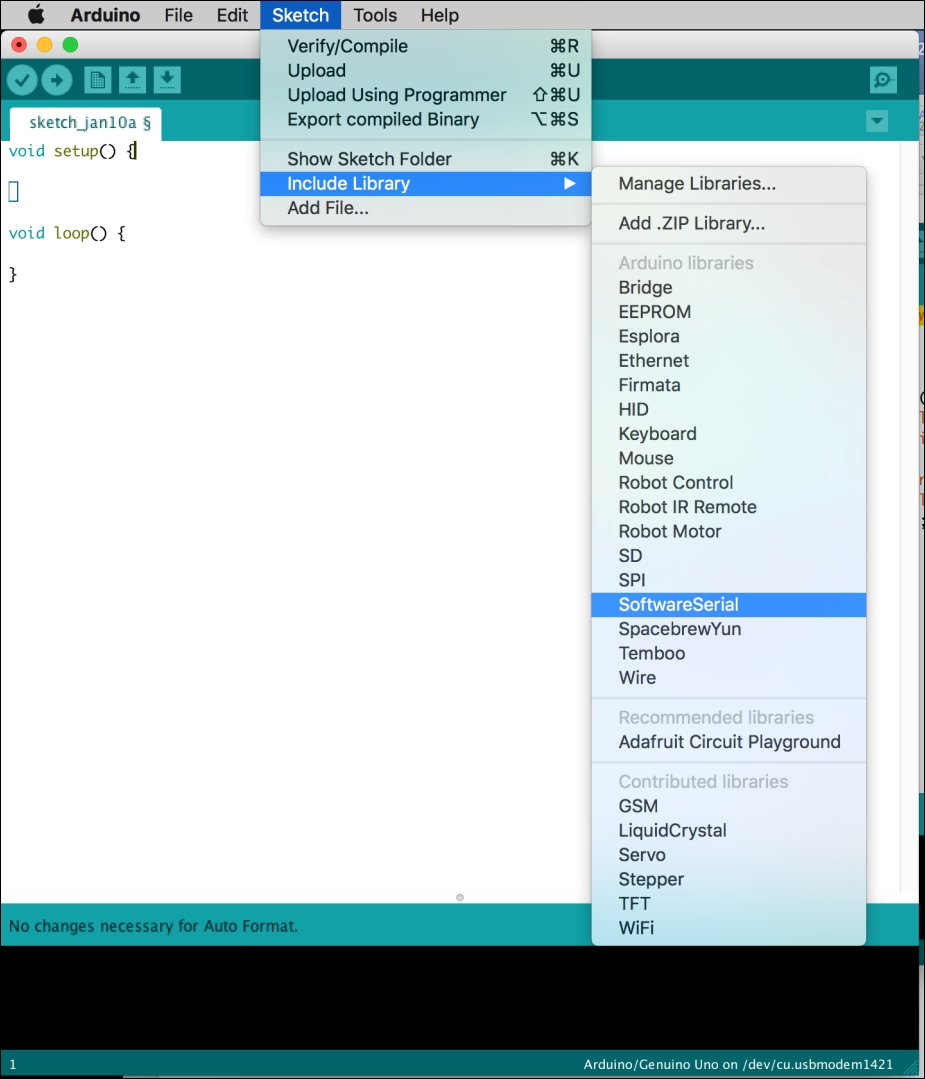
Your Arduino and the GSM Shield are connected and powered up. First, open the Arduino IDE and import the SoftwareSerial.h library, as shown in the previous chapter, or go to the menu shown in the following image (Sketch | Include
Library | SoftwareSerial):
You can also manually type the following line on the top of the setup() function:
#include <SoftwareSerial.h>
Now, we will define the pins of the Arduino where TX and RX will be attached as follows:
SoftwareSerial GSMSerial(2, 3); //Pin 2 is our TX and 3 is the RX
Here, GSMSerial() is a custom function which will be used later. You can name it anything you want. We passed two parameters into this function. The first parameter is for the TX pin and the second parameter is for the RX pin.
Let's print something on the Serial Monitor while the GSM Shield get ready to work. Then we will begin initializing the Shield by putting the baud rate inside our GSMSerial() object, as follows:
GSMSerial.begin...
In this section, we will learn how we can send an SMS using our GSM Shield and Arduino. To send an SMS, we will use AT Commands once more. It is almost similar to the method used when calling with the GSM Shield.
Since we know how we can configure the GSM Shield and the Arduino, we will skip this part and go straight to the coding.
We need to include the SoftwareSerial library as we did before.
This time we will first set our GSM to be ready to send a text message. We can do this by printing the following line on the GSM.println() function:
GSMSerial.println("AT+CMGF=1");
Here, the AT+CMGF=1 command will set the GSM Shield to text mode. It is something similar to the Boolean operation - 1 can be replaced with 0 if we want to disable the text mode. It is a good practice to wait few moments after sending a command to the GSM Shield. We will wait 1 second, so we need to write delay(1000); after the GSMSerial.println(); command.
Now we will set the phone number to which we want...
In this section, we will learn how we can receive an SMS using our GSM Shield and Arduino. We will display the SMS on the Serial Monitor.
To receive an SMS and display it on the Serial Monitor, we need to use the SoftwareSerial library. Receiving an SMS is simpler than sending an SMS. We just need to make the GSM Shield understand that the Shield is working and ready to receive a text.
To make the GSM Shield ready for receiving a text message, the command we should use is the following:
GSMSerial.println("AT+CNMI=2,2,0,0,0");
We can assign the received SMS to a string variable and print it on the Serial Monitor.
The full source code for receiving text messages is as follows:
#include <SoftwareSerial.h>
SoftwareSerial GSMSerial(2, 3);
void setup() {
  String text;
  Serial.begin(9600);
  Serial.println("Warming Up the GSM Shield; Look at the Shield's LED");
  Serial.println("..........");
  Serial.println("...............");
...In this chapter, we have learned a lot of things. We learned the characteristics of OOPs and we learned how to configure a GSM Shield with the Arduino board. This chapter is one of the most important chapters if you want to improve your use of the microcontroller and OOPs concepts. I do not recommend that you skip this chapter. If you feel this chapter is hard, try to study and do the exercises in a silent environment and do the electrical parts with caution. You might get a number of errors. Don't feel disappointed; just move to Chapter 10, Few Error Handlings. I hope this chapter won't be that hard for you. You will find a number of solutions to the problems you might find while working with the GSM Shield and Arduino. In the next chapter, we will learn two interesting thing-pointers and structure of C programming.
The rest of the chapter is locked
You have been reading a chapter from
Learning C for ArduinoPublished in: Mar 2017Publisher: PacktISBN-13: 9781787120099
Register for a free Packt account to unlock a world of extra content!
A free Packt account unlocks extra newsletters, articles, discounted offers, and much more. Start advancing your knowledge today.
undefined
Unlock this book and the full library FREE for 7 days
Get unlimited access to 7000+ expert-authored eBooks and videos courses covering every tech area you can think of
Renews at $15.99/month. Cancel anytime