

In the last chapter, we learned about basic Arduino coding. We also played with LEDs using an Arduino, by programming the microcontroller through the Arduino IDE. In this chapter, we are going to learn more about the C programming used for coding in Arduino IDE. We will also go deeper into C and some simple circuits in this chapter. We will learn about the data types of C, how we can declare our variables in C, how we can take an input and print in C, some mathematical operations, arrays, and strings. Let's start our journey into exploring C programming with Arduino IDE.
Variables are used to store data in programming languages. You might remember from your algebra class that, The number of chocolates is x, where we didn't know the value of x, but after the math was done, we found the value of x. Let's make it clear by giving an example. Consider a scenario: A boy has 23 pencils; he buys 13 pencils. How many pencils does he have now?
It's simple. Just sum up all the numbers. But let's try to do it using a variable. We can solve it as follows:
The number of pencils the boy has now is x:
So, x = 23+13 Or, x = 46
We have found the value of x, which is the total number of pencils the boy has now.
Have you noticed we stored the number of pencils on the variable x? Yes, this is what we do with variables.
In C programming, we often need to declare variables inside our code. During the C program execution, an entity that may vary is called a variable. There are a few rules for declaring a variable name. We cannot name our variables however we want, but aside...
In our day-to-day life, we use numbers, alphabets, words, and sentences. These can be defined as data. Again, numbers can be divided into two types: fraction and non-fraction, or integer and non-integer. Alphabets and symbols can be defined as characters. Let's look at what we call them in C, and their memory allocation. I will explain what memory allocation is and how you can find out how much memory a data type is consuming later.
Numbers that can be written without a fractional part are called integers: 5, 28, 273, 100, 986,343 are integers. There are negative integers too: -56, -87, -23,453, -1,000, and so on. They are called int in C programming. If we want to set a variable (number) equal to an integer (here, 24) we can write the following:
int number = 24;
An integer occupies 2 bytes (16 bits) or 4 bytes (32 bits) of memory depending on the processor's architecture. On 32-bit computers, an integer occupies 2 bytes of memory, and on 64-bit computers, integer occupies...
Before going any further, let's discuss how we can print something using Arduino IDE. We already printed Hello Arduino in the previous chapter. If you don't know how to print something using serial monitor, please go to the previous chapter and then come back here.
Let's recap the print program we used.
We took two functions, setup() and loop(). Inside the setup function, we declared our baud rate as follows:
Serial.begin(9600); //default baud for serial communication
Right after the baud was defined, we added a special function to print our text on the serial monitor. The function was Serial.print(). Inside the print()function, we wrote (in C we call it passed ) what we wanted to be seen on the serial monitor.
So, the full code for printing Hello Arduino is as follows:
void setup(){
  Serial.begin(9600);
  Serial.print("Hello Arduino");
}

void loop() {

}
You may know the difference between...
A string is one of the most important data types in C for Arduino. In this section, we will learn more about string.
By string, we mean a collection of characters. A sentence or word is a string.
In pure C, we don't have the data type String, but in C for Arduino, we do. Let's look at a basic program using the string data type:
String myString = "Hello, How are you?";
void setup() {
  Serial.begin(9600);
  Serial.print(myString);
}
void loop() {

}
The output of the program is as follows:
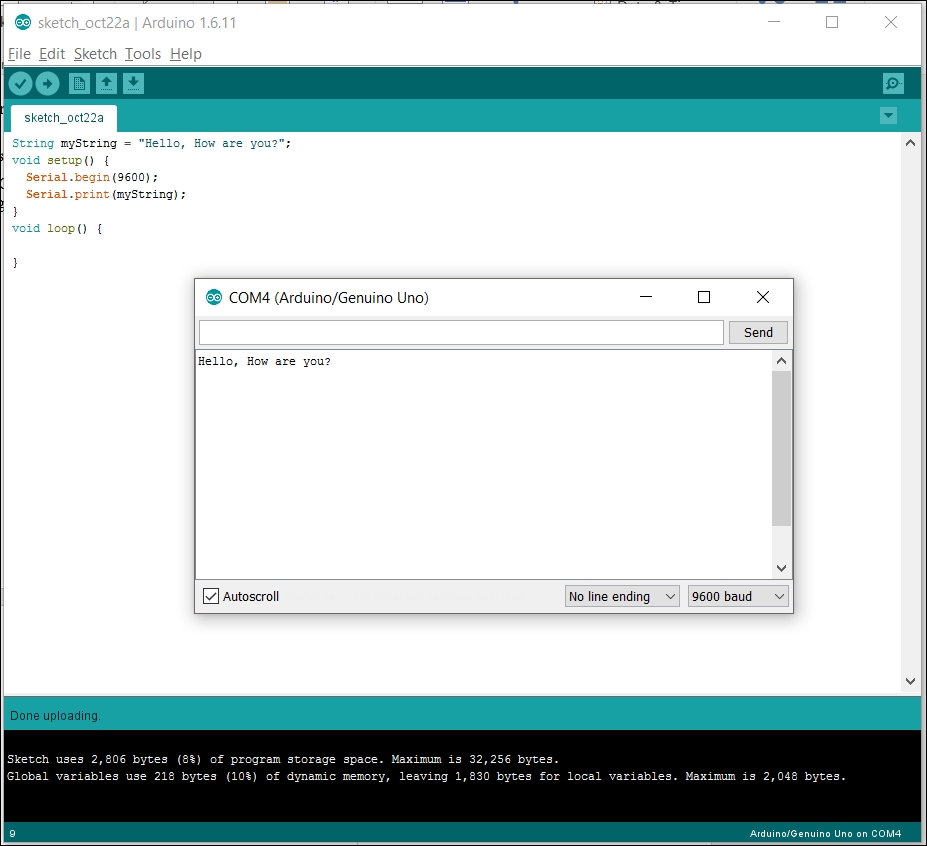
The output is a plain text that we assigned to our String variable,
myString
. If your string is too long, you can write it as follows:
String myString = " This is the first line"
                  " This is the second line"
                  " This is the third line"
                  " This is the fourth line"
                  " This is the fifth line";
void setup() {
Serial.begin(9600...In this chapter, we have looked at the basic ideas of C programming on Arduino IDE. We learned about variables, data types, arrays, and strings. We have also learned about a few operations using strings. To those who are new to both Arduino programming and C programming, my advice is, don't skip this chapter. Study the whole chapter carefully and do all the exercises assigned to you. Remember, do not copy the code from the book directly; it may cause errors on the Arduino IDE, since Arduino does not support Unicode character encodings.
If you have done all the exercises and studied the chapter, then you are most welcome to move onto the next chapter, Blinking with Operations and Loops, where we will learn about more exciting features of Arduino.
The rest of the chapter is locked
You have been reading a chapter from
Learning C for ArduinoPublished in: Mar 2017Publisher: PacktISBN-13: 9781787120099
Register for a free Packt account to unlock a world of extra content!
A free Packt account unlocks extra newsletters, articles, discounted offers, and much more. Start advancing your knowledge today.
undefined
Unlock this book and the full library FREE for 7 days
Get unlimited access to 7000+ expert-authored eBooks and videos courses covering every tech area you can think of
Renews at $15.99/month. Cancel anytime