In this section we will look at how to setup a Jupyter notebook with Spark. For those of you who haven't yet been able to grasp the concept of the notebook environment, it is important to understand the benefits as opposed to a traditional environment. Please do note that Jupyter Notebook is one of the many options that users have.
A Jupyter Notebook is an interactive computational environment which can combine execution of code, integrating rich media and text and visualizing your data with numerous visualization libraries. The notebook itself is just a small web application that you can use to create documents, and add explanatory text before sharing them with your peers or colleagues. Jupyter notebooks are being used at Google. Microsoft, IBM, NASA, and Bloomberg among many other leading companies.
Following are the steps to set up a Jupyter Notebook:
- Pre-requisites - You would need Python 2.7 or Python >=3.3 for installing Jupyter Notebook.
- Install Anaconda - Anaconda is recommended as it will install Python, Jupyter Notebook and other commonly used packages for scientific computing and data science. You can download Anaconda from the following link: https://www.continuum.io/downloads.
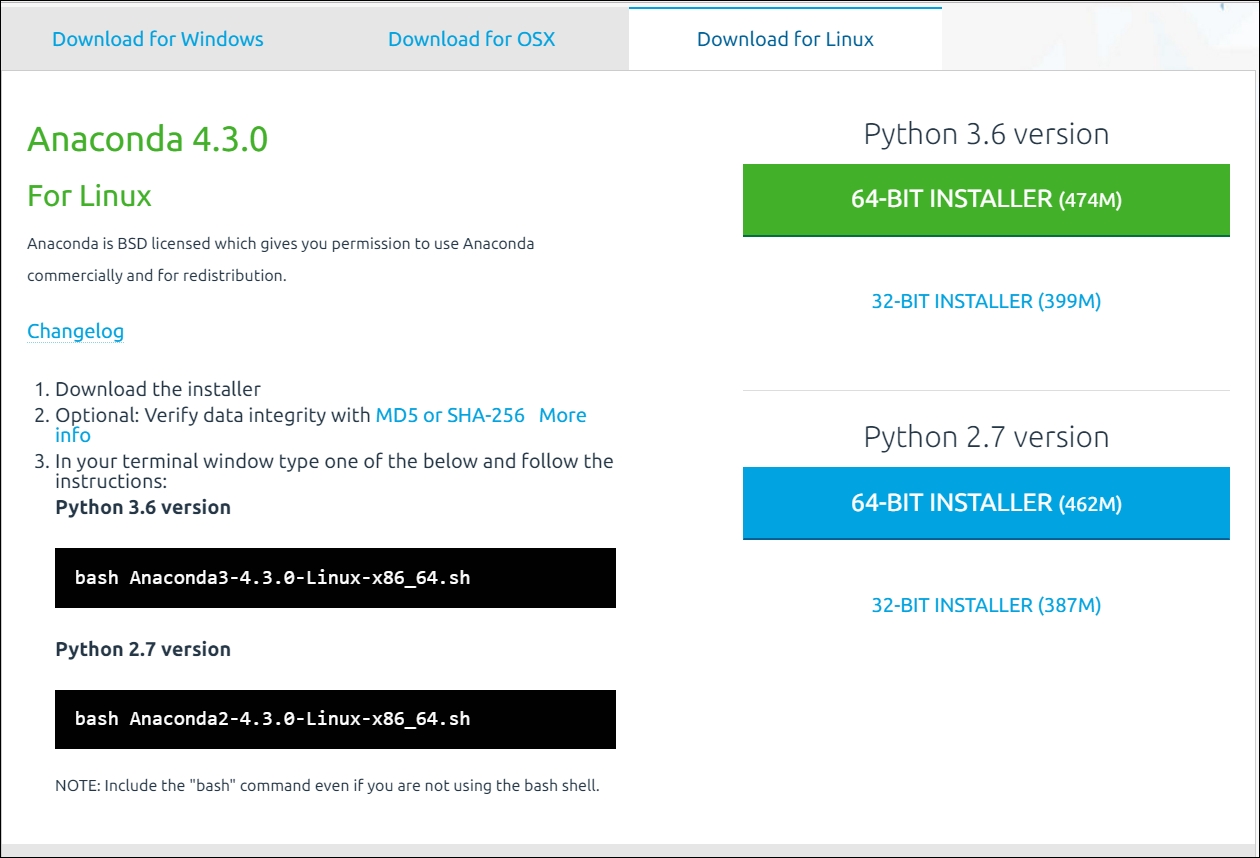
Figure 11-6: Installing Anaconda-1
You can click the link to get access to the installer and download it on your Linux system:

Figure 117: Installing Anaconda-2
Once you have downloaded Anaconda, you can go ahead and install it.

Figure 11.7: Installing Anaconda-3
The installer will ask you questions arbout the install location, and walk you through the license agreement, before asking you to confirm of installation and weather it should add the path to the bashrc file. You can then start the notebook using the following command:
jupyter notebookHowever, please bear in mind that by default a notebook server runs locally at 127.0.0.1:8888. If this is what you are looking for, then this is great. However, if you like to open it to the public, you will need to secure your notebook server.
Notebook server can be protected by a simple single password by configuring NotebookApp.password setting in the following file: Jupyter_notebook_config.py.
This file should be located in your home directory: ~/.jupyter. If you have just installed Anaconda, you might not have this directory. You can create this by executing the following command:
jupyter notebook --generate-configRunning this command will create a ~/.jupyter directory and will create a default configuration file:

Figure 11.9: Securing Jupyter for public access
You can use Jupyter to create a hashed password or prepare it manually.
You can issue the following command to create a hashed password:
jupyter notebook passwordThis will save the password in your ~/.jupyter director in a file called jupyter_notebook_config.json.
You can use Python to manually create the hashed password:
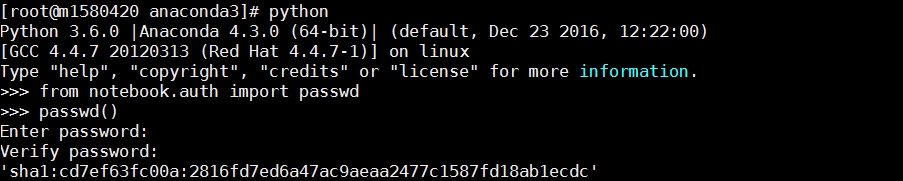
Figure 11.10: Manually creating a hashed password
You can use either of these passwords in your jupyter_notebook_config.py and replace the parameter value for c.NotebookApp.password.
c.NotebookApp.password = u'sha1:cd7ef63fc00a:2816fd7ed6a47ac9aeaa2477c1587fd18ab1ecdc'

Figure 11-11: Using the generated hashed password
By default the Notebook runs on port 8888; you'll see the option to change the port as well.
Since we want to allow public access to the notebook, we have to allow all IP's to access the notebook using any of the configured network interfaces for the public server. This can be done by making the following changes:
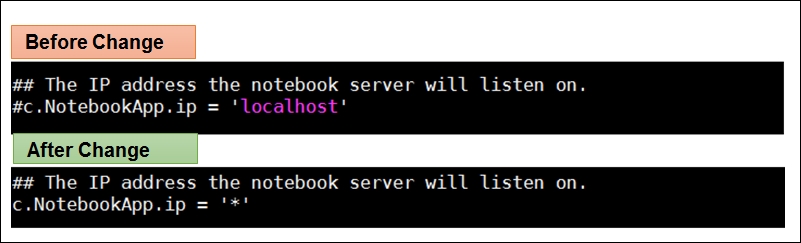
Figure 11.12: Configuring Notebook server to listen on all interfaces
You can now run Jupyter, and access it from any computer with access to the notebook server:
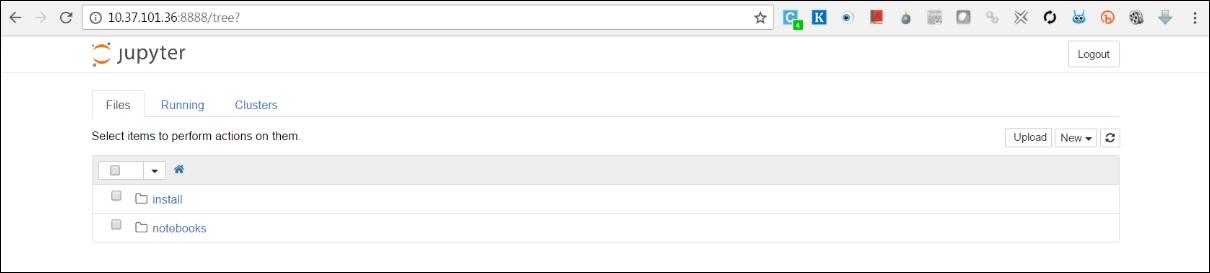
Figure 11-13: Jupyter interface
The next step is to integrate PySpark with Jupyter notebook. You have to do following steps to setup PySpark:
Update your
bashrcfile and set the following variables:# added by Anaconda3 4.3.0 installer export PATH="/root/anaconda3/bin:$PATH" PYSPARK_PYTHON=/usr/bin/python PYSPARK_DRIVER_PYTHON=/usr/bin/python SPARK_HOME=/spark/spark-2.0.2/ PATH=$PATH:/spark/spark-2.0.2/bin PYSPARK_DRIVER_PYTHON=jupyter PYSPARK_DRIVER_PYTHON_OPTS=notebookConfigure PySpark Kernel: Create a file
/usr/local/share/jupyter/kernels/pyspark/kernel.jsonwith the following parameters:{ "display_name": "PySpark", "language": "python", "argv": [ "/root/anaconda3/bin/python", "-m", "ipykernel", "-f", "{connection_file}" ], "env": { "SPARK_HOME": "/spark/spark-2.0.2/", "PYSPARK_PYTHON":"/root/anaconda3/bin/python", "PYTHONPATH": "/spark/spark-2.0.2/python/:/spark/ spark-2.0.2/python/lib/py4j-0.10.3-src.zip", "PYTHONSTARTUP": "/spark/spark-2.0.2/python/pyspark/ shell.py", "PYSPARK_SUBMIT_ARGS": "--master spark://sparkmaster:7077 pyspark-shell" } }Open the notebook: Now when you open the Notebook with
jupyter notebookcommand, you will find an additional kernel installed. You can create new Notebooks with the new Kernel: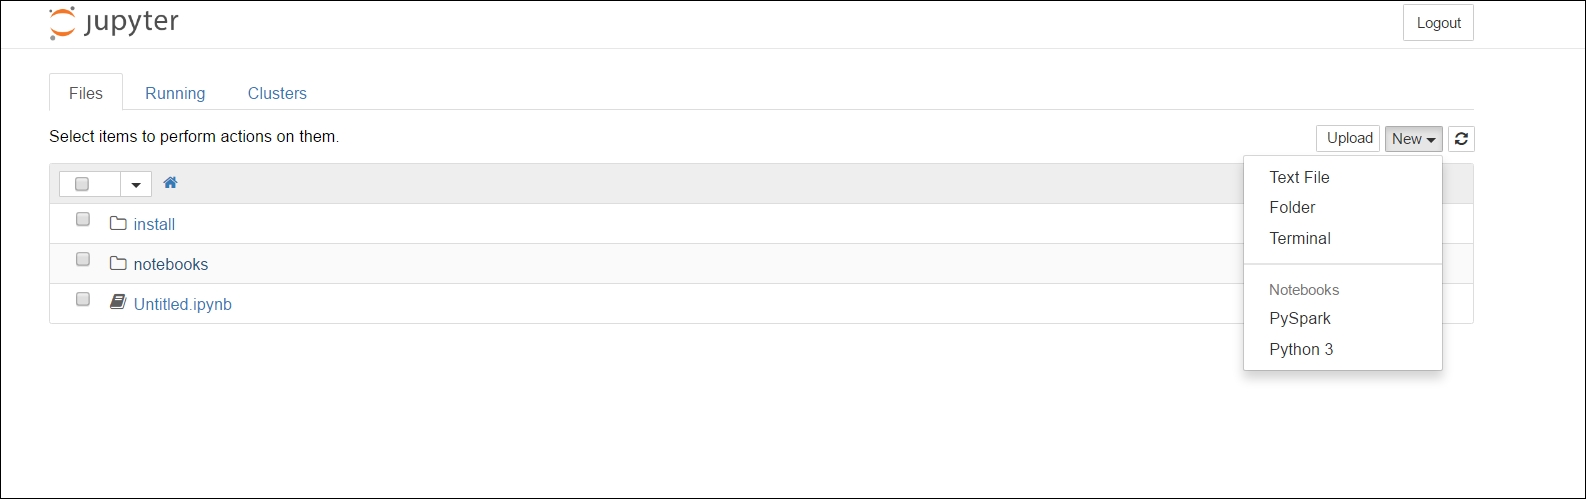
Figure 11.14: New Kernel