Reader small image

You're reading from  Learn SQL using MySQL in One Day and Learn It Well

Product typeBook
Published inApr 2024
PublisherPackt
ISBN-139781836205678
Edition1st Edition
Right arrow
Author (1)
Jamie Chan
Jamie Chan
author image
Jamie Chan

Jamie Chan is a tutor and freelance programmer with years of experience and a dedicated passion for sharing the joy of programming with as many people as possible. With seven bestselling programming books on Amazon, Jamie's publications stand out for their ability to break down complex concepts into simple terms. Additionally, each book includes complete projects at the end, enabling hands-on learning and a deep understanding of the concepts presented.
Read more about Jamie Chan

Right arrow

Chapter 1: Introduction


Welcome to SQL and thank you so much for picking up my book. I sincerely hope that this book can help you master SQL fast and introduce you to the exciting world of databases.


This book adopts a hands-on approach to learning. As we progress from one chapter to another, we’ll be doing various exercises. You are strongly encouraged to follow along these exercises.


At the end of the book, we’ll also be working on a new project together. This project involves building a SQL database for a sports complex. We’ll learn to build the database, insert data, perform queries, write routines, views, cursors, and more.


Excited and ready to start embarking on our SQL learning journey? Let’s do it!


What is SQL?


Simply stated, SQL stands for Structured Query Language and is a language used to manage data stored in a relational database.

This brings us to the next question - What is a database?


A database is a collection of data organized in some format so that the data can be easily accessed, managed and updated. The predominant type of database is a relational database. Relational databases organize data in the form of tables. In addition, they contain queries, views and other elements to help us interact with the data.


In order to manage our database, we need to use a software application known as a database management system (DBMS).


Clear?


So far, we have the following terminologies:


1) SQL is a language
2) A database is a structured collection of data
3) A DBMS is a software that we use to manage our databases


With regards to DBMS, there are a large number of them available. Some are free to download and use while others are not. The most commonly used DBMS include MySQL, Oracle, Microsoft SQL Server and IBM DB2.


Each of these DBMS have their own versions of SQL. While this may sound intimidating, rest assured that all DBMS support the major SQL commands (such as SELECT, UPDATE, DELETE, INSERT) in a similar manner. Hence, if you know one version of SQL, it is very easy to pick up other versions.


In this book, we'll be using MySQL. This is one of the most popular DBMS available. Best of all, it’s free! From this point forward, whenever I mention SQL, I’m referring to the MySQL version.


Getting Ready to Code


In order to start using MySQL, we need to first download and install two applications: MySQL Server and My SQL Workbench.


Note that the instructions provided below are accurate as of March 2024. MySQL may update its download links or alter installation procedures in the future. In such cases, you can typically find the most up-to-date installation guides on YouTube by searching for terms like "Installing MySQL on Windows" or "Installing MySQL on Mac" and selecting the latest video with the highest number of views.


For the time being, let's proceed with installing the latest version of MySQL.


Installing MySQL applications


Windows


For Windows users, go to https://dev.mysql.com/downloads/installer/.


Image


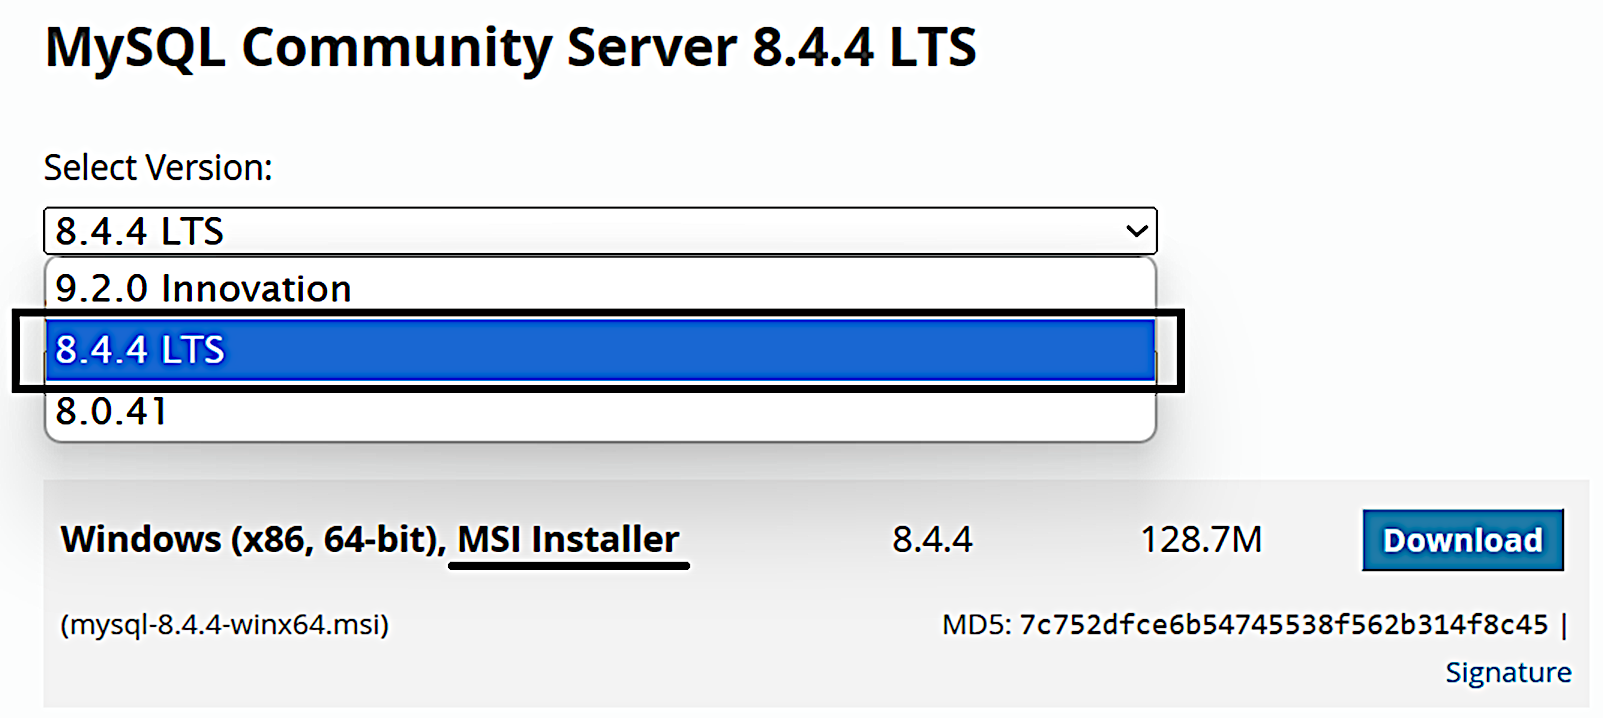
Scroll down and click on the second “Download” button to download the application. You’ll be directed to another page. Scroll to the bottom of the page and click on “No thanks, just start my download.”


Once you have downloaded the program, double-click on the file and follow the instructions to install the software. When prompted for administrative permissions, click “Yes” to grant the necessary permissions.


Next, you will be prompted to choose a setup type, select “Custom” and click “Next”.


Image


You’ll be asked to select the products to install.


Image


Under “Available Products”, fully expand “MySQL Servers” by clicking on the + signs. Once fully expanded, select the latest version (currently 8.0.36) and click on the green arrow to move this item to the “Products To Be Installed” section.


Next, scroll down and expand “Applications”. Fully expand “MySQL Workbench”, select the latest version, and click on the green arrow to move this item to the “Products To Be Installed” section.


Once you are done, click on “Next” and follow the instructions to continue with the installation. Stick to the default options selected at each stage.


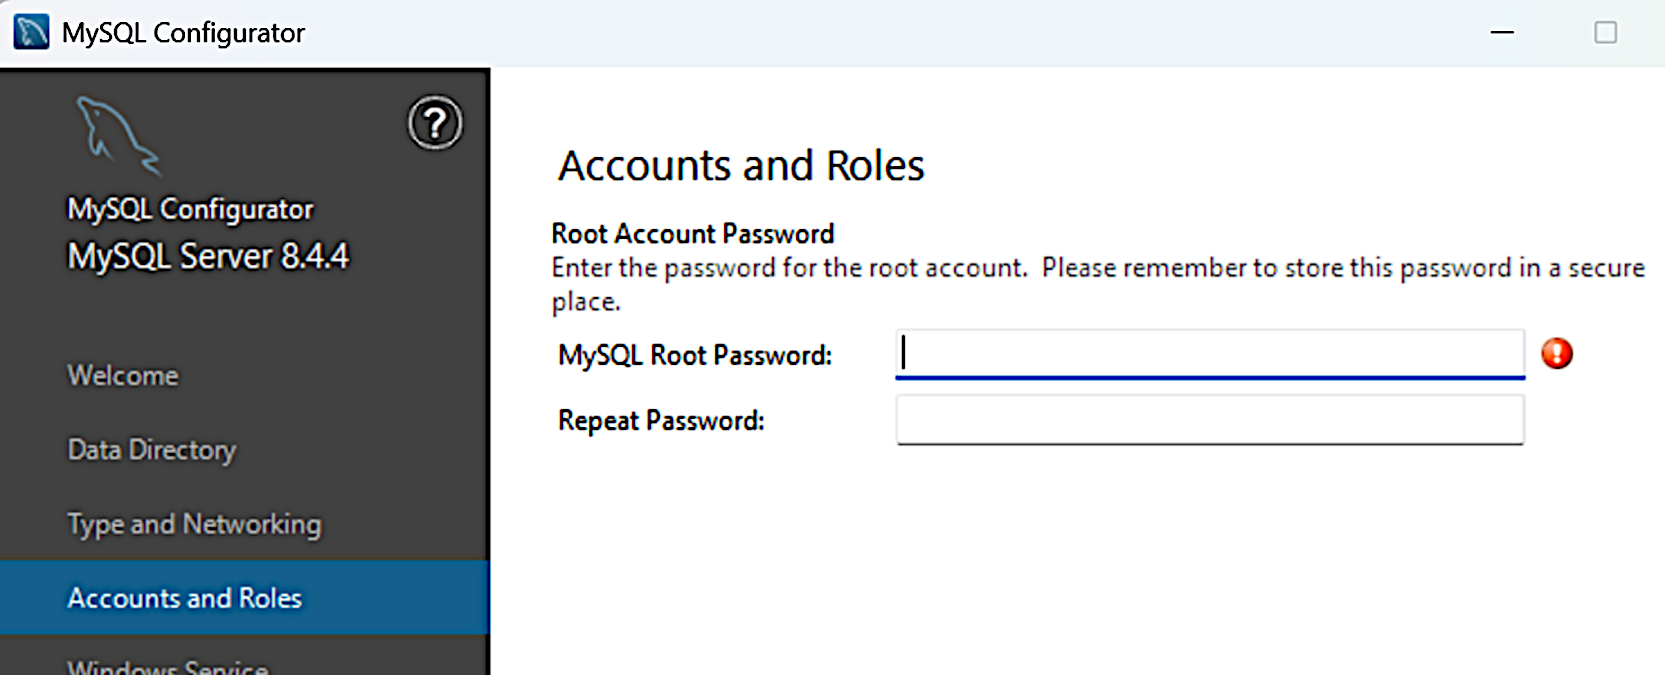
When prompted to enter a password (MySQL Root Password), enter your desired password and jot down the password; you’ll need this password later.


Click on “Next” to continue and complete the installation.


Mac OS


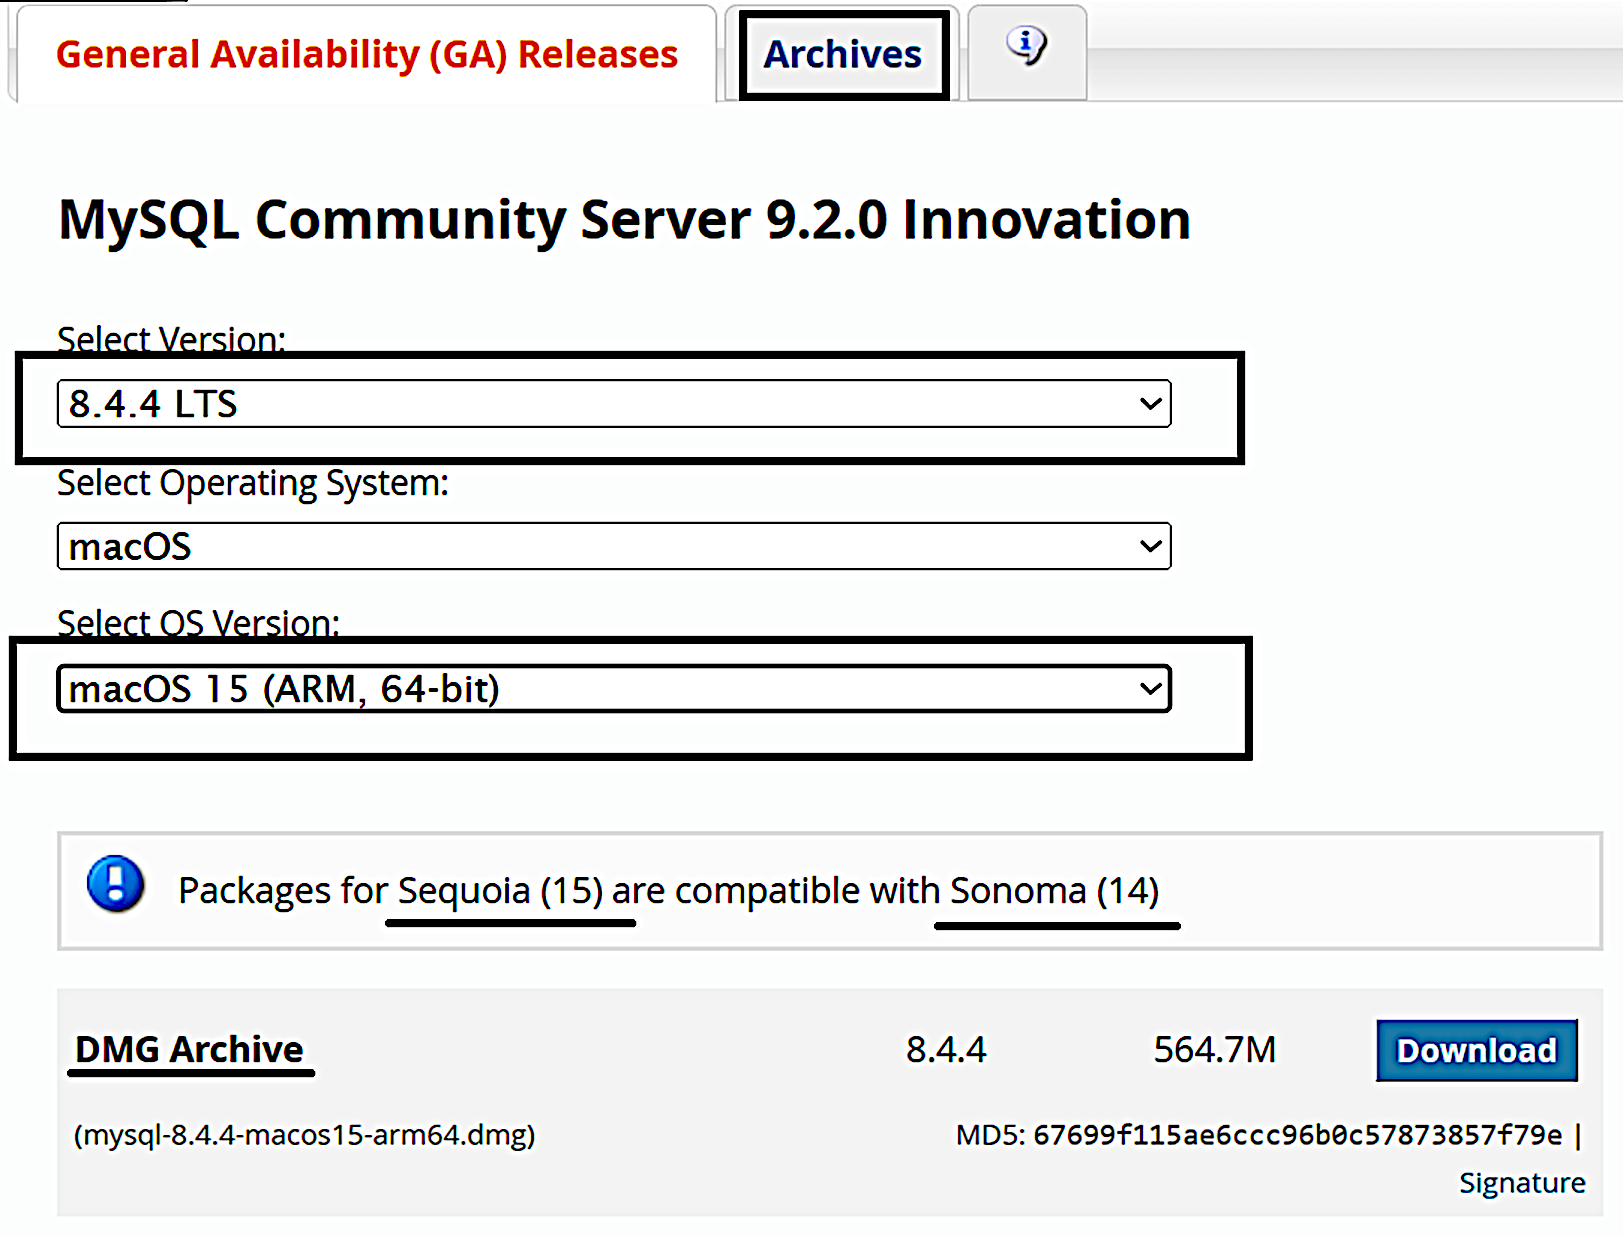
For Mac users, to install MySQL Server, go to https://dev.mysql.com/downloads/mysql/.


Scroll down and click on the first “Download” button if your system uses an Apple silicon processor (such as the M1 or M2 chip) or the second “Download” button if it uses an Intel processor.


Image


Once you do that, you’ll be directed to another page. Scroll to the bottom of the page and click on “No thanks, just start my download.”


Once you have downloaded the program, double-click on the file and follow the instructions to install the software. If you are asked for permission to continue, click on “Allow”, “Agree”, or provide your Macbook password when prompted to proceed.


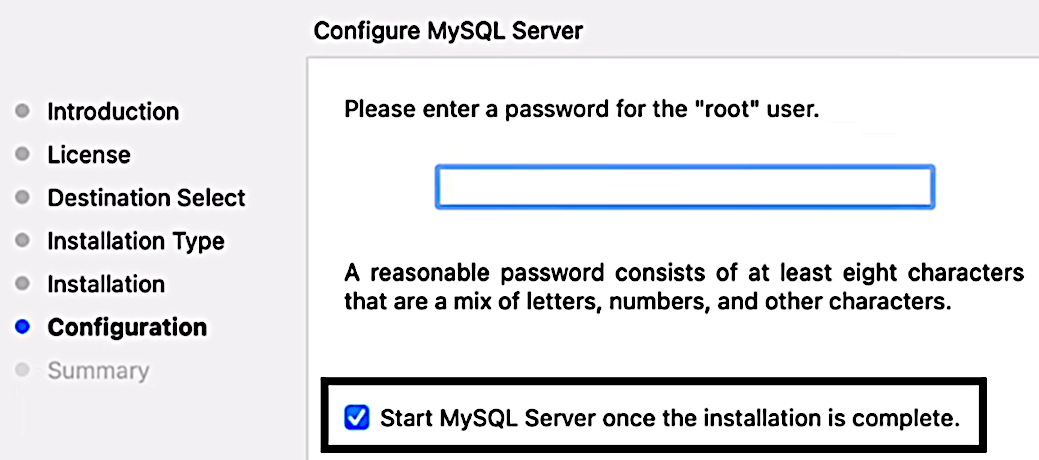
At the configuration stage, choose “Use Strong Password Encryption” and click “Next”. Enter your desired password and jot down the password; you’ll need this password later. Ensure that the "Start MySQL Server once the installation is complete" option is selected and click on "Finish" to complete the installation.


Once you are done installing MySQL Server, you need to install another software known as MySQL Workbench. This software provides us with a graphical user interface to make it easier for us to interact with MySQL. To download MySQL Workbench, go to https://dev.mysql.com/downloads/workbench/.


Click on the appropriate “Download” button (depending on the processor that your Macbook uses) to download the application. Once again, you’ll be directed to another page. Scroll to the bottom of the page and click on “No thanks, just start my download.” to download the program. Double-click on the downloaded file and follow the instructions to install it after downloading.


Launching MySQL Workbench


Once you have installed the necessary applications, we are ready to do some coding.


First, launch MySQL Workbench, you’ll get the screen below:


Image


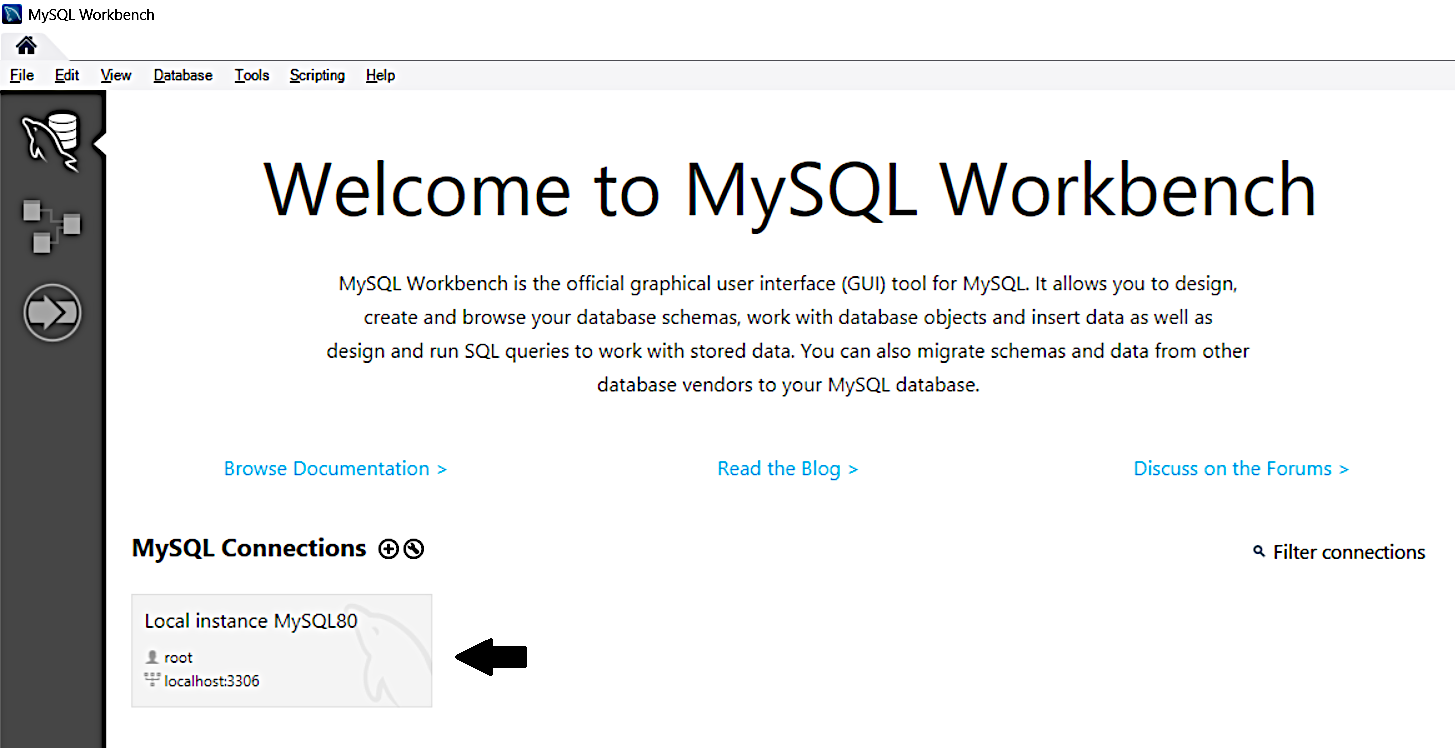
Click on the grey rectangle under "MySQL Connections" and you’ll be prompted for a password. Enter the password that you keyed in previously when you installed MySQL Server and select “Save password in vault” (or “Save password in keychain” for Mac users). Next, press OK to proceed. If all goes well, you should be directed to a screen that looks like the one below:


Image


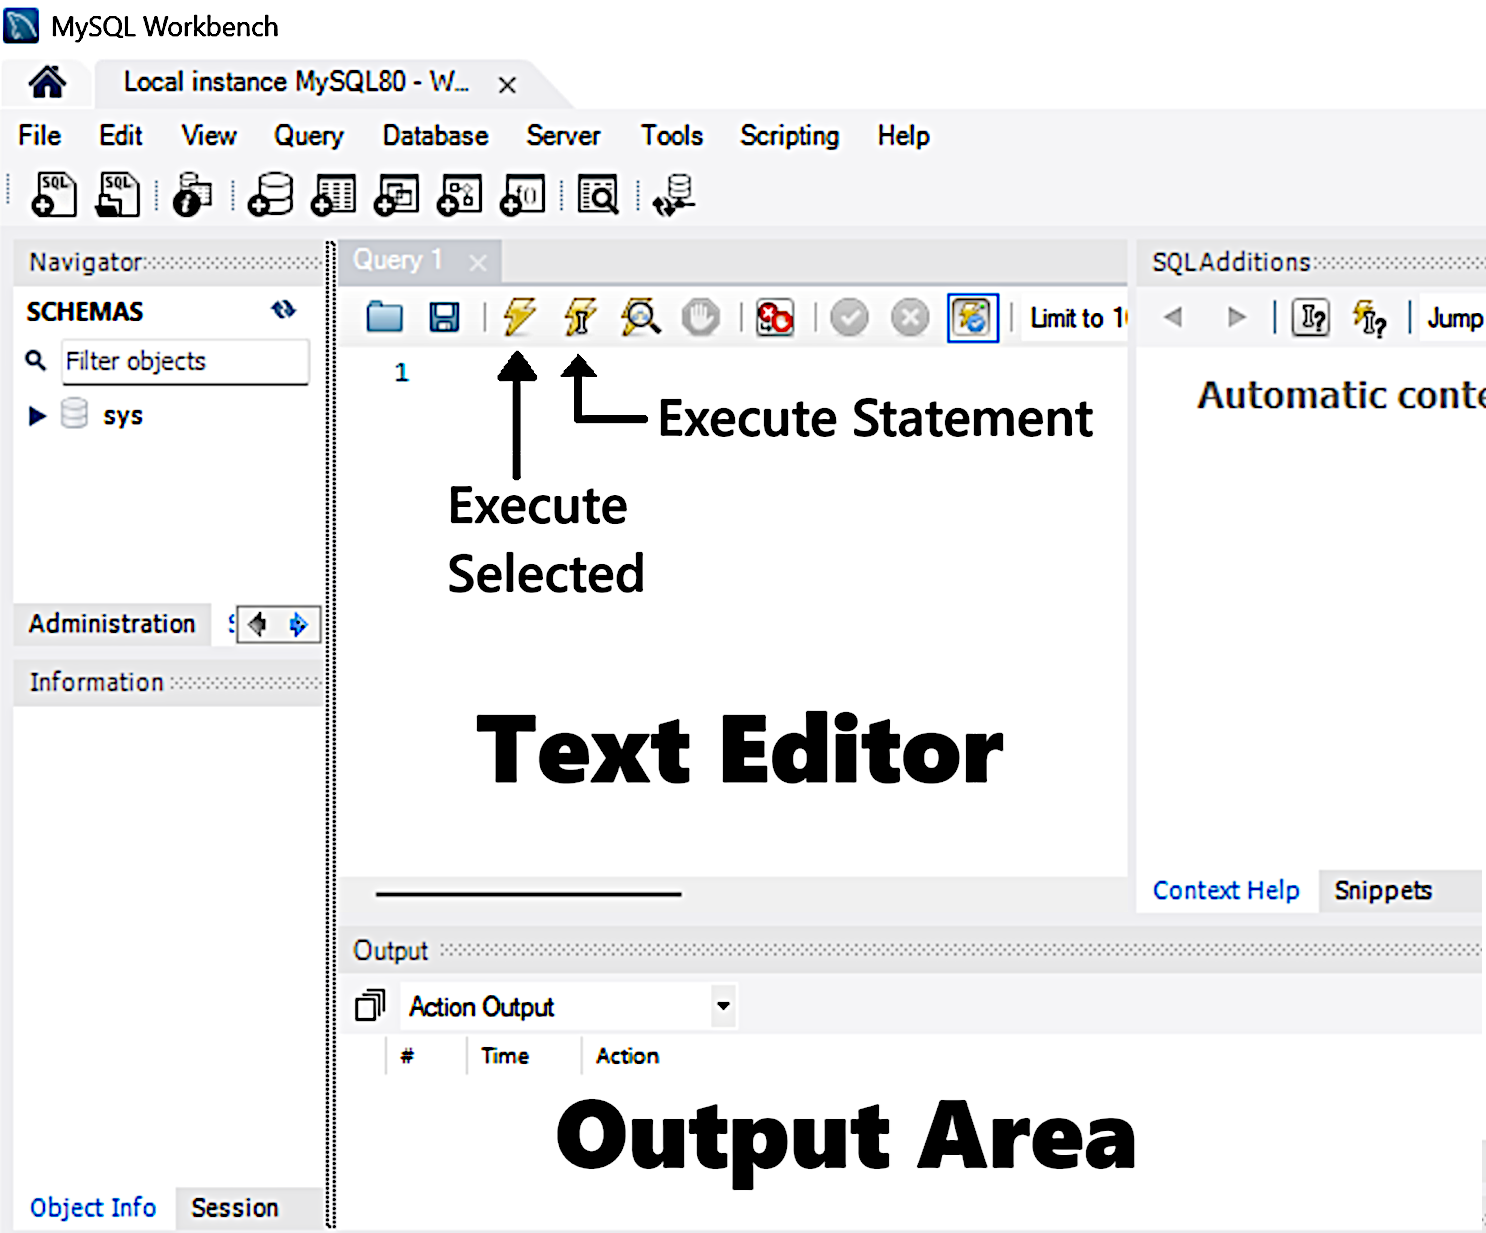
The main area is a text editor where we’ll be entering our SQL commands. The window below is the output area (refer to the screenshot above).


There’s an additional panel on the right (labeled “SQLAdditions” in the screenshot above) that we do not need. You can close this panel by selecting View > Panels > Hide Secondary Sidebar in the top menu.

Writing our first MySQL code


Now, we are ready to get our feet wet and write some SQL code.


Type the following lines into the text editor (for the first line, be sure to add a space after the two hyphens):


-- Using SELECT to display messages

SELECT 'Hello World';

SELECT 'MySQL is fun!';


You should notice that the word SELECT is in blue and 'Hello World' and 'MySQL is fun!' are in brown. (The colors may differ depending on your settings or the MySQL Workbench version that you are using).


This is the software’s way of making our code easier to read. Different words serve different purposes in our program, hence they are displayed using different colors. We’ll go into more detail in later chapters.


There are two ways to run the SQL commands that we wrote.


The first task is to select all the code that we want to run and click on the "Execute Selected" button (the button with a lightning bolt icon).


This button should normally be located to the right of the "Save" button (refer to the previous screenshot); it executes the selected portion of the script, or everything if there is no selection.


You will see a new panel called "Result Grid," with two tabs as shown below:


Image


These two tabs give the results of the last two lines of code that we wrote (i.e. the two lines that start with the word SELECT).


The first line of code that we wrote does not give any result as it is a comment. We’ll talk about comments in the next section.


Besides running all the code at one go, you can also choose to execute them one by one. To do that, simply position your cursor on the line that you want to execute and click on the “Execute Statement” button to run that statement. The “Execute Statement” button shows a lightning bolt and a cursor and is located to the right of the “Execute Selected” button.


For instance, if you place your cursor as shown in the image below


Image


and click on the “Execute Statement” button, you’ll get a single tab in the “Result Grid” that displays the message Hello World.


Comments


Now that we know how to execute SQL statements, we are ready to start learning some SQL commands. However, before we do that, there’s one more concept that I’ll like to cover - comments.


As mentioned previously, the first line in the code that we wrote (-- Using SELECT to display messages) is a comment.


Comments are written to make our code more readable for other programmers. They are meant for humans only and are ignored by the DBMS.


To add comments to our program, we type two hyphens, followed by a space, as demonstrated in the example above.


Alternatively, we can also use the # symbol as shown below:


# This is another way to add comment


Last, but not least, if we want to type multiple lines comments, we can use the /*...*/ symbols:


/* This is a comment

This is also a comment

This is the third comment */

You have been reading a chapter from
Learn SQL using MySQL in One Day and Learn It Well
Published in: Apr 2024Publisher: PacktISBN-13: 9781836205678
Register for a free Packt account to unlock a world of extra content!
A free Packt account unlocks extra newsletters, articles, discounted offers, and much more. Start advancing your knowledge today.
undefined
Unlock this book and the full library FREE for 7 days
Get unlimited access to 7000+ expert-authored eBooks and videos courses covering every tech area you can think of
Renews at $15.99/month. Cancel anytime

Author (1)

author image
Jamie Chan

Jamie Chan is a tutor and freelance programmer with years of experience and a dedicated passion for sharing the joy of programming with as many people as possible. With seven bestselling programming books on Amazon, Jamie's publications stand out for their ability to break down complex concepts into simple terms. Additionally, each book includes complete projects at the end, enabling hands-on learning and a deep understanding of the concepts presented.
Read more about Jamie Chan