

In Chapter 2, Building and Configuring Your Own MQTT Server, you have learned about the MQTT protocol, how a topic is constructed, and how to install and configure a mosquitto broker. At that time, you used a local configuration file to add a user and a password to be used as an authentication method for a local broker. How about the time the packets are travelling from your ESP8266 module to a cloud mosquitto instance? To encrypt the packets, you need to enable security on mosquitto and send encrypted packets from your ESP8266.
To enable encryption on mosquitto, you need first to have certificates. You can buy them from a company that is issuing certificates or you can generate them yourself as self-sign certificates.
First, verify that you have the openssl package installed and it has a newer version (1.0.2g), as seen in the following screenshot:

If you don't have openssl installed you need to install it first, using the following command:
sudo apt install openssl on UbuntuOr use the following command:
yum install openssl on CentOS/RedhatFirst go to /etc/mosquitto/certs and issue the following command:
sudo openssl req -x509 -newkey rsa:1024 -keyout ca.crt -out cert.crt -days 9999You will then be invited to fill some details, as seen in the following screenshot, about the owner of the certificate, such as country of residence, state, company, city, email address, and the most important one is the Fully Qualified Domain Name...
If you don't want to have your own broker, but you want a secure MQTT connection you can use a cloud MQTT instance, such as http://iotcentral.eu.
First create an account on iotcentral.eu and confirm your email address. After that you can log in to iotcental.eu and get your private assigned topic. It is an eight character code, such as c5c05211, and this code needs to precede all of your topics as follows:
c5c05211/living/temperature
No matter if you publish or subscribe. The following code connects to the Wi-Fi and then establishes a secure connection to the iotcentral.eu cloud MQTT over port 8883. Every message sent to the iotcentral.eu broker is received back like a loopback.
Included header files are the ESP8266WiFi and the PubSubClient MQTT class:
#include <ESP8266WiFi.h>
#include <PubSubClient.h>
GPIO 12 will be used later to blink a LED every time a message is received and GPIO 13 will be changed to HIGH every time a...
If your data is more sensitive and you don't want to share it across the Wi-Fi network or you don't have Wi-Fi connectivity, a solution is to store your data on an SD card.
Let's see how data can be stored on an SD card.
Necessary hardware that will be used:
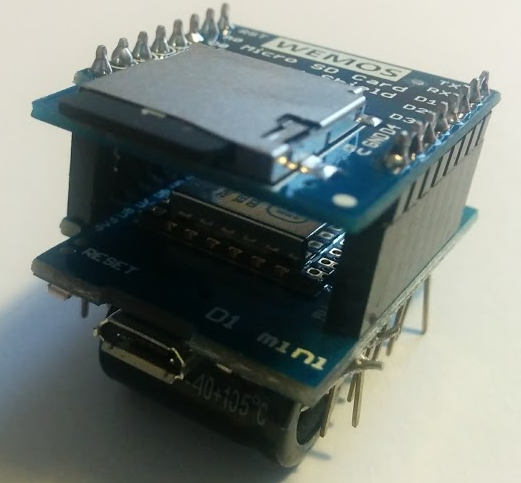
- Wemos D1 mini:

- microSD card shield:

- microSD card:

Since the microSD card is a shield for the Wemos D1 mini, it is easy to stack them; you just need to solder the pins that are coming into the package:
Let's determine the size of the SD card with the following sketch.
Include the SPI.h and the SD library:
#include <SPI.h>
#include <SD.h>
Set up variables using the SD utility library functions:
Sd2Card card;
SdVolume volume;
SdFile root;
const int chipSelect = D8;
In the setup function, we will determine if the card is inserted or not and the card details will be read over SPI:
void setup()
{
  Serial.begin(115200);
  Serial.print("\nInitializing SD card...");
Use the initialization code from the utility libraries...
Now you can transmit encrypted MQTT messages to an MQTT broker, and from there to another ESP8266 or to a database or a server. Doing this, no one can intercept and alter your data, so your home or your data are secure. Security in IoT is very important nowadays, since there are a lot of devices that are not secured even with a user and a password. If you need to work offline, now you have an entire microSD card to write or read data from it. Using a battery-powered ESP8266 and deep sleep features, now you can log data to a microSD card up to few a months. Encrypt them to be sure that you are the only one that has access to them.
In the next chapter will see how to stream data over a WebSocket connection, data that can be stored in a time series database or displayed as a real-time graphic.
The rest of the chapter is locked
You have been reading a chapter from
ESP8266 Home Automation ProjectsPublished in: Nov 2017Publisher: PacktISBN-13: 9781787282629
Register for a free Packt account to unlock a world of extra content!
A free Packt account unlocks extra newsletters, articles, discounted offers, and much more. Start advancing your knowledge today.
undefined
Unlock this book and the full library FREE for 7 days
Get unlimited access to 7000+ expert-authored eBooks and videos courses covering every tech area you can think of
Renews at $15.99/month. Cancel anytime