

Using Qt Widgets Application projects allows the creation of flexible and powerful GUIs by using the Qt Creator Design mode, or manually modifying the GUI files (*.ui) in a text editor. Up until now and throughout the chapters of this book, we relied on Qt Widgets applications as the basis for the GUIs that we created, and as we learned in Chapter 3, Creating a Comprehensive Qt+OpenCV Project, we use style sheets to effectively alter the look and feel of our Qt applications. But apart from Qt Widgets applications and using QtWidgets and QtGui modules, there is another approach to the creation of GUIs that is offered by the Qt Framework. This approach is based on the QtQuick module and the QML language, and it allows the creation of far more flexible (in terms of the look, feel, animations, effects, and so on) GUIs and with much more ease. Applications created by using this approach are referred to as Qt Quick applications. Note that in more recent Qt versions...
As mentioned in the introduction, QML has a JSON-like structure that be used to describe the elements on a user interface. A QML code imports one or more libraries and has a root element that contains all of the other visual and non-visual elements. The following is an example of a QML code that results in the creation of an empty window (ApplicationWindow type) with a specified width, height, and title:
    import QtQuick 2.7
    import QtQuick.Controls 2.2

    ApplicationWindow
    {
      visible: true
      width: 300
      height: 500
      title: "Hello QML"
    }
Each import statement must be followed with a QML library name and version. In the preceding code, two of the main QML libraries that include most of the default types are imported. For instance, ApplicationWindow is defined inside the QtQuick.Controls 2.2 library. The only source of truth for existing QML libraries and their correct versions is the Qt documentation, so make sure to always refer...
Responding to user actions events in QML code is done by adding scripts to slots of the items, in quite a similar way to Qt Widgets. The difference here is that each signal defined internally within a QML type also has a corresponding slot for it which is automatically generated and can be filled with a script to perform an action when the relevant signal is emitted. Well, let's see this with another example. A QML Button type has a pressed signal. This automatically means that there is an onPressed slot that you can use to code the required action of the specific button. Here's an example code:
    Button
    {
      onPressed:
      {
        // code goes here
      }
    }
For a list of available slots in QML types, you can refer to the Qt documentation. As mentioned before, you can easily guess the slot name of each signal by capitalizing the first letter of the signal name and prepending on to it. Thus, for the pressed signal you'll have...
QML files, because of their and readable syntax, are quite easy to modify and extend using any code editor; however, you can also use the integrated Quick Designer in Qt Creator for easier design and modification of a QML file. If you try to open a QML file in Qt Creator and switch to Design mode, then you'll be presented with the following Design mode, which is quite different from the standard Qt Widgets designer (used with *.ui files), and it contains most of what you need for quickly designing your user interfaces using a QML file:
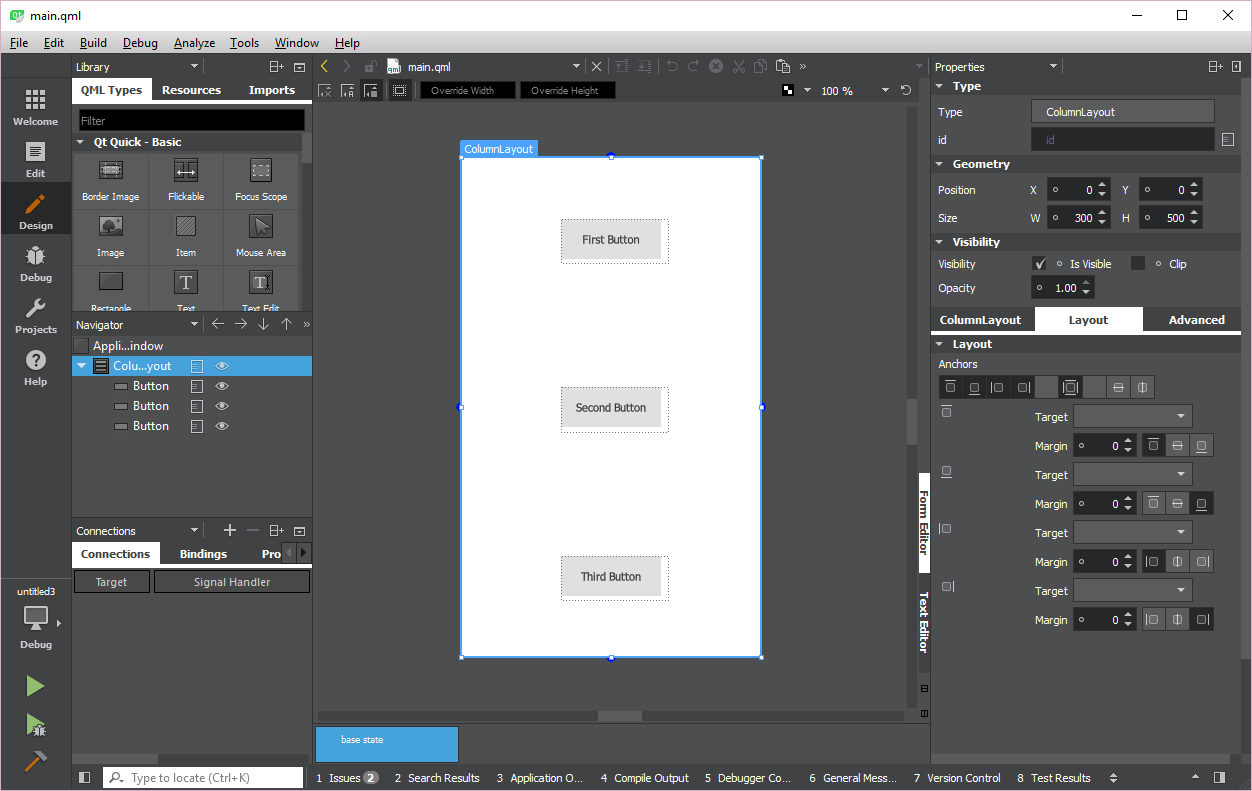
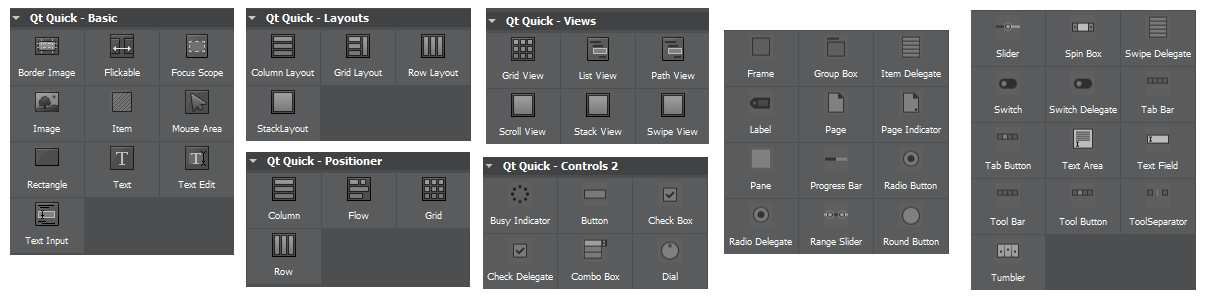
On the left side of the Qt Quick Designer screen, you can see the library of QML types that can be added to the user interface in the Library pane. It's similar to the Qt Widgets toolbox, but definitely with more components that you can use to design the user interface of your applications. You can simply drag and drop each one of them on the user interface and they'll be automatically added to your QML file:
Right below the Library...
In this section, we are going to about the structure of a Qt Quick Application project. Similar to Qt Widgets Application projects, most of the files required for a Qt Quick Application project are created automatically when you create a new project using Qt Creator, so you don't really need to memorize all of what is needed as a minimum, but still it is important to understand some of the basic concepts of how a Qt Quick Application is handled in order to be able to further extend it, or, as we'll learn in a later section of this chapter, to integrate and use C++ codes inside a QML file.
Let's go through this by creating an example application. Start by opening Qt Creator and pressing the New Project button from the welcome screen, or by choosing New File or Project from the File menu. Choose Qt Quick Controls 2 Application as the template type and press Choose, as seen in the following screenshot:

Set the name of the project as CvQml and press Next. In...
Even though the QML libraries have into a fully-fledged collection of types that can handle visuals, networking, cameras, and so on, it's still important to be to extend them by using the power of C++ classes. Fortunately, QML and the Qt Framework provides enough provisions to be able to easily handle this. In this section, we are going to learn how to create a non-visual C++ class that can be used within QML codes to process images using OpenCV. Then, we'll create a C++ class that can be used as a visual item within QML codes to display images.
Note
Note that there is an Image type by default in QML that can be used to display images saved on disk by providing their URL to the Image item. However, we'll be creating an image viewer QML type that can be used to display QImage objects, and use this opportunity to learn about the integration of C++ classes (visual) in QML codes.
Start by adding the OpenCV framework to our project that we created in the previous...
Ideally, you can build run the applications created by using Qt and OpenCV frameworks on desktop and mobile platforms alike, without the need to write any platform-specific codes. However, in practice, this is not as easy as it seems, since frameworks like Qt and OpenCV act as wrappers over the capabilities of the operating system itself (in some cases), and since are still undergoing extensive development, there might be some cases that are not yet fully implemented in a particular operating system, such as Android or iOS. The good news is that those cases are getting rarer as new of the Qt and OpenCV frameworks are released, and even now (Qt 5.9 and OpenCV 3.3), most of the classes and functions in both of these frameworks can be easily used in Windows, Linux, macOS, Android, and iOS operating systems.
So, first of all by keeping what we just mentioned in mind, we can say that practically (as opposed to ideally), to be able to build and run applications...
In this chapter, we learned about the Qt Quick Application development and the QML language. We started with the bare syntax of this highly readable and easy-to-use language, and then moved our way to developing applications that contain components that can interact with each other in order to achieve a common goal. We learned how to fill the gap between the QML and C++ codes and then built a visual and a non-visual class to process and display images processed using OpenCV. We also went through a brief introduction of the tools required in order to build and run the same applications on Android and iOS platforms. The final chapter of this book was meant to help you get up on your feet by starting to develop quick and beautiful applications using the new Qt Quick Controls 2 module, and also combining the power of C++ codes and third-party frameworks such as OpenCV to achieve the maximum power and flexibility in developing mobile and desktop applications.
Building cross-platform and...