All the packages that we will be installing in this section are vital for our upcoming projects. So, let's get started.
Installing additional libraries
Installing OpenCV
To get OpenCV, go to the following link: anaconda.org/conda-forge/opencv. Technically, we don't need to access the website to install this package. The site just shows the various versions of OpenCV and all the different systems we can install it on.
Copy and paste the installation command from the site into Command Prompt and then run it, as shown in the following screenshot:
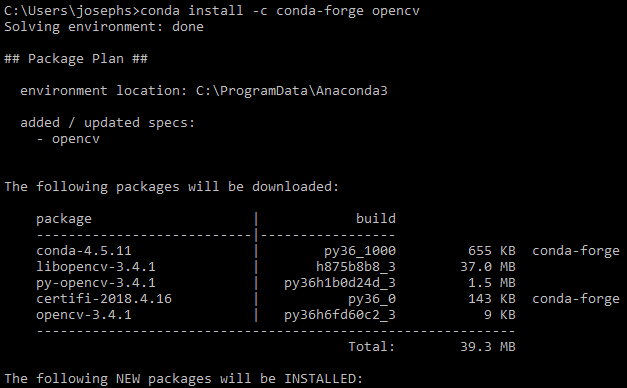
The preceding command is a simple, platform-independent way to get OpenCV. There are other methods for getting it; however, using this command ensures that we are installing the latest version.
Installing dlib
We need to install dlib from the Anaconda distribution, similar to OpenCV. Just as with OpenCV, installing dlib is a straightforward process.
Run the following command:
conda install -c menpo dlib
You will get the following output:
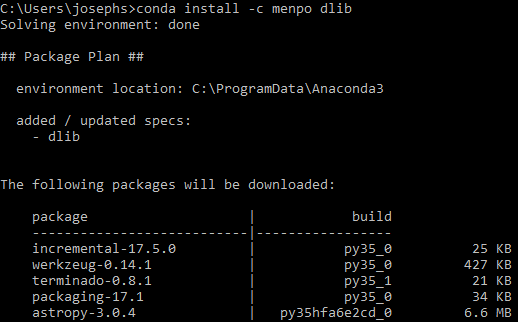
This will take around 10 to 20 seconds to run. If everything goes well, we should be good to go with dlib.
Installing Tesseract
Tesseract is Google's optical character recognition library, and is not natively a Python package. Because of this, there's a Python binding for it that calls the executable, which can then be installed manually.
Go to the GitHub repository for Tesseract, which is found at the following link: https://github.com/tesseract-ocr/tesseract.
Scroll down to the Installing Tesseract section in the GitHub readme. Here, we are presented with two options:
- Installing it via a pre-built binary package
- Building it from source
We want to install it via the pre-built binary package, so click on that link. We can also build it from source if we want to, but that doesn't really offer any advantages. The Tesseract Wiki explains the steps to install it on various different operating systems.
As we're using Windows, and we want to install a pre-built one, click on the Tesseract at UB Mannheim link, where you will find all the latest setup files. Download the latest setup from the site.
Once downloaded, run the installer or execute the command. However, this is not going to put Tesseract in your path. We need to make sure it is in your path; otherwise, when you call Tesseract from within Python, you're going to get an error message.
So, we need to figure out where Tesseract is and modify our path variable. To do this, type the where tesseract command in Command Prompt, as shown in the following screenshot:

Once you have the binary packages, use the pip command to apply the Python binding to the packages. Use the following commands:
$ pip install tesseract
$ pip install pytesseract
We should be good to go with Tesseract now.
Installing TensorFlow
Last but not least, we will install TensorFlow, which is a software library for data flow programming across a range of tasks. It is usually used for machine learning applications such as neural networks.
To install it, go to TensorFlow's website at the following link: tensorflow.org/install/. The website contains instructions for all the major operating systems.
As we're using Windows, the installation process is very simple. We just have to run the pip install tensorflow command in Command Prompt, as seen in the following screenshot:
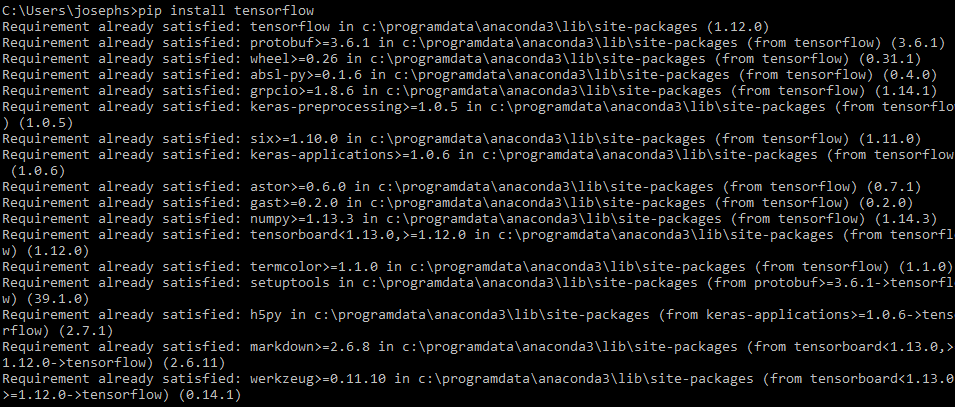
As seen in the preceding screenshot, TensorFlow is already installed on the system, so it says that the requirements are satisfied. We should be good to go with TensorFlow now.
Install tensorflow-hub using the following command:
pip install tensorflow-hub
Next, install tflearn using the following command:
pip install tflearn
Finally, Keras is a high-level interface, which can be installed using the following command:
pip install keras
We have installed OpenCV, TensorFlow, dlib, and Tesseract, so we should be good to go with the tools for our book. Our next step will be exploring Jupyter Notebook, which should be fun!