Chapter 6. Creating Custom Master Shapes
In the previous chapters, we learned about importing data into Visio, how to link data to shapes, and how to use the built-in Data Graphics. These are all necessary skills, but there are more ways that Visio can take advantage of linked shape data. Shapes can be made to resize, move, change appearance, and much more. The secret is to make Master shapes that respond to data values.
In this chapter, we will learn the following topics:
How to enhance built-in Masters
How to create custom Masters
How to make shapes react to Shape Data value changes
How to share custom templates and stencils with others
Understanding a Master and Shape instance
The normal Visio user creates a diagram by selecting a template, which opens a blank page with one or more docked stencils. Often, a shape is created by dragging and dropping a Master shape from one of these stencils onto the page. In fact, in Chapter 3, Linking Data to Shapes, multiple copies of the Person Master from...
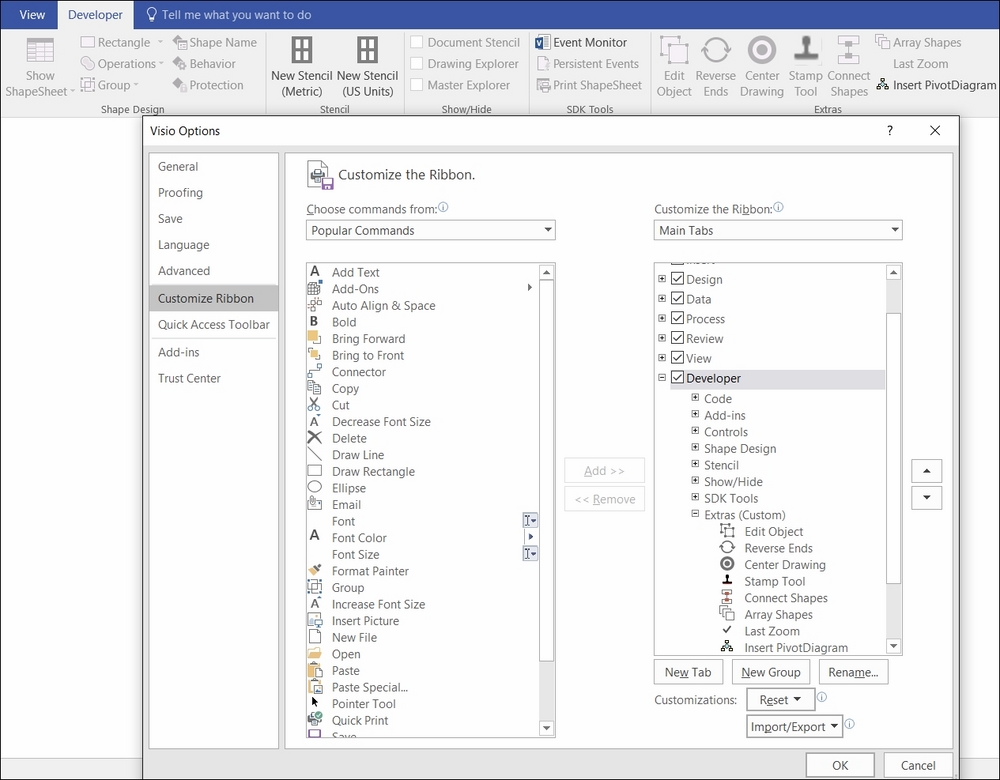
Microsoft created the ribbon to bring order into the UI, but that meant that they decided to leave some buttons out that were previously in the command bars. Some of these buttons were extremely useful, and fortunately, they can be easily added back into the ribbon. The following screenshot shows a few added to a new group called Extras in the Developer tab. The one called Edit Object is extremely useful because it will open a group shape in edit mode, allowing the sub-shapes to be selected and modified. This dialog can be opened from the right-click menu option, Customize the Ribbon…, from any blank area in the ribbon:
Preparing shapes for data linking
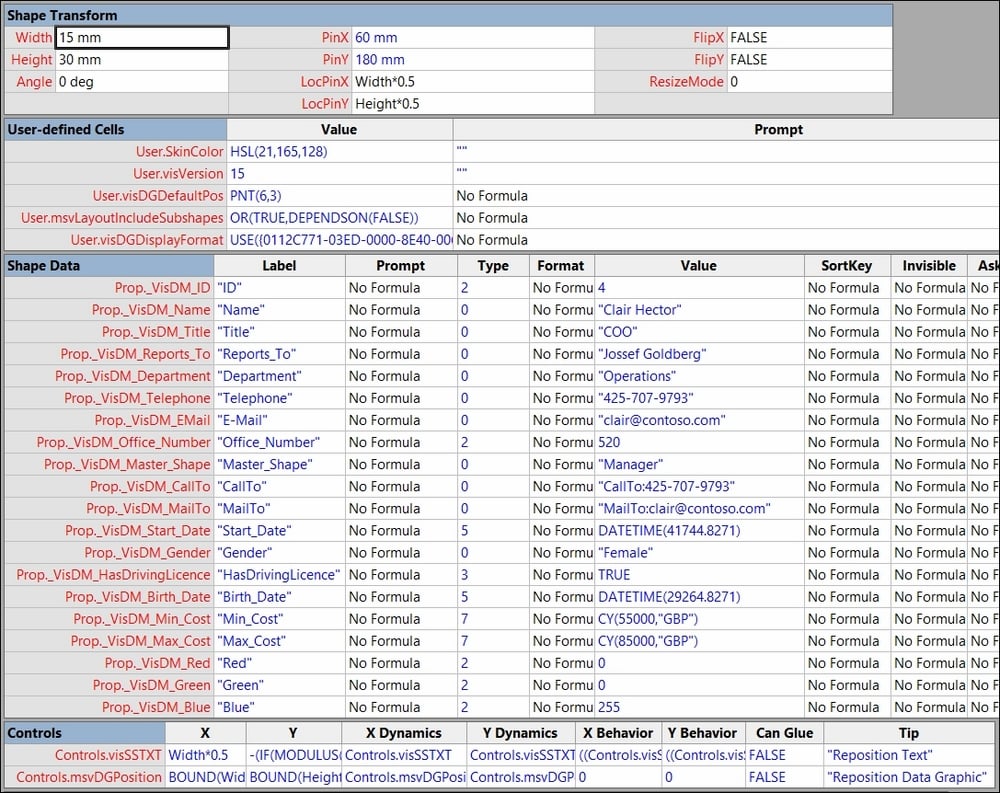
When it comes to preparing shapes for linking to data, then the most vital part of the shape is the Shape Data section, and Data Graphics will add three User-defined Cells rows plus one Controls row. In the following screenshot (which is part of the ShapeSheet of one of the Person Shape instances), the PinX and PinY values are colored blue, whereas the rest of the Shape Transform cell values are colored black. This black font color indicates that the value is inherited from a Master shape, and the blue font color indicates that the value is stored within the Shape itself. All of the values in the other three sections in this screenshot are colored blue because each of these sections have had rows inserted by data linking or by Data Graphics:
There are three very good reasons for preparing Master shapes for data linking and Data Graphics:
Making graphics respond to data value changes
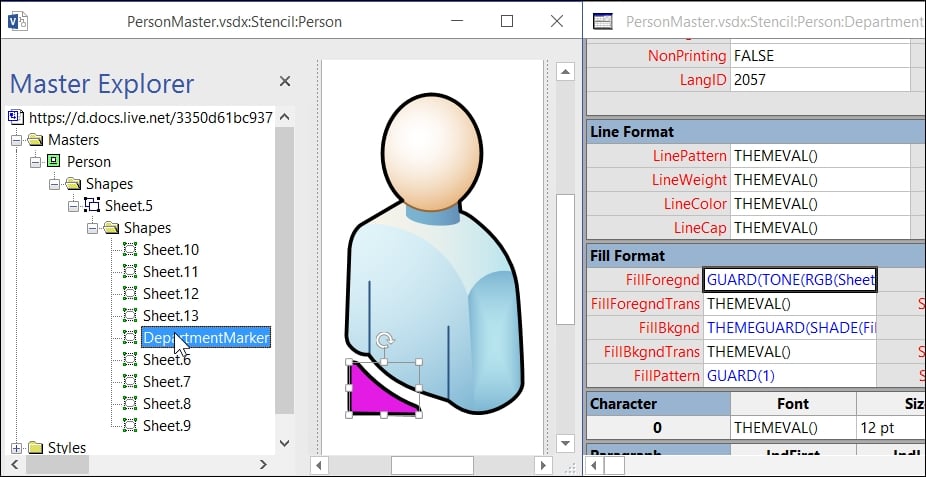
The following screenshot shows a triangular shape, named DepartmentMarker, added to the group shape of the Person master in the Document Stencil:
Notice that the top group shape is currently named Sheet.5. This is the default name, and it will remain as the NameID property even if the shape is renamed. In fact, 99% of Masters have the top group Shape with an ID of 5. NameID is the ID of the shape preceded by sheet making it Sheet.5.
To make the color of the DepartmentMarker Shape change whenever the value of the Department Shape Data row changes, the following formulas were entered:
The RGB(r,g,b) function takes three numbers between 0 and 255 for the red, green, and blue values. These are obtained from the respective Shape Data rows (Prop.Red, Prop.Green, and Prop.Blue) in the parent group Shape, Sheet.5. However, in order to mute the color...
Sharing custom Templates, Stencils, and Masters
Custom Masters are delivered in a custom Stencil. Stencils can be deployed individually or along with a custom Template that they are docked with. A Visio installation creates a <Documents>\My Shapes folder. If Visio Stencils are placed into this folder, or in a sub-folder, then they will become available in More Shapes | My Shapes in the Visio UI.
Alternatively, a folder path, or multiple folder paths separated by semicolons, can be entered into the Stencils option of the File Locations dialog opened from the Visio Options | Advanced panel, as shown in the following screenshot:
Similarly, the
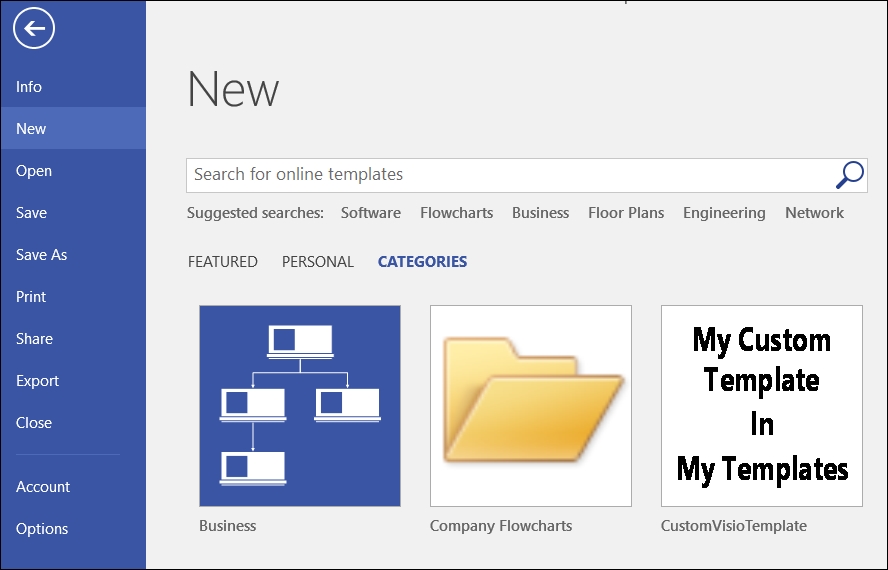
Templates option allows multiple folder paths for custom Templates. The Visio UI will display any template in the CATEGORIES panel, and any sub-folder that contains a template will be shown with a folder icon, as shown in the following screenshot:
There is no way currently of updating the default image for a sub-folder that appears as a category....
In this chapter, we learned how to create enhanced versions of Microsoft Visio Master shapes, and how to create our own Stencils and Masters. We then learned how we can share these customizations with others.
In the next chapter, we will learn how to create custom Text Callouts, Icon Sets, and Data Bars graphic items for use in Data Graphics.