


Creating the basic layout of our blog
A blog typically has a header containing all the primary website links and a footer containing copyright information and other useful links. In the world of Angular, both can be represented as separate components.
The header component is used only once since it is added when our application starts up, and it is always rendered as the main menu of the website. In Angular, we typically create a module, named core by convention, to keep such components or services central to our application. To create the module, we use the generate command of the Angular CLI:
ng generate module core
The preceding command will create the module in the src\app\core folder of our application. To create the header component, we will use the same command, passing a different set of options:
ng generate component header --path=src/app/core --module=core --export
The previous command will create all necessary component files inside the src\app\core\header folder. It will also declare HeaderComponent in the core.module.ts file and add it to the exports property so that other modules can use it:
import { NgModule } from '@angular/core';
import { CommonModule } from '@angular/common';
import { HeaderComponent } from './header/header.component';
@NgModule({
  declarations: [
    HeaderComponent
  ],
  imports: [
    CommonModule
  ],
  exports: [
    HeaderComponent
  ]
})
export class CoreModule { }
The header component should display the main links of our blog. Open the header.component.html template file of the header component and replace its content with the following snippet:
<nav class="navbar navbar-expand navbar-light bg-light">
  <div class="container-fluid">
    <a class="navbar-brand">Angular Projects</a>
    <ul class="navbar-nav me-auto">
      <li class="nav-item">
        <a class="nav-link">Articles</a>
      </li>
      <li class="nav-item">
        <a class="nav-link">Contact</a>
      </li>
    </ul>
  </div>
</nav>
The footer component can be used more than once in an Angular application. Currently, we want to display it on the main page of our application. In the future, we may want to have it also on a login page that will be available for blog visitors. In such a case, the footer component should be reusable. When we want to group components that will be reused throughout our application, we typically create a module named shared by convention. Use the Angular CLI generate command to create the module:
ng generate module shared
The previous command will create the shared module in the src\app\shared folder. The footer component can now be created using the following command:
ng generate component footer --path=src/app/shared --module=shared --export
The previous command will create all necessary files of the footer component inside the src\app\shared\footer folder. It will also add FooterComponent in the declarations and exports properties in the shared.module.ts file:
import { NgModule } from '@angular/core';
import { CommonModule } from '@angular/common';
import { FooterComponent } from './footer/footer.component';
@NgModule({
  declarations: [
    FooterComponent
  ],
  imports: [
    CommonModule
  ],
  exports: [
    FooterComponent
  ]
})
export class SharedModule { }
The content of the footer component should contain copyright information about our blog.
Let’s see how to add this information to our component:
- Open the
footer.component.tsfile, add acurrentDateproperty in theFooterComponentclass, and initialize it to a newDateobject:currentDate = new Date(); - Open the
footer.component.htmltemplate file of the footer component and replace its content with the following:<nav class="navbar fixed-bottom navbar-light bg-light"> <div class="container-fluid"> <p>Copyright @{{currentDate | date: 'y'}}. All Rights Reserved</p> </div> </nav>
The preceding code uses interpolation to display the value of the currentDate property on the screen. It also uses the built-in date pipe to display only the year of the current date.
Pipes are a built-in feature of the Angular framework that apply transformations on the view representation of a component property. The underlying value of the property remains intact.
We have already created the essential components of our blog. Now it is time to display them on the screen:
- Open the main module of the application, the
app.module.tsfile, and addCoreModuleandSharedModuleinto theimportsproperty of the@NgModuledecorator:@NgModule({ declarations: [ AppComponent ], imports: [ BrowserModule, AppRoutingModule, CoreModule, SharedModule ], providers: [], bootstrap: [AppComponent] }) - Add the appropriate
importstatements at the top of the file for each module:import { CoreModule } from './core/core.module'; import { SharedModule } from './shared/shared.module'; - Open the
app.component.htmltemplate file of the main component and replace its content with the following HTML snippet:<app-header></app-header> <app-footer></app-footer>
We added the header and the footer component in the preceding snippet by using their CSS selectors.
If we run the serve command of the Angular CLI to preview the application, we should get the following:
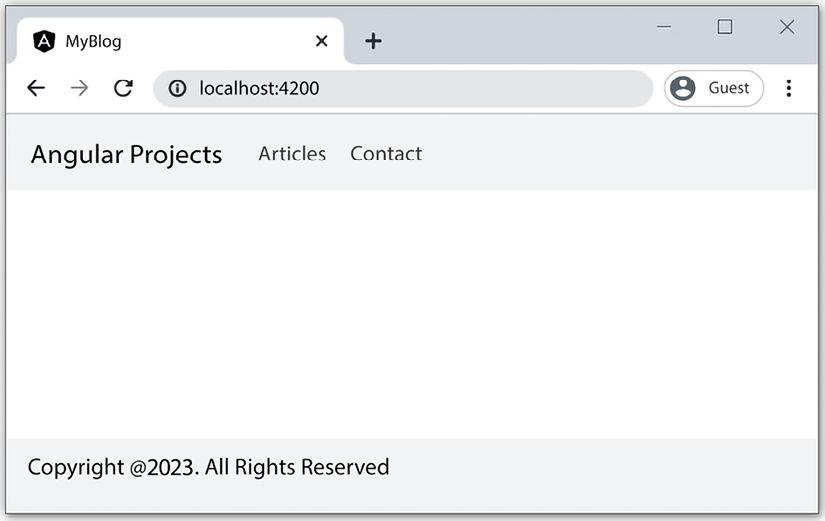
Figure 2.2 – Basic layout
We have already completed the basic layout of our blog application, and it looks great! But the header contains two additional links that we have not covered yet. We will learn how to use routing to activate those links in the following section.