


Creating compositions and keyframes
A composition is like a container that can contain and bring multiple files together as layers to create a composite. A composition can have different kinds of layers, such as these:
- Video and audio layers
- Image layers
- Text layers
- Shape layers
- Solid layers
- Light layers
- Camera layers
While creating a composition, the following key parameters should be defined:
- Resolution: Determines the width and height of the composition in pixels. You can set a custom resolution or choose from presets such as HD and 4K.
- Duration: Specifies the length of the composition. You can set the duration in seconds, minutes, hours, or frames, depending on your preference.
After Effects uses different formats to display the timecode, such as HH:MM:SS:Frames or just frames (the number of frames elapsed since the start of the composition):
- HH:MM:SS:Frames: 01:23:45:10 represents 1 hour, 23 minutes, 45 seconds, and 10 frames.
- Frames: This format simply counts the number of frames from the beginning of the composition.
- Frame rate (FPS): Sets the number of frames displayed per second in the composition. Common frame rates include 24, 30, and 60 FPS, but you can choose custom frame rates based on your project requirements.
- Pixel Aspect Ratio (PAR): Defines the shape of pixels in the composition. Most modern video uses square pixels (1.0 PAR), but certain formats, especially older ones, might use non-square pixels. After Effects allows you to adjust the PAR to match the specific requirements of your project.
- Background color: Specifies the color of the background in the composition. You can choose a specific color or set it to transparent if you want to create visual elements with transparent backgrounds (alpha channels).
In this section, we will learn how to create a new composition in After Effects using video files. Then, we will learn how to enable animations in the timeline and add keyframes to create animations for the layers.
Let’s begin with creating new compositions in After Effects:
- Simply drag the
earth.mp4file from the Project panel to the composition icon in the Project window. This action will create a composition based on the properties of the media and its duration.
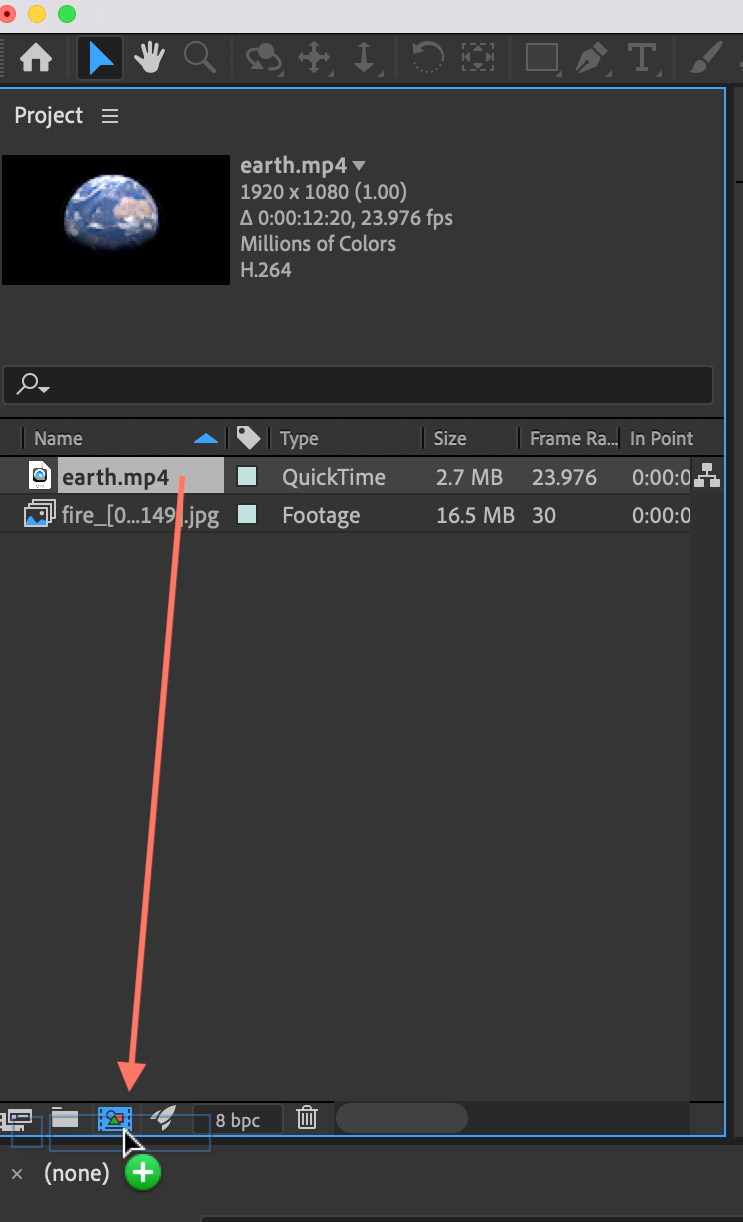
Figure 1.9: Using the Project panel to create new compositions
Files can also be dragged and dropped into the new composition window group. However, this option can only be used when there is no pre-existing composition in the workspace.
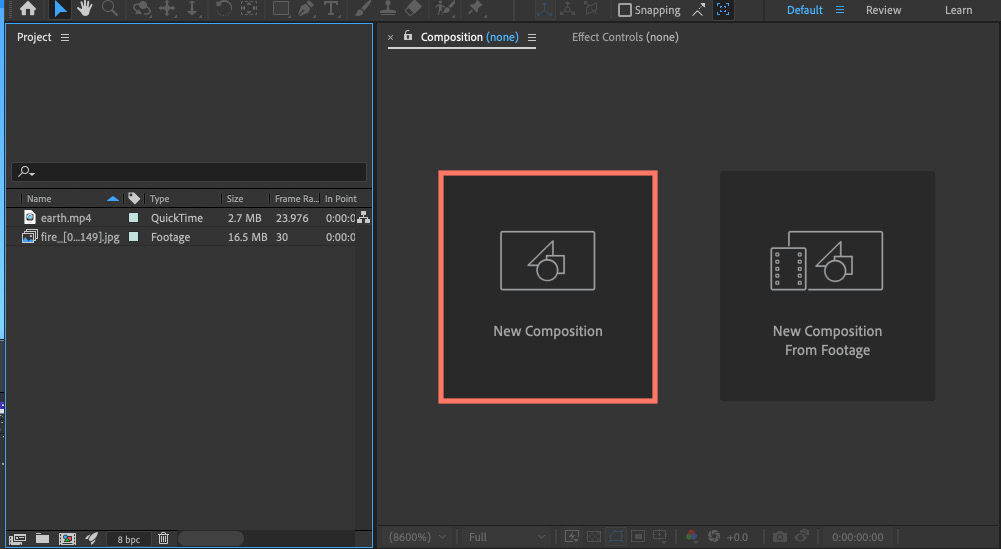
Figure 1.10: Using the Composition panel to create a new composition
Alternatively, you can also create a new composition by going to Composition | New compositions or using the Ctrl + N (Windows) or Cmd + N (macOS) keyboard shortcut.
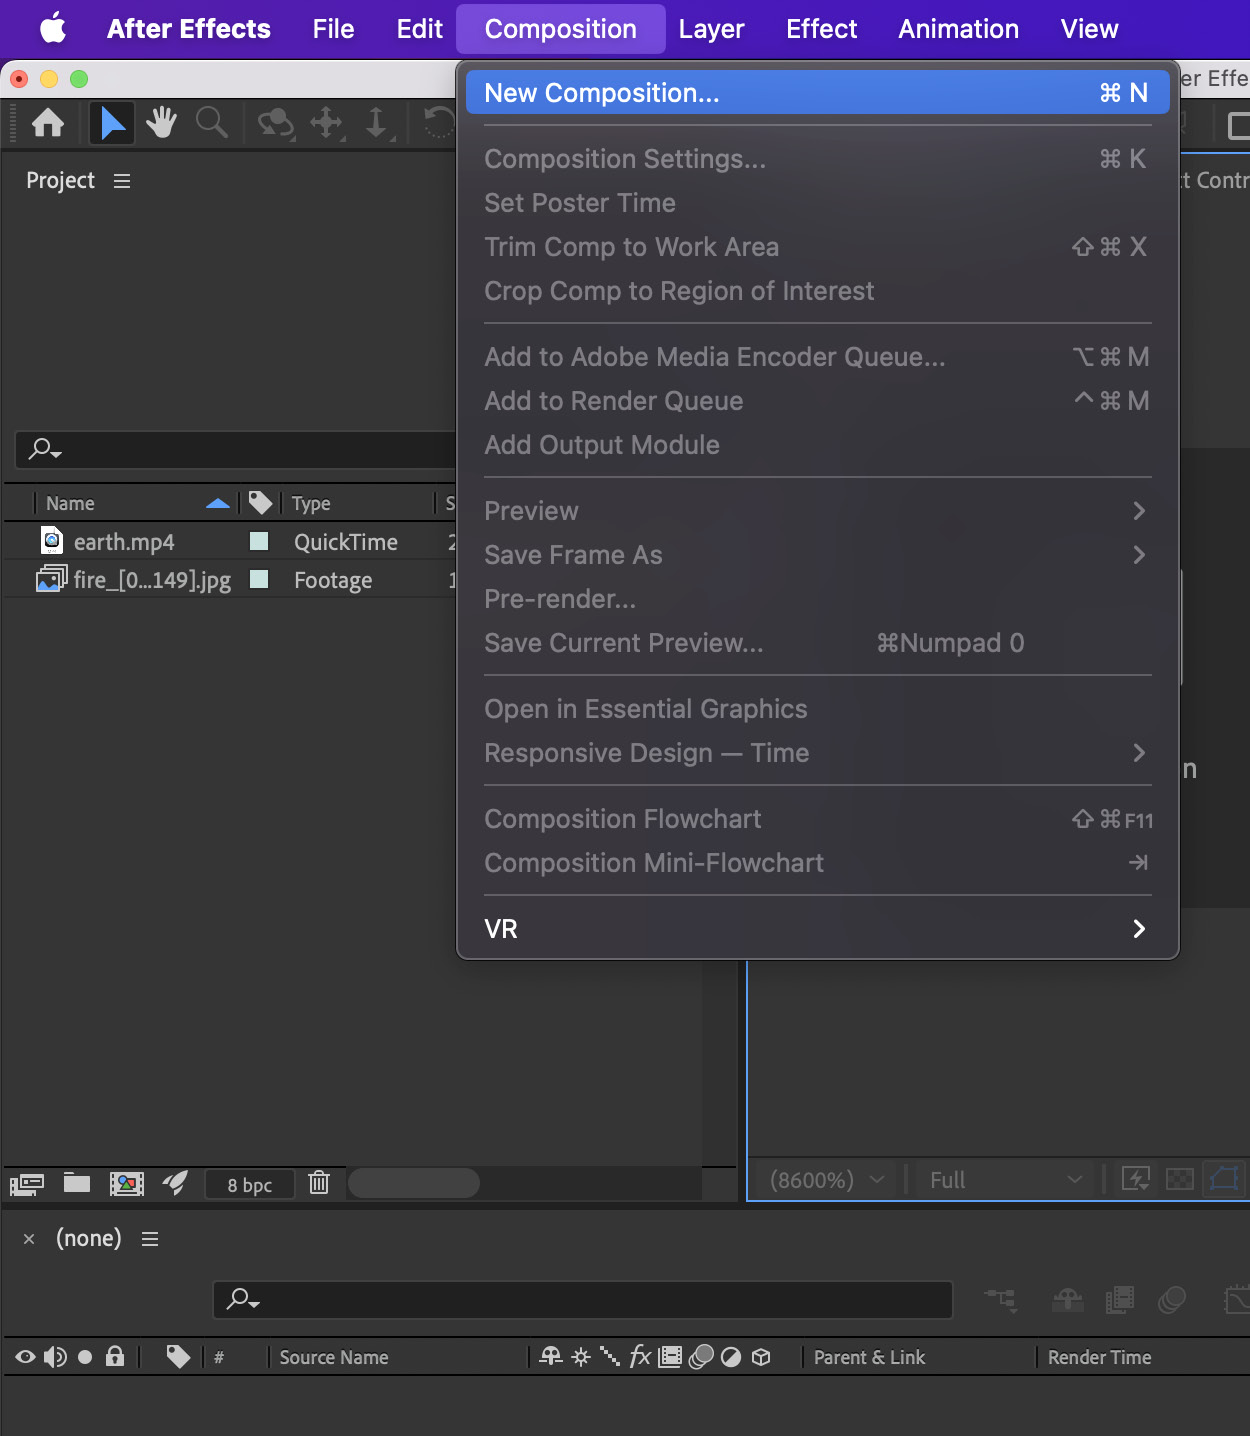
Figure 1.11: Using the Composition menu to create new compositions
- You can adjust the composition settings while creating the blank composition. If you would like to modify the settings of the composition created by the drag-and-drop process, then go to Composition | Composition Settings.
- You can alter the composition name, as well as the composition’s height and width, frame rate, and resolution in Composition Settings.
Note that the resolution used here is just for previewing reasons and has no effect on the project’s render resolution.
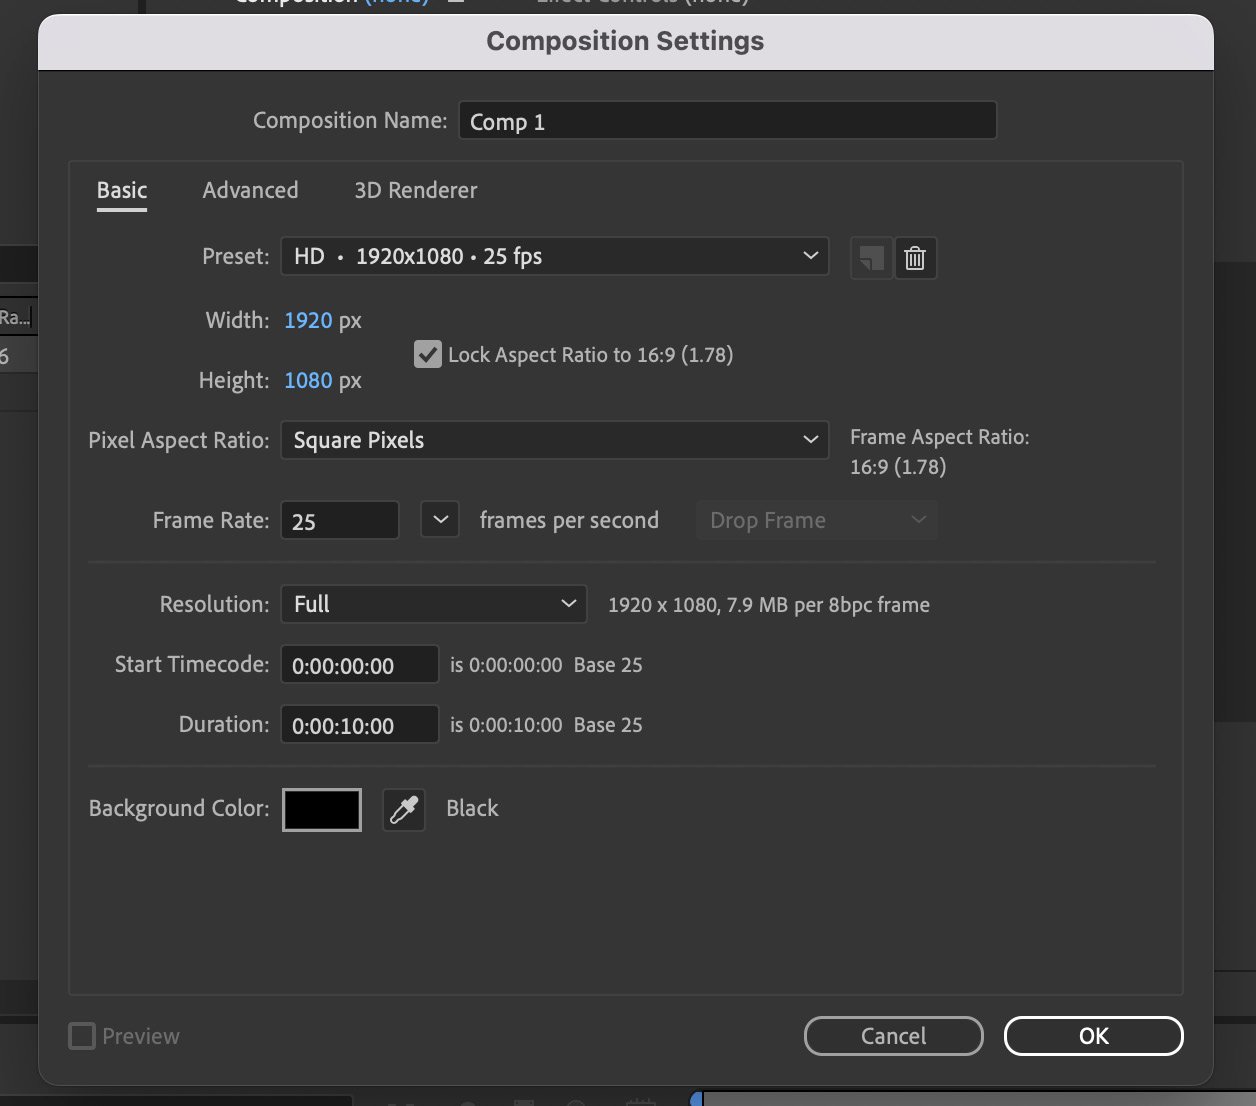
Figure 1.12: The Composition Settings window
- To alter the composition’s background color, click on the Background Color box, choose the appropriate color for the backdrop, and then click OK. Your personalized composition is now complete.
Let’s take a look at the composition’s layer properties.
Working with the Timeline panel and layer properties
To examine the layer properties, navigate to the drop-down menu next to the layer. The only property in our example earth.mp4 layer is Transform, and the Transform property includes sub-properties such as Anchor Point, Position, Rotation, and Opacity. We may also use shortcuts to access these attributes, and we can view them individually or as a group of properties. To do so, first, click on the layer.
The following shortcuts can be used to access the layer’s properties:
- P for Position
- S for Scale
- A for Anchor point
- R for Rotation
- T for Opacity
The following figure lists all the Transform properties of the earth.mp4 layer in the Timeline panel.
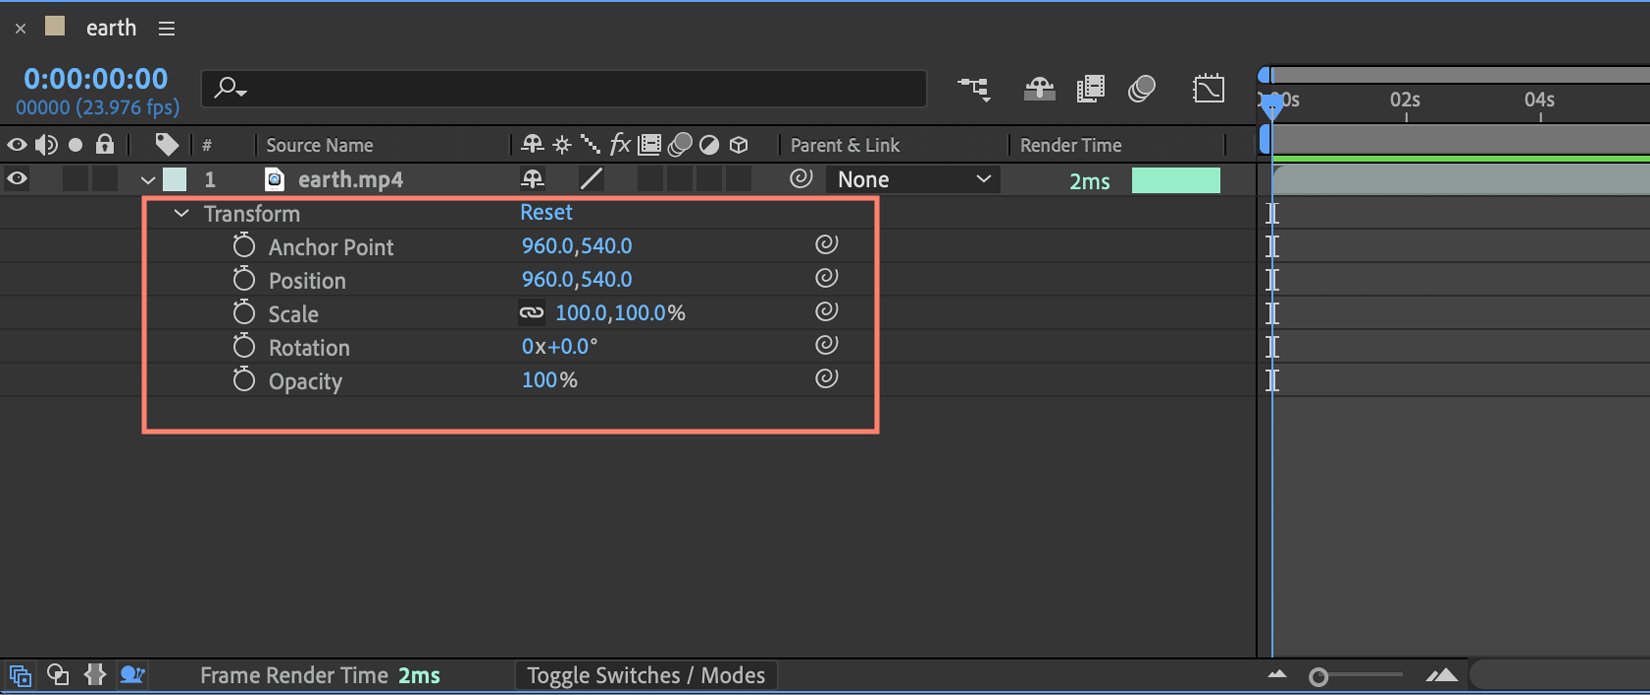
Figure 1.13: The Timeline panel with the layer transform properties listed
You can use the preceding shortcuts with the Shift key to see multiple layer properties at the same time. For a better understanding, let’s add another layer.
Drag the fire footage from the Project window to the earth layer in the composition.
If you want to get a preview of your animation or media, use the spacebar at any time. The fire layer has become the foreground in our case, while the earth layer has become the background. The preview of our earth layer is hidden due to the black background of our fire layer.
We must now adjust this layer in order to blend the fire layer over the earth layer in the composition. We may use the various blending modes for the fire layer to accomplish this. You can change the blending mode of the layer as follows:
- Click the toggle switch just below the layers panel to see the blending modes.
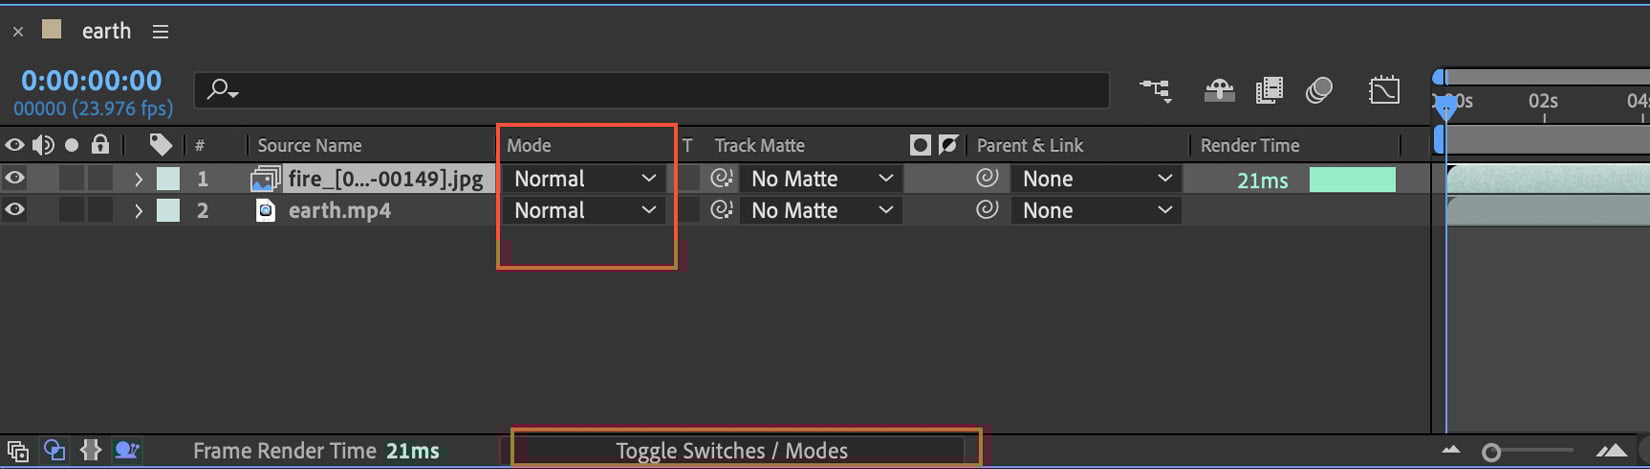
Figure 1.14: The Timeline panel with the toggle switches/modes highlighted
We can set the fire layer blend mode to Normal, as shown in Figure 1.15:
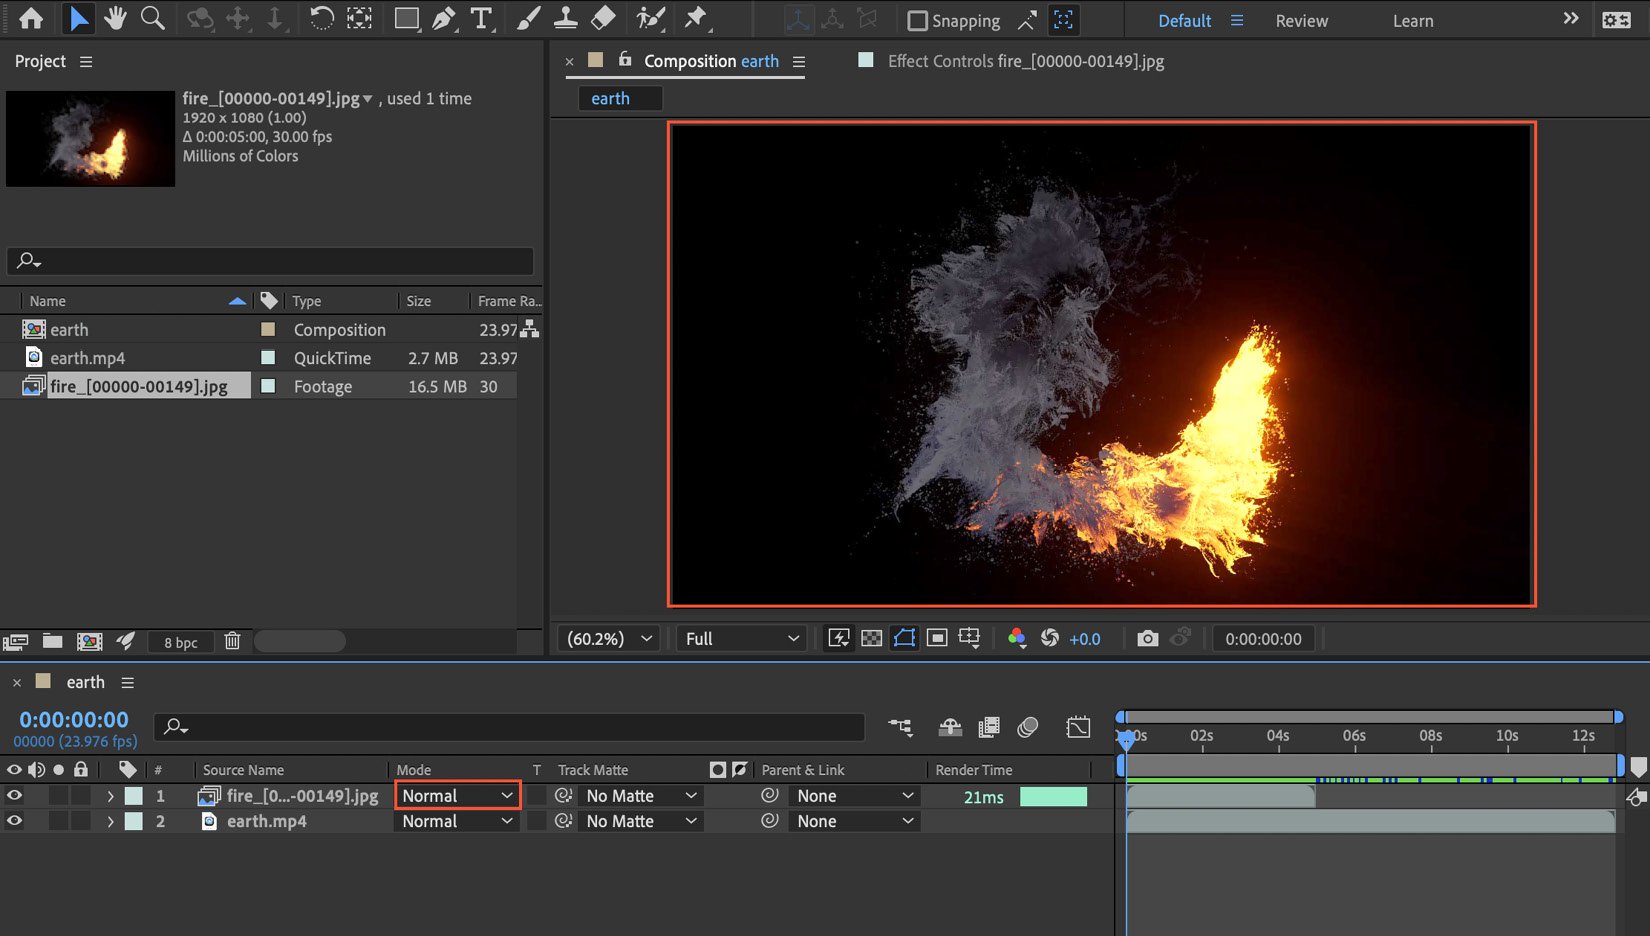
Figure 1.15: The fire layer blend mode is Normal
- Now we can change the appropriate blending mode for the fire layer from Normal mode to Screen mode to see the earth layer beneath the fire layer (foreground).
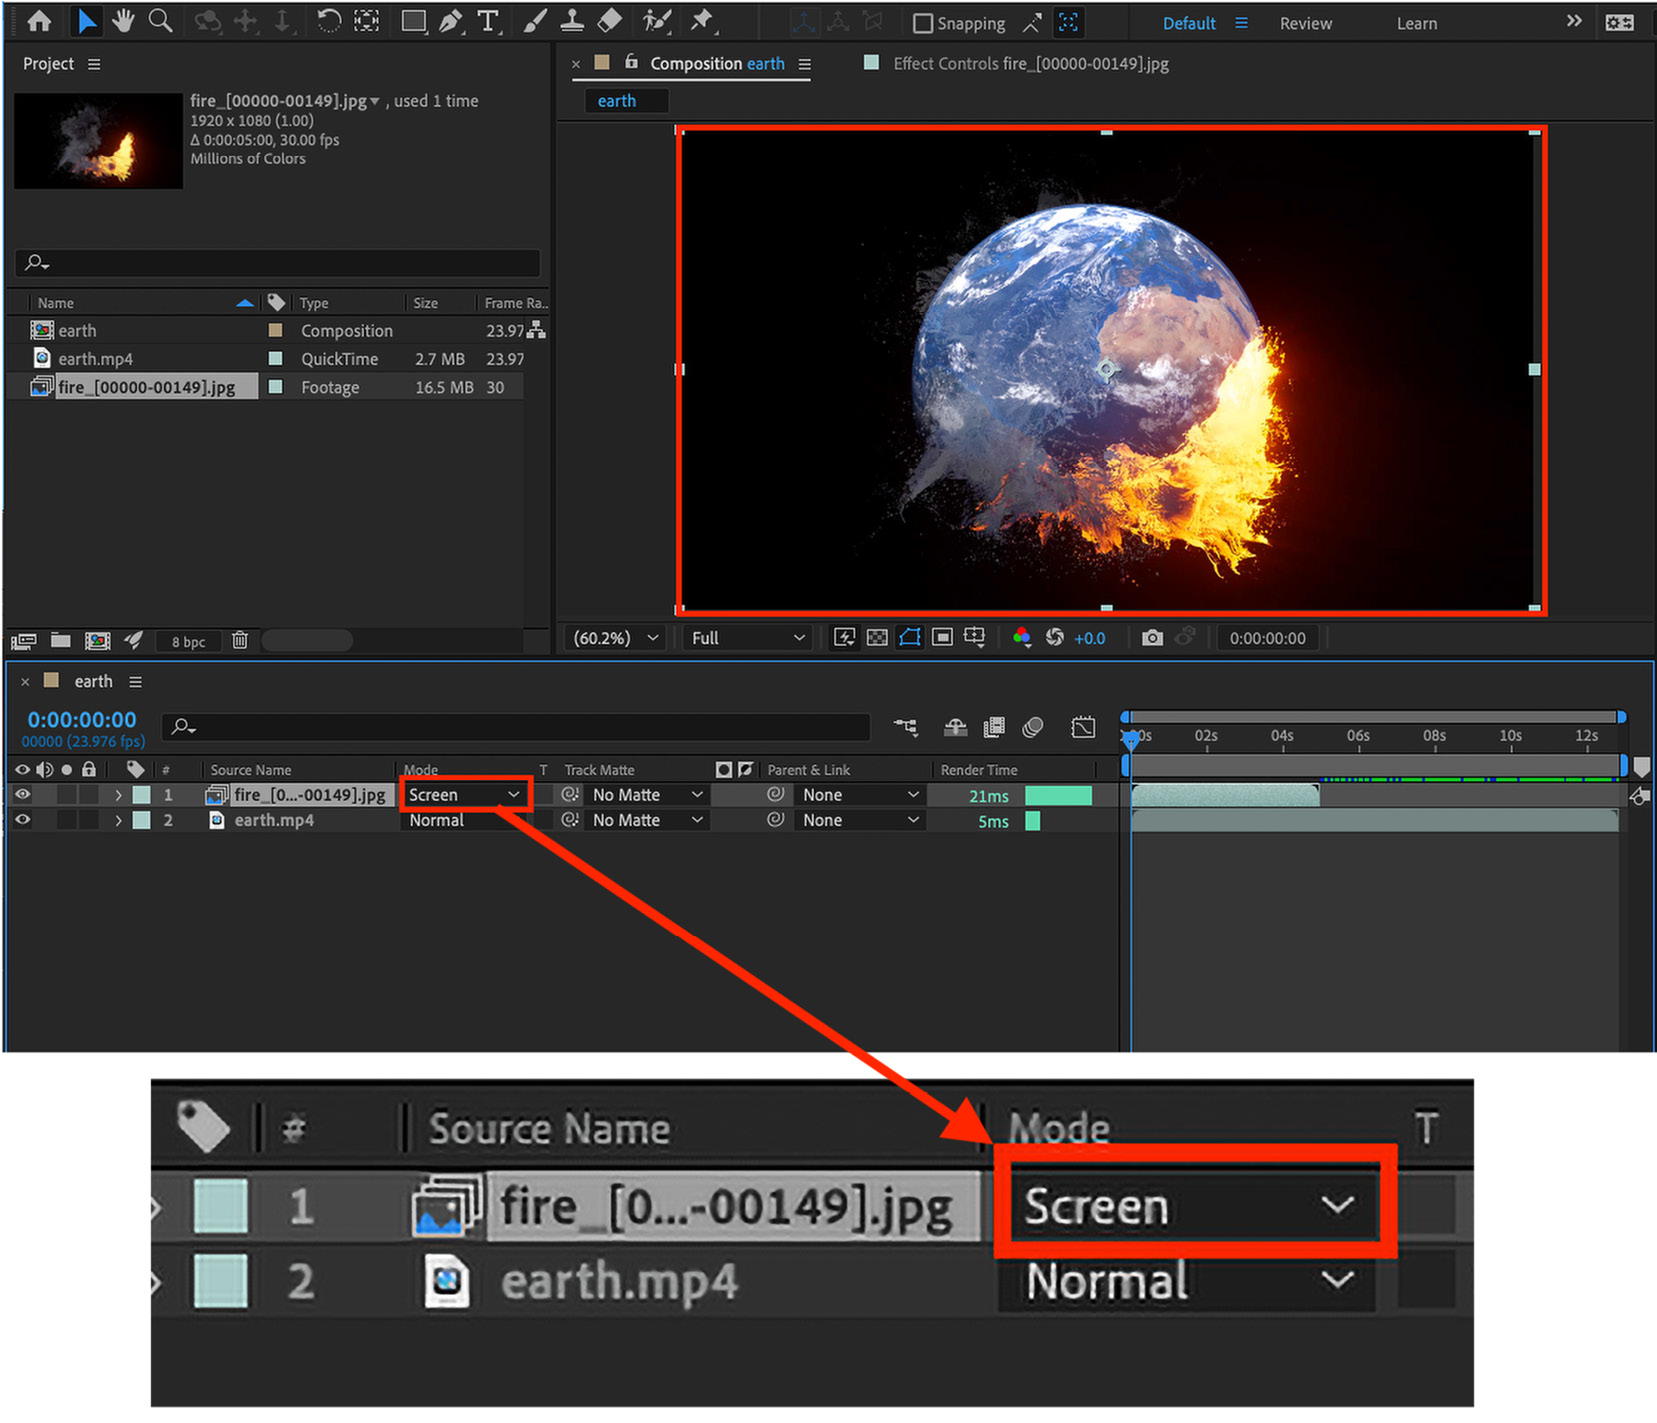
Figure 1.16: The fire layer blend mode is now Screen
After Effects accomplishes the effect in Figure 1.16 by removing the fire layer’s darker hues.
Note
Blend modes, also known as blending modes or composite modes, are features found in image editing and compositing software, including Adobe Photoshop, Adobe After Effects, and other similar programs. Blend modes determine how two layers or elements blend or interact with each other visually when they are combined.
Blend modes work by mathematically combining the pixel values of two layers to produce a new resulting color. Each blend mode has a specific algorithm that determines how the pixel values of the layers are combined. The resulting color is then displayed based on this combination.
Having used the blend mode for the layers, we have successfully blended the fire and earth layers. Next, we will explore how to trim the composition duration to match the duration of the fire footage layer within the composition.
Trimming composition duration
The composition duration is 13 seconds. We need to cut the composition duration down to roughly 6 seconds to fit the duration of the fire layer. This can be done by following these steps:
- Set the timeline in and out points to the desired time duration as follows:

Figure 1.17: The Timeline panel indicating the timeline’s work area range
- Press B to trim the start/in point of the composition and N to trim the end/out point, while positioning the playhead at the time you intend to trim to.
- Next, right-click on the timeline ruler; the Trim Comp to Work Area option will appear.
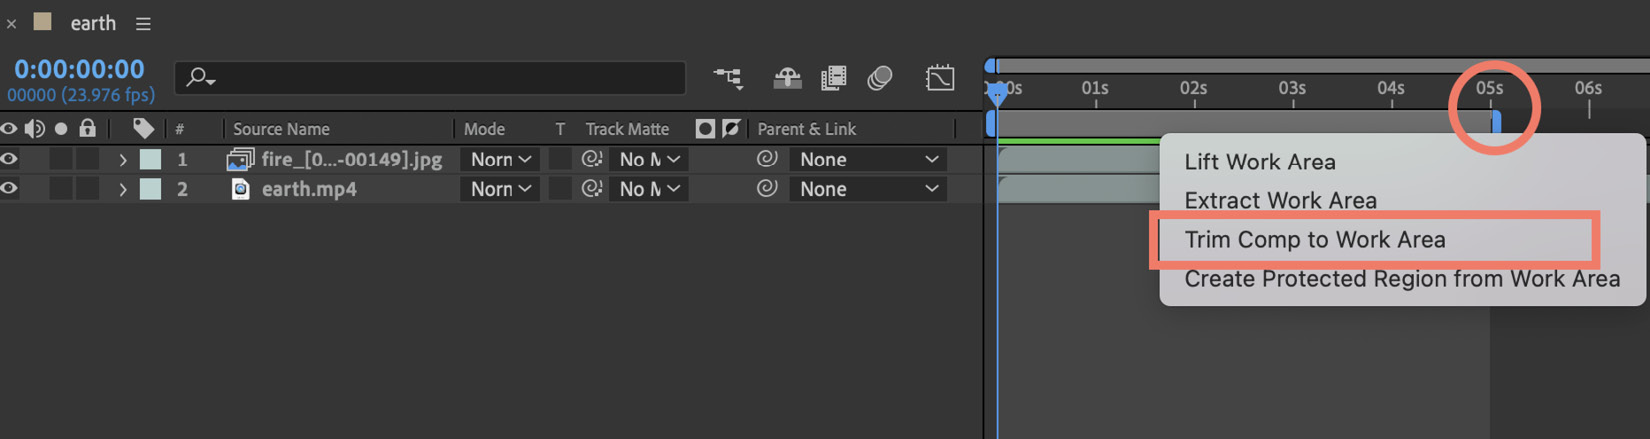
Figure 1.18: The Timeline panel (right-clicking between the in and out points to trim the timeline)
This will trim the composition and allow you to see the complete composition on the timeline.
Working with text and animations
The new duration of the composition is six seconds. Let’s now add a text layer to our composition. To do so, follow these steps:
- Click the T icon in the tool panel.
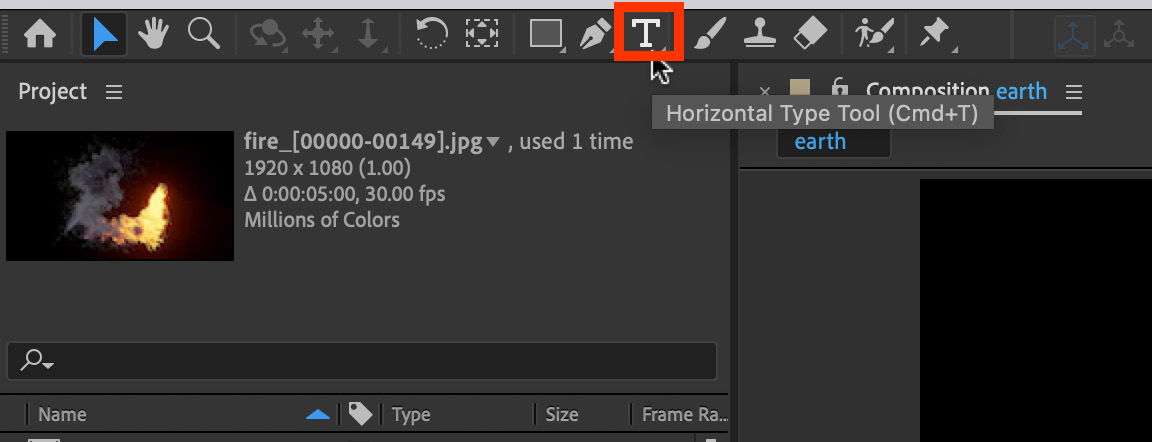
Figure 1.19: The text tool
- Now click on the area of the composition where you wish to put the text and write
Global Warning. - The Character panel on the right side of the screen can be used to adjust text features such as size, color, character style, and font. If the Character panel isn’t displayed, go to Windows | Character Panel and click on it. Place the text in the desired location on the preview.

Figure 1.20: Using the Character panel to customize the text properties
Now let’s animate the text layer property:
- Select the text layer and use the shortcut T to reveal the opacity property of the layer. We can now animate this using the stopwatch icon.
It’s worth noting that only attributes with the stopwatch icon can be animated in After Effects. Keep the play head at the start of our composition.
- Click on the stopwatch icon in the Opacity property to set the first keyframe in the timeline to zero seconds; change the value of Opacity to
0(you will see a diamond-shaped icon in the timeline, which indicates that the keyframe has been added to the timeline).
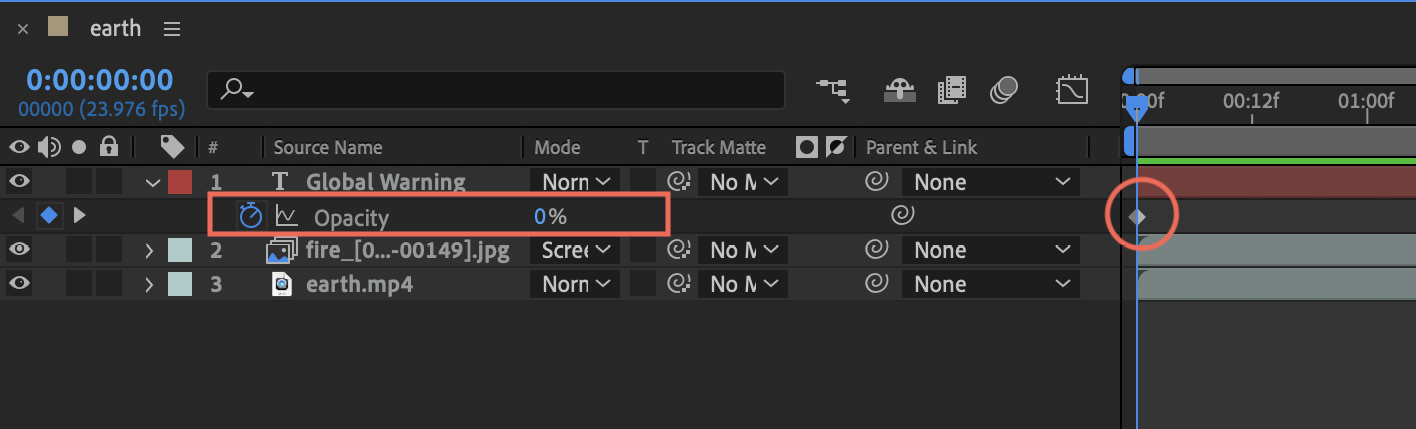
Figure 1.21: The Timeline panel with the Opacity property
- Now take the play head at three seconds in the timeline and increase Opacity to
100percent. As soon as you do so, After Effects will automatically add a keyframe at three seconds.

Figure 1.22: View of the final composite
- Now take your play head back to zero seconds and hit the spacebar to preview the timeline and you will notice that the words will fade in as the timeline reaches three seconds, creating an animating effect using the Opacity property of the text layer.
As we have now completed the animation and compositing of this composition, in the next section we will learn how to render the composition to convert it into a video that can be played back in any video player.


