

Setting up the software development environment
To develop tinyML applications, we require different software tools and frameworks to cover both ML development and embedded programming.
In the following subsection, we will start by introducing the Arduino development environment used to write and upload programs to the Arduino Nano, Raspberry Pi Pico, and the SparkFun RedBoard Artemis Nano.
Getting ready with Arduino IDE
Arduino Integrated Development Environment (Arduino IDE) is a software application developed by Arduino (https://www.arduino.cc/en/software) to write and upload programs to Arduino compatible boards.
The Arduino Nano, Raspberry Pi Pico, and SparkFun RedBoard Artemis Nano are Arduino compatible boards.
Programs are written in C++ and are commonly called sketches by Arduino programmers.
Arduino IDE makes software development accessible and straightforward to developers with no background in microcontroller programming. In fact, the tool abstracts all the complexities we might have when dealing with these platforms, such as cross-compilation and device programming.
To download, install, and set up the Arduino IDE on your computer, you can follow the instructions provided at the following link: https://github.com/PacktPublishing/TinyML-Cookbook_2E/blob/main/Docs/setup_local_arduino_ide.md.
In addition to the standalone version, Arduino offers a browser-based IDE called the Arduino Web Editor (https://create.arduino.cc/editor). The Arduino Web Editor enables even more streamlined programmability, as programs can be written, compiled, and uploaded directly from the web browser to microcontrollers.
To install the Arduino Web Editor, you can follow the guide available on the Arduino website: https://docs.arduino.cc/learn/starting-guide/the-arduino-web-editor.
The free version of the Arduino Web Editor has a daily compilation time limit of 200 seconds. Therefore, users may want to upgrade to a paid plan or use the free local Arduino IDE to avoid the compilation time constraint and have unlimited compilation time.
The Arduino projects presented in this book for the Arduino Nano and Raspberry Pi Pico are compatible with both IDEs, although the screenshots exclusively showcase the cloud-based Arduino Web Editor. However, the SparkFun RedBoard Artemis Nano projects can only be developed using the local Arduino IDE.
To install the SparkFun RedBoard Artemis Nano board in the Arduino IDE, you must follow the instructions provided at the following link: https://github.com/PacktPublishing/TinyML-Cookbook_2E/blob/main/Docs/setup_sparkfun_artemis_nano.md.
From now on, we will use the term Arduino IDE interchangeably for both the Arduino Web Editor and the local Arduino IDE. However, when mentioning the SparkFun RedBoard Artemis Nano, the Arduino IDE will specifically denote the local version.
Having introduced the development environment for microcontroller programming, let’s now introduce the framework and software environment to train ML models, which are TensorFlow and Google Colaboratory.
Getting ready with TensorFlow
TensorFlow (https://www.tensorflow.org) is an end-to-end free and open-source software platform developed by Google for ML. We will use this software to build and train our ML models, using Python in Google Colaboratory.
Colaboratory (https://colab.research.google.com/notebooks) – Colab for short– is a free Python development environment that runs in the browser using Google Cloud. It is like a Jupyter notebook but has some essential differences, such as the following:
- It does not need setting up.
- It is cloud-based and hosted by Google.
- There are numerous Python libraries pre-installed (including TensorFlow).
- It is integrated with Google Drive.
- It offers free access to GPU and TPU shared resources.
- It is easy to share (also on GitHub).
Therefore, TensorFlow does not require setting up because Colab comes with it.
In Colab, we recommend enabling the GPU acceleration on the Runtime tab to speed up the computation on TensorFlow. To do so, navigate to Runtime | Change runtime type, and select GPU from the Hardware accelerator drop-down list, as shown in Figure 1.22:
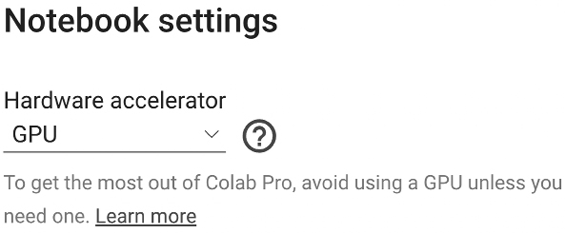
Figure 1.22: Hardware accelerator drop-down list
Since the GPU acceleration is a shared resource among other users, there is limited access to the free version of Colab.
You could subscribe to Colab Pro (https://colab.research.google.com/) to get priority access to the fastest GPUs.
TensorFlow is not the only software from Google that we will use. In fact, once we have produced the ML model, we will need to run it on the microcontroller. For this, Google developed TensorFlow Lite for Microcontrollers.
TensorFlow Lite forMicrocontrollers (https://www.tensorflow.org/lite/microcontrollers) – tflite-micro for short– is the crucial software library to unlock ML applications on low-power microcontrollers. The project is part of TensorFlow and allows you to run DL models on devices with a few KB of memory. Written in C/C++, the library does not require an operating system and dynamic memory allocation.
To build a tflite-micro-based application into any Arduino project, you first need to create the Arduino TensorFlow Lite library (https://github.com/tensorflow/tflite-micro-arduino-examples) and then import it into the Arduino IDE.
For your convenience, we have already produced this library, which is compatible with the Arduino Nano, Raspberry Pi Pico, and SparkFun RedBoard Artemis Nano and is available at the following link: https://github.com/PacktPublishing/TinyML-Cookbook_2E/blob/main/ArduinoLibs/Arduino_TensorFlowLite.zip.
At the moment, you do not need to import this library. When it is time to deploy the ML models on microcontrollers, we will guide you through the precise steps to import the library into the Arduino IDE.
For those interested in the process of creating the Arduino TensorFlow Lite library, we have outlined the steps on GitHub, which can be found at the following link: https://github.com/PacktPublishing/TinyML-Cookbook_2E/blob/main/Docs/build_arduino_tflitemicro_lib.md.
In this book, TensorFlow won’t be our only avenue to design and train ML models. Another framework will accompany us in preparing ML models for microcontrollers. This framework is Edge Impulse.
Getting ready with Edge Impulse
Edge Impulse (https://www.edgeimpulse.com) is an all-in-one software platform for ML development from data acquisition to model deployment. It is free for developers, and in a few minutes, we can have an ML model up and running on our microcontrollers. This platform features a wide range of integrated tools for the following:
- Data acquisition from sensor data
- Data labeling
- Applying digital signal processing routines on the input data
- Designing, training, and testing ML models via a user-friendly interface
- Deploying ML models on microcontrollers
- AutoML
Developers just need to sign up on the Edge Impulse website to access all these features directly within the user interface (UI).
We are approaching the end of this first chapter. However, before we wrap up, we want to ensure we can successfully run a basic sketch on our microcontrollers. Therefore, in the upcoming section, we will build a simple Arduino pre-built application, marking the beginning of our journey into tinyML.