


Listening for HTTP traffic using Burp
Burp is described as an intercepting proxy. This means Burp sits between the user’s web browser and the application’s web server and intercepts or captures all the traffic flowing between them. This type of behavior is commonly referred to as a proxy service.
Penetration testers use intercepting proxies to capture traffic flowing between a web browser and a web application for analysis and manipulation. For example, a tester can pause any HTTP request, thus allowing parameter tampering before the request is sent to the web server.
Intercepting proxies, such as Burp, allow testers to intercept both HTTP requests and HTTP responses. This allows a tester to observe the behavior of the web application under different conditions. And, as we shall see, sometimes the behaviors are unintended, deviating from what the original developer expected.
To see Burp Suite in action, you need to configure your Firefox browser’s Network Settings so that they point to your running instance of Burp. This enables Burp to capture all HTTP traffic that is flowing between your browser and the target web application.
Getting ready
We will configure the Firefox browser to allow Burp to listen to all HTTP traffic flowing between the browser and the OWASP BWA VM. This will allow the proxy service within Burp to capture traffic for testing purposes.
Instructions for this are available on PortSwigger at https://support.portswigger.net/customer/portal/articles/1783066-configuring-firefox-to-work-with-burp. We will step through this process in this recipe.
How to do it...
Follow these steps to start listening to all HTTP traffic using Burp:
- Open the Firefox browser and go to Options.
- In the General tab, scroll down to the Network Proxy section and then click Settings.
- In the Connection Settings window, select Manual proxy configuration and type in an IP address of
127.0.0.1with the port set to8080. Select the Use this proxy server for all protocols checkbox.
Make sure the No proxy for text box is blank, as shown in the following screenshot, and then click OK:
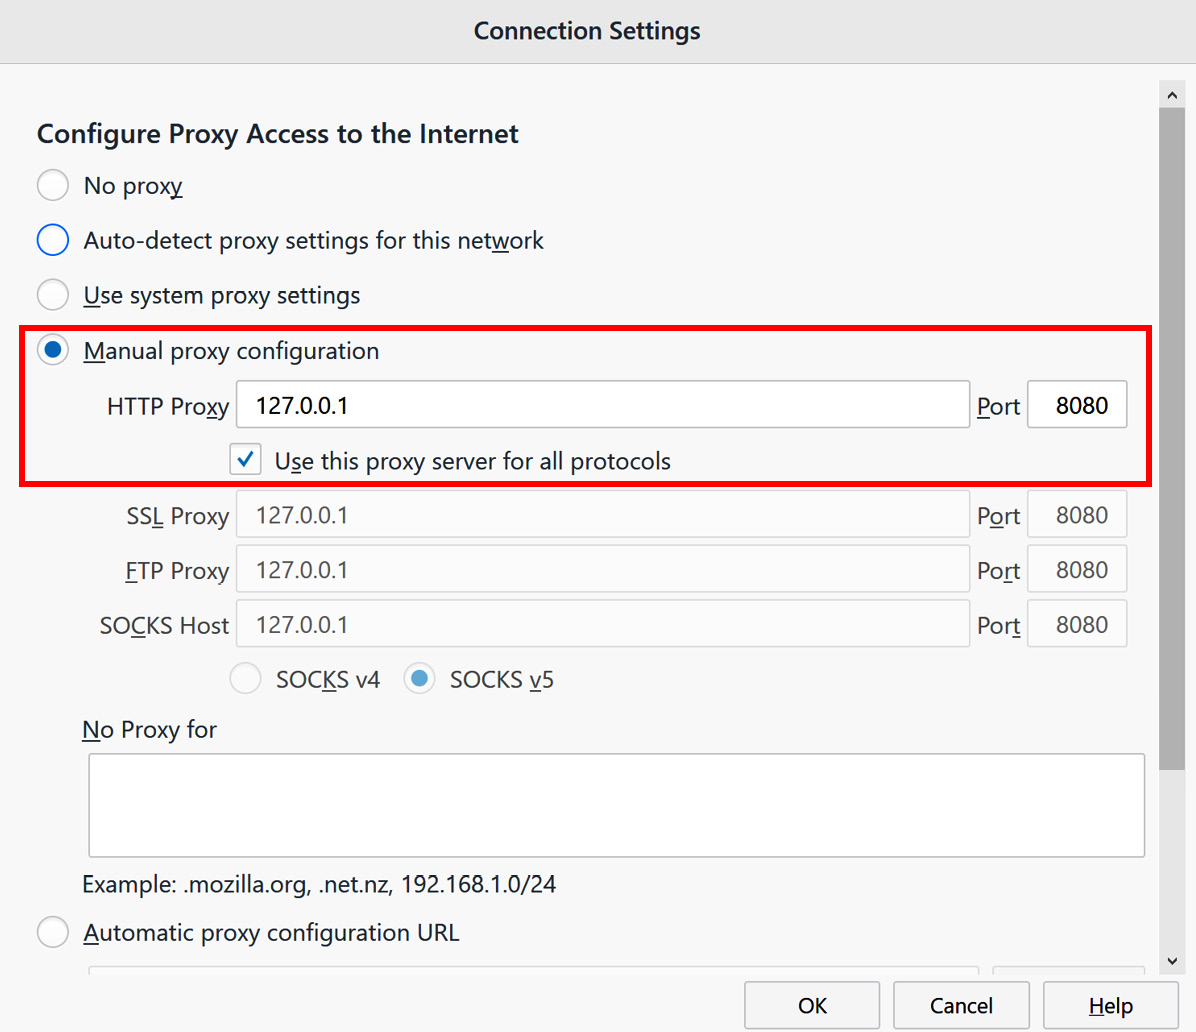
Figure 1.18 – Manually configuring the Firefox browser to send HTTP traffic to Burp
- With the OWASP BWA VM running in the background and using Firefox to browse to the URL specific to your machine (that is, the IP address shown on the Linux VM in VirtualBox), click the reload button (the arrow in a circle) to see the traffic captured in Burp.
- If you don’t happen to see any traffic, check whether Proxy | Intercept is holding up the request. If the button labeled Intercept is on is depressed, as shown in the following screenshot, then click the button again to disable the interception. After doing so, the traffic should flow freely into Burp, as follows:
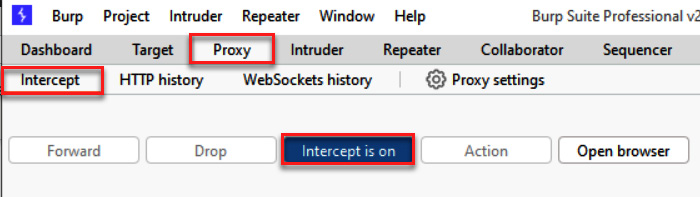
Figure 1.19 – By default, Intercept is on
In the following screenshot, the Proxy | Intercept button is disabled:
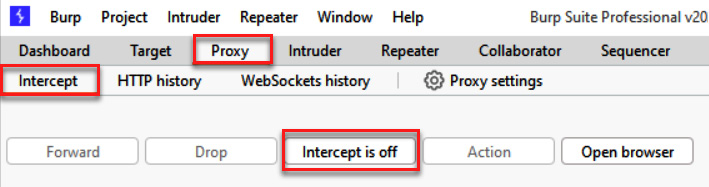
Figure 1.20 – Turning Intercept off to see traffic
- If everything is working properly, you will see traffic in your Target | Site map tab, similar to what is shown in the following screenshot. Your IP address will be different, of course, and you may have more items shown within your Site map area. Congratulations! You now have Burp listening to all of your browser traffic!
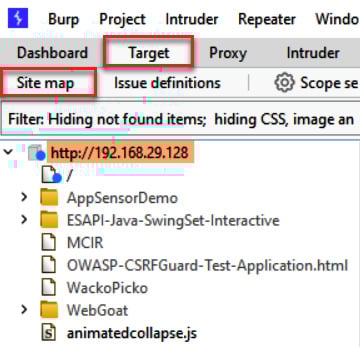
Figure 1.21 – Confirmation of HTTP traffic flowing into Burp
How it works...
The Burp Proxy service is listening on 127.0.0.1 at port 8080. Either of these settings can be changed so that you can listen on an alternative IP address or port number. However, for learning purposes, we will use the default settings.
There’s more…
As a simpler alternative, you can use the browser built into Burp. To access this, go to Proxy from the top menu, choose the Intercept sub-menu, and then click the Open browser button:
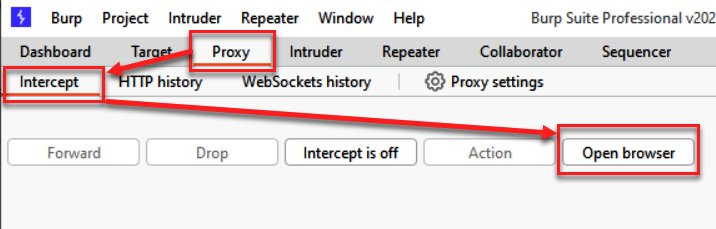
Figure 1.22 – Using Burp’s built-in browser instead of using an external browser (for example, Firefox)