


Since you have the operating system on your microSD card now, let us go ahead and boot your BeagleBone board from that microSD card and see how to login and access the filesystem via Linux Shell.
You will need your computer connected to your Router either via Ethernet or Wi-Fi and an Ethernet cable which you should connect between your Router and the BeagleBone board. The last but most important thing is an External Power Supply using which you will power up your BeagleBone board because power supply via a USB will be not be enough to run the BeagleBone board when it is booted from a microSD card.
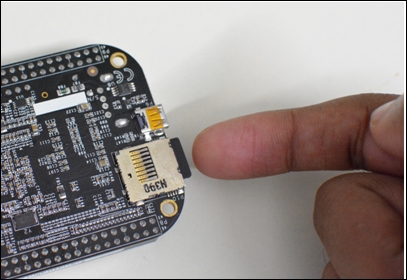
Insert the microSD card into BeagleBone board.
Now you should insert the microSD card that you have prepared into the microSD card slot available on your BeagleBone board.
Connect your BeagleBone to your LAN.
Now connect your BeagleBone board to your Internet router using an Ethernet cable.

You need to make sure that your BeagleBone board and your computer are connected to the same router to follow the next steps.
Connect external power supply to your BeagleBone board.

Boot your BeagleBone board from microSD card.
On BeagleBone Black and BeagleBone Green, you have a Boot Button which you need to hold on while turning on your BeagleBone board so that it starts booting from the microSD card instead of the default mode where it starts to boot from the onboard eMMC storage which holds the operating system. In case of BeagleBone White, you don't have this button, it starts to boot from the microSD card itself as it doesn't have onboard eMMC storage.

Depending on the board that you have, you can decide whether to boot the board from microSD card or eMMC. Consider you have a BeagleBone Black just like the one I have shown in the preceding picture. You hold down the User Boot button that is highlighted on the image and turn on the power supply. Once you turn on the board while holding the button down, the four on-board LEDs will light up and stay HIGH as shown in the following picture for 1 or 2 seconds, then they will start to blink randomly.
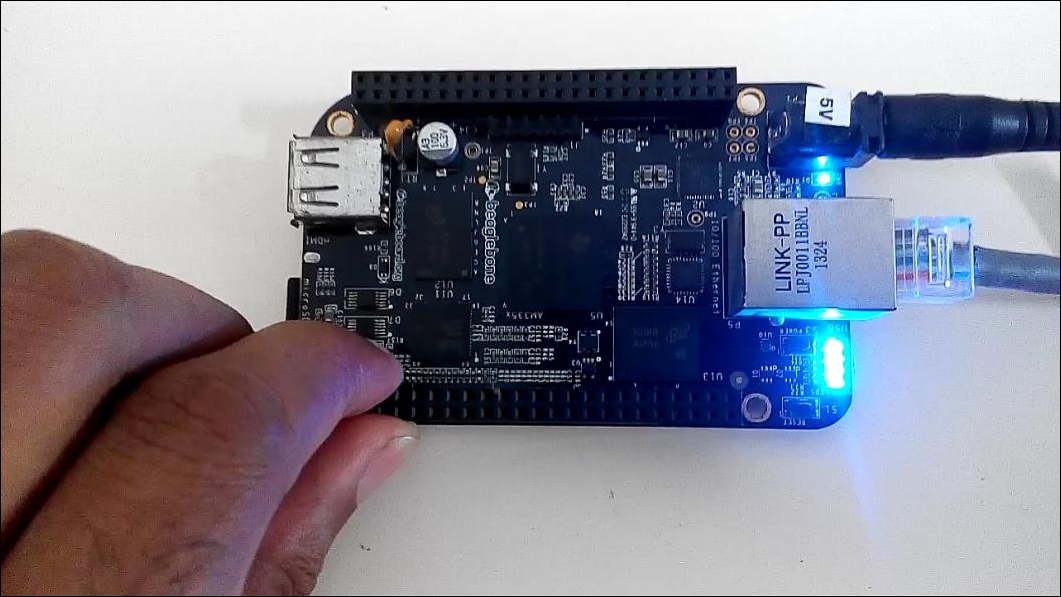
Once they start blinking, you can leave the button.
Now your BeagleBone board must have started Booting from the microSD card, so our next step will be to log in to the system and start working on it. The next topic will walk you through the steps on how to do this.


