Now that you have installed the Essbase analytic server, you need a tool which will enable you to play with your Essbase databases (commonly referred to as cubes) as you create, configure, and maintain them. The tool used for this purpose is called Essbase Administration Services. In earlier versions of Essbase, this tool is known as the Application manager or just App manager.
Note
Essbase databases are commonly called cubes after the Rubik's Cube style structure of how the data is conceptually stored.
The EAS user interface runs on any client and that is where you will install the software. The EAS talks to the Essbase service using TCP/IP and a web-based server. The servers recommended by Oracle are Tomcat, WebLogic, WebSphere, and Oracle Application Server. To simplify matters, Oracle includes a small Tomcat server with the installation package of the EAS service. In our example, we will be installing Tomcat as our administration server on the client with the EAS installation:
1. To get started, double-click the EAS executable file setup which is supplied by Oracle. Wouldn't you know that the very first screen to pleasure your eyes is the familiar old language selection screen. As always, this is where you select the language to be used with the installation wizard. Again, as always, select English as it is the only language option available. Click OK when you are ready.
2. As in the server software installation, you are now treated to the setup program welcome screen. Read this as you usually would and then click Next.
3. You may be noticing several similarities by now. This screen prompts you to select a country where, ideally, the software will be used.
Note
It is extremely important that the installation of all components of a system be installed using the same country selection. The primary benefits being the assurance of accuracy of the calculations and the ease of possible future root cause analysis.
For our example, we are using the United States. Select the country of your choice and click Next.
4. This step asks you to read and agree to the End User License Agreement (EULA). Read it carefully, and if you agree and wish to continue, click Next.
5. This step will ask you to accept or select the location for the Hyperion home directory (folder). Even though this software is being installed on a different physical machine than the Essbase analytics, ideally, it is a good idea to always install to consistent locations across the individual machines involved in the construction of the system.
Note
Whenever possible, accept and install in the default recommended paths and directories across all hardware components involved in the system. This will greatly simplify maintenance and support.
Make your selection and click Next.

6. Here, you are asked to select your path for EAS. As suggested in previous steps, make your selection and then click Next.

7. Here again, it will be best to accept the Typical installation to get you started. If you realize there is some feature missing that you must have, you can always reinstall the software at a later date and select the Custom option.
For the most part, the difference between the Typical and the Custom installation is the ability to select sample scripts. The actual Essbase administrative functionality is the same.
8. Just like Step 9 of the Essbase analytics installation, this requires you to select
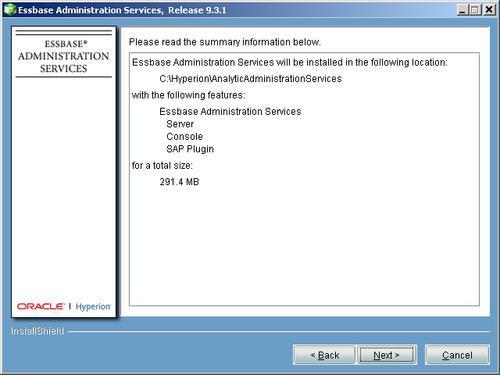
ESSLANG. TheESSLANGvariable defines the locale of the computer. For example, for US English it is ENGLISH (LATIN1). This is to ensure proper communication with other applications and is the Unicode setting.9. This step summarizes the current installation. Check the information carefully to confirm you have the locations correct as well as the selected Hyperion components. If there are any corrections to be made, use the Back button to go back and fix what is needed. This is your last chance before the wizard begins the actual installation.

10. This step basically tells you that the EAS installation is in progress. Take a break, read the installations notes as they flash on the screen. Seems like Déjà vu.
11. Now, here's another one we've seen before. In this case, there is no need for the configuration tool, since you are only installing the EAS tool. Do not check the box on the screen labeled Launch Configuration Tool. Simply click Finish.
Your EAS is now installed and ready for use. The next few steps briefly describe how to start the EAS and login for the first time.


