


Embedding an expense tracking list with SharePoint list Power Apps
Earlier, in the Creating an incident tracking solution – setting up the data source recipe, we configured our SharePoint data source. We will use the same steps to create our data source for this recipe.
Getting ready
Planning for this data source requires the creation of related columns to track expenses. As a template, we could use the following options:
- Projects: This list will hold project information, which will help us link the fees and the customer who owns the project. We will use the customer list created in the previous recipe for this connection.
- Expenses: This list will save the information related to the expense.
How to do it…
- Go to the desired SharePoint site and create the Projects list by selecting + New and then List:
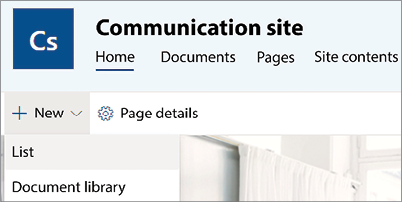
Figure 1.7: List creation process
- Set the name to
Projectsand once the list gets created, click on the gear icon at the top right and select List settings. Add the following columns by clicking on the Create column link inside the Columns section:Column name
Column data type
Required
Name
Single line of text
Yes
Client
Lookup
Yes
Table 1.3: Projects list columns
Click on the gear icon at the top right and then Site contents to create the expenses list. From there, select + New | List from the toolbar. Set the name to Expenses and use the following columns:
Column name
Column data type
Required
Expense
Single line of text
Yes
Date
Date
Yes
Category
Choice
Yes
Project Name
Lookup
No
Amount
Currency
Yes
Comments
Multiple lines of text
No
Table 1.4: Expenses list columns
- For the Category column, use these choices as an example:
Travel,Transport,Supplies, andMeals. Add as much example data to the list as you like. - Click on the gear icon in the top-right corner, select Site contents, and select the Expenses list.
- On the list’s toolbar, select Integrate | Power Apps | Customize forms. This action will automatically create an app based on the list structure. This time, it will build an app with only one form and one particular control called SharePointIntegration:
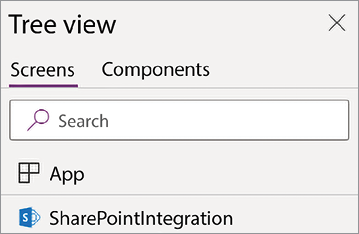
Figure 1.8: SharePointIntegration control inside Power Apps
- Make relevant changes to your app, such as increasing the comments’ height, resizing the attachments’ control, and making style changes.
- Save and publish your app.
How it works…
As you can see, the new application differs from the one created earlier because this one gets embedded inside the SharePoint list. It replaces the regular list’s data entry mechanism by displaying the Power App whenever you want to view, edit, or add new records:
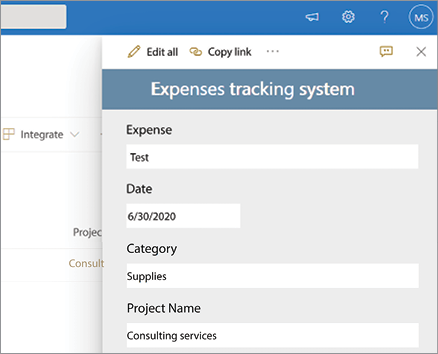
Figure 1.9: SharePoint list Power App
This integration gets done by the SharePointIntegration control mentioned earlier. It acts as a bridge between SharePoint and Power Apps to catch the data events (view, create, and edit) while also allowing us to handle the save and cancel events:
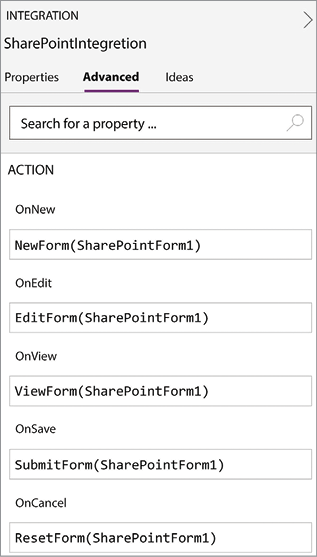
Figure 1.10: SharePointIntegration actions
These actions are regular code blocks that get triggered depending on each event.
Embedding Power Apps inside a SharePoint list gives us the flexibility to control how the data gets registered, improve the data validation, and even allow connections to other services besides SharePoint, just to name a few examples.
There’s more…
Think outside the box when building embedded apps. They are not only there to improve data entry forms. You can create full-fledged solutions inside your lists. Please refer to the following example showcased on the Power Apps blog: https://powerapps.microsoft.com/en-us/blog/island-council-of-tenerife-organizes-community-events-using-the-power-platform
Embedding Power Apps in SharePoint lists is just the tip of the iceberg. There are many more scenarios where you can enrich your current platforms by integrating Power Apps: Microsoft Teams and SharePoint pages, to name a couple. Want to know more? Please refer to Chapter 7, Power Apps Everywhere, to view more recipes that extend the use of Power Apps.


