


Creating a canvas app from existing data
Power Apps is the ideal choice when building enterprise solutions. These solutions are often needed to improve a particular process, especially when it comes to data handling. Sometimes, you will start from scratch, but most of the time, the data structure will already exist, just waiting for a robust and flexible application to handle it.
For these situations, there are some ready-made processes in the Microsoft ecosystem that allow the creation of applications from a particular set of data. We will discover these from Azure, SharePoint, and the Power Apps platform itself.
Getting ready
Azure is a platform that provides a wide range of cloud services for all kinds of scenarios, such as application development, data analysis, and cognitive services. When working with Azure, you will need to have an active subscription. To test the capabilities of this platform, you can apply for a free account by signing up here: https://azure.microsoft.com/en-us/free/
As this recipe requires starting from data, we will use an Azure SQL database. If you don’t have one already, please follow the steps of this quickstart to create one: https://docs.microsoft.com/en-us/azure/azure-sql/database/single-database-create-quickstart?tabs=azure-portal
How to do it…
To gather data from an existing Azure SQL database, take the following steps:
- Go to the Azure portal, https://portal.azure.com, and from the main search, enter
SQL databasesand select the service from the list, as seen in the following screenshot:
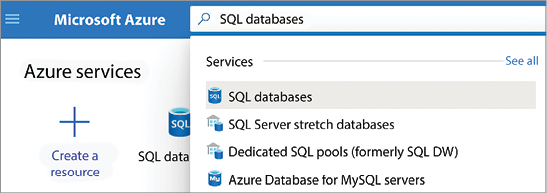
Figure 1.11: Azure SQL databases
- A list of databases will appear for you to pick. Select the one that has the data needed for your application. This action will open the configuration page, sometimes called a blade, with all the settings to configure the database.
- On the left pane of the configuration page, you will find a section called Power Platform, in which you can start working with any of the services available:
- Power BI, to connect and visualize the data from this database.
- Power Apps, to use this database as one of the data sources of your application.
- Power Automate, to automate processes using SQL server templates.
- Select Power Apps and then Get started, as seen in the following screenshot:
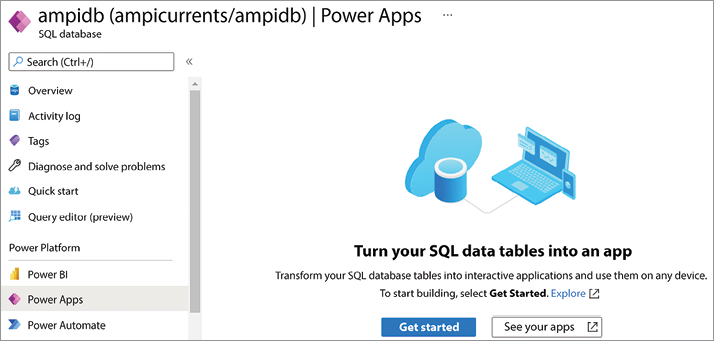
Figure 1.12: Power Apps option in Azure
- The Azure portal will open a Create an app form to gather the required settings for your app. If this form is disabled, it means that you don’t have an active Power Apps plan. You can apply for a trial by clicking on the Start trial link on the form’s header.
- Enter the app name and the credentials to authenticate to the database in the SQL Authentication section. Finally, select a table from the list of tables in the database. The following is a sample form to create an app:
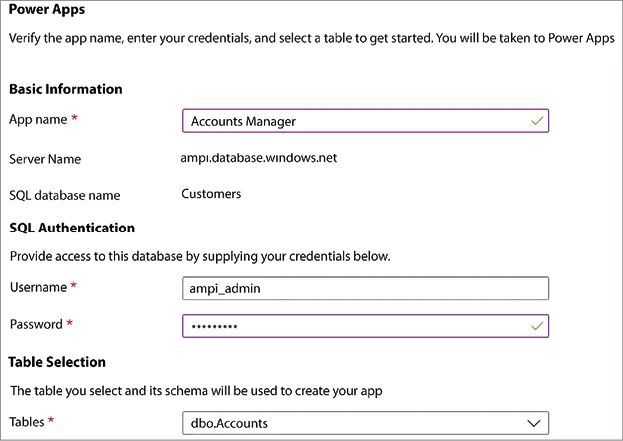
Figure 1.13: Create an app form
- Click Create to start the app-building process. If the Power Apps portal doesn’t open, check whether your browser of choice has blocked the pop-up. In the following screenshot, you can see what happens in Microsoft Edge. You can click the link or select to always allow pop-ups from the Azure portal:
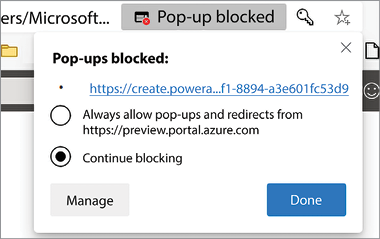
Figure 1.14: Pop-up blocking in Microsoft Edge
- When the process finishes, you will see an application created from the table data with a browse screen and a detail screen:
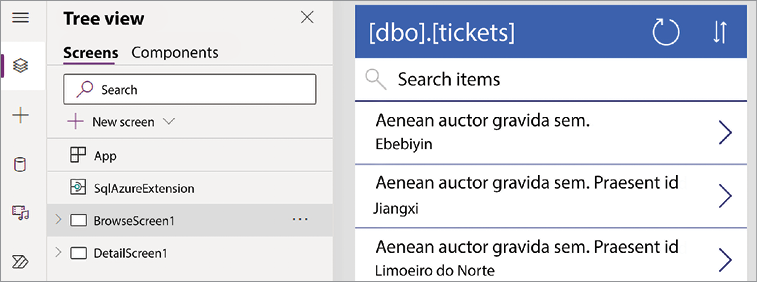
Figure 1.15: App from Azure SQL database
Getting data from a SharePoint list is done as follows:
- Go to your SharePoint site and open the list you want to use in your app. From the toolbar, select Integrate | Power Apps | Create an app. A new pane will open on the right, asking for the app’s name. Enter it and click Create.
- The Power Apps portal will start building the application from the selected list. This time, the template used to generate the app will also include an edit screen:
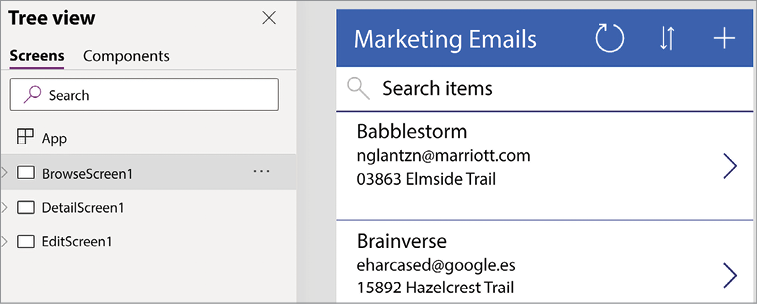
Figure 1.16: App from SharePoint list
Creating apps from data using the Power Apps maker portal is done as follows:
- Go to the Power Apps maker portal, https://make.powerapps.com, and from the left pane, select Create. Under the Start from section, you will see some of the most popular data sources in the Microsoft ecosystem and an option for More data sources. Selecting any of the choices will open a Connections page where you will be able to configure the service as follows:
- SharePoint: You will be able to choose from the available sites and lists.
- OneDrive for Business: A list of Excel files will appear to select as your data source.
- Using any other option will prompt you to connect to that service. Depending on the service, it will let you configure more options regarding the application data source connectivity.
- In the following screenshot, you can see OneDrive and SharePoint on the Connections page:
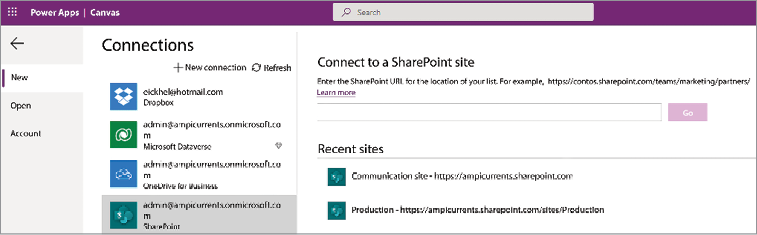
Figure 1.17: Connections page
- After selecting a data source, Power Apps Studio will create an app based on the existing fields or columns.
How it works…
Depending on your selection, the application will have the required screens to handle the data source’s information. When you create an application from an existing data source, Power Apps generates a minimum of two screens:
- BrowseScreen, to list records and interact with actions such as sort and filter
- DetailScreen, to present a complete set of fields related to the selected record in BrowseScreen
A third screen, EditScreen, only appears if you have the permissions necessary to update the records.
For instance, if you connect to a SharePoint list only with read-only permission, you will only get BrowseScreen and DetailScreen. In a list with update permission levels such as Contribute or Edit, EditScreen will handle the creation and update of records, as seen in the following screenshot:
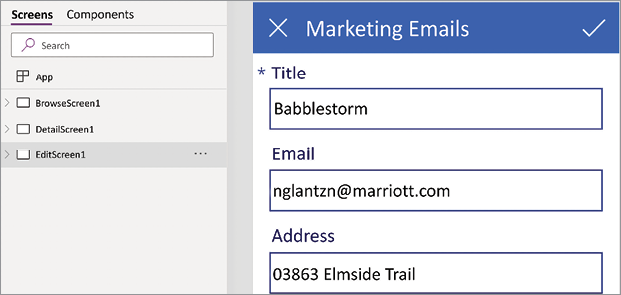
Figure 1.18: EditScreen on Power Apps
When working with Azure SQL databases, there is an additional requirement for EditScreen. From Power Apps, you can only update or delete records from tables with primary keys. If the table you select when creating the app from data doesn’t have a primary key defined, you will only get BrowseScreen and DetailScreen, as seen in the previous How to do it… section when using Azure SQL as our data source.
Keep in mind that there are other known issues and limitations when working with Azure SQL databases. For more information, please visit https://docs.microsoft.com/en-us/connectors/sql/#known-issues-and-limitations
Always refer to the connector’s documentation of your data source to learn more about possible issues or limitations that could compromise your solution: https://docs.microsoft.com/en-us/connectors/connector-reference/
There’s more…
The applications created in this chapter are fully functional for handling data but lack appeal in the user interface department. To enhance their design, please refer to Chapter 6, Improving User Experience, to see how to apply an application makeover.
Learn more on Discord
To join the Discord community for this book – where you can share feedback, ask questions to the author, and learn about new releases – follow the QR code below:
https://packt.link/lcncdserver


