


In this chapter we will go through a basic Zend Framework 2 application, from download, to setup, to running it. If you are unfamiliar with how Zend Framework 2 works, and the best way to install it, you can use this chapter as a reference. Further on in the chapter, we will get somewhat deeper in the framework by looking at the dependency injection (DI) and how it can help us code more efficiently. Lastly we will go more into the details of the configuration options, the EventManager and ModuleManager.
Nothing is more exciting than setting up a new project in our favourite framework. Every time we start a new project we begin with a clean slate.
Before you can set up a new Zend Framework 2 application you need to make sure you have the following items ready:
A web server such as Apache running PHP Version 5.3.3 or higher that you can reach from a web browser
Git
If you don't have everything ready as mentioned, you are best off reading the topics mentioned in the See also section of this recipe (every topic we explain in this chapter is called a recipe) before you continue reading here.
We are assuming that Zend Framework 2 will be used on a Linux-based platform running an Apache 2 web server; this means that commands might not directly work on a Windows platform. Windows users, however, can set up a virtual machine with Linux on it to make full use of the book.
To install a virtual machine on Windows, we can use an application called Oracle VM VirtualBox, which is freely available. We can go to www.virtualbox.org and download plus install the latest version of VirtualBox, we can go to VirtualBoxes (http://virtualboxes.org/images/ubuntu) and download a preconfigured virtual machine from there.
All we have to do on the VirtualBoxes website is click on the latest Ubuntu (which is a distribution of Linux) link in the list, please take note of the username and password displayed there as we will need it later to login. Once the image is downloaded, it can be made ready by following the instructions in the documentation that can be found on the VirtualBoxes site (http://virtualboxes.org/doc/register-and-load-a-downloaded-image).
Assuming the image is imported we can easily start up the virtual machine and put in our username and password that has been supplied with the downloaded virtual machine.
Once logged in to the virtual machine we need to make sure Git is installed, which can be done easily by typing in the following command (mind that the dollar sign is the command prompt, and not the command we actually need to type):
$ sudo apt-get install git
If Git wasn't installed, the system will ask you to install Git, which can be done by pressing the Y key, followed by the Enter key, on the other hand if Git was already installed, than it will not do anything and tell you it already is installed.
First of all, we need the Zend Framework 2 skeleton so we can easily create a new project. A skeleton is a template structure that can be used to start developing with an application, and in this case it creates a template for us to develop within Zend Framework. Fortunately doing this is relatively easy, and almost never causes any problems, and when it does, it is usually related to Git not being able to retrieve the code. When Git isn't able to retrieve the skeleton, please make sure there are no spelling mistakes in the command, and that Git has outside access (we can test this by typing ping Github.com and see whether we get a response back).
The method we are going to use to retrieve the skeleton is called cloning, through a version control system called Git. Cloning the source code will make sure we always get the latest version that the developer (in this case Zend itself) has put online.
We can clone the skeleton—and almost everything else on Github for that matter — through use of the following command:
$ git clone git://github.com/zendframework/
  ZendSkeletonApplication.git
Once finished we can go into the newly created folder called ZendSkeletonApplication, and copy and paste everything in there over to our web server document root. On a Linux system this is usually /var/www (this is also the case when we use Zend Server, as described in the Appendix, Setting up the Essentials). We can do this, for example, by typing the following commands:
$ cd ZendSkeletonApplication
$ mv ./* /var/www –f
$ cd /var/www
When everything is copied over, we are going to initialize the project by typing the following command:
$ php composer.phar install
Now the Command Line Interface (CLI) of PHP executes composer.phar, which will in this instance, download and install the Zend Framework 2 library and set up a simple project for us to be able to work in.
This command can take a long time before it is successfully executed, as Composer needs to do a lot of things before it tells you that Zend Framework 2 is ready for use, we won't go into the details of the workings of Composer here, as it is already discussed in the Appendix, Setting up the Essentials.
Once this command has been completed we need to make sure our web server document root is changed to match the layout of the skeleton. It is common practice that Zend Framework 2 uses the public folder as a main landing point for the application. The structure of the Zend Framework 2 skeleton allows us to bind the user to the public folder, while all our logic is safely outside the public area.
In essence this means we need to root or jail the web server in using the public folder first before we can actually see anything that we just installed. We want to root or jail the web server because we don't want the outside world to be able to abuse our web server more than necessary, and rooting or jailing makes sure that the web server itself has no access to any other folders than what it is jailed to, thus making our server a bit more secure.
In my personal case this means changing the Apache 2 configuration. In most Linux-based systems it will be the Apache web server that is serving our web requests.
The easiest thing that you can do is find your web server configuration (usually located in /etc/apache2 and append the DocumentRoot with /public. For me this would change the document root from /var/www' to '/var/www/public.
Tip
If you are using Apache, you need to check if the AllowOverride setting is set correctly, this can be found in the same section as your document root and should reflect the following:
AllowOverride FileInfo
Finally we need to restart the Apache web server, which can be done by the following command if you are logged in as a root user or invoke it by prepending the command with sudo, which tells the server that we want to execute it as a super user.
$ apache2ctl restart
Now we are able to check our browser and see what we have actually done. We now simply go with a web browser to the project created by typing in the URL, in my case this would be the following:
http://localhost/
This will result in the following screen:
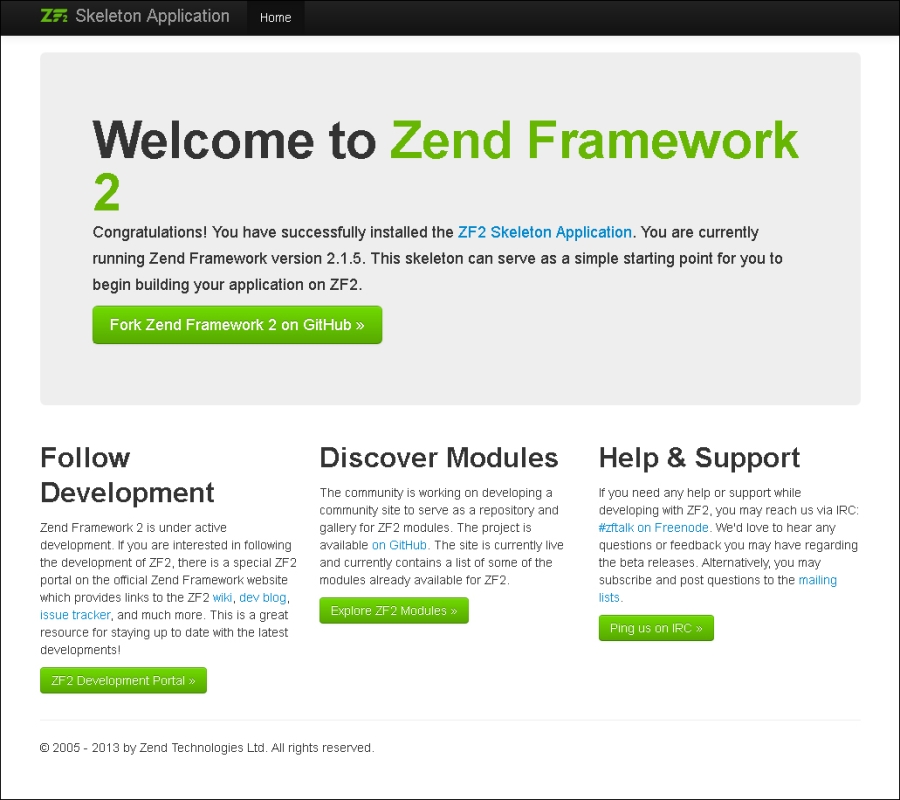
Congratulations, you have now set up a basic Zend Framework 2 application.
After getting the basic Zend Framework 2 skeleton working, it is the perfect time to install the ZFTool. The ZFTool is a utility module that comes in handy when we want to list the current modules in our project, or add a new module, or even set up a new project. It also contains an extremely useful class-map generator that we can use in the somewhat more advanced areas of Zend Framework 2.
We can install this utility by using the following commands:
$ cd /var/www
$ mkdir -p vendor/zftool
$ cd vendor/zftool
$ wget https://packages.zendframework.com/zftool.phar
Although we already set up our Zend Framework 2 skeleton through the composer, it might be a fun thing to show you how you can easily set up a new project through the ZFTool.
$ cd /var/www
$ php vendor/zftool/zftool.phar create project new-project
The preceding command will create a new Zend Framework 2 skeleton project in the folder /var/www/new-project. In turn this means that the document root for our new project should be set to /var/www/new-project/public.
To complete the Zend Framework 2 application in our new-project, we can simply go to the new-project directory and execute the following command:
$ cd new-project
$ php composer.phar install
Another handy command of the ZFTool is the creation and display of modules in our project. The ZFTool can easily display a list of modules that we currently use (with larger applications we tend to lose sight of the modules) and the ability to create a new skeleton module for our application. To see a list of the current modules used in our application we can use the following command:
$ php ../vendor/zftool/zftool.phar modules
To create a new module named wow-module in our project based in the directory /var/www/new-project we can use the following command:
$ php ../vendor/zftool/zftool.phar create module wow-module
  /var/www/new-project
Giving the path to the application is optional, but if we are using it with multiple projects on the same machine, it is best to make sure that we have the right path for our project.
And now for the last and probably the most useful command in the ZFTool box, the class-map generator. A class-map file is a file that has all the classes of a project with their respective paths declared, which makes it easier for the PHP auto loaders to load the class file. Normally class files are found in paths that we know of, creating a small lag because the auto loader actually needs to search for the file. With a class-map file, however, this is not the case as the auto load can immediately find the file required.
Class-mapping is a big issue in Zend Framework 2 because a bad class mapping can make a good application terribly slow, and to be completely fair Zend Framework 2 can use all the speed it can get.
What the class-map generator does is create a file that contains all the classes and paths that can be autoloaded. That way we don't have to worry about where the classes are located.
To generate a new class-map file, we can use the following command:
$ php zftool.phar classmap generate <directory> <file> -w
The command requires us to give in two different parameters:
<directory>: The directory that needs to have the classes indexed. For example, this can be a new library you added to thevendordirectory.<file>: This is the class-map file the ZFTool needs to generate. Our auto loader in Zend Framework 2 needs to pick this file up, so we need to make sure that the ZFTool can find the file. If you don't specify a file, it will create a file calledautoload_classmap.phpin the current working directory.
Most of the time it is necessary to append a class-map file instead of overwriting it, if you want to append it you can simply change -w with -a.
An example of a class-map file is the autoload_namespaces.php file in the vendor/composer directory, and it looks a little bit like this:
<?php
return array(
  // Every class beginning with namespace Zend\ will be
  // searched in this specific directory
  'Zend\\' => array(
    __DIR__ . '/../zendframework/zendframework/library'
  ),
  'ZendTest\\' => array(
    __DIR__ . '/../zendframework/zendframework/tests'
  ),
);
Tip
Downloading the example code
You can download the example code files for all Packt books you have purchased from your account at http://www.packtpub.com. If you purchased this book elsewhere, you can visit http://www.packtpub.com/support and register to have the files e-mailed directly to you.
There are also other ways of installing the ZFTool, some are just as easy as using the composer, so we'll cover two other methods of installing the ZFTool. That way we give ourselves the broadest options available to use.
Another method of installing ZFTool is by utilizing git, and thus cloning the source code from the repository itself. This however gets the current master version, which can be a bit buggy.
$ cd vendor
$ git clone https://github.com/zendframework/ZFTool.git
$ cd ZFTool
$ php ./zf.php
Instead of zftool.phar we have now got the zf.php file at our disposal, which can be used in exactly the same way. Now we have covered all the different options on installing ZFTool.
The Making sure you have all that you need recipe in the Appendix, Setting up the Essentials
The Downloading Zend Framework 2 and finding its documentation recipe in the Appendix, Setting up the Essentials
The Composer and its uses within Zend Framework 2 recipe in the Appendix, Setting up the Essentials
Apache web server http://apache.org/
PHP website http://php.net
An important aspect (if not the most important one) is the routing within Zend Framework 2. In its most basic form routing tells the framework how the user should get from page A to page B, and what needs to be done to arrive at that destination. That is why we generally think this is the most important part to understand if you are just starting out.
To define a route we can simply go into one of the configuration files and add the router configuration to there.
Let's look at our simple (Segment) configuration as follows (file: /module/Application/config/module.config.php):
return array(
  // Here we define our route configuration
  'routes' => array(

    // We give this route the name 'website'
    'website' => array(

      // The route type is of the class:
      // Zend\Mvc\Router\Http\Segment
      'type' => 'segment',

        // Lets set the options for this route
        'options' => array(

          /*
            The route that we want to match is /website
            where we can optionally add a controller name
            and an action name. For example:
              /website/index/index
          */
          'route' => '/website[/:controller[/:action]]',

          /*
            We don't want to accept everything, but this
            regex makes sure we only accept alpha-
            numeric characters and a dash and underscore.

            In our instance we want to check this for the
            action and the controller.
          */
          'constraints' => array(
            'controller' => '[a-zA-Z][a-zA-Z0-9_-]*',
            'action' => '[a-zA-Z][a-zA-Z0-9_-]*'
          ),

          /*
           We want to make sure that if the user only
           types /website in the URL bar it will actually
           go somewhere. We defined that here.
          */
          'defaults' => array(
            'controller' => 'Website\Controller\Index',
            'action' => 'index'
          ),
        ),
      ),
    ),
  ),
);
With this basic configuration we can easily define routes in our application, and in this instance we have configured a route that responds to the /website URL. When we would go to the /website URL, we would be routed to the Website\Controller\Index::indexAction by default. If we however use the route /website/another/route, we would be routed to the Website\Controller\Another::routeAction, as we have defined that the controller and action can be parsed behind that. If we omit the route path and put in /website/another, we would be redirected to the Website\Controller\Another::indexAction, as that is used by default by the framework.
The preceding example has only one really major drawback, which is, when we decide to use anonymous function in the configuration to create more dynamic routes, we would not be able to cache the route as closures are not serializeable by the cache.
However, there is another method of declaring the route, and that is in the code. The need to create the route functionality in the code could (obviously everyone has their own reasons and requirements) arise because we want to cache the configuration in a later stage (as we cannot cache anonymous function, for example) or when we want to load up a route dynamically from a database.
Let's take a look at the /module/Application/Module.php example:
<?php

// We are working in the Application module
namespace Application;

// Our main imports that we want to use
use Zend\Mvc\ModuleRouteListener;
use Zend\Mvc\MvcEvent;

// Define our module class, this is always 'Module', but
// needs to be specifically created by the developer.
class Module
{
  public function onBootstrap(MvcEvent $e)
  {
    // First we want to get the ServiceManager
    $sm = $e->getApplication()->getServiceManager();

    /*
      Say our logged in user is 'gdog' and we want
      him to be able to go to /gdog to see his profile.
    */
    $user = 'gdog';

    // Now get the router
    $router = $sm->get('router');

    // Lets add a route called 'member' to our router
    $router->addRoute('member', array(

      /*
        We want to make /$user the main end point, with
        an optional controller and action.
      */
     'route' => '/'. $user. '[/:controller[/:action]]',

      /*
        We want a default end point (if no controller
        and action is given) to go to the index action
        of the index controller.
      */
      'defaults' => array(
        'controller' => 'Member\Controller\Index',
        'action' => 'index'
      ),

      /*
        We only want to allow alphanumeric characters
        with an exception to the dash and underscore.
      */
      'constraints' => array(
          'controller' => '[a-zA-Z][a-zA-Z0-9_-]*',
          'action' => '[a-zA-Z][a-zA-Z0-9_-]*'
      ),
    ));
  }
}
Naturally there are more ways of adding a route, but the method mentioned in the preceding code for adding a route displays a canny way of dynamically adding a route. What we created there is that whenever Gdog goes to his profile, he can simply type in http://example.ext/gdog and end up on his profile.
Even more wonderful is that if our friend Gdog wants to see his friends, he is able to do that by just typing in for example, http://example.ext/gdog/my/friends, which will resolve to the Member module and then go to the My controller, lastly executing the Friends action.
This route stack is—as the name implies—the simplest router around and is basically a list with routes that is being parsed to see which route matches, by default this type of router is not used in Zend Framework 2. The general rule of thumb is that if we want to add a route with a high priority, we give it a high index number for example, 100, or 200. If we want to give the route a very low priority, we would give it an index number of, for example, 5 or 10.
Giving priorities to routes comes in handy when we have very specific routes (which usually have a high priority) and less specific routes (low priority). If we, for example, want to make /website/url redirect to a completely different module, controller, and action, but not affect the other website routes, we need to give the /website/url route a higher priority so that when it is found, it will not search for the lower priority routes.
If we, by accident, turn the priorities around, we would find our /website/url always redirect to the route that contains all the /website routes.
SimpleRouteStack uses a Zend\Mvc\Router\PriorityList class to manage its routes priorities.
We need to consider routing before we want to start creating our application, as when the application grows we might get into trouble with our routing if we haven't considered 'how to route' beforehand. It would therefore be wise for us to 'sitemap' the application before coding the routes to make sure we have a correct route list and are not creating any conflicting routes.
The SimpleRouteStack class has a number of methods defined that are very useful for us:
getRoute($name)/getRoutes($name): This will retrieve the current route—if a name is provided—or routes that are defined in ourSimpleRouteStack. If we are unsure about the routes we have defined, this would be a good place to check first.
addRoute($name, $route, $priority) / addRoutes($routes): We can use this to add a new route or an array of routes to our route type by simply adding it through this method. A route requires a name, route (which can be a string or an instance of RouteInterface) and if we fancy a priority, we can give that as the third parameter.
hasRoute($name): If we would want to check whether a specific route already exists, we can search using its name and find out if it does or doesn't.
removeRoute($name): When we are tired of a route we can simply give its name and remove it from the list. This can be particularly handy if we want for example to have a module override a certain /login when the user has logged in to route to/user.SimpleRouteStack: Does not have a functionality to have multiple routes with the same priority. If there is a route with a priority already defined, it will prioritize the last route added as the route with the highest priority.
In Zend Framework 2, we will generally use routing that is based on a request URI, which contains path segments that should be queried. Routes are matched by a router, which utilizes RouteStack to find the match to the query made by the router. We use RouteStack because we want a decent way of managing our different routes. With Zend Framework 2 there are loads of route types provided, but only two flavorless routers namely SimpleRouteStack and TreeRouteStack.
When we are defining a router, we need to make sure we understand how it works. Although creating lists with different paths is simple enough, it is wise to remember that the Zend Framework 2 router generally works with the Last In First Out (LIFO) concept, which means that a route that would be used often would be registered last, and a route that is less common would be registered earlier in the router stack.
Besides the two standard route types, Zend Framework 2 comes with a whole scale of route types that are more specialized to the Internet navigation or even through the console.
A wonderful set of HTTP routers can be found in the Zend\Mvc\Router\Http namespace and we will take a quick look at the different classes that reside within this namespace.
The Zend\Mvc\Router\Http\Hostname namespace will try to match its routing against the hostname defined in the configuration. For example, if we define the route to be something.example.ext, our router will make its routing decision based on the full URL. But, if we add a single colon at the beginning of that same route, for example: :something.example.ext, the router would base its route on the something variable, which could be anything from aardvark.example.ext to zyxt.example.ext.
The Zend\Mvc\Router\Http\Method class is used when we want to match against an HTTP method instead of a segment or path. This could be, for example, a POST, DELETE and so on. The method is also called verb by Zend Framework 2, which means that instead of a route parameter, it requests a verb parameter when adding the route, which is an excellent way to create RESTful APIs.
The Zend\Mvc\Router\Http\Part class is used to describe child_routes in our routing configuration. This means that—although never used directly—we can define that /user/profile is being redirected to use the UserController, with the profile action.
Let's consider the following configuration:
return array(
  // We begin our router configuration
  'router' => array(

    // Define our routes
    'routes' => array(

      // We are defining a route named 'Example'
      'Example' => array(
        'type' => 'Literal',
        'options' => array(

           /*
            This route will resolve to /recipe
            which will resolve to the Example
            module's IndexController and execute
            the IndexAction.
           */
           'route' => 'recipe',
           'defaults' => array(
             '__NAMESPACE__' => 'Example\Controller',
             'controller' => 'Index',
           ),
         ),

         'may_terminate' => true,

          /*
            Here we begin to define our Part route,
            which always begins with the
            'child_routes' configuration.
          */
          'child_routes' => array(
            'client' => array(
              'type' => 'Literal',
              'options' => array(

              /*
                This child route (or Part)
                will resolve to /recipe/foo
                and will call the fooAction in
                the IndexController.
              */
              'route' => '/foo',
              'defaults' => array(
               'action' => 'fooAction'
              ),
            ),
          ),
        ),
      ),
    ),
  ),
);The Zend\Mvc\Router\Http\Regex class would be used when we have a complex routing structure that requires us to dynamically create the route. This would, for example, come in handy when we look at News sites, where posts are built up like /archive/some-subject-2013.html. This fairly complex route (as some-subject-2013.html is dynamic in our case) would require a Regex router that can resolve the Controller, Action, and in our case also the output format.
Let's consider the following example:
// We begin our router configuration
'router' => array(

  // Define our routes
  'routes' => array(

    // We are defining a route named 'Archive'
    'Archive' => array(
      'type' => 'Literal',
      'options' => array(

        /*
          This route will resolve to /archive
          which will resolve to the Archive
          module's IndexController and execute
          the IndexAction.
        */
        'regex' => '/archive/(?<id>[a-zA-Z0-9_-
  ]+)(\.(?<format>(html|xml)))?',
        'defaults' => array(
            '__NAMESPACE__' => 'Archive\Controller',
            'controller' => 'Index',
            'action' => 'indexAction',
            'format' => 'html',
        ),
        'spec' => '/archive/%id%.%format%',
      ),
    ),
  ),
),
In the preceding example, it is important to note that /archive/%id%.%format% tells us that we will receive two parameters in our method called indexAction that is, id and format.
The Zend\Mvc\Router\Http\Scheme class is always using the defaults parameter and will accept only one other parameter, which is called scheme and can only contain one of the following options, that is, http, https, and mailto.
The Zend\Mvc\Router\Http\Segment class is probably one of the most-used routers that we would use, as you can dynamically define the route and controller for any module by using, for example, /:controller/:action, which is easily recognizable by the colon separation. We can define any constraints to the segment by configuring only the use of alphanumeric characters or another definition that we would like to use.
An example of Segment is given in the first example in the How to do it... section.
When we talk about the dependency injection, or in short DI, we talk about the simple task of, for example, injecting data in object or methods at initialization when needed by one or other higher up classes, which either modify or dispose off the object after use. The DI is probably the most complex feature in Zend Framework 2 to understand. Unfortunately because DI's over complexity in debugging and performance and the Service Locator (explained in Chapter 6, Modules, Models and Services). However, although it is not the best tool in the shed, we must try to learn it, because when mastered it could prove to be a very powerful tool to create a very maintainable piece of code.
If we come across a situation where it is necessary for us to input a lot of parameters in classes because of objects deeper in the code are dependent on them is probably the most annoying and un-maintainable piece of code that we can find in even the most professional environment. We need to think mainly about objects that are used more than once in an application, and always required to instantiate again.
Let us take a look at the following example and assume that FirstClass is the only class that we will actually need further in the code:
namespace OneNamespace
{
  class FirstClass
  {
    private $secondClass;
    public function __construct(SecondClass $secondClass)
    {
      $this->secondClass = $secondClass;
    }
  }

  class SecondClass
  {
    private $thirdClass;
    private $vehicle;
    public function __construct(ThirdClass $thirdClass, $vehicle)
    {
      $this->thirdClass = $thirdClass;
      $this->vehicle = $vehicle;
    }
  }
}

namespace AnotherNamespace
{
  class ThirdClass
  {
    private $first_name;
    private $last_name;

    public function __construct($first_name, $last_name)
    {
      $this->first_name = $first_name;
      $this->last_name = $last_name;
    }
  }
}

// Let us now create the example through the classic
// method.
$thirdClass = new AnotherNamespace\ThirdClass("John", "Doe");
$secondClass = new OneNamespace\SecondClass($thirdClass,
  'Motorcycle');
$firstClass = new OneNamespace\FirstClass($secondClass);
Both the preceding examples give either variables that are only used to instantiate another class and/or add complexity in reading the code. Although they both are correct, the use of DI can, in this case, make the configuration of both the classes much easier.
Let's take a look at this DI example, considering that we have the same classes as the preceding example:
namespace OneNamespace
{
  class FirstClass
  {
    [..]
  }

  class SecondClass
  {
    [..]
  }
}

namespace AnotherNamespace
{
  class ThirdClass
  {
    [..]
  }
}

// Instead of configuring all the classes, we will now
// simply configure the Di, and only instantiate the
// class that we want to use.
$di = new \Zend\Di\Di();
$lister = $di->get(
    'OneNamespace\FirstClass',
    array(
        'first_name' => 'Jane',
        'last_name' => 'Doe',
        'vehicle' => 'Car',
    )
);
In the preceding example, we simply say to the DI that AnotherNamespace\ThirdClass has two parameters in its __construct method. The DI will then utilize Reflection to find out what parameters are present there, and will then give any class that has a first_name, vehicle, or last_name parameter in its constructor that parameter.
Of course we will see a potential flaw here, as you might need to utilize multiple instantiations, one can presume that at some point the same parameter name will be used. In our example, it would cause a problem if another class also has a $first_name parameter but requires a different input, as the DI will simply give the one that is in its list.
Tip
If we use DI to instantiate our classes and all we need the constructor for is to set our variables, we can easily remove the constructor altogether as the DI doesn't use the constructor to initialize the variables. Instead the DI will just set the properties of the values.
One good thing about this is that this can flaw only happens when we use the DI at a call-time level, and not in a global configuration level as we will see now. That is why it isn't recommended to use the DI at call-time level at all.
What we also can do to create a more specific (or accurate) initialization of our object – and to make sure classes with the same property names don't conflict – is initializing the DI with a configuration object.
The idea behind this is that we first create a configuration object (or array) that defines which classes need which properties set, and then use that to initialize the DI, which in its turn finds out when it needs to initiate what.
Take a look at the following example, which shows you the exact thing we just explained:
<?php
// We are assuming that we are using the same classes as
// in the previously shown examples.
namespace OneNamespace
{
  class FirstClass
  {
    [..]
  }

  class SecondClass
  {
    [..]
  }
}

namespace AnotherNamespace
{
  class ThirdClass
  {
    [..]
  }
}

// After defining our classes we now begin to create our
// configuration array which we will use to initialize
// the DI.
$configuration = array(

  // We want to use this specific configuration at
  // initialization of our class.
  'instance' => array(

    // We specify the class name to use here
    'SecondClass' => array(

      // We want to use this as a parameter
      'parameters' => array(

        // The property name to fill is vehicle.
        'vehicle' => 'Airplane'
      ),
    ),

    'FirstClass' => array(
      // Again we want to use this as a parameter
      'parameters' => array(

        // The property name to fill is first name and
        //last name.
        'first_name' => 'Neil',
        'last_name' => 'deGrasse Tyson',
      ),
    ),
  ),
);

// We want to instantiate the Di\Configuration now.
use \Zend\Di\Configuration;

$diConfiguration = new Configuration($configuration);

// Now instantiate the Di itself, with the configuration
// attached.
$di = new \Zend\Di\Di($configuration);

// And to get the object we want to use, we just do the
//same as before.
$firstClass = $di->get('OneNamespace\FirstClass');
To make everything even nicer, we would just put the Zend\Di\Configuration of the DI in the bootstrap of our module, so that we can use it easily throughout the namespace. This way we can simply put the configuration of the DI in our module.config.php and let the framework take care of it.
The DI or dependency injector is an important, and most of the time overlooked feature of Zend Framework 2. The DI makes our lives a lot easier by automatically finding the classes we need in our application.
With all its complexity however, comes a couple of features we should be wary of.
This means that every get() call will result in the same instantiation over and over again. If we would like a new instance, we would need to call newInstance() as the DI implements the singleton pattern, which means that all the data persists every time we call the get() method unless we force a new instance of the DI.
When our class has more properties than we define, we will find out that the DI will use the last value for every other property in the class. Of course this is unwanted, and if we wrote the class ourselves we should consider refactoring the configuration and/or class.
However, when there is no other way we can define the right properties only by using a Fully Qualified (FQ) setter parameter.
In our configuration we would then define a very specific property name, for example, class::method:paramPos. If we take our ThirdClass example from earlier on, this would then be ThirdClass::setFirstName:0 and ThirdClass::setLastName:0 respectively.
There is loads more we can learn about the DI in Zend Framework 2. The following list provides a very short and compact description of other interesting DI components:
RuntimeDefinition(default),CompilerDefinitionandClassDefinition: These definitions are used to determine how to configure our objects. Although the default one usually does the job, it can't hurt to see what the other two Definitions do, because they all have their pros and cons.InstanceManager: Used to define the configuration, specifically theAliases,ParametersandPreferences.
Configurations play a crucial role in the workings of Zend Framework 2, therefore it is essential to know how it works.
Go through the following sections to use configurations to your benefit:
When beginning to code in Zend Framework 2 there is some misunderstanding as to what the different configuration files do. By default we have multiple configuration files, and it might not always be simple to understand where things need to go. That is why we like to apply a simple rule:
Note
Is the configuration necessary throughout all our modules? If yes, place your configuration in the config/application.config.php file. If not, place your configuration in the config/global.php file at the module where it belongs.
The configuration that we usually place in the global.php file can be, for example, the caching method and configuration, the database configuration. Normally we would like to place items in there that are environment related, but nothing that is security sensitive.
Let's take a look at a bad example of global.php:
<?php
return array(

  // We want to create a new database connection
  'db' => array(

    // The driver we want to use is the Pdo, our
    // favorite
    'driver' => 'Pdo',

    // This is our connection url, defining a MySQL
    // connection, with database 'somename' which is
    // available on the localhost server.
    'dsn' => 'mysql:dbname=somename;host=localhost',

    // This is exactly what we should NOT do in this
    // file, shame on you developer!
    'username' => 'terribleuser',
    'password' => 'evenworsepassword',
  ),

  // We need a database adapter defined as well,
  // otherwise we can't use it at all.
  'service_manager' => array(
    'factories' => array(
      'Zend\Db\Adapter\Adapter' =>
  'Zend\Db\Adapter\AdapterServiceFactory',
    ),
  ),
);
It is terrible practice to put the username and password in the global.php file. The global.php file is to be put in our version control, and therefore should contain only configuration items that are required to globally run the application, not specific information that is relevant per environment, such as database usernames and passwords.
One of the benefits of the ultra-many configuration files in Zend Framework 2, is that you are able to override your global configuration with your local configuration. This certainly comes in handy when developing and you find yourself in a position where your details are slightly different in configuration than your production environment.
Let's assume that we have the following /config/autoload/global.php configuration file:
<?php
return array(

  // We want to create a new database connection
  'db' => array(

    // The driver we want to use is the Pdo, our
    // favorite
    'driver' => 'Pdo',

    // This is our connection url, defining a MySQL
    // connection, with database 'somename' which is
    // available on the localhost server.
    'dsn' => 'mysql:dbname=somename;host=localhost',
  ),

  // We need a database adapter defined as well,
  // otherwise we can't use it at all.
  'service_manager' => array(
    'factories' => array(
      'Zend\Db\Adapter\Adapter' =>
  'Zend\Db\Adapter\AdapterServiceFactory',
    ),
  ),
);
As we can see in the preceding example, we create a nice and simple MySQL database connection to our somename database which resides on the localhost. But as good developers we have not defined our username and password in here. That is where the /config/autoload/local.php file comes in.
Let's take a look at how our local.php might look like:
<?php
return array(
  'db' => array(
    'username' => 'awesomeuser',
    'password' => 'terriblepassword',
  ),
);
If we are using a version control system (please say yes), we should not commit this file, not only for security reasons but also because this is a local configuration file and wouldn't be necessary on a live system, as we would create a new one with the right details for that environment.
If we look at our default config/application.config.php file we have only a few properties set, but loads of inline comments, which really come in handy when we can't remember the exact name or description of a property any more.
The main configuration that we will be changing the most in our application as we develop is the modules property. This specific property is a simple array with the different module namespaces that we have (and want to use) in our application. At default this looks somewhat like this:
<?php

return array(
  // This should be an array of module namespaces used
  // in the application.
  'modules' => array(
    'Application',
  ),
[..]
When we add or remove a module, this line needs to be modified as well and one can even suggest modifying this before starting a new module or removing one. The reason for this is simple, when we forget to modify this file when removing a module it will generate a 500 – Application Error when visiting the application in our browser. And because this configuration file is read quite early in the instantiation, it can sometimes be hard for the developer to pinpoint why the application fails to load all of a sudden.
If we look at the index.php file in the public folder, we can see that we parse our initial configuration file to the Zend Framework MVC Application with the line require 'config/application.config.php'. This then loads up the main configuration file, which in its turn defines all our properties.
A nifty property in the application.config.php file is the config_glob_paths property. Any additional configuration files are by default read by finding files in the config/autoload folder as well, using a very specific file pattern namely; *global.php and *local.php. The order in which this is defined is also very important.
When we say *global.php, we can define anything from somemodule.global.php to menu.global.php to just global.php, as the file pattern (also named GLOB_BRACE) searches for anything that matches that. The same happens for *local.php.
The order this is defined is very important as said before because we want our global configuration to be loaded before our local configuration, otherwise there would be no point in overriding our global configuration, would there?
To summarize the configuration files:
config/application.config.php: Modules can be added and removed here, and very low level configuration happens here.config/autoload/some-module.global.php: Used to override your default values of your module configuration. Make sure not to put sensitive information in here, but hostnames and database names should go in here.config/autoload/some-module.local.php: You can put your usernames and passwords and other configuration items that are very specific to your local environment here.module/SomeModule/config/module.config.php: Module specific configuration happens here, use only default values and make sure nothing too specific will be entered here.
We will be showing off one of the most beautiful features of Zend Framework 2: The EventManager.
The EventManager and Bootstrap classes are an essential part of our application, this recipe is all about how to use those two tools:
The bootstrap is in our case the start of a module, whenever a module is requested it will use the onBootstrap() method located in the Module.php file. Although the method is not required, we usually want this method in our module as it is an easy method of making sure that some instances already exist or are configured before venturing further in our client request.
Sessions are a wonderful way of saving information about a user on a temporary basis. Think about saving the information of a logged-in user, or history on the pages they have been. Once we begin creating an application we find ourselves saving a lot of things in the session.
The first thing we need to do is modify the /module/Application/config/module.config.php file, and add another section called session to it. Let's assume that we have a completely empty module configuration:
<?php
return array(
  'service_manager' => array(
     // These are the factories needed by the Service
     // Locator to load in the session manager
    'factories' => array(
      'Zend\Session\Config\ConfigInterface' =>
  'Zend\Session\Service\SessionConfigFactory',
      'Zend\Session\Storage\StorageInterface' =>
  'Zend\Session\Service\SessionStorageFactory',
      'Zend\Session\ManagerInterface' =>
  'Zend\Session\Service\SessionManagerFactory',
    ),
    'abstract_factories' => array(
  'Zend\Session\Service\ContainerAbstractFactory',
    ),
  ),
  'session_config' => array(
    // How long can the session be idle for in seconds
    // before it is being invalidated
    'remember_me_seconds' => 3600,

    // What is the name of the session (can be anything)
    'name' => 'some_name',
  ),
  // What kind of session storage do we want to use,
  // only SessionArrayStorage is available at the minute
  'session_storage' => array(
    'type' => 'SessionArrayStorage',
    'options' => array(),
  ),
  // These are session containers we can use to store
  // our information in
  'session_containers' => array(
    'ContainerOne',
    'ContainerTwo',
  ),
);
And that is it. Sessions are now useable in our controllers and models. We have now created two session containers that we can use to store our information in. We can access these containers in any Controller or Model that has a service locator available by doing the following (file: /module/Application/src/Application/Controller/IndexController.php):
<?php

namespace Application;

use Zend\Mvc\Controller\AbstractActionController;

class IndexController extends AbstractController
{
  public function indexAction()
  {
    // Every session container we define receives a
    // SessionContainer\ prefix before the name
    $containerOne = $this->getServiceLocator()
  ->get('SessionContainer\ContainerOne');
  }
}The EventManager class is possibly one of the nicest features in the framework. When used properly, it can make our code a lot more dynamic and maintainable without creating spaghetti code.
What it does is relatively simple, for example; a class might have a method called MethodA. This MethodA has a list of listeners, which are interested in the outcome of that class. When MethodA executes, it just runs through its normal procedures, and when finished it just notifies the EventManager a specific event has occurred. Now the EventManager will trigger all of the interested parties that this event has taken place, and the parties in their turn will execute their code.
Got it? Don't worry if you don't, because this example code might clear things up (file: /module/Application/src/Application/Model/SwagMachine.php):
<?php
// Don't forget to add the namespace
namespace Application\Model;

// We shouldn't forget to add these!
use Zend\EventManager\EventManager;

class SwagMachine
{
  // This will hold our EventManager
  private $em;

  public function getEventManager()
  {
    // If there is no EventManager, make one!
    if (!$this->em) {
      $this->em = new EventManager(__CLASS__);
    }

    // Return the EventManager.
    return $this->em;
  }

  public function findSwag($id)
  {
    // Trigger our findSwag.begin event
    // and push our $id variable with it.
    $response = $this->getEventManager()
                     ->trigger(
           'findSwag.begin',
           $this,
           array(
             'id' => $id
           )
    );

    // Make our last response, the final
    // ID if there is a response.
    if ($response->count() > 0)
      $id = $response->last();

    // ********************************
    // In the meantime important code
    // is happening...
    // ********************************

    // ...And that ends up with the
    // folowing return value:
    $returnValue = 'Original Value ('. $id. ')';

    // Now let's trigger our last
    // event called findSwag.end and
    // give the returnValue as a
    // parameter.
    $this->getEventManager()
         ->trigger(
           'findSwag.end',
           $this,
           array(
             'returnValue' => $returnValue
           )
    );

    // Now return our value.
    return $returnValue;
  }
}
As we can see we created a little class with two event triggers, findSwag.begin and findSwag.end, respectively on the beginning of the method, and one on the end of the method. The findSwag.begin event will potentially modify the $id, and the findSwag.end event only parses the returnValue object, with no modification possible to the value.
Now let's see the code that implements the triggers (file: /module/Application/src/Application/Controller/IndexController.php):
<?php

namespace Application\Controller;

use Zend\Mvc\Controller\AbstractActionController;

class IndexController extends AbstractActionController
{
  public function indexAction()
  {
    // Get our SwagMachine
    $machine = new SwagMachine();

    // Let's attach our first callback,
    // which potentially will increase
    // the $id with 10, which would
    // make it result in 30!
    $machine->getEventManager()
            ->attach(
        'findSwag.begin',
        function(Event $e)
        {
          // Get the ID from our findSwag()
          // method, and add it up with 12.
          return $e->getParam('id') + 10;
        },
        200
    );

    // Now attach our second callback,
    // which potentially will increase
    // the value of $id to 60! We give
    // this a *higher* priority then
    // the previous attached event
    // trigger.
    $machine->getEventManager()
            ->attach(
        'findSwag.begin',
        function(Event $e)
        {
        // Get the ID from our findSwag()
        // method, and add it up with 15.
        return $e->getParam('id') + 40;
      },
      100
    );

    // Now create a trigger callback
    // for the end event called findSwag.end,
    // which has no specific priority,
    // and will just output to the screen.
    $machine->getEventManager()
            ->attach(
        'findSwag.end',
        function(Event $e)
        {
          echo 'We are returning: '
             . $e->getParam('returnValue');
        }
    );

    // Now after defining the triggers,
    // simply try and find our 'Swag'.
    echo $machine->findSwag(20);
  }
}
As we can see attaching triggers to events is pretty straightforward. And – if the events are properly documented – can come in handy when we want to, say, modify parameters going into a method (like we did with the findSwag.begin), or just outputting the results to a log (like findSwag.end).
When we look at what is on our screen, it should be something like this:
We are returning: Original Value (60)
Original Value (60)
The result consists of the top line being the output from the findSwag.end trigger, while the value 60 comes from the highest priority trigger, the one with priority 100 (as that is considered a higher priority than 200).
Sometimes it is necessary that we have different View outputs, for example when we need to build ourselves a REST service or a SOAP service. Although this can be arranged much simpler by a controller plugin, it is an example on how to hook into the dispatch event, and see what is going on there.
Without further ado, let us take a look at the following code snippet:
Module.php:
namespace Application;

// We are going to use events, and because we use a MVC,
// we need to use the MvcEvent.
use Zend\Mvc\MvcEvent;

class Module
{
  public function onBootstrap(MvcEvent $e)
  {
    // Get our SharedEventManager from the MvcEvent $e
    // that we got from the method
    $sharedEvents = $e->getApplication()
                      ->getEventManager()
                      ->getSharedManager();

    // Also retrieve the ServiceManager of the
    // application.
    $sm = $e->getApplication()->getServiceManager();

    // Let's propose a new ViewStrategy to our
    // EventManager.
    $sharedEvents->attach(

        // We are attaching the event to this namespace
        // only.
        __NAMESPACE__,

        // We want to attach to this very specific
        // event, the Dispatch event of our controller.
        MvcEvent::EVENT_DISPATCH,

        // The callback function of the event, used when
        // the event we attached to happens. In our
        // callback we also want our local variable $sm
        // to be available for use.
        function($e) use ($sm)
        {
          // Get our alternate view strategy from the
          // ServiceManager and attach the EventManager
          // to the strategy.
          $strategy = $sm->get('ViewJsonStrategy');
          $view = $sm->get('ViewManager')->getView();
          $strategy->attach($view->getEventManager());
        },

        // We want to give this a priority, so this will
        // get more priority.
        100
    );
}
As we can see it is relatively simple to attach a callback function to the EventManager object. In this example we are using McvEvent::EVENT_DISPATCH as the event we want to hook in to. So what basically happens is that whenever a controller executes the onDispatch() method, this event will be triggered as well. This means that through events we can modify the outcome of a method without actually needing to modify the code.
The EventManager class works through a couple of different methods, namely the Observer pattern, the Aspect-Oriented Programming technique (or AOP) and the Event-Driven architecture.
Simply said the Observer pattern means that there are several interested parties, called listeners that want to know when the application triggers a certain event. When a specific event is triggered, the listeners will be notified so that they can take their necessary actions.
The EventManager object is queried through a PriorityQueue, which tells us that an important event will generally get a lower value, while an unimportant event a higher value. For example, the highest priority might get priority -1000 while a quite low priority might get 40. The EventManager class then gets the queue through a FIFO (First In, First Out) concept, meaning the higher the priority, the lower the number.