Search icon CANCEL
Subscription
0
Cart icon
Your Cart (0 item)
Close icon
You have no products in your basket yet
Save more on your purchases! discount-offer-chevron-icon
Savings automatically calculated. No voucher code required.
Arrow left icon
Explore Products
Best Sellers
New Releases
Books
Videos
Audiobooks
Learning Hub
Newsletter Hub
Free Learning
Arrow right icon
timer SALE ENDS IN
0 Days
:
00 Hours
:
00 Minutes
:
00 Seconds
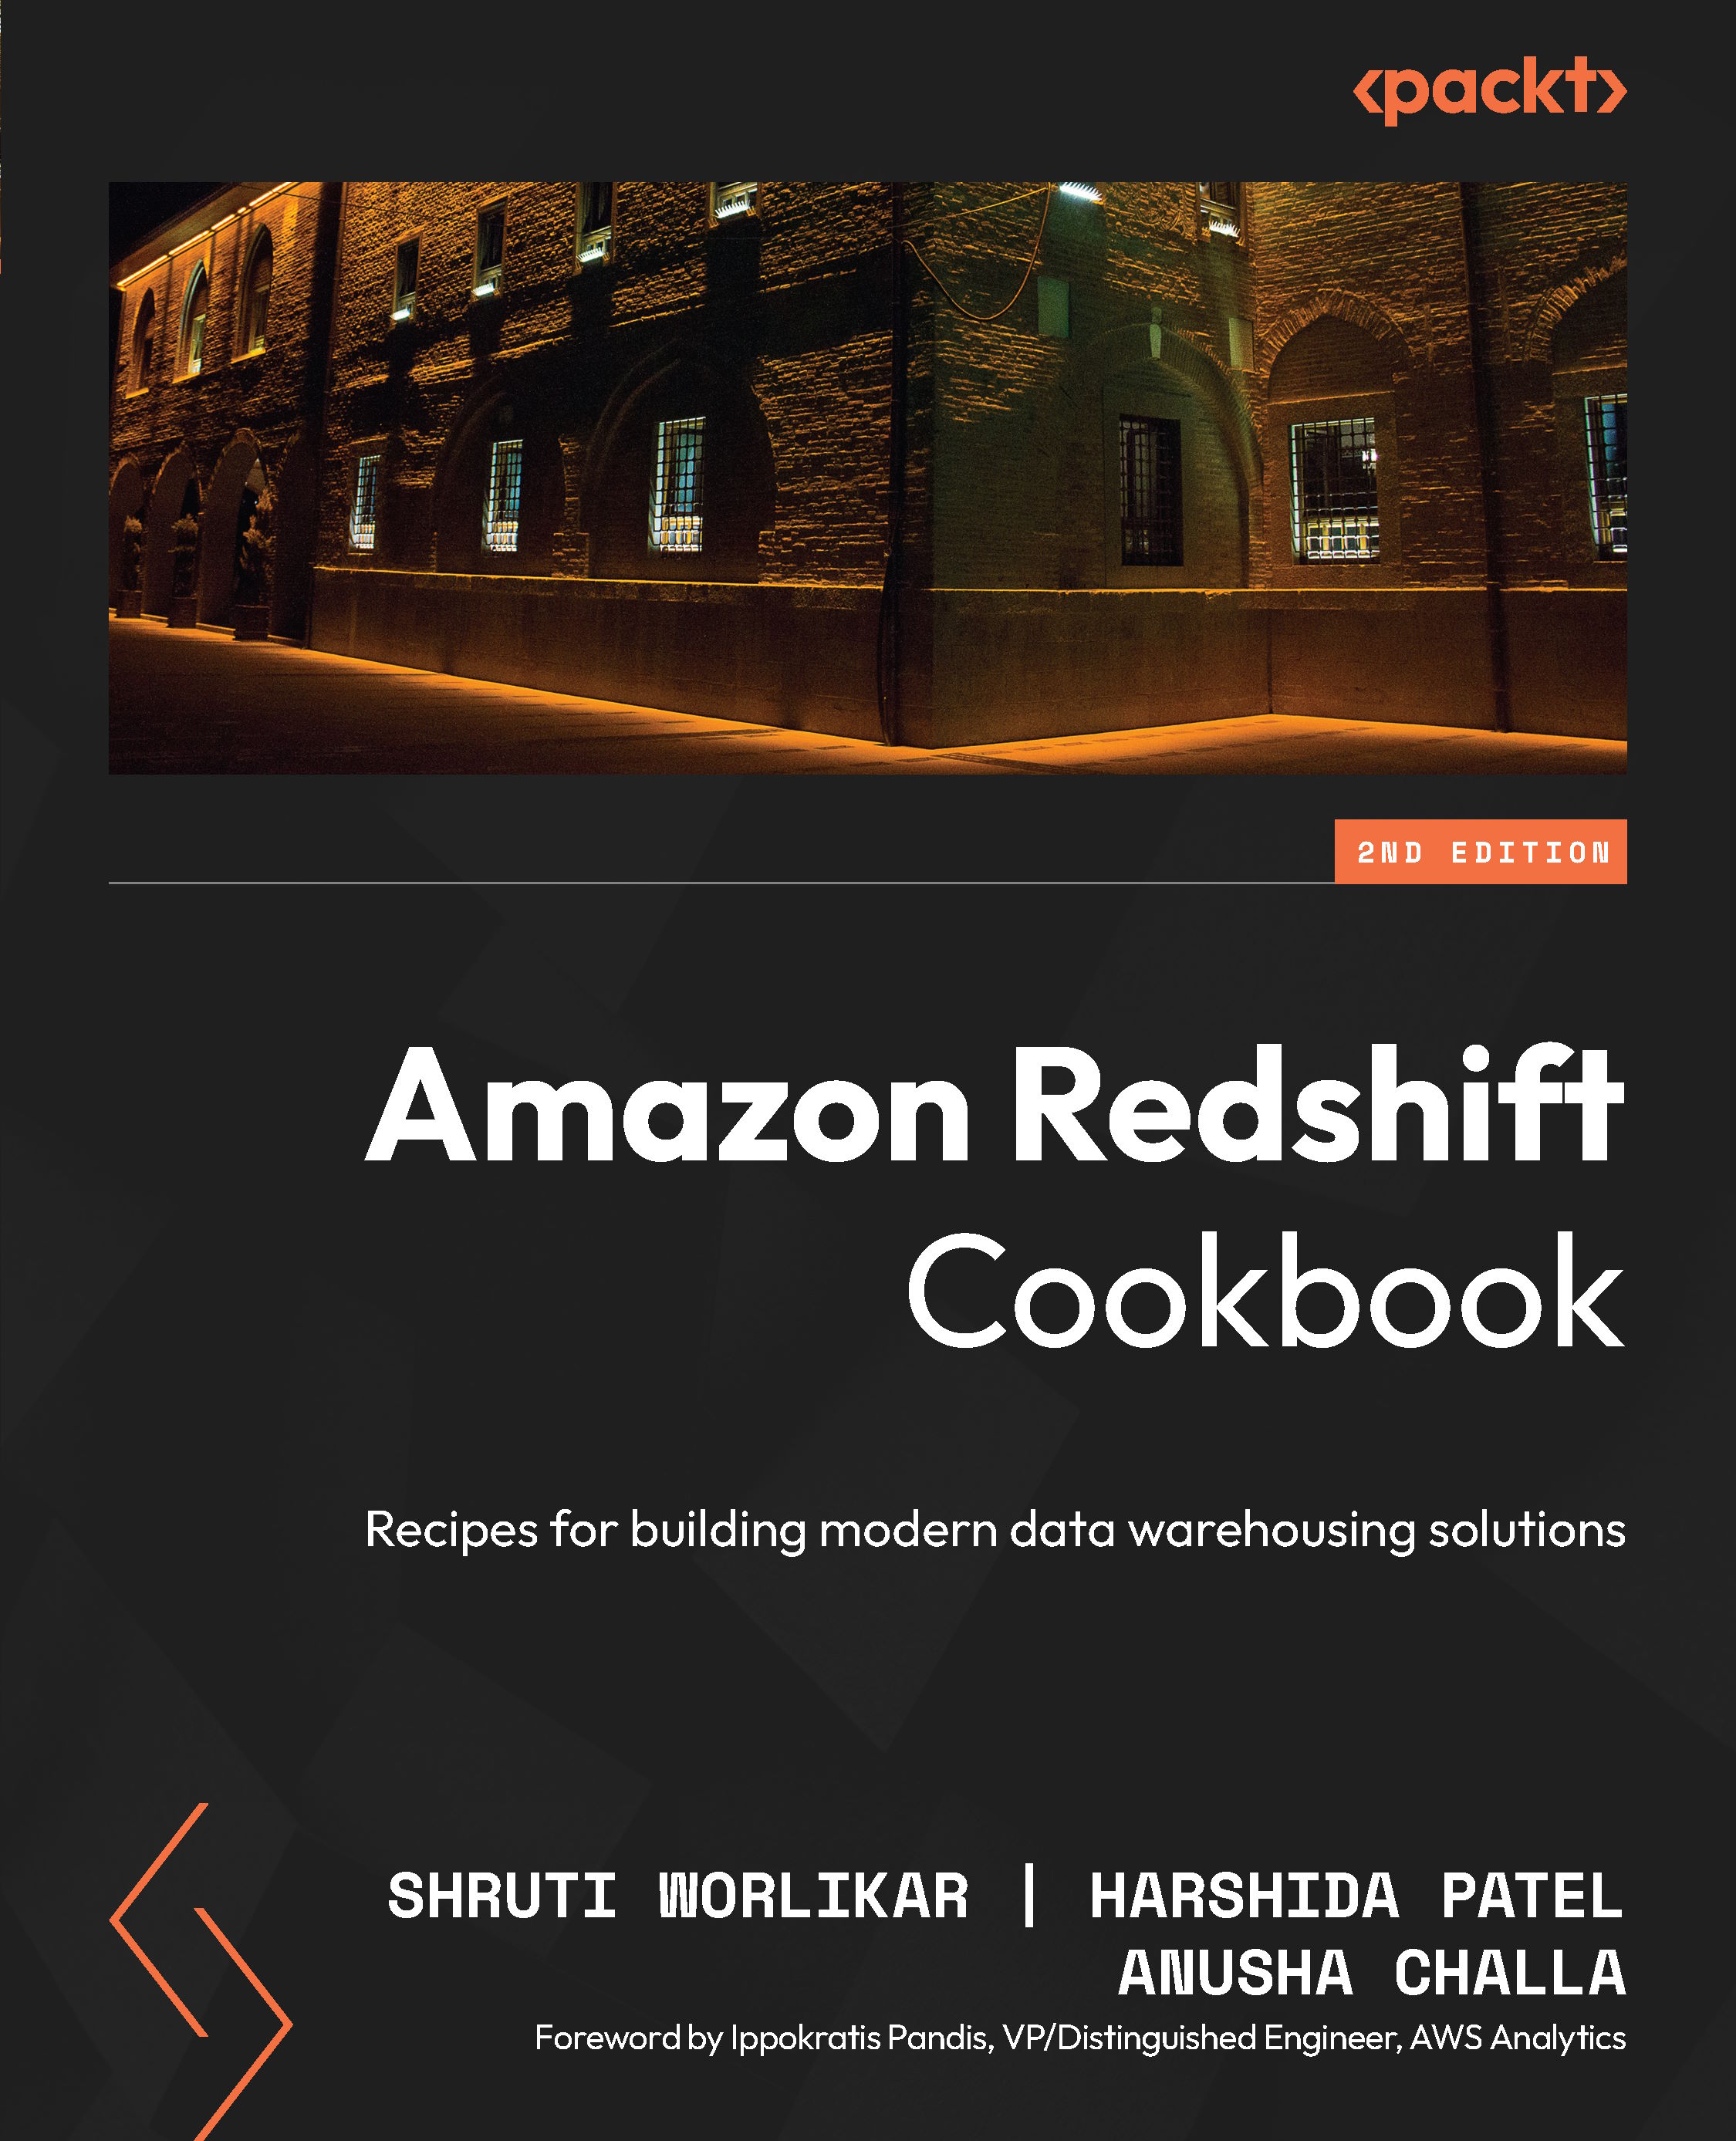
Amazon Redshift Cookbook

Amazon Redshift Cookbook: Recipes for building modern data warehousing solutions , Second Edition

Arrow left icon
Profile Icon Shruti Worlikar Profile Icon Patel Profile Icon Anusha Challa
Arrow right icon
$49.99
Paperback Apr 2025 468 pages 2nd Edition
eBook
$35.98 $39.99
Paperback
$49.99
Subscription
Free Trial
Renews at $19.99p/m
Arrow left icon
Profile Icon Shruti Worlikar Profile Icon Patel Profile Icon Anusha Challa
Arrow right icon
$49.99
Paperback Apr 2025 468 pages 2nd Edition
eBook
$35.98 $39.99
Paperback
$49.99
Subscription
Free Trial
Renews at $19.99p/m
eBook
$35.98 $39.99
Paperback
$49.99
Subscription
Free Trial
Renews at $19.99p/m

What do you get with Print?

Product feature icon Instant access to your digital copy whilst your Print order is Shipped
Product feature icon Paperback book shipped to your preferred address
Product feature icon Redeem a companion digital copy on all Print orders
Product feature icon Access this title in our online reader with advanced features
Product feature icon DRM FREE - Read whenever, wherever and however you want
Product feature icon AI Assistant (beta) to help accelerate your learning
OR
Modal Close icon
Payment Processing...
tick Completed

Shipping Address

Billing Address

Shipping Methods
Table of content icon View table of contents Preview book icon Preview Book

Amazon Redshift Cookbook

Getting Started with Amazon Redshift

Amazon Redshift is a fast, fully managed, petabyte-scale data warehouse service that makes it simple and cost-effective to efficiently analyze all your data using your existing business intelligence tools. It is optimized for datasets ranging from a few hundred gigabytes to a petabyte or more and costs less than $1,000 per terabyte per year, a tenth of the cost of most traditional data warehousing solutions. Amazon Redshift integrates into the data lake solution though the lakehouse architecture, allowing you to access all the structured and semi-structured data in one place. Each Amazon Redshift data warehouse is hosted as either a provisioned cluster or serverless. The Amazon Redshift provisioned data warehouse consists of one leader node and a collection of one or more compute nodes, which you can scale up or down as needed. The Amazon Redshift serverless data warehouse’s resources are automatically provisioned, and data warehouse capacity is intelligently scaled based on workload patterns. This chapter walks you through the process of creating a sample Amazon Redshift resource and connecting to it from different clients.

The following recipes are discussed in this chapter:

  • Creating an Amazon Redshift Serverless data warehouse using the AWS console
  • Creating an Amazon Redshift provisioned cluster using the AWS console
  • Creating an Amazon Redshift Serverless cluster using AWS CloudFormation
  • Creating an Amazon Redshift provisioned cluster using AWS CloudFormation
  • Connecting to a data warehouse using Amazon Redshift query editor v2
  • Connecting to Amazon Redshift using the SQL Workbench/J client
  • Connecting to Amazon Redshift using Jupyter Notebook
  • Connecting to Amazon Redshift programmatically using Python and the Redshift API
  • Connecting to Amazon Redshift using the command line (psql)

Technical requirements

Here is a list of the technical requirements for this chapter:

Creating an Amazon Redshift Serverless data warehouse using the AWS Console

The AWS Management Console allows you to interactively create an Amazon Redshift serverless data warehouse via a browser-based user interface. Once the data warehouse has been created, you can use the Console to monitor its health and diagnose query performance issues from a unified dashboard. In this recipe, you will learn how to use the unified dashboard to deploy a Redshift serverless.

Getting ready

To complete this recipe, you will need:

  • An existing or new AWS Account. If new AWS accounts need to be created, go to https://portal.aws.amazon.com/billing/signup, enter the information, and follow the steps on the site.
  • An IAM user with access to Amazon Redshift.

How to do it…

The following steps will enable you to create a cluster with minimal parameters:

  1. Navigate to the AWS Management Console and select Amazon Redshift, https://console.aws.amazon.com/redshiftv2/.
  2. Choose the AWS Region (eu-west-1) or the corresponding region at the top right of the screen and then click Next.
  3. On the Amazon Redshift console, in the left navigation pane, choose Serverless Dashboard, and then click Create workgroup, as shown in Figure 1.1:
Figure 1.1 – Creating an Amazon Redshift Serverless workgroup

Figure 1.1 – Creating an Amazon Redshift Serverless workgroup

  1. In the Workgroup section, type any meaningful Workgroup Name like my-redshift-wg.
  2. In the Performance and cost controls section, you can choose the compute capacity for the workgroup. You have two options to choose from:
    • Price-performance target (recommended): This option allows Amazon Redshift Serverless to learn your workload patterns by analyzing factors such as query complexity and data volumes. It automatically adjusts compute capacity throughout the day based on your needs. You can set your price-performance target using a slider:
      • Left: Optimizes for cost
      • Middle: Balances cost and performance
      • Right: Optimizes for performance
    Figure 1.2 – Price performance target option

    Figure 1.2 – Price performance target option

    • Base capacity: With this option, you will choose a static base compute capacity for the workgroup. Use this option only if you believe that you understand the workload characteristics well and want control of the compute capacity. Using the drop-down for Base capacity, you can choose a number for Redshift processing units (RPUs) between 8 and 1024, as shown in the following screenshot. RPU is a measure of compute capacity.
Figure 1.3 – Base capacity option

Figure 1.3 – Base capacity option

  1. In the Network and security section, set IP address type to IPv4.
  2. In the Network and security section, select the appropriate Virtual private cloud (VPC), VPC security groups, and Subnet.
  3. If your workload needs network traffic between your serverless database and data repositories routed through a VPC instead of the internet, then enable Turn on enhanced VPC routing by checking the box. For this book, we will leave it unchecked and then click Next.
  4. In the Namespace section, select Create a new Namespace and type any meaningful name for Namespace like my-redshift-ns.
  5. In the Database name and password section, leave the defaults as is, which will create a default database called dev and give the IAM credentials you are using as default admin user credentials.
  6. In the Permissions section, leave all the settings as default.
  7. In the Encryption and security section, leave all the settings at the defaults and then click Next.
  8. In the Review and create section, validate that all the settings are correct and then click Create.

How it works…

The Amazon Redshift serverless data warehouse consists of a namespace, which is a collection of database objects and users, and a workgroup, which is a collection of compute resources. Namespaces and workgroups are scaled and billed independently. Amazon Redshift Serverless automatically provisions and scales the compute capacity based on the usage, when required. You only pay for a workgroup when the queries are run, there is no compute charge for idleness. Similarly, you only pay for the volume of data stored in the namespace.

Creating an Amazon Redshift provisioned cluster using the AWS Console

The AWS Management Console allows you to interactively create an Amazon Redshift provisioned cluster via a browser-based user interface. It also recommends the right cluster configuration based on the size of your workload. Once the cluster has been created, you can use the Console to monitor the health of the cluster and diagnose query performance issues from a unified dashboard.

Getting ready

To complete this recipe, you will need:

  • An existing or new AWS account. If new AWS accounts need to be created, go to https://portal.aws.amazon.com/billing/signup, enter information, and follow the steps on the site.
  • An IAM user with access to Amazon Redshift.

How to do it…

The following steps will enable you to create a cluster with minimal parameters:

  1. Navigate to the AWS Management Console, select Amazon Redshift, https://console.aws.amazon.com/redshiftv2/, and browse to Provisioned clusters dashboard.
  2. Choose the AWS Region (eu-west-1) or the corresponding region in the top right of the screen.
  3. On the Amazon Redshift dashboard, select CLUSTERS, then click Create cluster.
  4. In the Cluster configuration section, type any meaningful Cluster identifier like myredshiftcluster.
  5. Choose either Production or Free trial depending on what you plan to use this cluster.
  6. If you need help determining the right size for your compute cluster, select the Help me choose option. Alternatively, if you know the required size of your cluster (that is, the node type and number of nodes), select I’ll choose. For example, you can choose Node type: ra3.xlplus with Nodes: 2.
Figure 1.4 – Create Amazon Redshift provisioned cluster

Figure 1.4 – Create Amazon Redshift provisioned cluster

  1. In the Database configuration section, specify values for Database name (optional), Database port (optional), Master user name, and Master user password. For example:
  2. Optionally, you can configure the Cluster permissions and Additional configurations section when you want to pick specific network and security configurations. The console defaults to the preset configuration otherwise.
  3. Choose Create cluster.
  4. The cluster creation takes a few minutes to complete. Navigate to the cluster, select Query data, and click on Query in Query Editor v2 to connect to the cluster.

Creating an Amazon Redshift Serverless cluster using AWS CloudFormation

With an AWS CloudFormation template, you treat your infrastructure as code. This enables you to create the Amazon Redshift cluster using json/yaml file. The declarative code in the file contains the steps to create the AWS resources, and enables easy automation and distribution. This template allows you to standardize the Amazon Redshift creation to meet your organizational infrastructure and security standards. Further, you can distribute them to different teams within your organization using the AWS service catalog for an easy setup. In this recipe, you will learn how to use CloudFormation template to deploy an Amazon Redshift Serverless cluster and the different parameters associated with it.

Getting ready

To complete this recipe, you will need:

  • An IAM user with access to AWS CloudFormation, Amazon EC2, and Amazon Redshift

How to do it…

We use a CloudFormation template to create the Amazon Redshift Serverless infrastructure as code using a JSON-based template. Follow these steps to create the Amazon Redshift using the Cloud Formation template:

  1. Download the AWS CloudFormation template from here: https://github.com/PacktPublishing/Amazon-Redshift-Cookbook-2E/blob/main/Chapter01/Create_Amazon_Redshift_Serverless.yaml.
  2. Navigate to the AWS Console, choose CloudFormation, and choose Create stack. Click on the Template is ready and Upload a template file options, choose the downloaded Creating_Amazon_Redshift_Serverless.yaml file from your local computer, and click Next.
Figure 1.5 – Choose the CloudFormation template file

Figure 1.5 – Choose the CloudFormation template file

  1. Choose the following input parameters:
    1. Stack name: Enter a name for the stack, for example, myredshiftserverless.
    2. NamespaceName: Enter a name for namespace, which is a collection of database objects and users.
    3. WorkgroupName: Enter a name for the workgroup, which is a collection of compute resources.
    4. BaseRPU: The base RPU for Redshift Serverless Workgroup ranges from 8 to 1024. The default is 8.
    5. DatabaseName: Enter a database name, for example, dev.
    6. AdminUsername: Enter an admin username, for example, awsuser.
    7. AdminPassword: Enter an admin user password. The password must be 8-64 characters long and must contain at least one uppercase letter, one lowercase letter, and one number. It can include any printable ASCII character except /, "", and @. The default is Awsuser123.
  2. Click Next and Create Stack.

AWS CloudFormation has deployed all the infrastructure and configuration listed in the template in completed and we’ll wait till the status changes to CREATE_COMPLETE.

How it works…

Let’s now see how this CloudFormation template works. The CloudFormation template is organized into three broad sections: input parameters, resources, and outputs. Let’s discuss them one by one.

The parameters section is used to allow user input choices and also can be used to apply constraints against its value. To create the Amazon Redshift Serverless cluster, we collect parameters such as namespace name, workgroup name, base RPU, database name, and admin username/ password. The parameters will later be substituted when creating the resources. Here is the Parameters section from the template:

Parameters:
  NamespaceName:
    Description: The name for namespace, which is a collection of database objects and users
    Type: String
  WorkgroupName:
    Description: The name for workgroup, which is a collection of compute resources
    Type: String
  BaseRPU:
    Description: Base RPU for Redshift Serverless Workgroup.
    Type: Number
    MinValue: '8'
    MaxValue: '1024'
    Default: '8'
    AllowedValues:
      - 8
      - 512
      - 1024
  DatabaseName:
    Description: The name of the first database to be created in the serverless data warehouse
    Type: String
    Default: dev
    AllowedPattern: ([a-z]|[0-9])+
  AdminUsername:
    Description: The user name that is associated with the admin user account for the serverless data warehouse
    Type: String
    Default: awsuser
    AllowedPattern: ([a-z])([a-z]|[0-9])*
  AdminPassword:
    Description: The password that is associated with the admin user account for the serverless data warehouse. Default is Awsuser123
    Type: String
    Default: Awsuser123
    NoEcho: 'true'
    MinLength: '8'
    MaxLength: '64'
    AllowedPattern: ^(?=.*[a-z])(?=.*[A-Z])(?=.*\d)[^\x00-\x20\x22\x27\x2f\x40\x5c\x7f-\uffff]+

In the above input section, DatabaseName is a string value that defaults to dev and also enforces an alphanumeric validation when specified using the condition check of AllowedPattern: ([a-z]|[0-9])+. Similarly, BaseRPU is defaulted to 8 and allows the valid BaseRPU from a list of values.

The Resources section contains a list of resource objects and the Amazon Serverless namespace is invoked using AWS::RedshiftServerless::Namespace along with references to input parameters such as NamespaceName, DbName, AdminUsername, and AdminPassword. The Amazon Serverless Workgroup is invoked using AWS::RedshiftServerless::Workgroup along with references to input parameters such as NamespaceName, WorkgroupName, BaseCapacity, and PublicAccessible:

Resources:
  Namespace:
    Type: AWS::RedshiftServerless::Namespace
    Properties:
      NamespaceName: !Ref NamespaceName
      AdminUsername: !Ref AdminUsername
      AdminUserPassword: !Ref AdminPassword
      DbName: !Ref DatabaseName
  Workgroup:
    Type: AWS::RedshiftServerless::Workgroup
    Properties:
      NamespaceName: !Ref NamespaceName
      WorkgroupName: !Ref WorkgroupName
      BaseCapacity: !Ref BaseRPU
      PubliclyAccessible: false
    DependsOn:
      - Namespace

The Resources section references the input section for values such as NamespaceName, WorkgroupName, BaseRPU, and DatabaseName that will be used when the resource is created.

The Outputs section is a handy way to capture the essential information about your resources or input parameters that you want to have available after the stack is created so you can easily identify the resource object names that are created. For example, you can capture output such as RedshiftServerlessEndpoint that will be used to connect into the cluster as follows:

Outputs:
RedshiftServerlessEndpoint:
    Description: Redshift Serverless endpoint
    Value:
      Fn::Join:
        - ':'
        - - Fn::GetAtt Workgroup.Endpoint.Address
          - "5439"

When authoring the template from scratch, you can take advantage of the AWS Application Composer – an integrated development environment for authoring and validating code. Once the template is ready, you can launch the resources by creating a stack (collection of resources), using the AWS CloudFormation console, API, or AWS CLI. You can also update or delete it afterward.

Creating an Amazon Redshift provisioned cluster using AWS CloudFormation

With an AWS CloudFormation template, you treat your infrastructure as code. This enables you to create an Amazon Redshift cluster using a JSON or YAML file. The declarative code in the file contains the steps to create the AWS resources and enables easy automation and distribution. This template allows you to standardize the Amazon Redshift provisioned cluster creation to meet your organizational infrastructure and security standards.

Further, you can distribute them to different teams within your organization using the AWS service catalog for an easy setup. In this recipe, you will learn how to use a CloudFormation template to deploy an Amazon Redshift provisioned cluster and the different parameters associated with it.

Getting ready

To complete this recipe, you will need:

  • An IAM user with access to AWS CloudFormation, Amazon EC2, and Amazon Redshift

How to do it…

We use the CloudFormation template to author the Amazon Redshift cluster infrastructure as code using a JSON-based template. Follow these steps to create the Amazon Redshift provisioned cluster using the CloudFormation template:

  1. Download the AWS CloudFormation template from https://github.com/PacktPublishing/Amazon-Redshift-Cookbook-2E/blob/main/Chapter01/Creating_Amazon_Redshift_Cluster.json.
  2. Navigate to the AWS Console, choose CloudFormation, and choose Create stack.
  3. Click on the Template is ready and Upload a template file options, choose the downloaded Creating_Amazon_Redshift_Cluster.json file from your local computer, and click Next.
  4. Set the following input parameters:
    1. Stack name: Enter a name for the stack, for example, myredshiftcluster.
    2. ClusterType: Single-node or a multiple node cluster.
    3. DatabaseName: Enter a database name, for example, dev.
    4. InboundTraffic: Restrict the CIDR ranges of IPs that can access the cluster. 0.0.0.0/0 opens the cluster to be globally accessible, which would be a security risk.
    5. MasterUserName: Enter a database master user name, for example, awsuser.
    6. MasterUserPassword: Enter a master user password. The password must be 8-64 characters long and must contain at least one uppercase letter, one lowercase letter, and one number. It can contain any printable ASCII character except /, "", or @.
    7. NodeType: Enter the node type, for example, ra3.xlplus.
    8. NumberofNodes: Enter the number of compute nodes, for example, 2.
    1. Redshift cluster port: Choose any TCP/IP port, for example, 5439.
  5. Click Next and Create Stack.

AWS CloudFormation has deployed all the infrastructure and configuration listed in the template in completed and we’ll wait till the status changes to CREATE_COMPLETE.

  1. You can now check the outputs section in the CloudFormation stack and look for the cluster endpoint, or navigate to the Amazon Redshift | Clusters | myredshiftcluster | General information section to find the JDBC/ODBC URL to connect to the Amazon Redshift cluster.

How it works…

Let’s now see how this CloudFormation template works. The CloudFormation template is organized into three broad sections: input parameters, resources, and outputs. Let’s discuss them one by one.

The Parameters section is used to allow user input choices and also can be used to apply constraints to the values. To create an Amazon Redshift resource, we collect parameters such as database name, master username/ password, and cluster type. The parameters will later be substituted when creating the resources. Here is an illustration of the Parameters section of the template:

"Parameters": {
        "DatabaseName": {
            "Description": "The name of the first database to be created when the cluster is created",
            "Type": "String",
            "Default": "dev",
            "AllowedPattern": "([a-z]|[0-9])+"
        },
        "NodeType": {
            "Description": "The type of node to be provisioned",
            "Type": "String",
            "Default": "ra3.xlplus",
            "AllowedValues": [
                "ra3.16xlarge",
                "ra3.4xlarge",
                "ra3.xlplus",
            ]
        }

In the previous input section, DatabaseName is a string value that defaults to dev and also enforces an alphanumeric validation when specified using the condition check of AllowedPattern: ([a-z]|[0-9])+. Similarly, NodeType defaults to ra3.xlplus and allows the valid NodeType from a list of values.

The Resources section contains a list of resource objects, and the Amazon resource is invoked using AWS::Redshift::Cluster along with references to the input parameters, such as DatabaseName, ClusterType, NumberOfNodes, NodeType, MasterUsername, and MasterUserPassword:

"Resources": {
        "RedshiftCluster": {
            "Type": "AWS::Redshift::Cluster",
            "DependsOn": "AttachGateway",
            "Properties": {
                "ClusterType": {
                    "Ref": "ClusterType"
                },
                "NumberOfNodes": {},
                "NodeType": {
                    "Ref": "NodeType"
                },
                "DBName": {
                    "Ref": "DatabaseName"
                },
..

The Resources section references the input section for values such as NumberOfNodes, NodeType, DatabaseName, that will be used during the resource creation.

The Outputs section is a handy place to capture the essential information about your resources or input parameters that you want to have available after the stack has been created, so you can easily identify the resource object names that are created.

For example, you can capture output such as ClusterEndpoint that will be used to connect into the cluster as follows:

"Outputs": {
        "ClusterEndpoint": {
            "Description": "Cluster endpoint",
            "Value": {
                "Fn::Join": [
                    ":",
                    [
                        {
                            "Fn::GetAtt": [
                                "RedshiftCluster",
                                "Endpoint.Address"
                            ]
                        },
                        {
                            "Fn::GetAtt": [
                                "RedshiftCluster",
                                "Endpoint.Port"
                            ]
                        }
                    ]
                ]
            }
        }

When authoring the template from scratch, you can take advantage of the AWS Application Composer – an integrated development environment for authoring and validating code. Once the template is ready, you can launch the resources by creating a stack (collection of resources) or using the AWS CloudFormation console, API, or AWS CLI. You can also update or delete the template afterward.

Connecting to a data warehouse using Amazon Redshift query editor v2

The query editor v2 is a client browser-based interface available on the AWS Management Console for running SQL queries on Amazon Redshift Serverless or provisioned cluster directly. Once you have created the data warehouse, you can use query editor to jumpstart querying the cluster without needing to set up the JDBC/ODBC driver. This recipe explains how to use query editor to access a Redshift data warehouse.

Query editor V2 allows you to do the following:

  • Explore schemas
  • Run multiple DDL and DML SQL commands
  • Run single/multiple select statements
  • View query execution details
  • Save a query
  • Download a query result set up to 100 MB in CSV, text, or HTML

Getting ready

To complete this recipe, you will need:

  • An Amazon Redshift data warehouse (serverless or provisioned cluster)
  • IAM user with access to Amazon Redshift and AWS Secrets Manager
  • Store the database credentials in Amazon Secrets Manager using Recipe 2 in the Appendix

How to do it…

Here are the steps to query an Amazon Redshift data warehouse using the Amazon Redshift query editor v2.

  1. Navigate to AWS Redshift Console https://console.aws.amazon.com/redshiftv2 and select the query editor v2 from the navigation pane on the left.
  2. Choose the AWS Region (eu-west-1) or corresponding region on the top right of the screen.
  3. With query editor v2, all the Redshift data warehouses, both serverless and provisioned clusters, are listed on the console. Select the dots beside the cluster name and click Create connection:
Figure 1.6 – Creating a connection in query editor v2

Figure 1.6 – Creating a connection in query editor v2

  1. In the connection window, select Other ways to connect, and then select AWS Secrets Manager:
Figure 1.7 – Connection options in query  editor v2

Figure 1.7 – Connection options in query editor v2

  1. In the Secret section, click on Choose a secret, select the correct secret, and click on Create connection.
  2. Now that you have successfully connected to the Redshift database, type the following query in the query editor:
    SELECT current_user;
    
  3. Then you can click on Run to execute the query.

The results of the query will appear in the Query Results section. You are now connected to the Amazon Redshift data warehouse and ready to execute more queries.

Connecting to Amazon Redshift using SQL Workbench/J client

There are multiple ways to connect to the Amazon Redshift data warehouse, but one of the most popular options is to connect using a UI based tool. SQL Workbench/J is a free cross-platform SQL query tool, which can be used to connect using your own local client.

Getting ready

To complete this recipe, you will need:

  • An Amazon Redshift data warehouse (serverless or provisioned cluster) and its login credentials (username and password).
  • Install SQL Workbench/J (https://www.sql-workbench.eu/manual/install.html).
  • Download Amazon Redshift Driver. Visit https://docs.aws.amazon.com/redshift/latest/mgmt/configuring-connections.html to download the latest driver version.
  • Modify the security group attached to the Amazon Redshift cluster to allow connection from a local client.
  • For provisioned clusters, navigate to Amazon Redshift | Provisioned clusters dashboard | myredshiftcluster | General information to find the JDBC/ODBC URL to connect to an Amazon Redshift provisioned cluster.
  • For Serverless, navigate to Amazon Redshift | Redshift Serverless | myredshiftwg | General information to find the JDBC/ODBC URL to connect to Amazon Redshift serverless clusters.

How to do it…

The following steps will enable you to connect using the SQL Workbench/J client tool from your computer:

  1. Open SQL Workbench/J by double-clicking on the SQLWorkbench.exe (on Windows) or SQLWorkbenchJ application (on Mac).
  2. In the SQL Workbench/J menu, select File and then select Connect window.
  3. Select Create a new connection profile.
  4. In the New profile box, choose any profile name, such as examplecluster_jdbc.
  5. Select Manage Drivers. The Manage Drivers dialog will open; select Amazon Redshift:
Figure 1.8 – SQL Workbench/J Manage drivers box

Figure 1.8 – SQL Workbench/J Manage drivers box

  1. Select the folder icon adjacent to the Library box, browse and point it to the Amazon Redshift driver location, and then select Choose:
Figure 1.9 – SQL Workbench/J to select Amazon Redshift driver

Figure 1.9 – SQL Workbench/J to select Amazon Redshift driver

  1. To set up the profile for the Amazon Redshift connection, enter the following details:
    1. In the Driver box, select the Amazon Redshift drive.
    2. In URL, paste the Amazon Redshift cluster JDBC URL obtained previously.
    3. In Username, enter the username (or the master user name) associated with the cluster.
    4. In Password, provide the password associated with the username.
    5. Checkmark the Autocommit box.
    6. Select the Save profile list icon, as shown in the following screenshot, and select OK:
    A screenshot of a computer

AI-generated content may be incorrect.

    Figure 1.10 – Amazon Redshift Connection Profile

  2. After setting up the JDBC connection, you can use the query to ensure you are connected to the Amazon Redshift cluster:
    select * from information_schema.tables;
    

A list of records will appear in the Results tab if the connection was successful:

Figure 1.11 – Sample query output from SQL Workbench/J

Figure 1.11 – Sample query output from SQL Workbench/J

Connecting to Amazon Redshift using Jupyter Notebook

The Jupyter Notebook is an interactive web application that enables you to analyze your data interactively. Jupyter Notebook is widely used by users such as business analysts and data scientists to perform data wrangling and exploration. Using Jupyter Notebook, you can access all the historical data available in an Amazon Redshift data warehouse (serverless or provisioned cluster) and combine that with data in many other sources, such as an Amazon S3 data lake. For example, you might want to build a forecasting model based on historical sales data in Amazon Redshift combined with clickstream data available in the data lake. Jupyter Notebook is the tool of choice due to the versatility it provides with exploration tasks and the strong support from the open source community. This recipe covers the steps to connect to an Amazon Redshift data warehouse using Jupyter Notebook.

Getting ready

To complete this recipe, you will need:

How to do it…

The following steps will help you connect to an Amazon Redshift cluster using an Amazon SageMaker notebook:

  1. Open the AWS Console and navigate to the Amazon SageMaker service.
  2. Navigate to your notebook instance and open JupyterLab. When using the Amazon SageMaker notebook, find the notebook instance that was launched and click on the Open JupyterLab link, as shown in the following screenshot:
Figure 1.12 – Navigating to JupyterLab using the AWS Console

Figure 1.12 – Navigating to JupyterLab using the AWS Console

  1. Now, let’s install the Python driver libraries to connect to Amazon Redshift using the following code in the Jupyter Notebook. Set the kernel as conda_python3:
    !pip install psycopg2-binary
    ### boto3 is optional, but recommended to leverage the AWS Secrets Manager storing the credentials  Establishing a Redshift Connection
    !pip install boto3
    

    Important Note

    You can connect to an Amazon Redshift cluster using Python libraries such as Psycopg (https://pypi.org/project/psycopg2-binary/) or pg (https://www.postgresql.org/docs/7.3/pygresql.html) to connect to the Notebook. Alternatively, you can also use a JDBC, but for ease of scripting with Python, the following recipes will use either of the preceding libraries.

  1. Grant the Amazon SageMaker instance permission to use the stored secret. On the AWS Secrets Manager console, click on your secret and find the Secret ARN. Replace the ARN information in the resource section with the following JSON code:
    {
      "Version": "2012-10-17",
      "Statement": [
        {
          "Effect": "Allow",
          "Action": [
            "secretsmanager:GetResourcePolicy",
            "secretsmanager:GetSecretValue",
            "secretsmanager:DescribeSecret",
            "secretsmanager:ListSecretVersionIds"
          ],
          "Resource": [
            "arn:aws:secretsmanager:eu-west-1:123456789012:secret:aes128-1a2b3c"
          ]
        }
      ]
    }
    
  2. Now, attach this policy as an inline policy to the execution role for your SageMaker notebook instance. To do this, follow these steps:
    1. Navigate to the Amazon SageMaker (https://us-west-2.console.aws.amazon.com/sagemaker/) console.
    2. Select Notebook Instances.
    3. Click on your notebook instance (the one running this notebook, most likely).
    4. Under Permissions and Encryption, click on the IAM role link.
    5. You should now be on an IAM console that allows you to Add inline policy. Click on the link.
    6. On the Create Policy page that opens, click JSON and replace the JSON lines that appear with the preceding code block.
    7. Click Review Policy.
    8. On the next page select a human-friendly name for the policy and click Create policy.
  3. Finally, paste the ARN for your secret in the following code block of the Jupyter Notebook to connect to the Amazon Redshift cluster:
    # Put the ARN of your AWS Secrets Manager secret for your redshift cluster here:
    secret_arn="arn:aws:secretsmanager:eu-west-1:123456789012:secret:aes128-1a2b3c"
    # This will get the secret from AWS Secrets Manager.
    import boto3
    import json
    session = boto3.session.Session()
    client = session.client(
        service_name='secretsmanager'
    )
    get_secret_value_response = client.get_secret_value(
        SecretId=secret_arn
    )
    if 'SecretString' in get_secret_value_response:
        connection_info = json.loads(get_secret_value_response['SecretString'])
    else:
        print("ERROR: no secret data found")
    # Sanity check for credentials
    expected_keys = set(['user', 'password', 'host', 'database', 'port'])
    if not expected_keys.issubset(connection_info.keys()):
        print("Expected values for ",expected_keys)
        print("Received values for ",set(connection_info.keys()))
        print("Please adjust query or assignment as required!")
    # jdbc:redshift://HOST:PORT/DBNAME
    import time
    import psycopg2
    database = "dev"
    con=psycopg2.connect(
        dbname   = database,
        host     = connection_info["host"],
        port     = connection_info["port"],
        user     = connection_info["username"],
        password = connection_info["password"]
    )
    
  4. Run basic queries against the database. These queries make use of the cursor class to execute a basic query in Amazon Redshift:
    cur = con.cursor()
    cur.execute("SELECT sysdate")
    res = cur.fetchall()
    print(res)
    cur.close()
    
  5. Optionally, you can use the code here to connect to Amazon Redshift using Amazon SageMaker notebook: https://github.com/PacktPublishing/Amazon-Redshift-Cookbook-2E/blob/main/Chapter01/Connecting_to_AmazonRedshift_using_JupyterNotebook.ipynb.

Connecting to Amazon Redshift programmatically using Python and the Redshift Data API

Python is widely used for data analytics due to its simplicity and ease of use. We will use Python to connect using the Amazon Redshift Data API.

The Data API allows you to access Amazon Redshift without using the JDBC or ODBC drivers. You can execute SQL commands on an Amazon Redshift data warehouse (serverless or provisioned cluster), invoking a secure API endpoint provided by the Data API. The Data API ensures the SQL queries to be submitted asynchronously. You can now monitor the status of the query and retrieve your results at a later time. The Data API is supported by the major programming languages, such as Python, Go, Java, Node.js, PHP, Ruby, and C++, along with the AWS SDK.

Getting ready

To complete this recipe, you will need:

  • An IAM user with access to Amazon Redshift, Amazon Secrets Manager, and Amazon EC2.
  • Store the database credentials in Amazon Secrets Manager using Recipe 2 in Appendix.
  • Linux machine terminal such as Amazon EC2, deployed in the same VPC as the Amazon Redshift cluster.
  • Python 3.6 or higher version installed on the Linux instance where you can write and execute the code. If you have not installed Python, you can download it from https://www.python.org/downloads/.
  • Install AWS SDK for Python (Boto3) on the Linux instance. You can see the getting started guide at https://aws.amazon.com/sdk-for-python/.
  • Modify the security group attached to the Amazon Redshift cluster to allow connections from the Amazon EC2 Linux instance, which will allow it to execute the Python code.
  • Create a VPC endpoint for Amazon Secrets Manager and allow the security group to allow the Linux instance to access the Secrets Manager VPC endpoint.

How to do it…

Follow these steps to use a Linux terminal to connect to Amazon Redshift using Python:

  1. Open the Linux terminal and install the latest AWS SDK for Python (Boto3) using the following command:
    pip install boto3
    
  2. Next, we will write the Python code. Type python on the Linux terminal and start typing the following code. We will first import the boto3 package and establish a session:
    import boto3
    import json
    redshift_cluster_id = "myredshiftcluster"
    redshift_database = "dev"
    aws_region_name = "eu-west-1"
    secret_arn="arn:aws:secretsmanager:eu-west-1:123456789012:secret:aes128-1a2b3c"
    def get_client(service, aws_region_name):
        import botocore.session as bc
        session = bc.get_session()
        s = boto3.Session(botocore_session=session, region_name=region)
        return s.client(service)
    
  3. You can now create a client object from the boto3.Session object using RedshiftData:
    rsd = get_client('redshift-data')
    
  4. We will execute a SQL statement to get the current date by using the secrets ARN to retrieve credentials. You can execute DDL or DML statements. The query execution is asynchronous in nature. When the statement is executed, it returns ExecuteStatementOutput, which includes the statement ID:
    resp = rsd.execute_statement(
        SecretArn= secret_arn
        ClusterIdentifier=redshift_cluster_id,
        Database= redshift_database,
        Sql="SELECT sysdate;"
    )
    queryId = resp['Id']
    print(f"asynchronous query execution: query id {queryId}")
    
  5. Check the status of the query using describe_statement and the number of records retrieved:
    stmt = rsd.describe_statement(Id=queryId)
    desc = None
    while True:
            desc = rsd.describe_statement(Id=queryId)       
            if desc["Status"] == "FINISHED":           
                break
                print(desc["ResultRows"])
    
  6. You can now retrieve the results of the above query using get_statement_result. get_statement_result returns a JSON-based metadata and result that can be verified using the below statement:
    if desc and desc["ResultRows"]  > 0:
       result = rsd.get_statement_result(Id=queryId)
       print("results JSON" + "\n")
       print(json.dumps(result, indent = 3))    
    

    Note

    The query results are available for retrieval only for 24 hours.

The complete script for the above Python code is also available at https://github.com/PacktPublishing/Amazon-Redshift-Cookbook-2E/blob/main/Chapter01/Python_Connect_to_AmazonRedshift.py. It can be executed as python Python_Connect_to_AmazonRedshift.py.

Connecting to Amazon Redshift using Command Line (psql)

PSQL is a command line front-end to PostgreSQL. It enables you to query the data in an Amazon Redshift data warehouse (serverless or provisioned cluster) interactively. In this recipe, we will see how to install psql and run interactive queries.

Getting ready

To complete this recipe, you will need:

  • Install psql (comes with PostgreSQL). To learn more about using psql, you can refer to https://www.postgresql.org/docs/8.4/static/app-psql.html. Based on your operating system, you can download the corresponding PostgreSQL binary from https://www.postgresql.org/download/.
  • If you are using Windows, set the PGCLIENTENCODING environment variable to UTF-8 using the following command using the Windows command-line interface:
    set PGCLIENTENCODING=UTF8
    
  • Capture the Amazon Redshift login credentials.
  • Modify the security group attached to the Amazon Redshift cluster to allow connection from the server or client running the psql application, which will allow access to execute the psql code.

How to do it…

The following steps will let you connect to Amazon Redshift through a command-line interface:

  1. Open the command-line interface and type psql to make sure it is installed.
  2. Provide the connection credentials as shown in the following command line to connect to Amazon Redshift:
    C:\Program Files\PostgreSQL\10\bin> .\psql -h cookbookcluster-2ee55abd.cvqfeilxsadl.eu-west-1.redshift.amazonaws.com -d dev -p 5439 -U dbuser
    Password for user dbuser:
    Type "help" for help.
    dev=# help
    You are using psql, the command-line interface to PostgreSQL.
    Type:  \copyright for distribution terms
            \h for help with SQL commands
            \? for help with psql commands
           \g or terminate with semicolon to execute query
           \q to quit
    

To connect to Amazon Redshift using the psql command line, you will need the clusters endpoint, the database username, and the port. You can use the following command to connect to the Redshift data warehouse:

psql -h <clusterendpoint> -U <dbuser> -d <databasename> -p <port>
  1. To check the database connection, you can use a sample query as specified in the following command:
    dev=# select sysdate;
    

You are now successfully connected to the Amazon Redshift data warehouse and ready to run the SQL queries!

Left arrow icon Right arrow icon
Download code icon Download Code

Key benefits

  • Learn how to translate familiar data warehousing concepts into Redshift implementation
  • Use impressive Redshift features to optimize development, productionizing, and operation processes
  • Find out how to use advanced features such as concurrency scaling, Redshift Spectrum, and federated queries
  • Purchase of the print or Kindle book includes a free PDF eBook

Description

Amazon Redshift Cookbook offers comprehensive guidance for leveraging AWS's fully managed cloud data warehousing service. Whether you're building new data warehouse workloads or migrating traditional on-premises platforms to the cloud, this essential resource delivers proven implementation strategies. Written by AWS specialists, these easy-to-follow recipes will equip you with the knowledge to successfully implement Amazon Redshift-based data analytics solutions using established best practices. The book focuses on Redshift architecture, showing you how to perform database administration tasks on Redshift. You'll learn how to optimize your data warehouse to quickly execute complex analytic queries against very large datasets. The book covers recipes to help you take full advantage of Redshift's columnar architecture and managed services. You'll discover how to deploy fully automated and highly scalable extract, transform, and load (ETL) processes, helping you minimize the operational effort that you invest in managing regular ETL pipelines and ensuring the timely and accurate refreshing of your data warehouse. By the end of this Redshift book, you'll be able to implement a Redshift-based data analytics solution by adopting best-practice approaches for solving commonly faced problems.

Who is this book for?

This book is for anyone involved in architecting, implementing, and optimizing an Amazon Redshift data warehouse, including data warehouse developers, data analysts, database administrators, data engineers, and data scientists. Basic knowledge of data warehousing, database systems, as well as cloud concepts and familiarity with Redshift is beneficial.

What you will learn

  • Integrate data warehouses with data lakes using AWS features
  • Create end-to-end analytical solutions from sourcing to consumption
  • Utilize Redshift's security for strict business requirements
  • Apply architectural insights with analytical recipes
  • Discover big data best practices for managed solutions
  • Enable data sharing for data mesh and hub-and-spoke architectures
  • Explore Redshift ML and generative AI with Amazon Q
Estimated delivery fee Deliver to United States

Economy delivery 10 - 13 business days

Free $6.95

Premium delivery 6 - 9 business days

$21.95
(Includes tracking information)

Product Details

Country selected
Publication date, Length, Edition, Language, ISBN-13
Publication date : Apr 25, 2025
Length: 468 pages
Edition : 2nd
Language : English
ISBN-13 : 9781836206910
Category :
Concepts :

What do you get with Print?

Product feature icon Instant access to your digital copy whilst your Print order is Shipped
Product feature icon Paperback book shipped to your preferred address
Product feature icon Redeem a companion digital copy on all Print orders
Product feature icon Access this title in our online reader with advanced features
Product feature icon DRM FREE - Read whenever, wherever and however you want
Product feature icon AI Assistant (beta) to help accelerate your learning
OR
Modal Close icon
Payment Processing...
tick Completed

Shipping Address

Billing Address

Shipping Methods
Estimated delivery fee Deliver to United States

Economy delivery 10 - 13 business days

Free $6.95

Premium delivery 6 - 9 business days

$21.95
(Includes tracking information)

Product Details

Publication date : Apr 25, 2025
Length: 468 pages
Edition : 2nd
Language : English
ISBN-13 : 9781836206910
Category :
Concepts :

Packt Subscriptions

See our plans and pricing
Modal Close icon
$19.99 billed monthly
Feature tick icon Unlimited access to Packt's library of 7,000+ practical books and videos
Feature tick icon Constantly refreshed with 50+ new titles a month
Feature tick icon Exclusive Early access to books as they're written
Feature tick icon Solve problems while you work with advanced search and reference features
Feature tick icon Offline reading on the mobile app
Feature tick icon Simple pricing, no contract
$199.99 billed annually
Feature tick icon Unlimited access to Packt's library of 7,000+ practical books and videos
Feature tick icon Constantly refreshed with 50+ new titles a month
Feature tick icon Exclusive Early access to books as they're written
Feature tick icon Solve problems while you work with advanced search and reference features
Feature tick icon Offline reading on the mobile app
Feature tick icon Choose a DRM-free eBook or Video every month to keep
Feature tick icon PLUS own as many other DRM-free eBooks or Videos as you like for just $5 each
Feature tick icon Exclusive print discounts
$279.99 billed in 18 months
Feature tick icon Unlimited access to Packt's library of 7,000+ practical books and videos
Feature tick icon Constantly refreshed with 50+ new titles a month
Feature tick icon Exclusive Early access to books as they're written
Feature tick icon Solve problems while you work with advanced search and reference features
Feature tick icon Offline reading on the mobile app
Feature tick icon Choose a DRM-free eBook or Video every month to keep
Feature tick icon PLUS own as many other DRM-free eBooks or Videos as you like for just $5 each
Feature tick icon Exclusive print discounts

Table of Contents

14 Chapters
Getting Started with Amazon Redshift Chevron down icon Chevron up icon
Data Management Chevron down icon Chevron up icon
Loading and Unloading Data Chevron down icon Chevron up icon
Zero-ETL Ingestions Chevron down icon Chevron up icon
Scalable Data Orchestration for Automation Chevron down icon Chevron up icon
Platform Authorization and Security Chevron down icon Chevron up icon
Data Authorization and Security Chevron down icon Chevron up icon
Performance Optimization Chevron down icon Chevron up icon
Cost Optimization Chevron down icon Chevron up icon
Lakehouse Architecture Chevron down icon Chevron up icon
Data Sharing with Amazon Redshift Chevron down icon Chevron up icon
Generative AI and ML with Amazon Redshift Chevron down icon Chevron up icon
Other Books You May Enjoy Chevron down icon Chevron up icon
Index Chevron down icon Chevron up icon
Get free access to Packt library with over 7500+ books and video courses for 7 days!
Start Free Trial

FAQs

What is the digital copy I get with my Print order? Chevron down icon Chevron up icon

When you buy any Print edition of our Books, you can redeem (for free) the eBook edition of the Print Book you’ve purchased. This gives you instant access to your book when you make an order via PDF, EPUB or our online Reader experience.

What is the delivery time and cost of print book? Chevron down icon Chevron up icon

Shipping Details

USA:

'

Economy: Delivery to most addresses in the US within 10-15 business days

Premium: Trackable Delivery to most addresses in the US within 3-8 business days

UK:

Economy: Delivery to most addresses in the U.K. within 7-9 business days.
Shipments are not trackable

Premium: Trackable delivery to most addresses in the U.K. within 3-4 business days!
Add one extra business day for deliveries to Northern Ireland and Scottish Highlands and islands

EU:

Premium: Trackable delivery to most EU destinations within 4-9 business days.

Australia:

Economy: Can deliver to P. O. Boxes and private residences.
Trackable service with delivery to addresses in Australia only.
Delivery time ranges from 7-9 business days for VIC and 8-10 business days for Interstate metro
Delivery time is up to 15 business days for remote areas of WA, NT & QLD.

Premium: Delivery to addresses in Australia only
Trackable delivery to most P. O. Boxes and private residences in Australia within 4-5 days based on the distance to a destination following dispatch.

India:

Premium: Delivery to most Indian addresses within 5-6 business days

Rest of the World:

Premium: Countries in the American continent: Trackable delivery to most countries within 4-7 business days

Asia:

Premium: Delivery to most Asian addresses within 5-9 business days

Disclaimer:
All orders received before 5 PM U.K time would start printing from the next business day. So the estimated delivery times start from the next day as well. Orders received after 5 PM U.K time (in our internal systems) on a business day or anytime on the weekend will begin printing the second to next business day. For example, an order placed at 11 AM today will begin printing tomorrow, whereas an order placed at 9 PM tonight will begin printing the day after tomorrow.


Unfortunately, due to several restrictions, we are unable to ship to the following countries:

  1. Afghanistan
  2. American Samoa
  3. Belarus
  4. Brunei Darussalam
  5. Central African Republic
  6. The Democratic Republic of Congo
  7. Eritrea
  8. Guinea-bissau
  9. Iran
  10. Lebanon
  11. Libiya Arab Jamahriya
  12. Somalia
  13. Sudan
  14. Russian Federation
  15. Syrian Arab Republic
  16. Ukraine
  17. Venezuela
What is custom duty/charge? Chevron down icon Chevron up icon

Customs duty are charges levied on goods when they cross international borders. It is a tax that is imposed on imported goods. These duties are charged by special authorities and bodies created by local governments and are meant to protect local industries, economies, and businesses.

Do I have to pay customs charges for the print book order? Chevron down icon Chevron up icon

The orders shipped to the countries that are listed under EU27 will not bear custom charges. They are paid by Packt as part of the order.

List of EU27 countries: www.gov.uk/eu-eea:

A custom duty or localized taxes may be applicable on the shipment and would be charged by the recipient country outside of the EU27 which should be paid by the customer and these duties are not included in the shipping charges been charged on the order.

How do I know my custom duty charges? Chevron down icon Chevron up icon

The amount of duty payable varies greatly depending on the imported goods, the country of origin and several other factors like the total invoice amount or dimensions like weight, and other such criteria applicable in your country.

For example:

  • If you live in Mexico, and the declared value of your ordered items is over $ 50, for you to receive a package, you will have to pay additional import tax of 19% which will be $ 9.50 to the courier service.
  • Whereas if you live in Turkey, and the declared value of your ordered items is over € 22, for you to receive a package, you will have to pay additional import tax of 18% which will be € 3.96 to the courier service.
How can I cancel my order? Chevron down icon Chevron up icon

Cancellation Policy for Published Printed Books:

You can cancel any order within 1 hour of placing the order. Simply contact customercare@packt.com with your order details or payment transaction id. If your order has already started the shipment process, we will do our best to stop it. However, if it is already on the way to you then when you receive it, you can contact us at customercare@packt.com using the returns and refund process.

Please understand that Packt Publishing cannot provide refunds or cancel any order except for the cases described in our Return Policy (i.e. Packt Publishing agrees to replace your printed book because it arrives damaged or material defect in book), Packt Publishing will not accept returns.

What is your returns and refunds policy? Chevron down icon Chevron up icon

Return Policy:

We want you to be happy with your purchase from Packtpub.com. We will not hassle you with returning print books to us. If the print book you receive from us is incorrect, damaged, doesn't work or is unacceptably late, please contact Customer Relations Team on customercare@packt.com with the order number and issue details as explained below:

  1. If you ordered (eBook, Video or Print Book) incorrectly or accidentally, please contact Customer Relations Team on customercare@packt.com within one hour of placing the order and we will replace/refund you the item cost.
  2. Sadly, if your eBook or Video file is faulty or a fault occurs during the eBook or Video being made available to you, i.e. during download then you should contact Customer Relations Team within 14 days of purchase on customercare@packt.com who will be able to resolve this issue for you.
  3. You will have a choice of replacement or refund of the problem items.(damaged, defective or incorrect)
  4. Once Customer Care Team confirms that you will be refunded, you should receive the refund within 10 to 12 working days.
  5. If you are only requesting a refund of one book from a multiple order, then we will refund you the appropriate single item.
  6. Where the items were shipped under a free shipping offer, there will be no shipping costs to refund.

On the off chance your printed book arrives damaged, with book material defect, contact our Customer Relation Team on customercare@packt.com within 14 days of receipt of the book with appropriate evidence of damage and we will work with you to secure a replacement copy, if necessary. Please note that each printed book you order from us is individually made by Packt's professional book-printing partner which is on a print-on-demand basis.

What tax is charged? Chevron down icon Chevron up icon

Currently, no tax is charged on the purchase of any print book (subject to change based on the laws and regulations). A localized VAT fee is charged only to our European and UK customers on eBooks, Video and subscriptions that they buy. GST is charged to Indian customers for eBooks and video purchases.

What payment methods can I use? Chevron down icon Chevron up icon

You can pay with the following card types:

  1. Visa Debit
  2. Visa Credit
  3. MasterCard
  4. PayPal
What is the delivery time and cost of print books? Chevron down icon Chevron up icon

Shipping Details

USA:

'

Economy: Delivery to most addresses in the US within 10-15 business days

Premium: Trackable Delivery to most addresses in the US within 3-8 business days

UK:

Economy: Delivery to most addresses in the U.K. within 7-9 business days.
Shipments are not trackable

Premium: Trackable delivery to most addresses in the U.K. within 3-4 business days!
Add one extra business day for deliveries to Northern Ireland and Scottish Highlands and islands

EU:

Premium: Trackable delivery to most EU destinations within 4-9 business days.

Australia:

Economy: Can deliver to P. O. Boxes and private residences.
Trackable service with delivery to addresses in Australia only.
Delivery time ranges from 7-9 business days for VIC and 8-10 business days for Interstate metro
Delivery time is up to 15 business days for remote areas of WA, NT & QLD.

Premium: Delivery to addresses in Australia only
Trackable delivery to most P. O. Boxes and private residences in Australia within 4-5 days based on the distance to a destination following dispatch.

India:

Premium: Delivery to most Indian addresses within 5-6 business days

Rest of the World:

Premium: Countries in the American continent: Trackable delivery to most countries within 4-7 business days

Asia:

Premium: Delivery to most Asian addresses within 5-9 business days

Disclaimer:
All orders received before 5 PM U.K time would start printing from the next business day. So the estimated delivery times start from the next day as well. Orders received after 5 PM U.K time (in our internal systems) on a business day or anytime on the weekend will begin printing the second to next business day. For example, an order placed at 11 AM today will begin printing tomorrow, whereas an order placed at 9 PM tonight will begin printing the day after tomorrow.


Unfortunately, due to several restrictions, we are unable to ship to the following countries:

  1. Afghanistan
  2. American Samoa
  3. Belarus
  4. Brunei Darussalam
  5. Central African Republic
  6. The Democratic Republic of Congo
  7. Eritrea
  8. Guinea-bissau
  9. Iran
  10. Lebanon
  11. Libiya Arab Jamahriya
  12. Somalia
  13. Sudan
  14. Russian Federation
  15. Syrian Arab Republic
  16. Ukraine
  17. Venezuela
Modal Close icon
Modal Close icon