


Connecting to Amazon Redshift using SQL Workbench/J client
There are multiple ways to connect to the Amazon Redshift data warehouse, but one of the most popular options is to connect using a UI based tool. SQL Workbench/J is a free cross-platform SQL query tool, which can be used to connect using your own local client.
Getting ready
To complete this recipe, you will need:
- An Amazon Redshift data warehouse (serverless or provisioned cluster) and its login credentials (username and password).
- Install SQL Workbench/J (https://www.sql-workbench.eu/manual/install.html).
- Download Amazon Redshift Driver. Visit https://docs.aws.amazon.com/redshift/latest/mgmt/configuring-connections.html to download the latest driver version.
- Modify the security group attached to the Amazon Redshift cluster to allow connection from a local client.
- For provisioned clusters, navigate to Amazon Redshift | Provisioned clusters dashboard | myredshiftcluster | General information to find the JDBC/ODBC URL to connect to an Amazon Redshift provisioned cluster.
- For Serverless, navigate to Amazon Redshift | Redshift Serverless | myredshiftwg | General information to find the JDBC/ODBC URL to connect to Amazon Redshift serverless clusters.
How to do it…
The following steps will enable you to connect using the SQL Workbench/J client tool from your computer:
- Open SQL Workbench/J by double-clicking on the
SQLWorkbench.exe(on Windows) orSQLWorkbenchJapplication (on Mac). - In the SQL Workbench/J menu, select File and then select Connect window.
- Select Create a new connection profile.
- In the New profile box, choose any profile name, such as
examplecluster_jdbc. - Select Manage Drivers. The Manage Drivers dialog will open; select Amazon Redshift:

Figure 1.8 – SQL Workbench/J Manage drivers box
- Select the folder icon adjacent to the Library box, browse and point it to the Amazon Redshift driver location, and then select Choose:
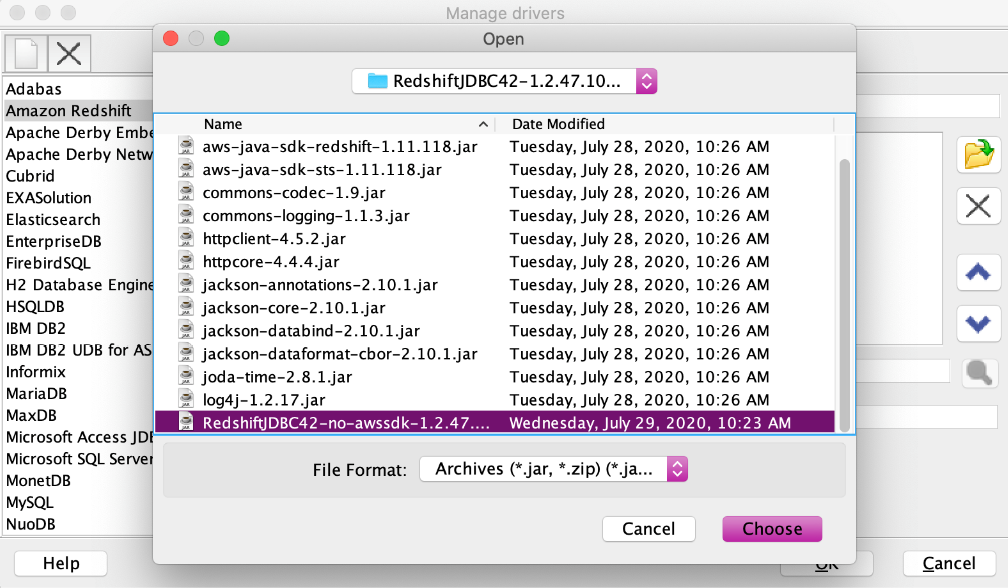
Figure 1.9 – SQL Workbench/J to select Amazon Redshift driver
- To set up the profile for the Amazon Redshift connection, enter the following details:
- In the Driver box, select the Amazon Redshift drive.
- In URL, paste the Amazon Redshift cluster JDBC URL obtained previously.
- In Username, enter the username (or the master user name) associated with the cluster.
- In Password, provide the password associated with the username.
- Checkmark the Autocommit box.
- Select the Save profile list icon, as shown in the following screenshot, and select OK:
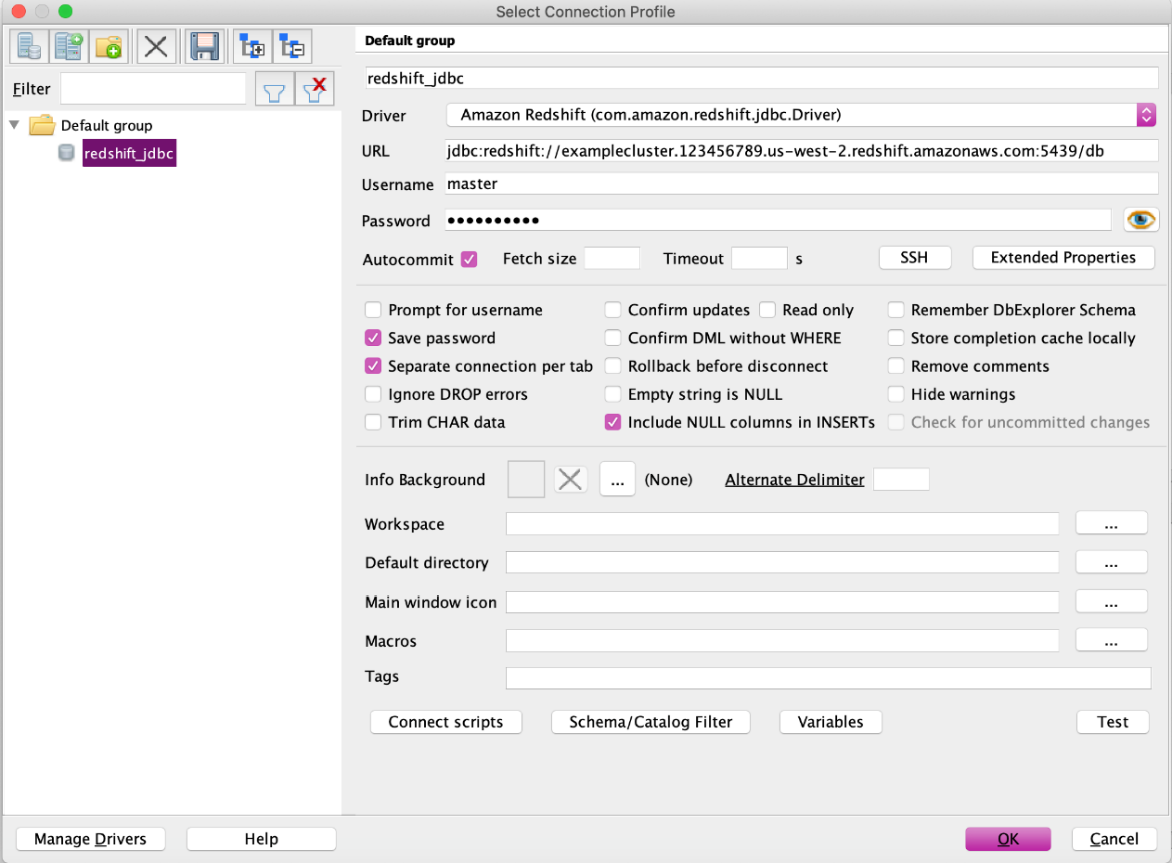
Figure 1.10 – Amazon Redshift Connection Profile
- After setting up the JDBC connection, you can use the query to ensure you are connected to the Amazon Redshift cluster:
select * from information_schema.tables;
A list of records will appear in the Results tab if the connection was successful:
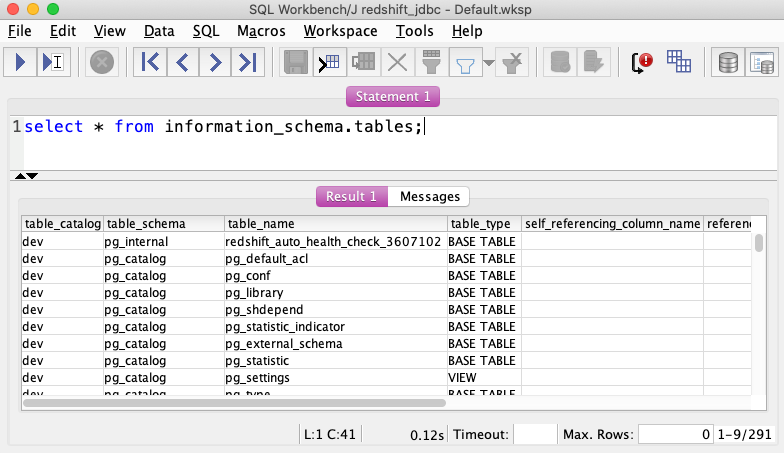
Figure 1.11 – Sample query output from SQL Workbench/J


