


 Download code from GitHub
Xamarin's development tools have given us the power to develop native iOS, Android, and Mac applications in C#, which is one of the most popular programming languages. There are many advantages of choosing Xamarin to develop mobile applications instead of Java and Objective-C. You can share code between both the platforms and can be more productive by taking advantage of the advanced language features of C# and the .NET base class libraries. Alternatively, you would have to write the app twice for Android and iOS and lose the benefits of garbage collection when using Objective-C.
In comparison to other techniques of developing cross-platform applications with JavaScript and HTML, Xamarin also has some distinct advantages. C# is generally more performant than JavaScript, and Xamarin gives developers direct access to the native APIs on each platform. This allows Xamarin applications to have a native look and perform in a manner similar to their Java or Objective-C counterparts.
Xamarin's tooling works by compiling your C# into a native ARM executable that can be packaged as an iOS or Android application. It bundles a stripped-down version of the Mono runtime with your application that only includes the features of the base class libraries your app uses.

In this chapter, we'll set up everything you need to get started on developing with Xamarin. By the end of this chapter, we'll have all the proper SDKs and tools installed and all the developer accounts needed for app store submission.
In this chapter, we will cover:
- An introduction to Xamarin tools and technology
- Installing Xcode, Apple's IDE
- Setting up all Xamarin tools and software
- Setting up the Android emulator
- Enrolling in the iOS Developer Program
- Registering for Google Play
Xamarin has developed three core products for developing cross-platform applications: Xamarin Studio (formerly MonoDevelop), Xamarin.iOS (formerly MonoTouch), and Xamarin.Android (formerly Mono for Android). These tools allow developers to leverage the native libraries on iOS and Android and are built on the Mono runtime.
Mono, an open source implementation of C# and the .NET framework, was originally developed by Novell to be used on Linux operating systems. Since iOS and Android are similarly based on Linux, Novell was able to develop MonoTouch and Mono for Android as products to target the new mobile platforms. Shortly after their release, another company acquired Novell, and the Mono team left to form a new company. Very shortly after, Xamarin was founded to focus completely on these tools for developing with C# on iOS and Android.
Getting a development machine ready for cross-platform application development can take some time. And to make matters worse, Apple and Google both have their own requirements for development on their respective platforms. Let's go over what needs to be installed on your machine.
To get started on iOS, we'll need to install the following:
- Xcode: This is the core IDE for developing iOS and Mac applications in Objective-C
- Xcode Command Line Tools: These are installed inside Xcode, and provide common command-line tools and scripting languages that developers will find useful, such as Subversion, Git, Perl, and Ruby
- The Mono runtime for Mac: This is required for compiling and running C# programs on OS X
- Xamarin.iOS: This is Xamarin's core product for iOS development
Android also requires the following software to be installed to get started:
- Java: This is the core runtime for running Java applications on OS X
- Android SDK: This contains Google's standard SDK, device drivers, and emulators for native Android development
- The Mono runtime for Mac: This is required for compiling and running C# programs on OS X
- Xamarin.Android: This is Xamarin's core product for Android development
Each of these will take some time to download and install. If you can access a fast Internet connection, it will help speed up the installation and setup process. With everything ready to go, let's move ahead step-by-step, and hopefully, we can skip a few dead-ends you might otherwise run into.
Tip
It is important to note that Xamarin can also be used on Windows and Visual Studio, even though it is not covered in this module. A Mac is required for iOS development, so Windows developers must connect Visual Studio to a Mac to compile for iOS. Luckily, most of what we learn in this module can be directly applied to using Xamarin on Windows.
To make things progress more smoothly, let's start off by installing Xcode for Mac. Along with Apple's IDE, it will also install the most commonly used developer tools on the Mac. Make sure you have at least OS X 10.8 (Mountain Lion), and locate Xcode in the App Store, as shown in the following screenshot:

This will take quite some time to download and install. I'd recommend that you take the time to enjoy a nice cup of coffee or work on another project to pass the time.
When that is out of the way, launch Xcode for the first time and progress through the initial startup dialog. Next, navigate to Xcode | Preferences… to open Xcode's main settings dialog.
In the Downloads tab, you'll notice several additional packages you can install inside Xcode. Here, you can download the official iOS documentation, which the Xamarin installer will make use of. Optionally, you can install older iOS simulators, but we can just use the default one for the content in this module. When you're finished, your Xcode's Components section should look something similar to the following screenshot:
.jpg)
Installing Xcode installs the iOS SDK, which is a requirement for iOS development in general. As a restriction from Apple, the iOS SDK can only run on a Mac. Xamarin has done everything possible to make sure they follow Apple's guidelines for iOS, such as restricting dynamic code generation. Xamarin's tools also leverage features of Xcode wherever possible to avoid reinventing the wheel.
After installing Xcode, there are several other dependencies that need to be installed in order prior to developing with Xamarin's tools. Luckily, Xamarin has improved the experience by creating a neat all-in-one installer.
Install the free Xamarin Starter Edition by performing the following steps:
- Go to http://Xamarin.com and click on the large Download now button.
- Fill out some basic information about yourself.
- Download the
XamarinInstaller.dmgfile and mount the disk image. - Launch
Install Xamarin.appand accept any OS X security warnings that appear. - Progress through the installer; the default options will work fine. You can optionally install Xamarin.Mac, but this topic is not covered in this module.
The Xamarin installer will download and install prerequisites such as the Mono runtime, Java, the Android SDK (including the Android emulator and tools), and everything else you need to get up and running.
You will end up with something similar to what is shown in the following screenshot, and we can move on to conquer bigger topics in cross-platform development:

Xamarin's tools can seem a bit pricy to the casual observer, but I tend to think of it as how much time you will save using a more productive language such as C#. Additionally, their products will save you a good percentage of development time by enabling you to develop a cross-platform application instead of writing it twice in Java and Objective-C.
Xamarin has several editions, so it is good to know the differences in order to determine which license you might need to purchase. The editions are as follows:
- Starter Edition: This is available to individuals only, and it has a limit of 64 KB of compiled user code. Certain features are unavailable such as the Xamarin.Forms framework and calling into third-party native libraries.
- Indie Edition: This is available to individuals only, and it does not include Visual Studio support.
- Business Edition: This is available for companies; it adds features for Visual Studio and includes better Xamarin product support.
- Enterprise Edition: This includes prime components in the Xamarin Component Store for free and many more Xamarin support options such as hotfixes and less than 24 hours response time to issues.
The Android emulator has historically been known to be sluggish compared to developing on a physical device. To help solve this issue, Google has produced a new x86 emulator that supports hardware acceleration on desktop computers. It isn't installed by default in the Android Virtual Device (AVD) Manager, so let's set that up.
The x86 Android emulator can be installed by performing the following steps:
- Open Xamarin Studio.
- Navigate to Tools | Open Android SDK Manager….
- Scroll down to Extras; install Intel x86 Emulator Accelerator (HAXM). This will download an installer that we have to run.
- Open Finder and press Command + Shift + G to open the navigation popup.
- Navigate to
~/Library/Developer/Xamarin/android-sdk-macosx/extras/inteland install the appropriate package (based on your Mac OS X version). - Scroll to Android 4.4.2 (API 19); install Intel x86 Atom System Image.
- Optionally, install any other packages you are interested in. As a shortcut, the Android SDK Manager automatically selects certain packages for you to install by default.
- Close the Android SDK Manager and switch back to Xamarin Studio.
- Navigate to Tools | Open Android Emulator Manager….
- Click on Create….
- Enter an AVD name of your choice, such as
x86 Emulator. - Pick a generic device that will be appropriately sized for your display, such as one with a 4" WVGA display.
- As Target, make sure that you select Intel x86 Atom System Image.
- After creating the device, go ahead and click on Start… to make sure the emulator runs properly.
The emulator will take some time to start up, so it is a good idea to leave the emulator running while performing Android development. Xamarin is using the standard Android tools here, so you would have the same issue while developing with Java. If everything starts properly, you will see an Android boot screen followed by a virtual Android device ready for deploying applications from Xamarin Studio, as shown in the following screenshot:

To deploy to an iOS device, Apple requires membership to its iOS Developer Program. Membership is $99 USD per year and gives you access to deploy 200 devices for development purposes. You also get access to test servers for implementing more advanced iOS features such as in-app purchases, push notifications, and iOS Game Center. Testing your Xamarin.iOS applications on a physical device is important, so I recommend that you get an account prior to starting iOS development. Performance is very different in a simulator running on your desktop versus a real mobile device. There are also a few Xamarin-specific optimizations that only occur when running on a real device. We'll fully cover the reasons for testing your apps on devices in the later chapters.
Signing up for the iOS Developer Program can be performed through the following steps:
- Go to https://developer.apple.com/programs/ios.
- Click on Enroll Now.
- Sign in with an existing iTunes account or create a new one. This can't be changed later, so choose one that is appropriate for your company.
- Enroll either as an individual or a company. Both are priced at $99; but, registering as a company will require paperwork to be faxed to Apple with the assistance of your company's accountant.
- Review the developer agreement.
- Fill out Apple's survey for developers.
- Purchase the $99 developer registration.
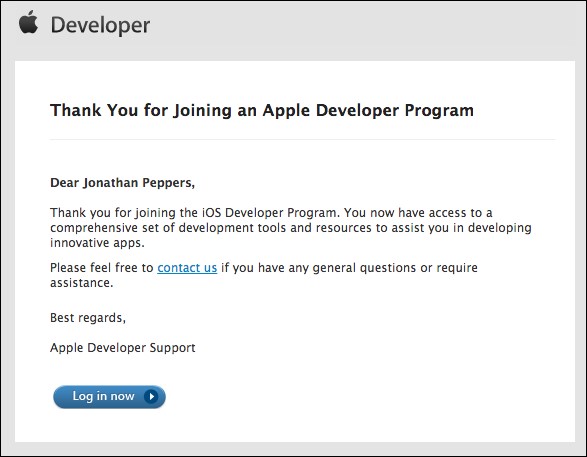
- Wait for a confirmation e-mail.
You should receive an e-mail that looks something similar to the following screenshot within two business days:
From here, we can continue setting up your account:
- Either click on Log in now from the e-mail you received or go to https://itunesconnect.apple.com.
- Log in with your earlier iTunes account.
- Agree to any additional agreements that appear on the home page of your dashboard.
- From the iTunes Connect dashboard, navigate to Agreements, Tax, and Banking.
- In this section, you will see three columns for Contact Info, Bank Info, and Tax Info.
- Fill out the appropriate information for your account in all of these sections. Assistance from an accountant will most likely be needed for a company account.
When all is said and done, your Contracts, Tax, and Banking section should look something similar to the following screenshot:

With your iOS developer account successfully registered, you will now be able to deploy to iOS devices and publish your apps to the Apple App Store.
Unlike iOS, deploying your applications to Android devices is free and just requires a few changes in your device settings. A Google Play developer account has only a one-time fee of $25 and doesn't have to be renewed each year. However, just like iOS, you will need a Google Play account to develop in-app purchases, push notifications, or Google Play game services. I would recommend that you set up an account ahead of time if you inevitably plan on submitting an app to Google Play or need to implement one of these features.
To register as a developer for Google Play, perform the following steps:
- Go to https://play.google.com/apps/publish.
- Log in with an existing Google Account or create a new one. This can't be changed later, so choose one that is appropriate for your company if needed.
- Accept the agreement and enter your credit card information.
- Choose a developer name and enter other important information for your account. Again, choose names appropriate for your company to be seen by users in the app store.
If everything is filled out correctly, you will end up with the following Google Play Developer Console:

If you plan on selling paid apps or in-app purchases, at this point, I would recommend that you set up your Google merchant account. This will enable Google to pay you the proceeds toward your app sales by applying the appropriate tax laws in your country. If you are setting this up for your company, I would recommend that you get the assistance of your company's accountant or bookkeeper.
The following are the steps to set up a Google merchant account:
- Click on the set up a merchant account button.
- Log in with your Google account a second time.
- Fill out the appropriate information for selling apps: address, phone number, tax information, and a display name to appear on your customers' credit card bill.
When done, you will see that the help tip for setting up a merchant account is now missing from the developer console, as shown in the following screenshot:

At this point, one would think that our account would be fully set up, but there is one more crucial step prior to being able to sell apps: we have to enter the banking information.
Setting up banking for your Google merchant account can be performed with the following steps:
- Go back to the Google Play Developer Console at https://play.google.com/apps/publish.
- Click on the Financial Reports section.
- Click on the small link titled Visit your merchant account for details.
- You should see a warning indicating that you do not have a bank account set up. Click on the Specify a Bank Account link to get started.
- Enter your banking information. Again, a company accountant might be needed.
- In a few days, look for a small deposit in your account from Google.
- Confirm the amount by going to http://checkout.google.com/sell.
- Click on the Settings tab, then Financials.
- Next, click on Verify Account.
- Enter the amount that appeared on your bank account and click on Verify deposit.
Your Google merchant account is also the place where you can cancel or refund customer orders. Google Play is different from the iOS App Store in that all customer issues are directed to the developers.
In this chapter, we discussed Xamarin's core products for developing Android and iOS applications in C#: Xamarin Studio, Xamarin.iOS, and Xamarin.Android. We installed Xcode and then ran the Xamarin all-in-one installer, which installs Java, the Android SDK, Xamarin Studio, Xamarin.iOS, and Xamarin.Android. We set up the x86 Android emulator for a faster, more fluid experience when debugging applications. Finally, we set up iOS and Google Play developer accounts for distributing our applications.
In this chapter, you should have acquired everything you need to get started on building cross-platform applications with Xamarin. Your development computer should be ready to go and you should have all the native SDKs installed and ready for creating the next great app to take the world by storm.
The concepts in this chapter will set us up for more advanced topics that will require the proper software installed as well as developer accounts with Apple and Google. We will be deploying applications to real devices and implementing more advanced features such as push notifications. In the next chapter, we'll create our first iOS and Android application and cover the basics of each platform.
If you are familiar with developing applications using Visual Studio on Windows, then using Xamarin Studio should be very straightforward. Xamarin uses the same concept of a solution containing one or more projects, and it has created several new project types for iOS and Android applications. There are also several project templates to jump-start your development of common applications.
Xamarin Studio supports several out-of-the-box project types, including standard .NET class libraries and console applications. You cannot natively develop Windows applications on a Mac with Xamarin Studio, but you can certainly develop the shared code portion of your application in Xamarin Studio. We'll focus on sharing code in the later chapters, but keep in mind that Xamarin enables you to share a common C# backend between most platforms that support C#.
In this chapter, we will cover:
- Creating a "Hello World" application for iOS
- Apple's MVC pattern
- Xcode and storyboards
- Creating a "Hello World" application for Android
- Android activities
- Xamarin's Android designer
Launch Xamarin Studio and start a new solution. Just like in Visual Studio, there are lots of project types that can be created from the New Solution dialog. Xamarin Studio, formerly MonoDevelop, supports the development of many different types of projects such as C# console applications targeting the Mono runtime, NUnit test projects, and even other languages besides C#, such as VB or C++.
Xamarin Studio supports the following project types for iOS:
- iPhone or iPad project: These categories of projects use storyboards to lay out the UI and target either the iPad or iPhone only.
- Universal project: This category supports both iPhone and iPad in the same iOS application. This is the preferred project type if you need to target both types of devices.
- Single View Application: This is the basic project type that sets up an iOS storyboard along with a single view and controller.
- Tabbed Application: This is a project type that automatically sets up UITabViewController for applications with a tab layout.
- WebView Application: This project type is for creating hybrid applications that are partially HTML and partially native. The application is set up to take advantage of the Razor templating features of Xamarin Studio.
- iOS binding project: This is an iOS project that can create C# bindings for an Objective-C library.
- iOS unit test project: This is a special iOS application project that can run NUnit tests.
- iOS library project: This is a class library used within other iOS application projects.
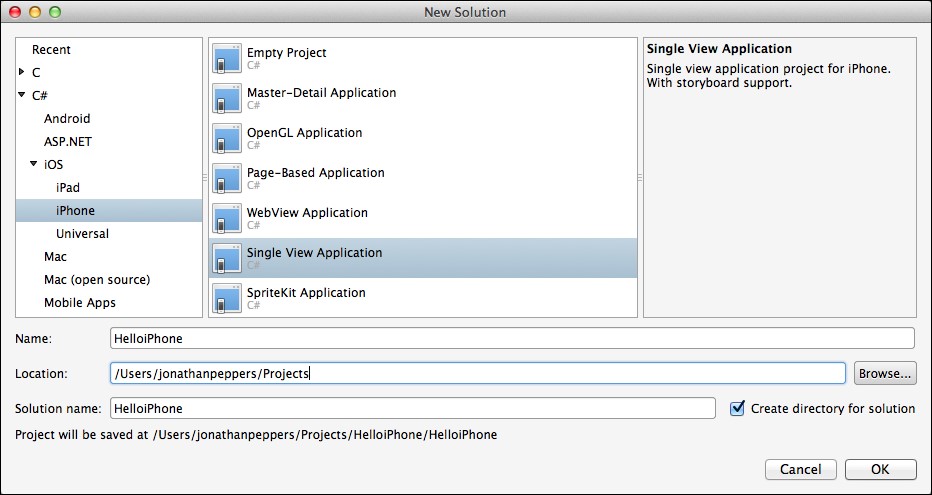
To get started, navigate to iOS | iPhone, and create Single View Application in the directory of your choice, as shown in the following screenshot:
You'll notice that several files and folders are automatically created from the project template. These files are as follows:
Components: This folder will contain any components added from the Xamarin Component Store. See Chapter 9, Third-party Libraries, for more information about the Xamarin Component Store.Resources: This directory will contain any images or plain files that you want to be copied directly to your application bundle. Note that this will contain a black splash screen image, by default. This ensures that your iOS application runs full screen on the iPhone 5.AppDelegate.cs: This is Apple's main class that handles application-level events in your app.Entitlements.plist: This is a settings file Apple uses to declare permissions for certain iOS features such as push notifications and iCloud. You will generally only have to use it for advanced iOS features.*ViewController.cs: This is the controller that represents the first screen in your app. It will have the same name as your project.Info.plist: This is Apple's version of amanifestfile that can declare various settings for your application such as the app title, icon, splash screens, and other common settings.Main.cs: This file contains the standard entry point for a C# program:static void Main(). It's most likely that you will not need to modify this file.MainStoryboard.storyboard: This is the storyboard definition file for your application. It will contain the layouts for the views in your app, list of controllers, and the transitions used to navigate throughout your app.
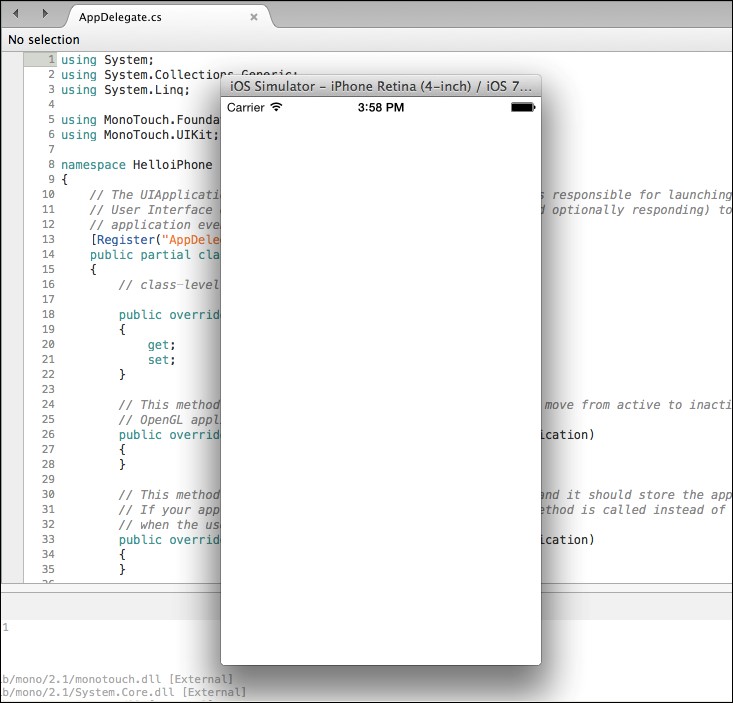
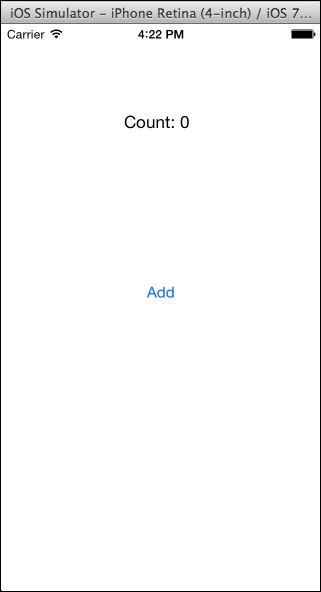
Now, let's run the application to see what we get by default from the project template. Click on the large play button in the top-left corner of Xamarin Studio. You will be greeted by the simulator running your first iOS application, as shown in the following screenshot:
So far, your app is just a plain white screen, which is not very exciting or useful. Let's get a little more background on iOS development before moving forward.
Depending on your application's minimum iOS target, you can also run the application on different versions of the iOS simulator. Apple also provides simulators for iPad and all the different iOS devices currently in the market. It is also important to know that these are simulators and not emulators. An emulator will run an encapsulated version of the mobile OS (just as Android does). Emulators generally exhibit slower performance but give you a closer replica of the real OS. Apple's simulators run in native Mac applications and are not true operating systems. The benefit is that they are very fast in comparison to Android emulators.
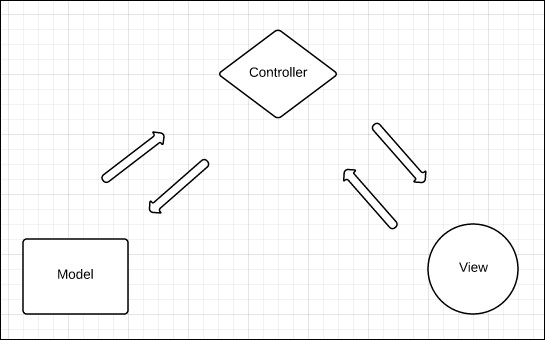
Before getting too far with iOS development, it is really important to get a foundation with Apple's design pattern to develop on iOS. You might have used the Model View Controller (MVC) pattern with other technologies such as ASP.NET, but Apple implements this paradigm in a slightly different way.
The MVC design pattern includes the following:
- Model: This is the backend business logic that drives the application. This can be any code that, for example, makes web requests to a server or saves data to a local SQLite database.
- View: This is the actual user interface seen on the screen. In iOS terms, this is any class that derives from
UIView. Examples are toolbars, buttons, and anything else the user would see on the screen and interact with. - Controller: This is the workhorse of the MVC pattern. The controller interacts with the Model layer and updates the View layer with the results. Similar to the View layer, any controller class will derive from
UIViewController. This is where a good portion of the code in iOS applications resides.
The following figure shows you the MVC design pattern:
To understand this pattern better, let's walk you through the following example of a common scenario:
- We have an iOS application with a search box that needs to query a website for a list of jobs.
- The user will enter some text into the
UITextFieldtextbox and click on theUIButtonbutton to start the search. This is the View layer. - Some code will respond to the button by interacting with the view, display a
UIActivityIndicatorViewspinner, and call a method in another class to perform the search. This is the Controller layer. - A web request will be made in the called class and a list of jobs will be returned asynchronously. This is the Model layer.
- The controller will then update the view with the list of jobs and hide the spinner.
Note
For more information on Apple's MVC pattern, see the documentation site at https://developer.apple.com/library/mac/documentation/general/conceptual/devpedia-cocoacore/MVC.html.
A point to note is that you are free to do anything you want in the Model layer of your application. This is where we can use plain C# classes that can be reused on other platforms such as Android. This includes any functionality using the C# Base Class Libraries (BCL), such as working with web services or a database. We'll dive deeper into cross-platform architecture and code-sharing concepts later in the module.
Since our plain white application is quite boring, let's modify the View layer of our application with some controls. To do this, we will modify the MainStoryboard.storyboard file in your project in Xamarin Studio. Optionally, you can open the storyboard file in Xcode, which was previously the method of editing storyboard files before the designer was available in Xamarin Studio. Using Xcode can still be useful if there is a feature in iOS storyboards that isn't available yet in the Xamarin designer or if you need to edit an older iOS format such as XIB files. However, Xcode is not quite as good of an experience, since custom controls in Xcode render as a plain white square. Xamarin's designer actually runs your drawing code in custom controls, so that you get an accurate view of what your application will look like at runtime.
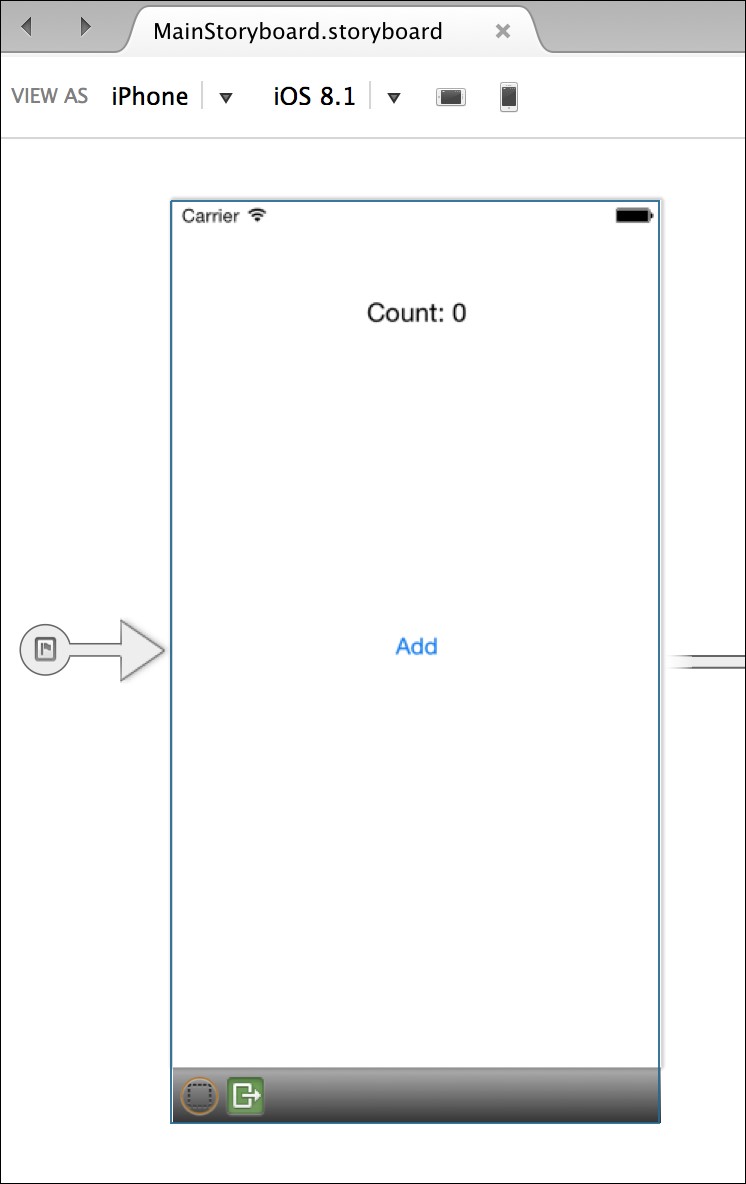
Let's add some controls to our app by performing the following steps:
- Open the project you created earlier in this chapter in Xamarin Studio.
- Double-click on the
MainStoryboard.storyboardfile. - The iOS designer will open, and you will see the layout for the single controller in your application.
- In the Document Outline tab on the right-hand side, you'll see that your controller contains a single view in its layout hierarchy.
- In the top-left corner, you'll notice a toolbox that contains several types of objects that you can drag and drop onto your controller's view.
- In the search box, search for
UILabeland drag the label onto your view at a location of your choice. - Double-click on the label to edit the text of the label to anything you wish. You can also fill out this value from the Properties tab in the bottom-right corner.
- Likewise, search for
UIButtonand drag the button onto your view somewhere above or below the label. You can edit the text on the button using the Properties tab. Double-clicking on the button will add a click event handler as you might be familiar in Visual Studio when developing for other platforms. - Run the application.
Your application should start looking a lot more like a real application, as shown in the following screenshot:
Now you might be wondering about adding user interaction options to the app at this point. In Xcode's iOS designer, you can make an outlet that will make each view visible from C#. An outlet is a reference to a view in a storyboard or XIB file that will be filled out with an instance of the view at runtime. You can compare this concept to naming a control in other technologies such as ASP.NET MVC, WebForms, or Windows Presentation Foundation (WPF). Luckily, Xamarin's iOS designer is a bit simpler than setting up an outlet in Xcode. You merely fill out the Name field in the Properties tab, and Xamarin Studio will generate a property in partial class, which gives you access to the label and button from your controller. Additionally, you can wire an action from a storyboard file, which is a method that will be called when an event occurs. Xamarin Studio exposes iOS actions as partial methods to be implemented in your classes.
Let's add some interactions to the app as follows:
- Switch back to Xamarin Studio.
- Double-click on the
MainStoryboard.storyboardfile again. - Select the label you created earlier and go to the Properties pane and make sure that you have the Widget tab selected.
- Enter the name
labelin the Name field. - Repeat this process for the button, and enter the name
buttoninto its Name field.
Xamarin has improved this experience greatly from what the experience used to be in Xcode. Xcode has a strange interface for those used to Visual Studio. The method used to create an outlet involved clicking and dragging from the control onto an Objective-C header file. Merely filling out a Name field is much simpler and much more intuitive for developers that have a C# background.
Now that we have two outlets defined, two new properties will be available from your controller. Expand the *ViewController.cs file in your solution and open the *ViewController.designer.cs file. You will see your properties defined as follows:
[Outlet]
[GeneratedCode ("iOS Designer", "1.0")]
MonoTouch.UIKit.UILabel label { get; set; }

[Outlet]
[GeneratedCode ("iOS Designer", "1.0")]
MonoTouch.UIKit.UIButton button { get; set; }
It is not a good idea to modify this file since Xamarin Studio can rebuild it if you make further changes in the designer or Xcode. Nevertheless, it is a good practice to learn how things are actually working behind the scenes.
Open your *ViewController.cs file, and let's enter the following code in your controller's ViewDidLoad method:
public override void ViewDidLoad()
{
base.ViewDidLoad();
int count = 0;
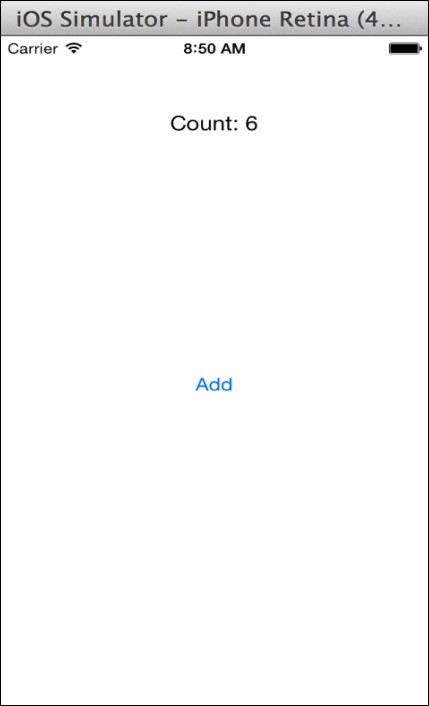
button.TouchUpInside += (sender, e) =>
label.Text = string.Format("Count: {0}", ++count);
}When the ViewDidLoad method is called, your controller's view is loaded for the first time. This happens once in the lifetime of your controller. We subscribed to the TouchUpInside event, which is fired when the button is clicked; iOS does not have a click event, which might be what you are used to on Windows platforms. We also used C#'s convenient lambda expression syntax to update the label when the event is fired. A lambda expression is shorthand for an anonymous method, which is a feature that has been part of C# since .NET 4.0.
Run your application, and you will be able to interact with your button and increment the value displayed in the label, as shown in the following screenshot:
Next, we need to make a transition from one controller to another. To do this, iOS has a concept called segue, which is basically some kind of animation that switches from one controller to the next. There are several types of segues, but the most common segue slides transition to a new controller from the right or bottom of the screen.
Now, let's add a second controller to the application as follows:
- Return to your project in Xamarin Studio.
- Double-click on the
MainStoryboard.storyboardfile. - Drag a new controller from the object library that is usually in the bottom-left corner next to the first controller.
- Click on the controller to select it.
- Select the Properties pane and make sure you are on the Widget tab.
- Enter a name such as
SecondControllerfor the controller into the Class field. - Now let's add a segue for the transition from the first controller to this one. Hold the Ctrl key while clicking on the button from the original controller to your new controller. A blue line will appear followed by a small pop-up menu.
- Select modal from the pop-up menu.
- Run the application from Xamarin Studio.
Since we set up a modal segue from the first controller's button, your second controller will appear while clicking on it. However, there isn't a way to exit the new controller yet. If you return to Xamarin Studio, you'll notice that a SecondController.cs file and a SecondController.designer.cs file have been automatically created for you.
Let's add a button to SecondController as follows:
- Return to Xamarin Studio.
- Double-click on the
MainStoryboard.storyboardfile. - Drag a button from the object library onto the second controller.
- Navigate to the Properties pane and Widget tab.
- Set the Name of the button to
close. - Set the Title of the button to
Close.
Open the SecondController.cs file and add the following method:
public override void ViewDidLoad()
{
    base.ViewDidLoad();
    close.TouchUpInside += (sender, e) =>
      DismissViewController(true, null);
}
If you compile and run your application, clicking on the button will increment the value on the label and display the modal second controller. You can then close the second controller by tapping on the Close button. Notice the neat sliding animation; iOS automatically applies these kinds of transition effects and are very easy to customize on iOS:

Since we have gone over the basics of laying out controls in Xamarin's iOS designer and interacting with outlets in C#, let's go over the standard lifecycle of an iOS application. The primary location for handling application-level events is in the AppDelegate class.
If you open your AppDelegate.cs file, you can override the following methods:
FinishedLaunching: This is the first entry point for the application, which should returntrue.DidEnterBackground: This means that the user clicked on the home button on their device or another app, such as a phone call, came to the foreground. You should perform any action needed to save the user's progress or state of the UI as the iOS might close your application to save memory once pushed to the background. While your application is in the background, the user could be navigating through the home screen or opening other apps. Your application is effectively paused in memory until resumed by the user.WillEnterForeground: This means that the user has reopened your application from the background. You might need to perform other actions here such as refreshing the data on the screen and so on.OnResignActivation: This happens if the operating system displays a system popup on top of your application. Examples of this are calendar reminders or the menu the user can swipe down from the top of the screen.OnActivated: This happens immediately after theOnResignActivationmethod is executed as the user returns to your app.ReceiveMemoryWarning: This is a warning from the operating system to free up the memory in your application. It is not commonly needed with Xamarin because of the C#'s garbage collector, but if there are any heavy objects such as images throughout your app, this is a good place to dispose them. If enough memory cannot be freed, the operating system can terminate your application.HandleOpenUrl: This is called if you implement a URL scheme, which is the iOS equivalent of file extension associations on a desktop platform. If you register your app to open different types of files or URLs, this method will be called.
Likewise, in your *ViewController.cs file, you can override the following methods on your controller:
ViewDidLoad: This occurs when the view associated with your controller is loaded. It will occur only once on devices running iOS 6 or higher.ViewWillAppear: This occurs prior to your view appearing on the screen. If there are any views that need to be refreshed while navigating throughout your app, this is generally the best place to do it.ViewDidAppear: This occurs after the completion of any transition animations and your view is displayed on the screen. In some uncommon situations, you might need to perform actions here instead of inViewWillAppear.ViewWillDisappear: This method is called prior to your view being hidden. You might need to perform some cleanup operations here.ViewDidDisappear: This occurs after any transition animations are completed for displaying a different controller on the screen. Just like the methods for appearing, this occurs afterViewWillDisappear.
There are several more methods available to override, but many are deprecated for recent versions of iOS. Familiarize yourself with Apple's documentation site at http://developer.apple.com/library/ios. It is very helpful to read the documentation on each class and method when trying to understand how Apple's APIs work. Learning how to read (not necessarily code) Objective-C is also a useful skill to learn so that you are able to convert Objective-C examples to C# when developing iOS applications.
Setting up an Android application in Xamarin Studio is just as easy as it is for iOS and is very similar to the experiences in Visual Studio. Xamarin Studio includes several project templates that are specific for Android to jump-start your development.
Xamarin Studio includes the following project templates:
- Android application: A standard Android application that targets the newest Android SDKs installed on your machine.
- Android Honeycomb application: A project that targets Android Honeycomb, which is API (Application Programming Interface) level 12 and higher.
- Android Ice Cream Sandwich application: A project that targets Android Ice Cream Sandwich, which is API level 15 and above.
- Android library project: A class library that can only be referenced by Android application projects.
- Android Java bindings library: A project for setting up a Java library to be called from C#.
- Android OpenGL application: A project template to use low-level OpenGL for 3D or 2D rendering.
- Android WebView application: A project template for a hybrid app using HTML for certain parts. Support for Razor templating is available.
- Android unit test project: A project for running NUnit tests on Android.
Launch Xamarin Studio and start a new solution. From the New Solution dialog, create a new Android Application under the Android section.
You will end up with a solution looking something similar to what is shown in the following screenshot:
You'll see that the following files and folders specific to Android have been created for you:
- The
Componentsfolder: This is the same as for iOS projects; the place where components from the Xamarin Component Store can be added. - The
Assetsfolder: This directory will contain files with abuildaction ofAndroidAsset. This folder will contain raw files to be bundled with an Android application. - The
Properties/AndroidManifest.xmlfile: This file contains standard declarations about your Android applications, such as the application name, ID, and permissions. - The
Resourcesfolder: Resources are images, layouts, strings, and so on that can be loaded via Android's resource system. Each file will have an ID generated inResources.designer.csthat you can use to load the resource. - The
Resources/drawablefolder: Any images used by your application are generally placed here. - The
Resources/layoutfolder: This contains any*.axml(Android XML) files that Android uses to declare UIs. Layouts can be used for an entire activity, fragment, dialog, or child control to be displayed on the screen. - The
Resources/valuesfolder: This contains XML files to declare key-value pairs for strings (and other types) throughout an application. This is how localization for multiple languages is normally set up on Android. - The
MainActivity.csfile: This is theMainLauncheraction and the first activity of your Android application. There is nostatic void Mainfunction in Android apps; execution begins on the activity that hasMainLauncherset totrue.
Now let's perform the following steps to run the application:
- Click on the play button to compile and run the application.
- A Select Device dialog will appear.
- Select the emulator of your choice and click on Start Emulator. If you have set up the x86 emulator in Chapter 1, Setting Up Xamarin, I would recommend that you use it.
- Wait a few seconds for the emulator to start. Once it starts, it is a good idea to leave it running as long as you are working on an Android project. This will save you a good deal of time waiting.
- You should see the emulator now enabled in the list of devices; select it, and click on OK.
- The very first time you deploy to an emulator or device, Xamarin Studio will have to install a few things such as the Mono shared runtime and Android platform tools.
- Switch over to the Android emulator and your application will appear.
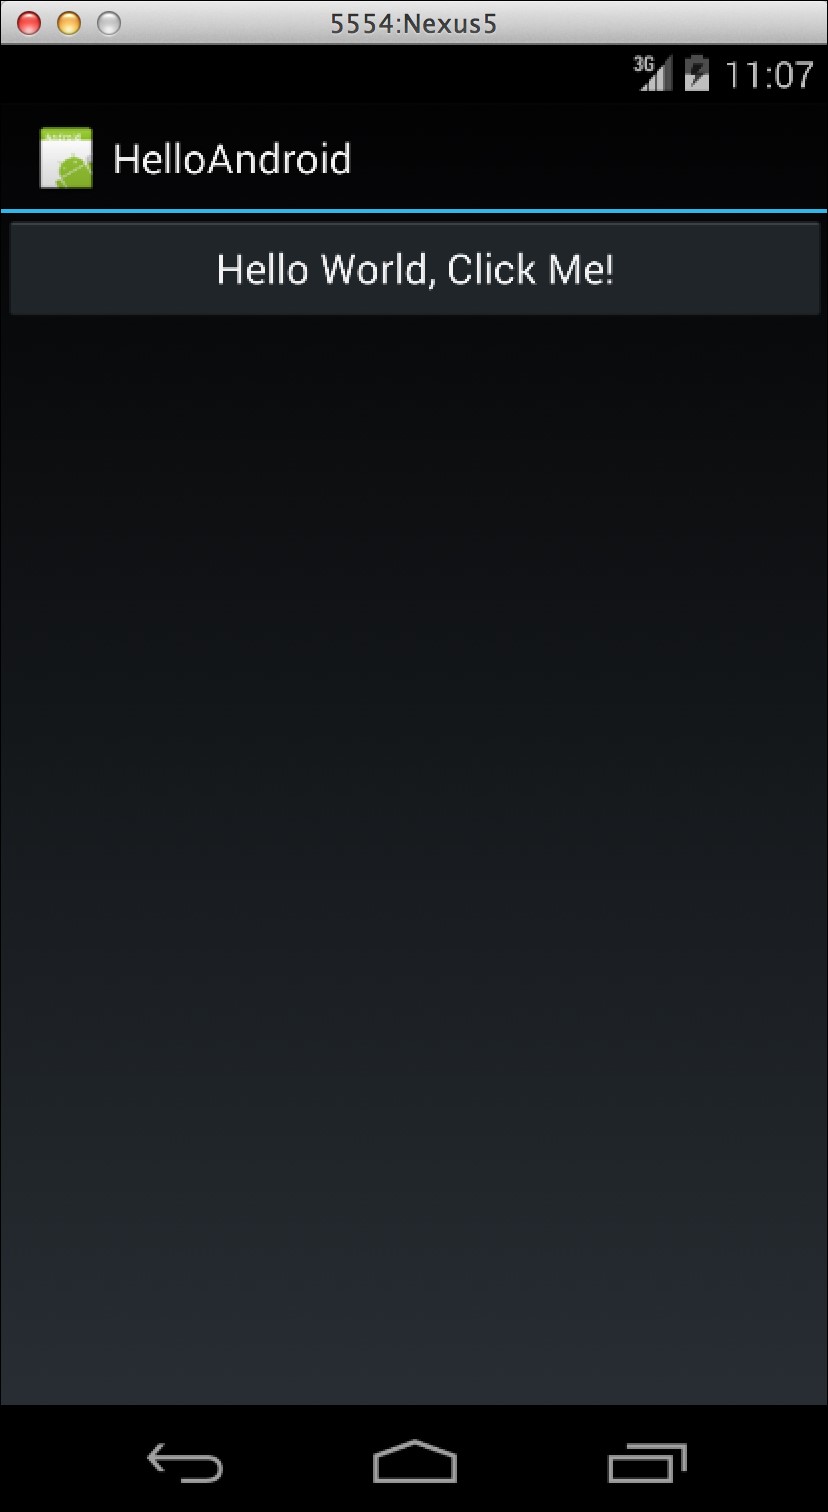
When all is done, you have deployed your first Android application, complete with a single button. Your app will look like what is shown in the following screenshot:
The Android operating system is very focused on the concept of an activity. An activity is a task or unit of work that users can perform on their screen. For example, users would perform a phone activity to dial a number and carry out a second activity that involves interacting with their address book to locate the number. Each Android application is a collection of one or more activities that users can launch and press the hardware's back key on their device to exit or cancel. The user's history is kept in the Android back stack, which you can manipulate from code in special cases. When a new activity starts, the previous one is paused and maintained in memory for later use, unless the operating system is running low on memory.
Activities are loosely coupled with each other; in some ways, you can think of them as having completely separate states from one another in memory. Static values will persist the life of the application as in .NET applications, but the common practice is to pass a state through an Android bundle. An Android bundle is a set of key-value pairs used to pass data from one Android object to another. This is useful to pass an identifier for an item displayed in a list to edit that item in a new activity.
Activities have the following lifecycle callback methods that you can override:
OnCreate: This is the first method called when your activity is created. Set up your views and perform other loading logic here. Most importantly, you will callSetContentViewhere to set up your activity's view.OnResume: This is called when your activity's view is visible on the screen. It is called if your activity is displayed for the first time, and when the user returns to it from another activity.OnPause: This is called to notify that the user has left your activity. It can happen prior to navigating to a new activity within your app, locking the screen, or hitting the home button. Assume that the user might not return, so you need to save any changes the user made here.OnStart: This occurs immediately beforeOnResumewhen the activity's view is about to be displayed on the screen. It occurs when an activity starts and when a user returns to it from another activity.OnStop: This occurs immediately afterOnPausewhen the activity's view is no longer displayed on the screen.OnRestart: This method occurs when the user returns to your activity from a previous activity.OnActivityResult: This method is used to communicate with other activities in other applications on Android. It is used in conjunction withStartActvityForResult; for example, you will use this to interact with the Facebook application to log in a user.OnDestroy: This is called when your activity is about to be freed from memory. Perform any additional cleanup that could help the operating system here, such as disposing of any other heavyweight objects the activity was using.
A flowchart of the Android lifecycle is as follows:

Unlike iOS, Android does not enforce any design patterns upon its developers. However, it is not possible to get away without understanding the Android activity lifecycle to some degree. Many concepts with activities are parallel to controllers on iOS; for example, OnStart is equivalent to ViewWillAppear and OnResume is equivalent to ViewDidAppear.
Other methods for working with activities are as follows:
StartActivity(Type type): This method starts a new activity within your application and passes no extra information to the activity.StartActivity(Intent intent): This is an overload method to start a new activity withIntent. This gives you the ability to pass additional information to the new activity, and you can also launch activities in other applications.StartActivityForResult: This method starts a new activity with the anticipation of receivingOnActivityResultwhen the activity's operation is completed.Finish: This will close the current activity and invokeOnDestroywhen it is completely closed and no longer displayed on the screen. Depending on what is currently on the back stack, the user will return to a previous activity or the home screen.SetContentView: This method sets the primary view to be displayed for an activity. It should be called within theOnCreatemethod prior to the activity being displayed on the screen.FindViewById: This is a method to locate the view displayed in your activity. It has a generic version to return a view of the appropriate type.
You can think of intent as an object that describes the transition from one activity to another. You can pass additional data through intents as well as modify how the activity is displayed and the user's navigation history.
In addition to activities, Android has the concept of a fragment. You can think of a fragment to be a miniature activity that is displayed inside a parent activity. Fragments are useful for reusing different pieces of a UI throughout your apps and can also help you implement split screen navigation on tablets.
The default template for Android projects has a little more built-in functionality than iOS. Android user interface layouts are defined in XML files that are readable by humans and editable. However, Xamarin Studio has provided an excellent design tool that allows you to drag and drop controls to define your Android layouts. Let's add some more features to your application and start using the Android designer.
Return to Xamarin Studio and carry out the following steps to add features to your app:
- Open the Android project you created earlier in this chapter in Xamarin Studio.
- Navigate to Resources | layout in your project and open
Main.axml. - You will see the Android designer open in Xamarin Studio.
- Drag TextView from the Toolbox section on the right to the layout just above the button labeled Hello World, Click Me!
- Type some default text such as
Count: 0into the label. - In the Properties pane on the right, you'll see the id value is set to
@+id/textView1. Let's change it to@+id/myText, in order to be consistent with the button. - While we're here, go ahead and change the text on the button to something more appropriate such as
Add. - Click on the play button to compile and run the application. If you still have the Android emulator, you can simply switch to it. Otherwise, you will have to start it again.
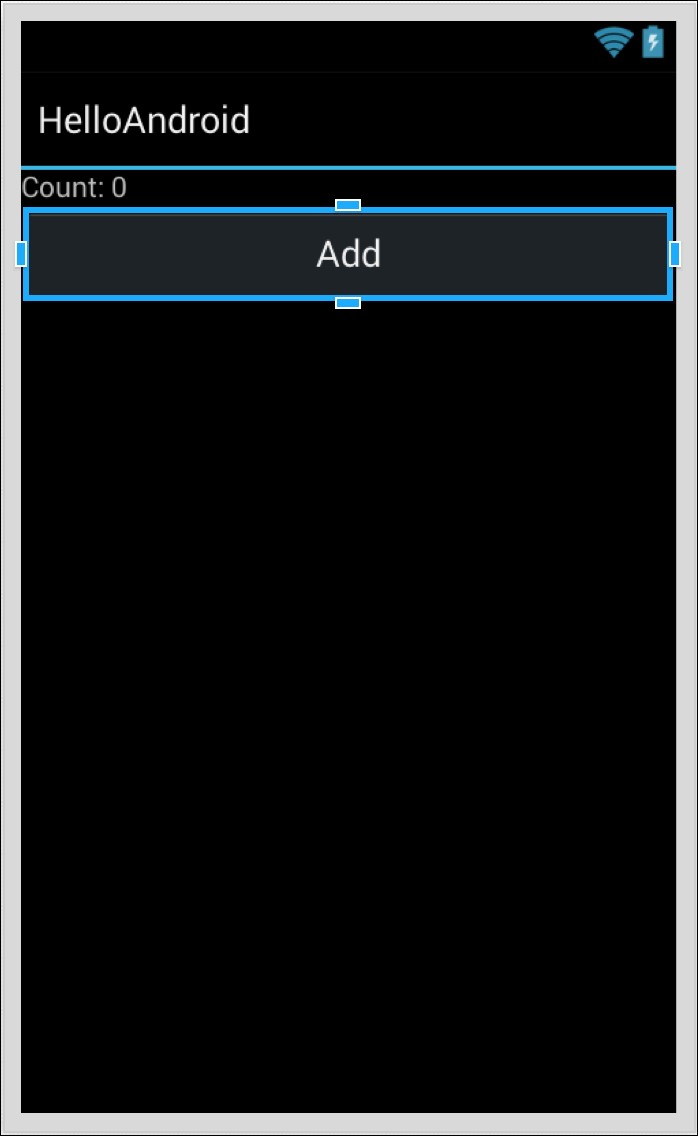
Your Android application will now look identical to the changes you made in the designer as follows:
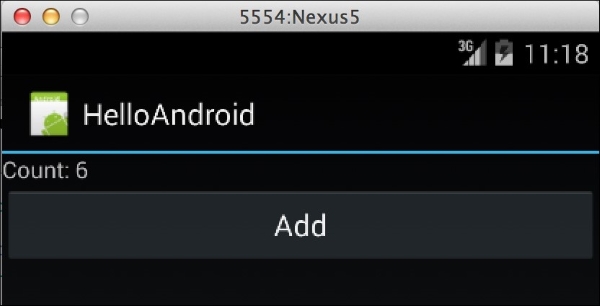
Now, let's interact with the new label from the code. Switch back to Xamarin Studio and open MainActivity.cs. Let's modify the activity to interact with the TextView field instead of the button. We use the FindViewById method to retrieve a view by the ID we set up in the layout file. Xamarin Studio has also auto-generated a static class named Resource to reference your identifiers.
So let's retrieve the instance of the TextView field by placing this code in OnCreate as follows:
TextView text = FindViewById<TextView>(Resource.Id.myText);
The Resource class is a static class that the Xamarin designer will populate for you. For future reference, you might have to build your Android project for new IDs and other resources to show up in your C# files in Xamarin Studio.
Next, let's update the Click event on the button:
button.Click += delegate
{
    text.Text = string.Format("Count: {0}", ++count);
};
This will rewire the button to update the text in TextView instead of on the button itself. Now if we run the application, we'll get an Android app that functions identically to the iOS one in the previous chapter. The Android app will look like what is shown in the following screenshot:
Since we added some of our own views to our layout, let's add a second activity to build on our understanding of activities in Android.
Return to Xamarin Studio and perform the following steps:
- If needed, open the Android project you created earlier in the chapter in Xamarin Studio.
- Create a new Android activity in the project under the Android section. Name it
SecondActivity.cs. - Navigate to Resources | layouts, and create a new Android layout named
Second.axml. - Open
SecondActivity.csand add the following code toOnCreate:SetContentView(Resource.Layout.Second);
- Open
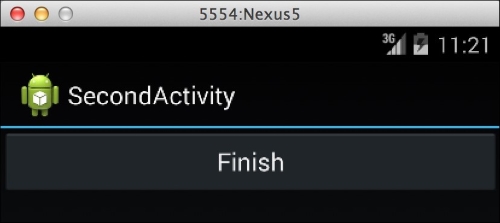
MainActivity.csand add the following line of code to theClickevent of your button:StartActivity(typeof(SecondActivity));
- Open
Second.axmland drag a button into the view. Set its text toFinish, for example, and set its ID to@+id/finish. - Finally, open
SecondActivity.csand add the following lines to itsOnCreatemethod:var finish = FindViewById<Button>(Resource.Id.finish); finish.Click += (sender, e) => Finish();
- Build and run your application.
Your application's button will now launch a new activity in addition to incrementing the count on the label. Once SecondActivity is visible, you can click on its button to finish the activity and return to the first activity. Down the road, if you need to pass information from one activity to another, you will need to create an Intent object to pass to StartActivity. The second activity of your app is shown in the following screenshot:
In this chapter, we created our first iOS application in Xamarin Studio. We covered Apple's MVC design pattern to better understand the relationship between UIViewController and UIView and also covered how to use the iOS designer in Xamarin Studio to edit storyboard files. Next, we created our first Android application in Xamarin Studio and learned the activity lifecycle in Android. We also used Xamarin's Android designer to make changes to Android XML layouts.
From the topics covered in this chapter, you should be fairly confident in developing simple apps for iOS and Android using Xamarin's tools. You should have a basic understanding of the native SDKs and design patterns to accomplish tasks on iOS and Android.
In the next chapter, we'll cover various techniques used to share code across platforms with Xamarin Studio. We'll go over different ways of architecting your cross-platform application and how to set up Xamarin Studio projects and solutions.
Xamarin's tools promise to share a good portion of your code between iOS and Android while taking advantage of the native APIs on each platform where possible. Doing so is an exercise in software engineering more than a programming skill or having the knowledge of each platform. To architect a Xamarin application to enable code sharing, it is a must to separate your application into distinct layers. We'll cover the basics of this in this chapter as well as specific options to consider in certain situations.
In this chapter, we will cover:
- The MVVM design pattern for code sharing
- Project and solution organization strategies
- Portable Class Libraries (PCLs)
- Preprocessor statements for platform-specific code
- Dependency injection (DI) simplified
- Inversion of Control (IoC)
The Model-View-ViewModel (MVVM) design pattern was originally invented for Windows Presentation Foundation (WPF) applications using XAML for separating the UI from business logic and taking full advantage of data binding. Applications architected in this way have a distinct ViewModel layer that has no dependencies on its user interface. This architecture in itself is optimized for unit testing as well as cross-platform development. Since an application's ViewModel classes have no dependencies on the UI layer, you can easily swap an iOS user interface for an Android one and write tests against the ViewModel layer.
The MVVM design pattern is also very similar to the MVC design pattern discussed in the previous chapters.
The MVVM design pattern includes the following:
- Model: The Model layer is the backend business logic that drives the application and any business objects to go along with it. This can be anything from making web requests to a server to using a backend database.
- View: This layer is the actual user interface seen on the screen. In the case of cross-platform development, it includes any platform-specific code for driving the user interface of the application. On iOS, this includes controllers used throughout an application, and on Android, an application's activities.
- ViewModel: This layer acts as the glue in MVVM applications. The ViewModel layers coordinate operations between the View and Model layers. A ViewModel layer will contain properties that the View will get or set, and functions for each operation that can be made by the user on each View. The ViewModel layer will also invoke operations on the Model layer if needed.
The following figure shows you the MVVM design pattern:

It is important to note that the interaction between the View and ViewModel layers is traditionally created by data binding with WPF. However, iOS and Android do not have built-in data binding mechanisms, so our general approach throughout the module will be to manually call the ViewModel layer from the View layer. There are a few frameworks out there that provide data binding functionality such as MVVMCross (not covered in this module) and Xamarin.Forms.
To understand this pattern better, let's implement a common scenario. Let's say we have a search box on the screen and a search button. When the user enters some text and clicks on the button, a list of products and prices will be displayed to the user. In our example, we use the async and await keywords that are available in C# 5 to simplify asynchronous programming.
To implement this feature, we will start with a simple model class (also called a business object) as follows:
public class Product
{
    public int Id { get; set; } //Just a numeric identifier
    public string Name { get; set; } //Name of the product
    public float Price { get; set; } //Price of the product
}
Next, we will implement our Model layer to retrieve products based on the searched term. This is where the business logic is performed, expressing how the search needs to actually work. This is seen in the following lines of code:
// An example class, in the real world would talk to a web
// server or database.
public class ProductRepository
{
  // a sample list of products to simulate a database
  private Product[] products = new[]
  {
    new Product { Id = 1, Name = "Shoes", Price = 19.99f },
    new Product { Id = 2, Name = "Shirt", Price = 15.99f },
    new Product { Id = 3, Name = "Hat", Price = 9.99f },
  };
  public async Task<Product[]> SearchProducts(string searchTerm)
  {
    // Wait 2 seconds to simulate web request
    await Task.Delay(2000);

    // Use Linq-to-objects to search, ignoring case
    searchTerm = searchTerm.ToLower();
    return products.Where(p => p.Name.ToLower().Contains(searchTerm)).ToArray();
  }
}
It is important to note here that the Product and ProductRepository classes are both considered as a part of the Model layer of a cross-platform application. Some might consider ProductRepository as a service that is generally a self-contained class to retrieve data. It is a good idea to separate this functionality into two classes. The Product class's job is to hold information about a product, while the ProductRepository class is in charge of retrieving products. This is the basis for the single responsibility principle, which states that each class should only have one job or concern.
Next, we will implement a ViewModel class as follows:
public class ProductViewModel
{
  private readonly ProductRepository repository = new ProductRepository();

  public string SearchTerm
  {
    get;
    set;
  }
  public Product[] Products
  {
    get;
    private set;
  }
  public async Task Search()
  {
    if (string.IsNullOrEmpty(SearchTerm))
      Products = null;
    else
      Products = await repository.SearchProducts(SearchTerm);
  }
}
From here, your platform-specific code starts. Each platform will handle managing an instance of a ViewModel class, setting the SearchTerm property, and calling Search when the button is clicked. When the task completes, the user interface layer will update a list displayed on the screen.
Tip
If you are familiar with the MVVM design pattern used with WPF, you might notice that we are not implementing INotifyPropertyChanged for data binding. Since iOS and Android don't have the concept of data binding, we omitted this functionality. If you plan on having a WPF or Windows 8 version of your mobile application or are using a framework that provides data binding, you should implement support for it where needed.
You might be asking yourself at this point, how do I set up my solution in Xamarin Studio to handle shared code and also have platform-specific projects? Xamarin.iOS applications can only reference Xamarin.iOS class libraries, so setting up a solution can be problematic. There are several strategies for setting up a cross-platform solution, each with its own advantages and disadvantages.
Options for cross-platform solutions are as follows:
- File Linking: For this option, you will start with either a plain .NET 4.0 or .NET 4.5 class library that contains all the shared code. You would then have a new project for each platform you want your app to run on. Each platform-specific project will have a subdirectory with all of the files linked in from the first class library. To set this up, add the existing files to the project and select the Add a link to the file option. Any unit tests can run against the original class library. The advantages and disadvantages of file linking are as follows:
- Advantages: This approach is very flexible. You can choose to link or not link certain files and can also use preprocessor directives such as
#if IPHONE. You can also reference different libraries on Android versus iOS. - Disadvantages: You have to manage a file's existence in three projects: core library, iOS, and Android. This can be a hassle if it is a large application or if many people are working on it. This option is also a bit outdated since the arrival of shared projects.
- Advantages: This approach is very flexible. You can choose to link or not link certain files and can also use preprocessor directives such as
- Cloned Project Files: This is very similar to file linking. The main difference being that you have a class library for each platform in addition to the main project. By placing the iOS and Android projects in the same directory as the main project, the files can be added without linking. You can easily add files by right-clicking on the solution and navigating to Display Options | Show All Files. Unit tests can run against the original class library or the platform-specific versions:
- Advantages: This approach is just as flexible as file linking, but you don't have to manually link any files. You can still use preprocessor directives and reference different libraries on each platform.
- Disadvantages: You still have to manage a file's existence in three projects. There is additionally some manual file arranging required to set this up. You also end up with an extra project to manage on each platform. This option is also a bit outdated since the arrival of shared projects.
- Shared Projects: Starting with Visual Studio 2013 Update 2, Microsoft created the concept of shared projects to enable code sharing between Windows 8 and Windows Phone apps. Xamarin has also implemented shared projects in Xamarin Studio as another option to enable code sharing. Shared projects are virtually the same as file linking, since adding a reference to a shared project effectively adds its files to your project:
- Advantages: This approach is the same as file linking, but a lot cleaner since your shared code is in a single project. Xamarin Studio also provides a dropdown to toggle between each referencing project, so that you can see the effect of preprocessor statements in your code.
- Disadvantages: Since all the files in a shared project get added to each platform's main project, it can get ugly to include platform-specific code in a shared project. Preprocessor statements can quickly get out of hand if you have a large team or have team members that do not have a lot of experience. A shared project also doesn't compile to a DLL, so there is no way to share this kind of project without the source code.
- Portable Class Libraries: This is the most optimal option; you begin the solution by making a Portable Class Library (PCL) project for all your shared code. This is a special project type that allows multiple platforms to reference the same project, allowing you to use the smallest subset of C# and the .NET framework available in each platform. Each platform-specific project will reference this library directly as well as any unit test projects:
- Advantages: All your shared code is in one project, and all platforms use the same library. Since preprocessor statements aren't possible, PCL libraries generally have cleaner code. Platform-specific code is generally abstracted away by interfaces or abstract classes.
- Disadvantages: You are limited to a subset of .NET depending on how many platforms you are targeting. Platform-specific code requires use of dependency injection, which can be a more advanced topic for developers not familiar with it.
To understand each option completely and what different situations call for, let's define a solution structure for each cross-platform solution. Let's use the product search example used earlier in the chapter and set up a solution for each approach.
To set up file linking, perform the following steps:
- Open Xamarin Studio and start a new solution.
- Select a new Library project under the general C# section.
- Name the project
ProductSearch.Core, and name the solutionProductSearch. - Right-click on the newly created project and select Options.
- Navigate to Build | General, and set the Target Framework option to .NET Framework 4.5.
- Add the
Product,ProductRepository, andProductViewModelclasses to the project used earlier in the chapter. You will need to addusing System.Threading.Tasks;andusing System.Linq;where needed. - Navigate to Build | Build All from the menu at the top to be sure that everything builds properly.
- Now, let's create a new iOS project by right-clicking on the solution and navigating to Add | Add New Project. Then, navigate to iOS | iPhone | Single View Application and name the project
ProductSearch.iOS. - Create a new Android project by right-clicking on the solution and navigating to Add | Add New Project. Create a new project by navigating to Android | Android Application and name it
ProductSearch.Droid. - Add a new folder named
Coreto both the iOS and Android projects. - Right-click on the new folder for the iOS project and navigate to Add | Add Files from Folder. Select the root directory for the
ProductSearch.Coreproject. - Check the three C# files in the root of the project. An Add File to Folder dialog will appear.
- Select Add a link to the file and make sure that the Use the same action for all selected files checkbox is selected.
- Repeat this process for the Android project.
- Navigate to Build | Build All from the menu at the top to double-check everything. You have successfully set up a cross-platform solution with file linking.
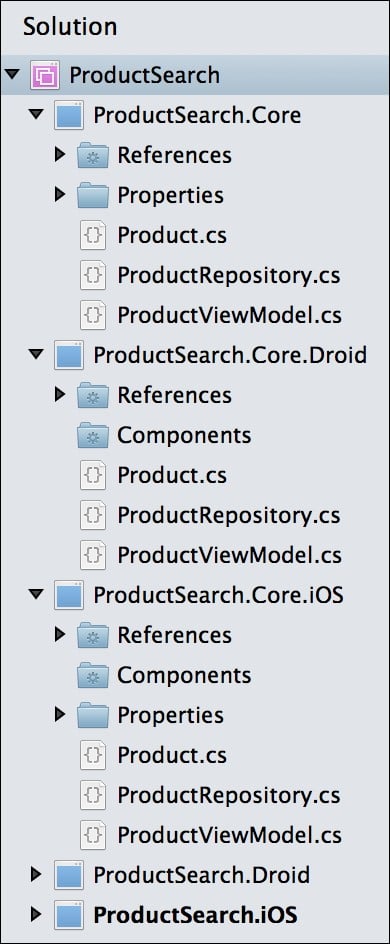
When all is done, you will have a solution tree that looks something like what you can see in the following screenshot:

You should consider using this technique when you have to reference different libraries on each platform. You might consider using this option if you are using MonoGame, or other frameworks that require you to reference a different library on iOS versus Android.
Setting up a solution with the cloned project files approach is similar to file linking, except that you will have to create an additional class library for each platform. To do this, create an Android library project and an iOS library project in the same ProductSearch.Core directory. You will have to create the projects and move them to the proper folder manually, then re-add them to the solution. Right-click on the solution and navigate to Display Options | Show All Files to add the required C# files to these two projects. Your main iOS and Android projects can reference these projects directly.
Your project will look like what is shown in the following screenshot, with ProductSearch.iOS referencing ProductSearch.Core.iOS and ProductSearch.Droid referencing ProductSearch.Core.Droid:
Setting up a cross-platform solution
To understand each option completely and what different situations call for, let's define a solution structure for each cross-platform solution. Let's use the product search example used earlier in the chapter and set up a solution for each approach.
To set up file linking, perform the following steps:
- Open Xamarin Studio and start a new solution.
- Select a new Library project under the general C# section.
- Name the project
ProductSearch.Core, and name the solutionProductSearch. - Right-click on the newly created project and select Options.
- Navigate to Build | General, and set the Target Framework option to .NET Framework 4.5.
- Add the
Product,ProductRepository, andProductViewModelclasses to the project used earlier in the chapter. You will need to addusing System.Threading.Tasks;andusing System.Linq;where needed. - Navigate to Build | Build All from the menu at the top to be sure that everything builds properly.
- Now, let's create a new iOS project by right-clicking on the solution and navigating to Add | Add New Project. Then, navigate to iOS | iPhone | Single View Application and name the project
ProductSearch.iOS. - Create a new Android project by right-clicking on the solution and navigating to Add | Add New Project. Create a new project by navigating to Android | Android Application and name it
ProductSearch.Droid. - Add a new folder named
Coreto both the iOS and Android projects. - Right-click on the new folder for the iOS project and navigate to Add | Add Files from Folder. Select the root directory for the
ProductSearch.Coreproject. - Check the three C# files in the root of the project. An Add File to Folder dialog will appear.
- Select Add a link to the file and make sure that the Use the same action for all selected files checkbox is selected.
- Repeat this process for the Android project.
- Navigate to Build | Build All from the menu at the top to double-check everything. You have successfully set up a cross-platform solution with file linking.
When all is done, you will have a solution tree that looks something like what you can see in the following screenshot:
You should consider using this technique when you have to reference different libraries on each platform. You might consider using this option if you are using MonoGame, or other frameworks that require you to reference a different library on iOS versus Android.
Setting up a solution with the cloned project files approach is similar to file linking, except that you will have to create an additional class library for each platform. To do this, create an Android library project and an iOS library project in the same ProductSearch.Core directory. You will have to create the projects and move them to the proper folder manually, then re-add them to the solution. Right-click on the solution and navigate to Display Options | Show All Files to add the required C# files to these two projects. Your main iOS and Android projects can reference these projects directly.
Your project will look like what is shown in the following screenshot, with ProductSearch.iOS referencing ProductSearch.Core.iOS and ProductSearch.Droid referencing ProductSearch.Core.Droid:
A Portable Class Library (PCL) is a C# library project that can be supported on multiple platforms, including iOS, Android, Windows, Windows Store apps, Windows Phone, Silverlight, and Xbox 360. PCLs have been an effort by Microsoft to simplify development across different versions of the .NET framework. Xamarin has also added support for iOS and Android for PCLs. Many popular cross-platform frameworks and open source libraries are starting to develop PCL versions such as Json.NET and MVVMCross.
Let's create our first portable class library:
- Open Xamarin Studio and start a new solution.
- Select a new Portable Library project under the general C# section.
- Name the project
ProductSearch.Coreand name the solutionProductSearch. - Add the
Product,ProductRepository, andProductViewModelclasses to the project used earlier in the chapter. You will need to addusing System.Threading.Tasks;andusing System.Linq;where needed. - Navigate to Build | Build All from the menu at the top to be sure that everything builds properly.
- Now, let's create a new iOS project by right-clicking on the solution and navigating to Add | Add New Project. Create a new project by navigating to iOS | iPhone | Single View Application and name it
ProductSearch.iOS. - Create a new Android project by right-clicking on the solution and navigating to Add | Add New Project. Then, navigate to Android | Android Application and name the project
ProductSearch.Droid. - Simply add a reference to the portable class library from the iOS and Android projects.
- Navigate to Build | Build All from the top menu and you have successfully set up a simple solution with a portable library.
Each solution type has its distinct advantages and disadvantages. PCLs are generally better, but there are certain cases where they can't be used. For example, if you were using a library such as MonoGame, which is a different library for each platform, you would be much better off using a shared project or file linking. Similar issues would arise if you needed to use a preprocessor statement such as #if IPHONE or a native library such as the Facebook SDK on iOS or Android.
Using PCLs in Xamarin
Let's create our first portable class library:
- Open Xamarin Studio and start a new solution.
- Select a new Portable Library project under the general C# section.
- Name the project
ProductSearch.Coreand name the solutionProductSearch. - Add the
Product,ProductRepository, andProductViewModelclasses to the project used earlier in the chapter. You will need to addusing System.Threading.Tasks;andusing System.Linq;where needed. - Navigate to Build | Build All from the menu at the top to be sure that everything builds properly.
- Now, let's create a new iOS project by right-clicking on the solution and navigating to Add | Add New Project. Create a new project by navigating to iOS | iPhone | Single View Application and name it
ProductSearch.iOS. - Create a new Android project by right-clicking on the solution and navigating to Add | Add New Project. Then, navigate to Android | Android Application and name the project
ProductSearch.Droid. - Simply add a reference to the portable class library from the iOS and Android projects.
- Navigate to Build | Build All from the top menu and you have successfully set up a simple solution with a portable library.
Each solution type has its distinct advantages and disadvantages. PCLs are generally better, but there are certain cases where they can't be used. For example, if you were using a library such as MonoGame, which is a different library for each platform, you would be much better off using a shared project or file linking. Similar issues would arise if you needed to use a preprocessor statement such as #if IPHONE or a native library such as the Facebook SDK on iOS or Android.
When using shared projects, file linking, or cloned project files, one of your most powerful tools is the use of preprocessor statements. If you are unfamiliar with them, C# has the ability to define preprocessor variables such as #define IPHONE , allowing you to use #if IPHONE or #if !IPHONE.
The following is a simple example of using this technique:
#if IPHONE
  Console.WriteLine("I am running on iOS");
#elif ANDROID
  Console.WriteLine("I am running on Android");
#else
  Console.WriteLine("I am running on ???");
#endif
In Xamarin Studio, you can define preprocessor variables in your project's options by navigating to Build | Compiler | Define Symbols, delimited with semicolons. These will be applied to the entire project. Be warned that you must set up these variables for each configuration setting in your solution (Debug and Release); this can be an easy step to miss. You can also define these variables at the top of any C# file by declaring #define IPHONE, but they will only be applied within the C# file.
Let's go over another example, assuming that we want to implement a class to open URLs on each platform:
public static class Utility
{
  public static void OpenUrl(string url)
  {
    //Open the url in the native browser
  }
}
The preceding example is a perfect candidate for using preprocessor statements, since it is very specific to each platform and is a fairly simple function. To implement the method on iOS and Android, we will need to take advantage of some native APIs. Refactor the class to look as follows:
#if IPHONE
  //iOS using statements
  using MonoTouch.Foundation;
  using MonoTouch.UIKit;
#elif ANDROID
  //Android using statements
  using Android.App;
  using Android.Content;
  using Android.Net;
#else
  //Standard .Net using statement
  using System.Diagnostics;
#endif

public static class Utility
{
  #if ANDROID
    public static void OpenUrl(Activity activity, string url)
  #else
    public static void OpenUrl(string url)
  #endif
  {
    //Open the url in the native browser
    #if IPHONE
      UIApplication.SharedApplication.OpenUrl(NSUrl.FromString(url));
    #elif ANDROID
      var intent = new Intent(Intent.ActionView,Uri.Parse(url));
      activity.StartActivity(intent);
    #else
      Process.Start(url);
    #endif
  }
}
The preceding class supports three different types of projects: Android, iOS, and a standard Mono or .NET framework class library. In the case of iOS, we can perform the functionality with static classes available in Apple's APIs. Android is a little more problematic and requires an Activity object to launch a browser natively. We get around this by modifying the input parameters on Android. Lastly, we have a plain .NET version that uses Process.Start() to launch a URL. It is important to note that using the third option would not work on iOS or Android natively, which necessitates our use of preprocessor statements.
Using preprocessor statements is not normally the cleanest or the best solution for cross-platform development. They are generally best used in a tight spot or for very simple functions. Code can easily get out of hand and can become very difficult to read with many #if statements, so it is always better to use it in moderation. Using inheritance or interfaces is generally a better solution when a class is mostly platform specific.
Dependency injection at first seems like a complex topic, but for the most part it is a simple concept. It is a design pattern aimed at making your code within your applications more flexible so that you can swap out certain functionality when needed. The idea builds around setting up dependencies between classes in an application so that each class only interacts with an interface or base/abstract class. This gives you the freedom to override different methods on each platform when you need to fill in native functionality.
The concept originated from the SOLID object-oriented design principles, which is a set of rules you might want to research if you are interested in software architecture. There is a good article about SOLID on Wikipedia, (http://en.wikipedia.org/wiki/SOLID_%28object-oriented_design%29) if you would like to learn more. The D in SOLID, which we are interested in, stands for dependencies. Specifically, the principle declares that a program should depend on abstractions, not concretions (concrete types).
To build upon this concept, let's walk you through the following example:
- Let's assume that we need to store a setting in an application that determines whether the sound is on or off.
- Now let's declare a simple interface for the setting:
interface ISettings { bool IsSoundOn { get; set; } }. - On iOS, we'd want to implement this interface using the
NSUserDefaultsclass. - Likewise, on Android, we will implement this using
SharedPreferences. - Finally, any class that needs to interact with this setting will only reference
ISettingsso that the implementation can be replaced on each platform.
Tip
Downloading the example code
You can download the example code files for all Packt books you have purchased from your account at http://www.packtpub.com. If you purchased this book elsewhere, you can visit http://www.packtpub.com/support and register to have the files e-mailed directly to you.
For reference, the full implementation of this example will look like the following snippet:
public interface ISettings
{
  bool IsSoundOn
  {
    get;
    set;
  }
}
//On iOS
using MonoTouch.UIKit;
using MonoTouch.Foundation;

public class AppleSettings : ISettings
{
  public bool IsSoundOn
  {
    get
    {
      return NSUserDefaults.StandardUserDefaults;
      BoolForKey("IsSoundOn");
    }
    set
    {
      var defaults = NSUserDefaults.StandardUserDefaults;
      defaults.SetBool(value, "IsSoundOn");
      defaults.Synchronize();
    }
  }
}
//On Android
using Android.Content;

public class DroidSettings : ISettings
{
  private readonly ISharedPreferences preferences;

  public DroidSettings(Context context)
  {
    preferences = context.GetSharedPreferences(context.PackageName, FileCreationMode.Private);
  }
  public bool IsSoundOn
  {
    get
    {
      return preferences.GetBoolean("IsSoundOn", true");
    }
    set
    {
      using (var editor = preferences.Edit())
      {
        editor.PutBoolean("IsSoundOn", value);
        editor.Commit();
      }
    }
  }
}
Now you will potentially have a ViewModel class that will only reference ISettings when following the MVVM pattern. It can be seen in the following snippet:
public class SettingsViewModel
{
  private readonly ISettings settings;

  public SettingsViewModel(ISettings settings)
  {
    this.settings = settings;
  }
  public bool IsSoundOn
  {
    get;
    set;
  }
  public void Save()
  {
    settings.IsSoundOn = IsSoundOn;
  }
}
Using a ViewModel layer for such a simple example is not necessarily needed, but you can see it would be useful if you needed to perform other tasks such as input validation. A complete application might have a lot more settings and might need to present the user with a loading indicator. Abstracting out your setting's implementation has other benefits that add flexibility to your application. Let's say you suddenly need to replace NSUserDefaults on iOS with the iCloud instead; you can easily do so by implementing a new ISettings class and the remainder of your code will remain unchanged. This will also help you target new platforms such as Windows Phone, where you might choose to implement ISettings in a platform-specific way.
You might be asking yourself at this point in time, how do I switch out different classes such as the ISettings example? Inversion of Control (IoC) is a design pattern meant to complement dependency injection and solve this problem. The basic principle is that many of the objects created throughout your application are managed and created by a single class. Instead of using the standard C# constructors for your ViewModel or Model classes, a service locator or factory class will manage them throughout the application.
There are many different implementations and styles of IoC, so let's implement a simple service locator class to use through the remainder of this module as follows:
public static class ServiceContainer
{
  static readonly Dictionary<Type, Lazy<object>> services = new Dictionary<Type, Lazy<object>>();

  public static void Register<T>(Func<T> function)
  {
    services[typeof(T)] = new Lazy<object>(() => function());
  }
  public static T Resolve<T>()
  {
    return (T)Resolve(typeof(T));
  }
  public static object Resolve(Type type)
  {
    Lazy<object> service;
    if (services.TryGetValue(type, out service))
    {
      return service.Value;
    }
    throw new Exception("Service not found!");
  }
}
This class is inspired by the simplicity of XNA/MonoGame's GameServiceContainer class and follows the service locator pattern. The main differences are the heavy use of generics and the fact that it is a static class.
To use our ServiceContainer class, we will declare the version of ISettings or other interfaces that we want to use throughout our application by calling Register, as seen in the following lines of code:
//iOS version of ISettings
ServiceContainer.Register<ISettings>(() => new AppleSettings());

//Android version of ISettings
ServiceContainer.Register<ISettings>(() => new DroidSettings());

//You can even register ViewModels
ServiceContainer.Register<SettingsViewModel>(() =>
new SettingsViewModel());
On iOS, you can place this registration code in either your static void Main() method or in the FinishedLaunching method of your AppDelegate class. These methods are always called before the application is started.
On Android, it is a little more complicated. You cannot put this code in the OnCreate method of your activity that acts as the main launcher. In some situations, the Android OS can close your application but restart it later in another activity. This situation is likely to cause an exception somewhere. The guaranteed safe place to put this is in a custom Android Application class which has an OnCreate method that is called prior to any activities being created in your application. The following lines of code show you the use of the Application class:
[Application]
public class Application : Android.App.Application
{
  //This constructor is required
  public Application(IntPtr javaReference, JniHandleOwnership transfer): base(javaReference, transfer)
  {
  }
  public override void OnCreate()
  {
    base.OnCreate();
    //IoC Registration here
  }
}
To pull a service out of the ServiceContainer class, we can rewrite the constructor of the SettingsViewModel class so that it is similar to the following lines of code:
public SettingsViewModel()
{
  this.settings = ServiceContainer.Resolve<ISettings>();
}
Likewise, you will use the generic Resolve method to pull out any ViewModel classes you would need to call from within controllers on iOS or activities on Android. This is a great, simple way to manage dependencies within your application.
There are, of course, some great open source libraries out there that implement IoC for C# applications. You might consider switching to one of them if you need more advanced features for service location or just want to graduate to a more complicated IoC container.
Here are a few libraries that have been used with Xamarin projects:
- TinyIoC: https://github.com/grumpydev/TinyIoC
- Ninject: http://www.ninject.org/
- MvvmCross: https://github.com/slodge/MvvmCross includes a full MVVM framework as well as IoC
- Simple Injector: http://simpleinjector.codeplex.com
- OpenNETCF.IoC: http://ioc.codeplex.com
In this chapter, we learned about the MVVM design pattern and how it can be used to better architect cross-platform applications. We compared several project organization strategies for managing a Xamarin Studio solution that contains both iOS and Android projects. We went over portable class libraries as the preferred option for sharing code and how to use preprocessor statements as a quick and dirty way to implement platform-specific code.
After completing this chapter, you should be able to speed up with several techniques for sharing code between iOS and Android applications using Xamarin Studio. Using the MVVM design pattern will help you divide your shared code and code that is platform specific. We also covered several options for setting up cross-platform Xamarin solutions. You should also have a firm understanding of using dependency injection and Inversion of Control to give your shared code access to the native APIs on each platform. In our next chapter, we will begin with writing a cross-platform application and dive into using these techniques.
The best way to truly learn a programming skill, in my opinion, is to take on a simple project that requires you to exercise that skill. This gives new developers a project where they can focus on the concepts they are trying to learn without the overhead of fixing bugs or following customer requirements. To increase our understanding of Xamarin and cross-platform development, let's develop a simple app called XamChat for iOS and Android.
In this chapter, we will cover the following topics:
- Our sample application concept
- The Model layer of our application
- Mocking a web service
- The ViewModel layer of our application
- Writing unit tests
The concept is simple: a chat application that uses a standard Internet connection as an alternative to send text messages. There are several popular applications like this on the Apple App Store, probably due to the cost of text messaging and support for devices such as the iPod Touch or iPad. This will be a neat real-world example that can be useful for users, and will cover specific topics in developing applications for iOS and Android.
Before we start with the development, let's list the set of screens that we'll need:
- Login / sign up: This screen will include a standard login and sign-up process for the user
- List of conversations: This screen will include a button to start a new conversation
- List of friends: This screen will provide a way to add new friends when we start a new conversation
- Conversation: This screen will have a list of messages between you and another user, and an option to reply
So a quick wireframe layout of the application will help you grasp a better understanding of the layout of the app. The following figure shows you the set of screens to be included in your app:
Since we have a good idea of what the application is, the next step is to develop the business objects, or Model layer, of this application. Let's start by defining a few classes that will contain the data to be used throughout the app. It is recommended, for the sake of organization, to add these to a Models folder in your project. This is the bottom layer of the MVVM design pattern.
Let's begin with a class that represents a user. The class can be created as follows:
public class User
{
  public string Id { get; set; }
  public string Username { get; set; }
  public string Password { get; set; }
}
Pretty straightforward so far; let's move on to create classes representing a conversation and a message as follows:
public class Conversation
    {
        public string Id { get; set; }
        public string UserId { get; set; }
        public string Username { get; set; }
        public string LastMessage { get; set; }
    }
public class Message
    {
        public string Id { get; set; }
        public string ConversationId { get; set; }
        public string UserId { get; set; }
        public string Username { get; set; }
        public string Text { get; set; }
        public DateTime Date { get; set; }
}
Notice that we are using strings as identifiers for the various objects. This will simplify our integration with Azure Mobile Services in the later chapters. UserId is the value that will be set by the application to change the user that the object is associated with.
Now, let's go ahead and set up our solution by performing the following steps:
- Start by creating a new solution and a new Portable Library project.
- Name the project
XamChat.Coreand the solutionXamChat. - You can also choose to use a Shared Project for this project, but I chose to use a portable class library because it encourages better programming practices in general.
Many times when developing a mobile application, you might need to begin the development of your application before the real backend web service is available. To prevent the development from halting entirely, a good approach would be to develop a mock version of the service. This is also helpful when you need to write unit tests, or just need to add a real backend to your app later.
First, let's break down the operations our app will perform against a web server. The operations are as follows:
- Log in with a username and password.
- Register a new account.
- Get the user's list of friends.
- Add friends by their usernames.
- Get a list of the existing conversations for the user.
- Get a list of messages in a conversation.
- Send a message.
Now let's define an interface that offers a method for each scenario. The method is as follows:
public interface IWebService
{
  Task<User> Login(string username, string password);
  Task<User> Register(User user);
  Task<User[]> GetFriends(string userId);
  Task<User> AddFriend(string userId, string username);
  Task<Conversation[]> GetConversations(string userId);
  Task<Message[]> GetMessages(string conversationId);
  Task<Message> SendMessage(Message message);
}
As you can see, we're simplifying any asynchronous communication with a web service by leveraging the Task Parallel Library (TPL) from the .NET base class libraries.
Since communicating with a web service can be a lengthy process, it is always a good idea to use the Task<T> class for these operations. Otherwise, you can inadvertently run a lengthy task on the user interface thread, which will prevent user input during the operation. Task is definitely needed for web requests, since users could be using a cellular Internet connection on iOS and Android, and it will give us the ability to use the async and await keywords down the road.
Now let's implement a fake service that implements this interface. Place classes such as FakeWebService in the Fakes folder of the project. Let's start with the class declaration and the first method of the interface:
public class FakeWebService
{
  public int SleepDuration { get; set; }

  public FakeWebService()
  {
    SleepDuration = 1;
  }
  private Task Sleep()
  {
    return Task.Delay(SleepDuration);
  }
  public async Task<User> Login(string username, string password)
  {
    await Sleep();
    return new User { Id = "1", Username = username };
  }
}
We started off with a SleepDuration property to store a number in milliseconds. This is used to simulate an interaction with a web server, which can take some time. It is also useful for changing the SleepDuration value in different situations. For example, you might want to set this to a small number when writing unit tests so that the tests execute quickly.
Next, we implemented a simple Sleep method to return a task that introduces a delay of a number of milliseconds. This method will be used throughout the fake service to cause a delay on each operation.
Finally, the Login method merely used an await call on the Sleep method and returned a new User object with the appropriate Username. For now, any username or password combination will work; however, you might wish to write some code here to check specific credentials.
Now, let's implement a few more methods to continue our FakeWebService class as follows:
public async Task<User> Register(User user)
{
  await Sleep();

  return user;
}
public async Task<User[]> GetFriends(string userId)
{
  await Sleep();

  return new[]
  {
    new User { Id = "2", Username = "bobama" },
    new User { Id = "3", Username = "bobloblaw" },
    new User { Id = "4", Username = "gmichael" },
  };
}
public async Task<User> AddFriend(string userId, string username)
{
  await Sleep();
  return new User { Id = "5", Username = username };
}
For each of these methods, we used exactly the same pattern as the Login method. Each method will delay and return some sample data. Feel free to mix the data with your own values.
Now, let's implement the GetConversations method required by the interface as follows:
public async Task<Conversation[]> GetConversations(string userId)
        {
            await Sleep();

            return new[]
            {
                new Conversation { Id = "1", UserId = "2", Username = "bobama", LastMessage = "Hey!" },
                new Conversation { Id = "1", UserId = "3", Username = "bobloblaw", LastMessage = "Have you seen that new movie?" },
                new Conversation { Id = "1", UserId = "4", Username = "gmichael", LastMessage = "What?" },
            };
        }
Basically, we just create a new array of the Conversation objects with arbitrary IDs. We also make sure to match up the UserId values with the IDs we have used on the User objects so far.
Next, let's implement GetMessages to retrieve a list of messages as follows:
public async Task<Message[]> GetMessages(string conversationId)
        {
            await Sleep();

            return new[]
            {
                new Message
                {
                    Id = "1",
                    ConversationId = conversationId,
                    UserId = "2",
                    Text = "Hey",
                    Date = DateTime.Now.AddMinutes(-15),
                },
                new Message
                {
                    Id = "2",
                    ConversationId = conversationId,
                    UserId = "1",
                    Text = "What's Up?",
                    Date = DateTime.Now.AddMinutes(-10),
                },
                new Message
                {
                    Id = "3",
                    ConversationId = conversationId,
                    UserId = "2",
                    Text = "Have you seen that new movie?",
                    Date = DateTime.Now.AddMinutes(-5),
                },
                new Message
                {
                    Id = "4",
                    ConversationId = conversationId,
                    UserId = "1",
                    Text = "It's great!",
                    Date = DateTime.Now,
                },
            };
        }
Once again, we are adding some arbitrary data here, and mainly making sure that UserId and ConversationId match our existing data so far.
And finally, we will write one more method to send a message, as follows:
public async Task<Message> SendMessage(Message message)
{
  await Sleep();

  return message;
}
Most of these methods are very straightforward. Note that the service doesn't have to work perfectly; it should merely complete each operation successfully with a delay. Each method should also return test data of some kind to be displayed in the UI. This will give us the ability to implement our iOS and Android applications while filling in the web service later.
Next, we need to implement a simple interface for persisting application settings. Let's define an interface named ISettings as follows:
public interface ISettings
{
  User User { get; set; }
  void Save();
}
We are making ISettings synchronous, but you might want to set up the Save method to be asynchronous and return Task if you plan on storing settings in the cloud. We don't really need this with our application since we will only be saving our settings locally.
Later on, we'll implement this interface on each platform using Android and iOS APIs. For now, let's just implement a fake version that will be used later when we write unit tests. We will implement the interface with the following lines of code:
public class FakeSettings : ISettings
{
  public User User { get; set; }
  public void Save() { }
}
Note that the fake version doesn't actually need to do anything; we just need to provide a class that will implement the interface and not throw any unexpected errors.
This completes the Model layer of the application. Here is a final class diagram of what we have implemented so far:
Now that we have our Model layer implemented, we can move on to write the ViewModel layer. The ViewModel layer will be responsible for presenting each operation to the UI and offering properties to be filled out by the View layer. Other common responsibilities of this layer are input validation and simple logic to display busy indicators.
At this point, it would be a good idea to include the ServiceContainer class from the previous chapter in our XamChat.Core project, as we will be using it throughout our ViewModel layer to interact with the Model layer. We will be using it as a simple option to support dependency injection and Inversion of Control. However, you can use another library of your preference for this.
Normally, we start off by writing a base class for all the ViewModel layers within our project. This class always has the functionalities shared by all the classes. It's a good place to put some parts of the code that are used by all the methods in the classes; for example, notification changes, methods, or similar instances.
Place the following code snippet in a new ViewModels folder within your project:
public class BaseViewModel
{
  protected readonly IWebService service = ServiceContainer.Resolve<IWebService>();
  protected readonly ISettings settings = ServiceContainer.Resolve<ISettings>();

  public event EventHandler IsBusyChanged = delegate { };

  private bool isBusy = false;
  public bool IsBusy
  {
    get { return isBusy; }
    set
    {
      isBusy = value;
      IsBusyChanged(this, EventArgs.Empty);
    }
  }
}
The BaseViewModel class is a great place to place any common functionality that you plan on reusing throughout your application. For this app, we only need to implement some functionality to indicate whether the ViewModel layer is busy. We provided a property and an event that the UI will be able to subscribe to and display a wait indicator on the screen. We also added some fields for the services that will be needed. Another common functionality that could be added would be validation for user inputs; however, we don't really need it for this application.
Now that we have a base class for all of the ViewModel layers, we can implement a ViewModel layer for the first screen in our application, the Login screen.
Now let's implement a LoginViewModel class as follows:
public class LoginViewModel : BaseViewModel
{
  public string Username { get; set; }
  public string Password { get; set; }
  public async Task Login()
  {
    if (string.IsNullOrEmpty(Username))
      throw new Exception("Username is blank.");

    if (string.IsNullOrEmpty(Password))
      throw new Exception("Password is blank.");

    IsBusy = true;
    try
    {
      settings.User = await service.Login(Username, Password);
      settings.Save();
    }
    finally
    {
      IsBusy = false;
    }
  }
}
In this class, we implemented the following:
- We subclassed
BaseViewModelto get access toIsBusyand the fields that contain common services - We added the
UsernameandPasswordproperties to be set by the View layer - We added a
Userproperty to be set when the login process is completed - We implemented a
Loginmethod to be called from View, with validation on theUsernameandPasswordproperties - We set
IsBusyduring the call to theLoginmethod onIWebService - We set the
Userproperty by awaiting the result fromLoginon the web service
Basically, this is the pattern that we'll follow for the rest of the ViewModel layers in the application. We provide properties for the View layer to be set by the user's input, and methods to call for various operations. If it is a method that could take some time, such as a web request, you should always return Task and use the async and await keywords.
Since we have finished writing our ViewModel class to log in, we will now need to create one for the user's registration.
Let's implement another ViewModel layer to register a new user:
public class RegisterViewModel : BaseViewModel
{
  public string Username { get; set; }
  public string Password { get; set; }
  public string ConfirmPassword { get; set; }
}
These properties will handle inputs from the user. Next, we need to add a Register method as follows:
public async Task Register()
{
  if (string.IsNullOrEmpty(Username))
    throw new Exception("Username is blank.");
  if (string.IsNullOrEmpty(Password))
    throw new Exception("Password is blank.");
  if (Password != ConfirmPassword)
    throw new Exception("Passwords don't match.");
  IsBusy = true;
  try
  {
    settings.User = await service.Register(new User { Username = Username, Password = Password, });
    settings.Save();
  }
  finally
  {
    IsBusy = false;
  }
}
The RegisterViewModel class is very similar to the LoginViewModel class, but has an additional ConfirmPassword property for the UI to be set. A good rule to follow for when to split the ViewModel layer's functionality is to always create a new class when the UI has a new screen. This helps you keep your code clean and somewhat follow the Single Responsibility Principal (SRP) for your classes. The SRP states that a class should only have a single purpose or responsibility. We'll try to follow this concept to keep our classes small and organized, which can be more important than usual when sharing code across platforms.
Next on the list is a ViewModel layer to work with a user's friend list. We will need a method to load a user's friend list and add a new friend.
Now let's implement the FriendViewModel as follows:
public class FriendViewModel : BaseViewModel
{
  public User[] Friends { get; private set; }
  public string Username { get; set; }
}
Now we'll need a method to load friends. This method is as follows:
public async Task GetFriends()
{
  if (settings.User == null)
    throw new Exception("Not logged in.");

  IsBusy = true;
  try
  {
    Friends = await service.GetFriends(settings.User.Id);
  }
  finally
  {
    IsBusy = false;
  }
}
Finally, we'll need a method to add a new friend and then update the list of friends contained locally:
public async Task AddFriend()
{
  if (settings.User == null)
    throw new Exception("Not logged in.");

  if (string.IsNullOrEmpty(Username))
    throw new Exception("Username is blank.");

  IsBusy = true;
  try
  {
    var friend = await service.AddFriend(settings.User.Id, Username);

    //Update our local list of friends
    var friends = new List<User>();
    if (Friends != null)
      friends.AddRange(Friends);
    friends.Add(friend);

    Friends = friends.OrderBy(f => f.Username).ToArray();
  }
  finally
  {
    IsBusy = false;
  }
}
Again, this class is fairly straightforward. The only thing new here is that we added some logic to update the list of friends and sort them within our client application and not the server. You can also choose to reload the complete list of friends if you have a good reason to do so.
Our final required ViewModel layer will handle messages and conversations. We need to create a way to load conversations and messages and send a new message.
Let's start implementing our MessageViewModel class as follows:
public class MessageViewModel : BaseViewModel
{
  public Conversation[] Conversations { get; private set; }
  public Conversation Conversation { get; set; }
  public Message[] Messages { get; private set; }
  public string Text { get; set; }
}
Next, let's implement a method to retrieve a list of conversations as follows:
public async Task GetConversations()
{
  if (settings.User == null)
    throw new Exception("Not logged in.");

  IsBusy = true;
  try
  {
    Conversations = await service.GetConversations(settings.User.Id);
  }
  finally
  {
    IsBusy = false;
  }
}
Similarly, we need to retrieve a list of messages within a conversation. We will need to pass the conversation ID to the service as follows:
public async Task GetMessages()
{
  if (Conversation == null)
    throw new Exception("No conversation.");

  IsBusy = true;
  try
  {
    Messages = await service.GetMessages(Conversation.Id);
  }
  finally
  {
    IsBusy = false;
  }
}
Finally, we need to write some code to send a message and update the local list of messages as follows:
public async Task SendMessage()
{
  if (settings.User == null)
    throw new Exception("Not logged in.");

  if (Conversation == null)
    throw new Exception("No conversation.");

  if (string.IsNullOrEmpty (Text))
    throw new Exception("Message is blank.");

  IsBusy = true;
  try
  {
    var message = await service.SendMessage(new Message
    {
      UserId = settings.User.Id,ConversationId = Conversation.Id,
      Text = Text
    });
    //Update our local list of messages
    var messages = new List<Message>();
    if (Messages != null)
      messages.AddRange(Messages);
    messages.Add(message);

    Messages = messages.ToArray();
  }
  finally
  {IsBusy = false;
  }
}
This concludes the ViewModel layer of our application and the entirety of the shared code used on iOS and Android. For the MessageViewModel class, you could have also chosen to put the GetConversations and Conversations properties in their own class, since they can be considered as a separate responsibility, but it is not really necessary.
Here is the final class diagram of our ViewModel layer:
Implementing our LoginViewModel class
Now that we have a base class for all of the ViewModel layers, we can implement a ViewModel layer for the first screen in our application, the Login screen.
Now let's implement a LoginViewModel class as follows:
public class LoginViewModel : BaseViewModel
{
  public string Username { get; set; }
  public string Password { get; set; }
  public async Task Login()
  {
    if (string.IsNullOrEmpty(Username))
      throw new Exception("Username is blank.");

    if (string.IsNullOrEmpty(Password))
      throw new Exception("Password is blank.");

    IsBusy = true;
    try
    {
      settings.User = await service.Login(Username, Password);
      settings.Save();
    }
    finally
    {
      IsBusy = false;
    }
  }
}
In this class, we implemented the following:
- We subclassed
BaseViewModelto get access toIsBusyand the fields that contain common services - We added the
UsernameandPasswordproperties to be set by the View layer - We added a
Userproperty to be set when the login process is completed - We implemented a
Loginmethod to be called from View, with validation on theUsernameandPasswordproperties - We set
IsBusyduring the call to theLoginmethod onIWebService - We set the
Userproperty by awaiting the result fromLoginon the web service
Basically, this is the pattern that we'll follow for the rest of the ViewModel layers in the application. We provide properties for the View layer to be set by the user's input, and methods to call for various operations. If it is a method that could take some time, such as a web request, you should always return Task and use the async and await keywords.
Since we have finished writing our ViewModel class to log in, we will now need to create one for the user's registration.
Let's implement another ViewModel layer to register a new user:
public class RegisterViewModel : BaseViewModel
{
  public string Username { get; set; }
  public string Password { get; set; }
  public string ConfirmPassword { get; set; }
}
These properties will handle inputs from the user. Next, we need to add a Register method as follows:
public async Task Register()
{
  if (string.IsNullOrEmpty(Username))
    throw new Exception("Username is blank.");
  if (string.IsNullOrEmpty(Password))
    throw new Exception("Password is blank.");
  if (Password != ConfirmPassword)
    throw new Exception("Passwords don't match.");
  IsBusy = true;
  try
  {
    settings.User = await service.Register(new User { Username = Username, Password = Password, });
    settings.Save();
  }
  finally
  {
    IsBusy = false;
  }
}
The RegisterViewModel class is very similar to the LoginViewModel class, but has an additional ConfirmPassword property for the UI to be set. A good rule to follow for when to split the ViewModel layer's functionality is to always create a new class when the UI has a new screen. This helps you keep your code clean and somewhat follow the Single Responsibility Principal (SRP) for your classes. The SRP states that a class should only have a single purpose or responsibility. We'll try to follow this concept to keep our classes small and organized, which can be more important than usual when sharing code across platforms.
Next on the list is a ViewModel layer to work with a user's friend list. We will need a method to load a user's friend list and add a new friend.
Now let's implement the FriendViewModel as follows:
public class FriendViewModel : BaseViewModel
{
  public User[] Friends { get; private set; }
  public string Username { get; set; }
}
Now we'll need a method to load friends. This method is as follows:
public async Task GetFriends()
{
  if (settings.User == null)
    throw new Exception("Not logged in.");

  IsBusy = true;
  try
  {
    Friends = await service.GetFriends(settings.User.Id);
  }
  finally
  {
    IsBusy = false;
  }
}
Finally, we'll need a method to add a new friend and then update the list of friends contained locally:
public async Task AddFriend()
{
  if (settings.User == null)
    throw new Exception("Not logged in.");

  if (string.IsNullOrEmpty(Username))
    throw new Exception("Username is blank.");

  IsBusy = true;
  try
  {
    var friend = await service.AddFriend(settings.User.Id, Username);

    //Update our local list of friends
    var friends = new List<User>();
    if (Friends != null)
      friends.AddRange(Friends);
    friends.Add(friend);

    Friends = friends.OrderBy(f => f.Username).ToArray();
  }
  finally
  {
    IsBusy = false;
  }
}
Again, this class is fairly straightforward. The only thing new here is that we added some logic to update the list of friends and sort them within our client application and not the server. You can also choose to reload the complete list of friends if you have a good reason to do so.
Our final required ViewModel layer will handle messages and conversations. We need to create a way to load conversations and messages and send a new message.
Let's start implementing our MessageViewModel class as follows:
public class MessageViewModel : BaseViewModel
{
  public Conversation[] Conversations { get; private set; }
  public Conversation Conversation { get; set; }
  public Message[] Messages { get; private set; }
  public string Text { get; set; }
}
Next, let's implement a method to retrieve a list of conversations as follows:
public async Task GetConversations()
{
  if (settings.User == null)
    throw new Exception("Not logged in.");

  IsBusy = true;
  try
  {
    Conversations = await service.GetConversations(settings.User.Id);
  }
  finally
  {
    IsBusy = false;
  }
}
Similarly, we need to retrieve a list of messages within a conversation. We will need to pass the conversation ID to the service as follows:
public async Task GetMessages()
{
  if (Conversation == null)
    throw new Exception("No conversation.");

  IsBusy = true;
  try
  {
    Messages = await service.GetMessages(Conversation.Id);
  }
  finally
  {
    IsBusy = false;
  }
}
Finally, we need to write some code to send a message and update the local list of messages as follows:
public async Task SendMessage()
{
  if (settings.User == null)
    throw new Exception("Not logged in.");

  if (Conversation == null)
    throw new Exception("No conversation.");

  if (string.IsNullOrEmpty (Text))
    throw new Exception("Message is blank.");

  IsBusy = true;
  try
  {
    var message = await service.SendMessage(new Message
    {
      UserId = settings.User.Id,ConversationId = Conversation.Id,
      Text = Text
    });
    //Update our local list of messages
    var messages = new List<Message>();
    if (Messages != null)
      messages.AddRange(Messages);
    messages.Add(message);

    Messages = messages.ToArray();
  }
  finally
  {IsBusy = false;
  }
}
This concludes the ViewModel layer of our application and the entirety of the shared code used on iOS and Android. For the MessageViewModel class, you could have also chosen to put the GetConversations and Conversations properties in their own class, since they can be considered as a separate responsibility, but it is not really necessary.
Here is the final class diagram of our ViewModel layer:
Implementing our RegisterViewModel class
Since we have finished writing our ViewModel class to log in, we will now need to create one for the user's registration.
Let's implement another ViewModel layer to register a new user:
public class RegisterViewModel : BaseViewModel
{
  public string Username { get; set; }
  public string Password { get; set; }
  public string ConfirmPassword { get; set; }
}
These properties will handle inputs from the user. Next, we need to add a Register method as follows:
public async Task Register()
{
  if (string.IsNullOrEmpty(Username))
    throw new Exception("Username is blank.");
  if (string.IsNullOrEmpty(Password))
    throw new Exception("Password is blank.");
  if (Password != ConfirmPassword)
    throw new Exception("Passwords don't match.");
  IsBusy = true;
  try
  {
    settings.User = await service.Register(new User { Username = Username, Password = Password, });
    settings.Save();
  }
  finally
  {
    IsBusy = false;
  }
}
The RegisterViewModel class is very similar to the LoginViewModel class, but has an additional ConfirmPassword property for the UI to be set. A good rule to follow for when to split the ViewModel layer's functionality is to always create a new class when the UI has a new screen. This helps you keep your code clean and somewhat follow the Single Responsibility Principal (SRP) for your classes. The SRP states that a class should only have a single purpose or responsibility. We'll try to follow this concept to keep our classes small and organized, which can be more important than usual when sharing code across platforms.
Next on the list is a ViewModel layer to work with a user's friend list. We will need a method to load a user's friend list and add a new friend.
Now let's implement the FriendViewModel as follows:
public class FriendViewModel : BaseViewModel
{
  public User[] Friends { get; private set; }
  public string Username { get; set; }
}
Now we'll need a method to load friends. This method is as follows:
public async Task GetFriends()
{
  if (settings.User == null)
    throw new Exception("Not logged in.");

  IsBusy = true;
  try
  {
    Friends = await service.GetFriends(settings.User.Id);
  }
  finally
  {
    IsBusy = false;
  }
}
Finally, we'll need a method to add a new friend and then update the list of friends contained locally:
public async Task AddFriend()
{
  if (settings.User == null)
    throw new Exception("Not logged in.");

  if (string.IsNullOrEmpty(Username))
    throw new Exception("Username is blank.");

  IsBusy = true;
  try
  {
    var friend = await service.AddFriend(settings.User.Id, Username);

    //Update our local list of friends
    var friends = new List<User>();
    if (Friends != null)
      friends.AddRange(Friends);
    friends.Add(friend);

    Friends = friends.OrderBy(f => f.Username).ToArray();
  }
  finally
  {
    IsBusy = false;
  }
}
Again, this class is fairly straightforward. The only thing new here is that we added some logic to update the list of friends and sort them within our client application and not the server. You can also choose to reload the complete list of friends if you have a good reason to do so.
Our final required ViewModel layer will handle messages and conversations. We need to create a way to load conversations and messages and send a new message.
Let's start implementing our MessageViewModel class as follows:
public class MessageViewModel : BaseViewModel
{
  public Conversation[] Conversations { get; private set; }
  public Conversation Conversation { get; set; }
  public Message[] Messages { get; private set; }
  public string Text { get; set; }
}
Next, let's implement a method to retrieve a list of conversations as follows:
public async Task GetConversations()
{
  if (settings.User == null)
    throw new Exception("Not logged in.");

  IsBusy = true;
  try
  {
    Conversations = await service.GetConversations(settings.User.Id);
  }
  finally
  {
    IsBusy = false;
  }
}
Similarly, we need to retrieve a list of messages within a conversation. We will need to pass the conversation ID to the service as follows:
public async Task GetMessages()
{
  if (Conversation == null)
    throw new Exception("No conversation.");

  IsBusy = true;
  try
  {
    Messages = await service.GetMessages(Conversation.Id);
  }
  finally
  {
    IsBusy = false;
  }
}
Finally, we need to write some code to send a message and update the local list of messages as follows:
public async Task SendMessage()
{
  if (settings.User == null)
    throw new Exception("Not logged in.");

  if (Conversation == null)
    throw new Exception("No conversation.");

  if (string.IsNullOrEmpty (Text))
    throw new Exception("Message is blank.");

  IsBusy = true;
  try
  {
    var message = await service.SendMessage(new Message
    {
      UserId = settings.User.Id,ConversationId = Conversation.Id,
      Text = Text
    });
    //Update our local list of messages
    var messages = new List<Message>();
    if (Messages != null)
      messages.AddRange(Messages);
    messages.Add(message);

    Messages = messages.ToArray();
  }
  finally
  {IsBusy = false;
  }
}
This concludes the ViewModel layer of our application and the entirety of the shared code used on iOS and Android. For the MessageViewModel class, you could have also chosen to put the GetConversations and Conversations properties in their own class, since they can be considered as a separate responsibility, but it is not really necessary.
Here is the final class diagram of our ViewModel layer:
Implementing our FriendViewModel class
Next on the list is a ViewModel layer to work with a user's friend list. We will need a method to load a user's friend list and add a new friend.
Now let's implement the FriendViewModel as follows:
public class FriendViewModel : BaseViewModel
{
  public User[] Friends { get; private set; }
  public string Username { get; set; }
}
Now we'll need a method to load friends. This method is as follows:
public async Task GetFriends()
{
  if (settings.User == null)
    throw new Exception("Not logged in.");

  IsBusy = true;
  try
  {
    Friends = await service.GetFriends(settings.User.Id);
  }
  finally
  {
    IsBusy = false;
  }
}
Finally, we'll need a method to add a new friend and then update the list of friends contained locally:
public async Task AddFriend()
{
  if (settings.User == null)
    throw new Exception("Not logged in.");

  if (string.IsNullOrEmpty(Username))
    throw new Exception("Username is blank.");

  IsBusy = true;
  try
  {
    var friend = await service.AddFriend(settings.User.Id, Username);

    //Update our local list of friends
    var friends = new List<User>();
    if (Friends != null)
      friends.AddRange(Friends);
    friends.Add(friend);

    Friends = friends.OrderBy(f => f.Username).ToArray();
  }
  finally
  {
    IsBusy = false;
  }
}
Again, this class is fairly straightforward. The only thing new here is that we added some logic to update the list of friends and sort them within our client application and not the server. You can also choose to reload the complete list of friends if you have a good reason to do so.
Our final required ViewModel layer will handle messages and conversations. We need to create a way to load conversations and messages and send a new message.
Let's start implementing our MessageViewModel class as follows:
public class MessageViewModel : BaseViewModel
{
  public Conversation[] Conversations { get; private set; }
  public Conversation Conversation { get; set; }
  public Message[] Messages { get; private set; }
  public string Text { get; set; }
}
Next, let's implement a method to retrieve a list of conversations as follows:
public async Task GetConversations()
{
  if (settings.User == null)
    throw new Exception("Not logged in.");

  IsBusy = true;
  try
  {
    Conversations = await service.GetConversations(settings.User.Id);
  }
  finally
  {
    IsBusy = false;
  }
}
Similarly, we need to retrieve a list of messages within a conversation. We will need to pass the conversation ID to the service as follows:
public async Task GetMessages()
{
  if (Conversation == null)
    throw new Exception("No conversation.");

  IsBusy = true;
  try
  {
    Messages = await service.GetMessages(Conversation.Id);
  }
  finally
  {
    IsBusy = false;
  }
}
Finally, we need to write some code to send a message and update the local list of messages as follows:
public async Task SendMessage()
{
  if (settings.User == null)
    throw new Exception("Not logged in.");

  if (Conversation == null)
    throw new Exception("No conversation.");

  if (string.IsNullOrEmpty (Text))
    throw new Exception("Message is blank.");

  IsBusy = true;
  try
  {
    var message = await service.SendMessage(new Message
    {
      UserId = settings.User.Id,ConversationId = Conversation.Id,
      Text = Text
    });
    //Update our local list of messages
    var messages = new List<Message>();
    if (Messages != null)
      messages.AddRange(Messages);
    messages.Add(message);

    Messages = messages.ToArray();
  }
  finally
  {IsBusy = false;
  }
}
This concludes the ViewModel layer of our application and the entirety of the shared code used on iOS and Android. For the MessageViewModel class, you could have also chosen to put the GetConversations and Conversations properties in their own class, since they can be considered as a separate responsibility, but it is not really necessary.
Here is the final class diagram of our ViewModel layer:
Implementing our MessageViewModel class
Our final required ViewModel layer will handle messages and conversations. We need to create a way to load conversations and messages and send a new message.
Let's start implementing our MessageViewModel class as follows:
public class MessageViewModel : BaseViewModel
{
  public Conversation[] Conversations { get; private set; }
  public Conversation Conversation { get; set; }
  public Message[] Messages { get; private set; }
  public string Text { get; set; }
}
Next, let's implement a method to retrieve a list of conversations as follows:
public async Task GetConversations()
{
  if (settings.User == null)
    throw new Exception("Not logged in.");

  IsBusy = true;
  try
  {
    Conversations = await service.GetConversations(settings.User.Id);
  }
  finally
  {
    IsBusy = false;
  }
}
Similarly, we need to retrieve a list of messages within a conversation. We will need to pass the conversation ID to the service as follows:
public async Task GetMessages()
{
  if (Conversation == null)
    throw new Exception("No conversation.");

  IsBusy = true;
  try
  {
    Messages = await service.GetMessages(Conversation.Id);
  }
  finally
  {
    IsBusy = false;
  }
}
Finally, we need to write some code to send a message and update the local list of messages as follows:
public async Task SendMessage()
{
  if (settings.User == null)
    throw new Exception("Not logged in.");

  if (Conversation == null)
    throw new Exception("No conversation.");

  if (string.IsNullOrEmpty (Text))
    throw new Exception("Message is blank.");

  IsBusy = true;
  try
  {
    var message = await service.SendMessage(new Message
    {
      UserId = settings.User.Id,ConversationId = Conversation.Id,
      Text = Text
    });
    //Update our local list of messages
    var messages = new List<Message>();
    if (Messages != null)
      messages.AddRange(Messages);
    messages.Add(message);

    Messages = messages.ToArray();
  }
  finally
  {IsBusy = false;
  }
}
This concludes the ViewModel layer of our application and the entirety of the shared code used on iOS and Android. For the MessageViewModel class, you could have also chosen to put the GetConversations and Conversations properties in their own class, since they can be considered as a separate responsibility, but it is not really necessary.
Here is the final class diagram of our ViewModel layer:
Since all the code we've written so far is not dependent on the user interface, we can easily write unit tests against our classes. This step is generally taken after the first implementation of a ViewModel class. Proponents of Test Driven Development (TDD) would recommend writing tests first and implementing things afterward, so choose which method is best for you. In either case, it is a good idea to write tests against your shared code before you start using them from the View layer, so that you can catch bugs before they hold up your development on the UI.
Xamarin projects take advantage of an open source testing framework called NUnit. It was originally derived from a Java testing framework called JUnit, and it is the de-facto standard for unit testing C# applications. Xamarin Studio provides several project templates for writing tests with NUnit.
Let's set up a new project for unit tests by performing the following steps:
- Add a new NUnit Library Project to your solution, which is found under the C# section.
- Name the project
XamChat.Teststo keep things consistent. - Next, let's set the library to a Mono/.NET 4.5 project under Project Options, then navigate to Build | General | Target Framework.
- Right-click on Project References and choose Edit References.
- Under the Projects tab, add a reference to XamChat.Core.
- Now, open the
Test.csfile and you will notice the following required attributes that make up a unit test using NUnit:using NUnit.Framework: This attribute is the main statement to be used to work with NUnit[TestFixture]: This decorates a class to indicate that the class has a list of methods for running tests[Test]: This decorates a method to indicate a test
In addition to the required C# attributes, there are several others that are useful for writing tests, and they are as follows:
[TestFixtureSetUp]: This decorates a method that runs before all the tests contained within a text fixture class.[SetUp]: This decorates a method that runs before each test in a test fixture class.[TearDown]: This decorates a method that runs after each test in a test fixture class.[TestFixtureTearDown]: This decorates a method that runs after all the tests in a text fixture class have been completed.[ExpectedException]: This decorates a method that is intended to throw an exception. It is useful for test cases that are supposed to fail.[Category]: This decorates a test method and can be used to organize different tests; for example, you might categorize them as fast and slow tests.
The next concept to learn about writing tests with NUnit is how to write assertions. An assertion is a method that will throw an exception if a certain value is not true. It will cause a test to fail and give a descriptive explanation as to what happened. NUnit has a couple of different sets of APIs for assertions; however, we will use the more readable and fluent versions of the APIs.
The basic syntax of a fluent-style API is using the Assert.That method. The following example this:
Assert.That(myVariable, Is.EqualTo(0));
Likewise, you can assert the opposite:
Assert.That(myVariable, Is.Not.EqualTo(0));
Or any of the following:
Assert.That(myVariable, Is.GreaterThan(0));Assert.That(myBooleanVariable, Is.True);Assert.That(myObject, Is.Not.Null);
Feel free to explore the APIs. With code completion in Xamarin Studio, you should be able to discover useful static members or methods on the Is class to use within your tests.
Before we begin writing specific tests for our application, let's write a static class and method to create a global setup to be used throughout our tests. You can rewrite Test.cs as follows:
public static class Test
{
  public static void SetUp()
  {
    ServiceContainer.Register<IWebService>(() =>new FakeWebService { SleepDuration = 0 });
    ServiceContainer.Register<ISettings>(() =>new FakeSettings());
  }
}
We'll use this method throughout our tests to set up fake services in our Model layer. Additionally, this replaces the existing services so that our tests execute against new instances of these classes. This is a good practice in unit testing to guarantee that no old data is left behind from a previous test. Also, notice that we set SleepDuration to 0. This will make our tests run very quickly.
We will begin by creating a ViewModels folder in our test project and adding a class named LoginViewModelTests as follows:
[TestFixture]
public class LoginViewModelTests
{
  LoginViewModel loginViewModel;
  ISettings settings;
  [SetUp]
  public void SetUp()
  {
    Test.SetUp();
    settings = ServiceContainer.Resolve<ISettings>();
    loginViewModel = new LoginViewModel();
  }
  [Test]
  public async Task LoginSuccessfully()
  {
    loginViewModel.Username = "testuser";
    loginViewModel.Password = "password";
    await loginViewModel.Login();
    Assert.That(settings.User, Is.Not.Null);
  }
}
Notice our use of a SetUp method. We recreate the objects used in every test to make sure that no old data is left over from the previous test runs. Another point to note is that you must return a Task when using async/await in a test method. Otherwise, NUnit would not be able to know when a test completes.
To run the test, use the NUnit menu found docked to the right of Xamarin Studio, by default. Go ahead and run the test using the Run Test button that has a gear icon. You will get a successful result similar to what is shown in the following screenshot:
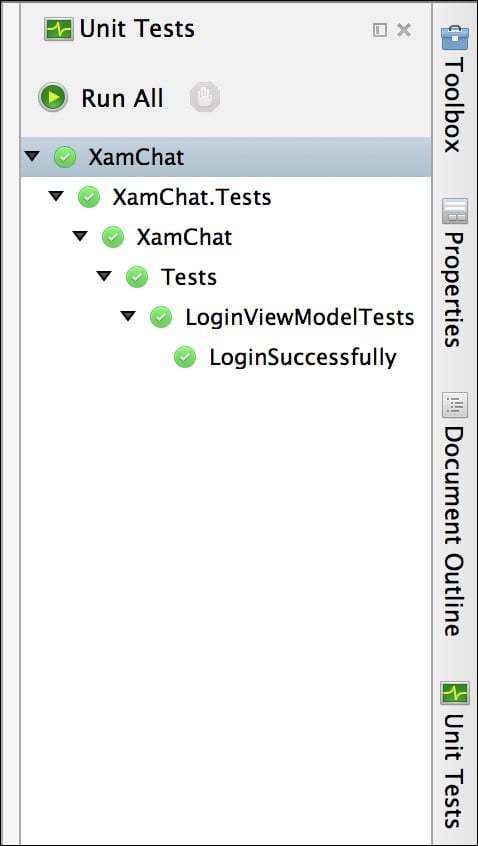
You can also view the Test Results pane, which will show you the extended details if a test fails, as shown in the following screenshot:
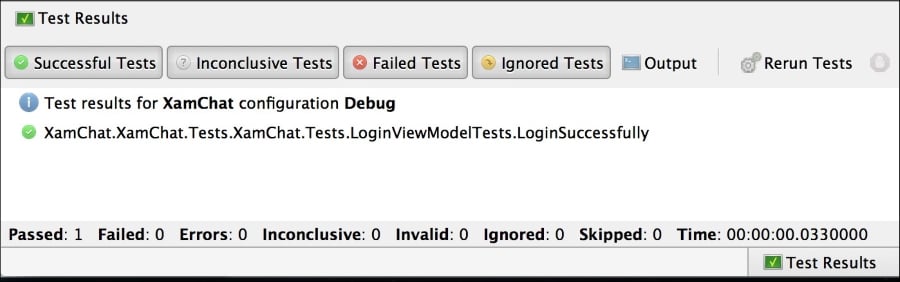
To see what happens when a test fails, go ahead and modify your test to assert against an incorrect value as follows:
//Change Is.Not.Null to Is.Null
Assert.That(settings.User, Is.Null);
You will get a very descriptive error in the Test Results pane, as shown in the following screenshot:
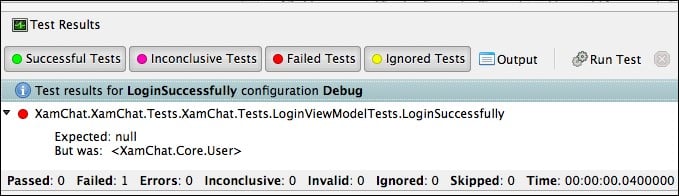
Now let's implement another test for the LoginViewModel class; let's make sure that we get the appropriate outcome if the username and password fields are blank. The test is implemented as follows:
[Test]
public async Task LoginWithNoUsernameOrPassword()
{
  //Throws an exception
  await loginViewModel.Login();
}
If we run the test as it is, we will get an exception and the test will fail. Since we expect an exception to occur, we can decorate the method to make the test pass only if an exception occurs as follows:
[Test,
  ExpectedException(typeof(Exception),
  ExpectedMessage = "Username is blank.")]
More tests are included with the sample code along with this module. It is recommended that you write tests against each public operation on each ViewModel class. Additionally, write tests for any validation or other important business logic. I would also recommend that you write tests against the Model layer; however, this is not needed in our project yet since we only have fake implementations.
Setting up a new project for unit tests
Let's set up a new project for unit tests by performing the following steps:
- Add a new NUnit Library Project to your solution, which is found under the C# section.
- Name the project
XamChat.Teststo keep things consistent. - Next, let's set the library to a Mono/.NET 4.5 project under Project Options, then navigate to Build | General | Target Framework.
- Right-click on Project References and choose Edit References.
- Under the Projects tab, add a reference to XamChat.Core.
- Now, open the
Test.csfile and you will notice the following required attributes that make up a unit test using NUnit:using NUnit.Framework: This attribute is the main statement to be used to work with NUnit[TestFixture]: This decorates a class to indicate that the class has a list of methods for running tests[Test]: This decorates a method to indicate a test
In addition to the required C# attributes, there are several others that are useful for writing tests, and they are as follows:
[TestFixtureSetUp]: This decorates a method that runs before all the tests contained within a text fixture class.[SetUp]: This decorates a method that runs before each test in a test fixture class.[TearDown]: This decorates a method that runs after each test in a test fixture class.[TestFixtureTearDown]: This decorates a method that runs after all the tests in a text fixture class have been completed.[ExpectedException]: This decorates a method that is intended to throw an exception. It is useful for test cases that are supposed to fail.[Category]: This decorates a test method and can be used to organize different tests; for example, you might categorize them as fast and slow tests.
The next concept to learn about writing tests with NUnit is how to write assertions. An assertion is a method that will throw an exception if a certain value is not true. It will cause a test to fail and give a descriptive explanation as to what happened. NUnit has a couple of different sets of APIs for assertions; however, we will use the more readable and fluent versions of the APIs.
The basic syntax of a fluent-style API is using the Assert.That method. The following example this:
Assert.That(myVariable, Is.EqualTo(0));
Likewise, you can assert the opposite:
Assert.That(myVariable, Is.Not.EqualTo(0));
Or any of the following:
Assert.That(myVariable, Is.GreaterThan(0));Assert.That(myBooleanVariable, Is.True);Assert.That(myObject, Is.Not.Null);
Feel free to explore the APIs. With code completion in Xamarin Studio, you should be able to discover useful static members or methods on the Is class to use within your tests.
Before we begin writing specific tests for our application, let's write a static class and method to create a global setup to be used throughout our tests. You can rewrite Test.cs as follows:
public static class Test
{
  public static void SetUp()
  {
    ServiceContainer.Register<IWebService>(() =>new FakeWebService { SleepDuration = 0 });
    ServiceContainer.Register<ISettings>(() =>new FakeSettings());
  }
}
We'll use this method throughout our tests to set up fake services in our Model layer. Additionally, this replaces the existing services so that our tests execute against new instances of these classes. This is a good practice in unit testing to guarantee that no old data is left behind from a previous test. Also, notice that we set SleepDuration to 0. This will make our tests run very quickly.
We will begin by creating a ViewModels folder in our test project and adding a class named LoginViewModelTests as follows:
[TestFixture]
public class LoginViewModelTests
{
  LoginViewModel loginViewModel;
  ISettings settings;
  [SetUp]
  public void SetUp()
  {
    Test.SetUp();
    settings = ServiceContainer.Resolve<ISettings>();
    loginViewModel = new LoginViewModel();
  }
  [Test]
  public async Task LoginSuccessfully()
  {
    loginViewModel.Username = "testuser";
    loginViewModel.Password = "password";
    await loginViewModel.Login();
    Assert.That(settings.User, Is.Not.Null);
  }
}
Notice our use of a SetUp method. We recreate the objects used in every test to make sure that no old data is left over from the previous test runs. Another point to note is that you must return a Task when using async/await in a test method. Otherwise, NUnit would not be able to know when a test completes.
To run the test, use the NUnit menu found docked to the right of Xamarin Studio, by default. Go ahead and run the test using the Run Test button that has a gear icon. You will get a successful result similar to what is shown in the following screenshot:
You can also view the Test Results pane, which will show you the extended details if a test fails, as shown in the following screenshot:
To see what happens when a test fails, go ahead and modify your test to assert against an incorrect value as follows:
//Change Is.Not.Null to Is.Null
Assert.That(settings.User, Is.Null);
You will get a very descriptive error in the Test Results pane, as shown in the following screenshot:
Now let's implement another test for the LoginViewModel class; let's make sure that we get the appropriate outcome if the username and password fields are blank. The test is implemented as follows:
[Test]
public async Task LoginWithNoUsernameOrPassword()
{
  //Throws an exception
  await loginViewModel.Login();
}
If we run the test as it is, we will get an exception and the test will fail. Since we expect an exception to occur, we can decorate the method to make the test pass only if an exception occurs as follows:
[Test,
  ExpectedException(typeof(Exception),
  ExpectedMessage = "Username is blank.")]
More tests are included with the sample code along with this module. It is recommended that you write tests against each public operation on each ViewModel class. Additionally, write tests for any validation or other important business logic. I would also recommend that you write tests against the Model layer; however, this is not needed in our project yet since we only have fake implementations.
Writing assertions
The next concept to learn about writing tests with NUnit is how to write assertions. An assertion is a method that will throw an exception if a certain value is not true. It will cause a test to fail and give a descriptive explanation as to what happened. NUnit has a couple of different sets of APIs for assertions; however, we will use the more readable and fluent versions of the APIs.
The basic syntax of a fluent-style API is using the Assert.That method. The following example this:
Assert.That(myVariable, Is.EqualTo(0));
Likewise, you can assert the opposite:
Assert.That(myVariable, Is.Not.EqualTo(0));
Or any of the following:
Assert.That(myVariable, Is.GreaterThan(0));Assert.That(myBooleanVariable, Is.True);Assert.That(myObject, Is.Not.Null);
Feel free to explore the APIs. With code completion in Xamarin Studio, you should be able to discover useful static members or methods on the Is class to use within your tests.
Before we begin writing specific tests for our application, let's write a static class and method to create a global setup to be used throughout our tests. You can rewrite Test.cs as follows:
public static class Test
{
  public static void SetUp()
  {
    ServiceContainer.Register<IWebService>(() =>new FakeWebService { SleepDuration = 0 });
    ServiceContainer.Register<ISettings>(() =>new FakeSettings());
  }
}
We'll use this method throughout our tests to set up fake services in our Model layer. Additionally, this replaces the existing services so that our tests execute against new instances of these classes. This is a good practice in unit testing to guarantee that no old data is left behind from a previous test. Also, notice that we set SleepDuration to 0. This will make our tests run very quickly.
We will begin by creating a ViewModels folder in our test project and adding a class named LoginViewModelTests as follows:
[TestFixture]
public class LoginViewModelTests
{
  LoginViewModel loginViewModel;
  ISettings settings;
  [SetUp]
  public void SetUp()
  {
    Test.SetUp();
    settings = ServiceContainer.Resolve<ISettings>();
    loginViewModel = new LoginViewModel();
  }
  [Test]
  public async Task LoginSuccessfully()
  {
    loginViewModel.Username = "testuser";
    loginViewModel.Password = "password";
    await loginViewModel.Login();
    Assert.That(settings.User, Is.Not.Null);
  }
}
Notice our use of a SetUp method. We recreate the objects used in every test to make sure that no old data is left over from the previous test runs. Another point to note is that you must return a Task when using async/await in a test method. Otherwise, NUnit would not be able to know when a test completes.
To run the test, use the NUnit menu found docked to the right of Xamarin Studio, by default. Go ahead and run the test using the Run Test button that has a gear icon. You will get a successful result similar to what is shown in the following screenshot:
You can also view the Test Results pane, which will show you the extended details if a test fails, as shown in the following screenshot:
To see what happens when a test fails, go ahead and modify your test to assert against an incorrect value as follows:
//Change Is.Not.Null to Is.Null
Assert.That(settings.User, Is.Null);
You will get a very descriptive error in the Test Results pane, as shown in the following screenshot:
Now let's implement another test for the LoginViewModel class; let's make sure that we get the appropriate outcome if the username and password fields are blank. The test is implemented as follows:
[Test]
public async Task LoginWithNoUsernameOrPassword()
{
  //Throws an exception
  await loginViewModel.Login();
}
If we run the test as it is, we will get an exception and the test will fail. Since we expect an exception to occur, we can decorate the method to make the test pass only if an exception occurs as follows:
[Test,
  ExpectedException(typeof(Exception),
  ExpectedMessage = "Username is blank.")]
More tests are included with the sample code along with this module. It is recommended that you write tests against each public operation on each ViewModel class. Additionally, write tests for any validation or other important business logic. I would also recommend that you write tests against the Model layer; however, this is not needed in our project yet since we only have fake implementations.
In this chapter, we went through the concept of building a sample application called XamChat. We also implemented the core business objects for the application in the Model layer. Since we do not have a server to support this application yet, we implemented a fake web service. This gives you the flexibility to move forward with the app without building a server application. We also implemented the ViewModel layer. This layer will expose operations in a simple way to the View layer. Finally, we wrote tests covering the code we've written so far using NUnit. Writing tests against shared code in a cross-platform application can be very important, as it is the backbone of more than one application.
After completing this chapter, you should have completed the shared library for our cross-platform application in its entirety. You should have a very firm grasp on our application's architecture and its distinct Model and ViewModel layers. You should also have a good understanding of how to write fake versions of parts of your application that you might not be ready to implement yet. In the next chapter, we will implement the iOS version of XamChat.
In this chapter, we will develop the iOS portion of our cross-platform XamChat application. Since we are using the MVVM design pattern, most of the work we will be doing will be in the View layer of the application. We will mainly be working with native iOS APIs and understanding how we can apply them leverage the shared code in our portable class library. Since Xamarin.iOS enables us to call Apple APIs directly, our iOS app will be indistinguishable from an application developed in Objective-C or Swift.
To begin writing the iOS version of XamChat, create a new Single View Application under the iOS section. Name the project XamChat.iOS or some other appropriate name of your choice. The project template will automatically create a controller with an unfamiliar name; go ahead and delete it. We will create our own controllers as we go.
In this chapter, we will cover the following:
- The basics of an iOS application
- The use of
UINavigationController - Implementing a login screen
- Segues and
UITableView - Adding a friends list
- Adding a list of messages
- Composing messages
Before we start developing our app, let's review the main settings of the application. Apple uses a file named Info.plist to store important information about any iOS app. These settings are used when an iOS application is installed on a device by the Apple App Store. We will begin development on any new iOS application by filling out the information in this file.
Xamarin Studio provides a neat menu to modify values in the Info.plist file, as shown in the following screenshot:
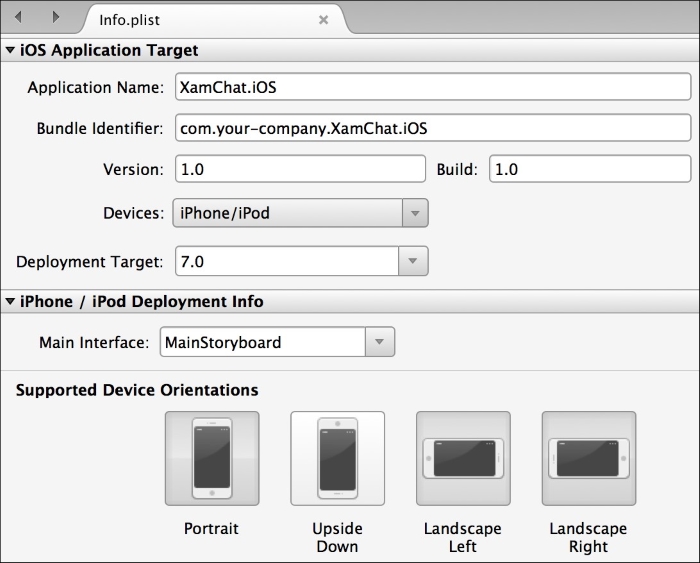
The most important settings are as follows:
- Application Name: This is the title below an app's icon in iOS. Note that this is not the same as the official name of your app in the iOS App Store.
- Bundle Identifier: This is your app's bundle identifier or bundle ID. It is a unique name to identify your application. The convention is to use a reverse domain naming style beginning with your company name, such as
com.packt.xamchat. - Version: This is a version number for your application such as
1.0.0. - Devices: In this field you can select iPhone/iPod, iPad, or Universal (all devices) for your application.
- Deployment Target: This is the minimum iOS version your application runs on.
- Main Interface: This is the main storyboard file for your app that declares most of the UI of your application. iOS will automatically load this file and open the root controller as the initial screen to be displayed.
- Supported Device Orientations: These are the different positions your application will be able to rotate to and support.
There are other settings for app icons, splash screens, and so on. You can also toggle between the Advanced or Source tabs to configure additional settings that Xamarin does not provide a user-friendly menu for.
Configure the following settings for our application:
- Application Name:
XamChat - Bundle Identifier:
com.yourcompanyname.xamchat; make sure that you name future apps beginning withcom.yourcompanyname - Version: This can be any version number you prefer, but it should just not be left blank
- Devices: iPhone/iPod
- Deployment Target: 7.0 (you can also target 8.0, but we aren't using any iOS 8-specific APIs in this app)
- Supported Device Orientations: Only select Portrait
You can find some additional settings for Xamarin iOS applications if you right-click on your project and select Options. It is a good idea to know what is available for iOS-specific projects in Xamarin Studio.
Let's discuss some of the most important options.
- Navigate to the iOS Build | General tab as shown in the following screenshot:

You have the following options under this tab:
- SDK version: This is the version of the iOS SDK to compile your application with. It is generally best to use Default.
- Linker behavior: Xamarin has implemented a feature called linking. The linker will strip any code that will never be called within your assemblies. This keeps your application small and allows them to ship a stripped-down version of the core Mono framework with your app. Except for debug builds, it is best to use the Link SDK assemblies only option. We will cover linking in the next chapter.
- Optimize PNG files for iOS: Apple uses a custom PNG format to speed up the loading of PNGs within your app. You can turn this off to speed up builds, or if you plan on optimizing the images yourself.
- Enable debugging: Turning this on allows Xamarin to include extra information with your app to enable debugging from Xamarin Studio.
- Additional mtouch arguments: This field is for passing extra command-line arguments to the Xamarin compiler for iOS. You can check out the complete list of these arguments at http://iosapi.xamarin.com.
- Navigate to iOS Build | Advanced tab as shown in the following screenshot:

You have the following options under this tab:
- Supported architectures: Here, the options are ARMv7, ARMv7s, and a FAT version that includes both. These are instruction sets that different iOS device processors support. If you really care about performance, you might consider selecting the option to support both; however, this will make your application larger.
- Use LLVM optimizing compiler: Checking this compiles the code that is smaller and runs faster, but it takes longer to compile. LLVM stands for Low Level Virtual Machine.
- Enable generic value type sharing: This is an option specific to Mono that draws better performance from C# generics with value types. It has the downside of making the application slightly larger, but I would recommend that you leave it on.
- Use SGen generational garbage collector: This uses the new Mono garbage collector in your app. I would recommend that you turn this on if you really need good performance with the garbage collector (GC) or are working on an app that needs to be responsive in real time, such as a game. It is probably safe to turn this on by default now, as the SGen garbage collector is very stable.
- Use the reference counting extension (preview): This is currently an experimental feature, but improves the general memory usage of native objects that are accessible from C#. These native object's reference is managed by the GC instead of a backing field on the object when using this setting. Since it is still in preview, you should be careful when using this option.
- You have the following options under iOS Bundle Signing:
- Identity: This is the certificate to identify the app's creator for deploying the application to devices. We'll cover more on this in later chapters.
- Provisioning profile: This is a specific profile that deploys the app to a device. This works in tandem with Identity, but also declares the distribution method, and the devices that can install the app.
- Custom Entitlements: This file contains additional settings to be applied to the provisioning profile, and it contains other specific declarations for the app such as iCloud or push notifications. The project template for iOS apps includes a default
Entitlements.plistfile for new projects.
- iOS Application: These settings are identical to what you see in the
Info.plistfile.
For this application, you can leave all these options at their defaults. When making a real iOS application on your own, you should consider changing many of these as per your application's needs.
In iOS applications, the key class that manages navigation between different controllers is the UINavigationController class. The navigation controller is the most basic building block of navigation on iOS, so it is the best choice to start with most of the iOS applications. It is a parent controller that contains several child controllers in a stack. Users can move forward by putting new controllers on top of the stack or using a built-in back button to pop a controller off the stack and navigate to the previous screen.
The following are the methods in Navigation Controllers:
SetViewControllers: This sets an array of child controllers. It has a value to optionally animate the transition.ViewControllers: This is a property to get or set the array of child controllers without an option for animations.PushViewController: This places a new child controller at the top of the stack with an option to display an animation.PopViewControllerAnimated: This pops off the child controller at the top of the stack with an option to animate the transition.PopToViewController: This pops to the specified child controller, removing all controllers above it. It provides an option to animate the transition.PopToRootViewController: This removes all the child controllers except the bottom-most controller. It includes an option to display an animation.TopViewController: This is a property that returns the child controller that is currently on top of the stack.
Tip
It is important to note that using the option for animations will cause a crash if you try to modify the stack during the animation. To fix this situation, either use the SetViewControllers method and set the entire list of child controllers, or refrain from using the animations during a combination of transitions.
Perform the following steps to set up a Navigation Controller:
- Double-click on the
MainStoryboard.storyboardfile to open it in Xamarin Studio. - Remove the controller that was created by the project template.
- Drag a Navigation Controller element from the Toolbox pane on the right-hand side onto the storyboard.
- Notice that a default View Controller element was created as well as a Navigation Controller element.
- You will see a segue that connects the two controllers. We'll cover this concept in more detail later in the chapter.
- Save the storyboard file.
If you run the application at this point, you will have a basic iOS app with a status bar at the top, a navigation controller that contains a navigation bar with a default title, and a child controller that is completely white, as shown in the following screenshot:
Methods in Navigation Controllers
The following are the methods in Navigation Controllers:
SetViewControllers: This sets an array of child controllers. It has a value to optionally animate the transition.ViewControllers: This is a property to get or set the array of child controllers without an option for animations.PushViewController: This places a new child controller at the top of the stack with an option to display an animation.PopViewControllerAnimated: This pops off the child controller at the top of the stack with an option to animate the transition.PopToViewController: This pops to the specified child controller, removing all controllers above it. It provides an option to animate the transition.PopToRootViewController: This removes all the child controllers except the bottom-most controller. It includes an option to display an animation.TopViewController: This is a property that returns the child controller that is currently on top of the stack.
Tip
It is important to note that using the option for animations will cause a crash if you try to modify the stack during the animation. To fix this situation, either use the SetViewControllers method and set the entire list of child controllers, or refrain from using the animations during a combination of transitions.
Perform the following steps to set up a Navigation Controller:
- Double-click on the
MainStoryboard.storyboardfile to open it in Xamarin Studio. - Remove the controller that was created by the project template.
- Drag a Navigation Controller element from the Toolbox pane on the right-hand side onto the storyboard.
- Notice that a default View Controller element was created as well as a Navigation Controller element.
- You will see a segue that connects the two controllers. We'll cover this concept in more detail later in the chapter.
- Save the storyboard file.
If you run the application at this point, you will have a basic iOS app with a status bar at the top, a navigation controller that contains a navigation bar with a default title, and a child controller that is completely white, as shown in the following screenshot:
Setting up a Navigation Controller
Perform the following steps to set up a Navigation Controller:
- Double-click on the
MainStoryboard.storyboardfile to open it in Xamarin Studio. - Remove the controller that was created by the project template.
- Drag a Navigation Controller element from the Toolbox pane on the right-hand side onto the storyboard.
- Notice that a default View Controller element was created as well as a Navigation Controller element.
- You will see a segue that connects the two controllers. We'll cover this concept in more detail later in the chapter.
- Save the storyboard file.
If you run the application at this point, you will have a basic iOS app with a status bar at the top, a navigation controller that contains a navigation bar with a default title, and a child controller that is completely white, as shown in the following screenshot:
Since the first screen of our application will be a login screen, let's begin by setting up the appropriate views in the storyboard file. We will implement the login screen using Xamarin Studio to write the C# code, and its iOS designer to create iOS layouts in our storyboard file.
Return to the project in Xamarin Studio and perform the following steps:
- Double-click on the
MainStoryboard.storyboardfile to open it in the iOS designer. - Select your view controller and click on the Properties pane and select the Widget tab.
- Enter
LoginControllerinto the Class field. - Notice that the
LoginControllerclass is generated for you. You can create aControllersfolder and move the file in it if you wish.
The following screenshot shows you what the controller's settings will look like in Xamarin Studio after the changes have been made:

Now let's modify the layout of the controller by performing the following steps:
- Double-click on the
MainStoryboard.storyboardfile a second time to return to the iOS designer. - Tap on the navigation bar and edit the Title field to read
Login. - Drag two text fields onto the controller. Position and size them appropriately for the username and password entries. You might also want to remove the default text to make the fields blank.
- For the second field, check the Secure Text Entry checkbox. This will set the control to hide the characters for the password field.
- You might also want to fill out the Placeholder field for
UsernameandPasswordrespectively. - Drag a button onto the controller. Set the button's Title to
Login. - Drag an activity indicator onto the controller. Check the Animating and Hidden checkboxes.
- Next, create an outlet for each of the controls by filling out the Name field. Name the outlets
username,password,login, andindicatorrespectively. - Save the storyboard file and take a look at
LoginController.designer.cs.
You will see that Xamarin Studio has generated properties for each of the outlets:
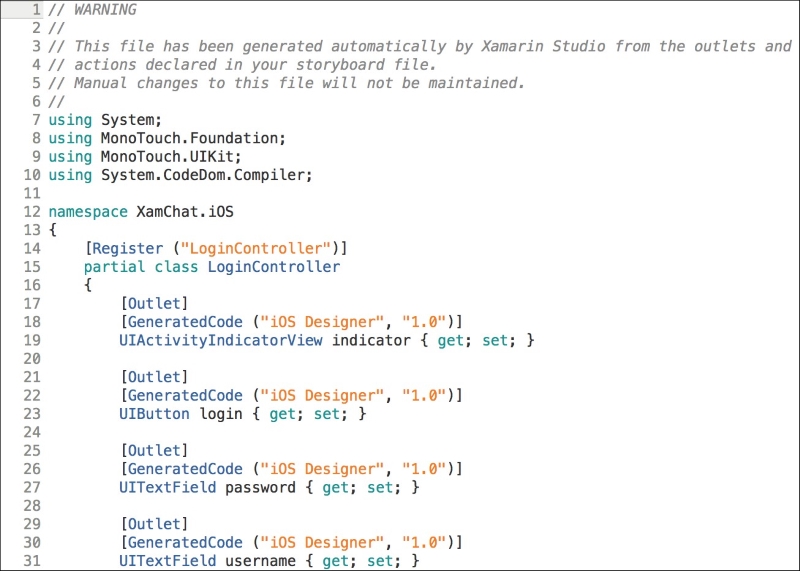
Go ahead and compile the application to make sure that everything is okay. At this point, we also need to add a reference to the XamChat.Core project created in the previous chapter.
Next, let's set up our iOS application to register all of its view models and other services that will be used throughout the application. We will use the ServiceContainer class that we created in Chapter 4, XamChat – a Cross-platform App, to set up the dependencies throughout our application. Open AppDelegate.cs and add the following method:
public override bool FinishedLaunching(UIApplication application,NSDictionary launchOptions)
{
  //View Models
  ServiceContainer.Register<LoginViewModel>(() =>new LoginViewModel());
  ServiceContainer.Register<FriendViewModel>(() =>new FriendViewModel());
  ServiceContainer.Register<RegisterViewModel>(() =>new RegisterViewModel());
  ServiceContainer.Register<MessageViewModel>(() =>new MessageViewModel());
  //Models
  ServiceContainer.Register<ISettings>(() =>new FakeSettings());
  ServiceContainer.Register<IWebService>(() =>new FakeWebService());

  return true;
}
Down the road, we will replace the fake services with the real ones. Now, let's add the login functionality to LoginController.cs. First, add LoginViewModel to a member variable at the top of the class as follows:
readonly LoginViewModel loginViewModel = ServiceContainer.Resolve<LoginViewModel>();
This will pull a shared instance of LoginViewModel into a local variable in the controller. This is the pattern that we will use throughout the module in order to pass a shared view model from one class to another.
Next, override ViewDidLoad to hook up the view model's functionality with the views set up in outlets as follows:
public override void ViewDidLoad()
{
  base.ViewDidLoad();
  login.TouchUpInside += async(sender, e) =>
  {
    loginViewModel.Username = username.Text;
    loginViewModel.Password = password.Text;
    try
    {
      await loginViewModel.Login();
      //TODO: navigate to a new screen
    }
    catch (Exception exc)
    {
      new UIAlertView("Oops!", exc.Message, null, "Ok").Show();
    }
  };
}
We'll add the code to navigate to a new screen later in the chapter.
Next, let's hook up the IsBusyChanged event to actually perform an action as follows:
public override void ViewWillAppear(bool animated)
{
  base.ViewWillAppear(animated);
  loginViewModel.IsBusyChanged += OnIsBusyChanged;
}
public override void ViewWillDisappear(bool animated)
{
  base.ViewWillDisappear(animated);
  loginViewModel.IsBusyChanged -= OnIsBusyChanged;
}
void OnIsBusyChanged(object sender, EventArgs e)
{
  username.Enabled =
    password.Enabled =
    login.Enabled =
    indicator.Hidden = !loginViewModel.IsBusy;
}
Now you might be wondering, why we subscribe to the event in this manner. The problem is that the LoginViewModel class will last through your application's lifetime, while the LoginController class will not. If we subscribed to the event in ViewDidLoad, but didn't unsubscribe later, then our application will have a memory leak. We also avoided using a lambda expression for the event since it would otherwise be impossible to unsubscribe the event. Note that we don't have the same problem with the TouchUpInside event on the button, since it will live in memory as long as the controller does. This is a common problem with events in C#, which is why it is a good idea to use the preceding pattern on iOS.
If you run the application now, you should be able to enter a username and password, as shown in the following screenshot. When you press Login, you should see the indicator appear and all the controls disabled. Your application will correctly be calling the shared code, and should function correctly when we add a real web service.
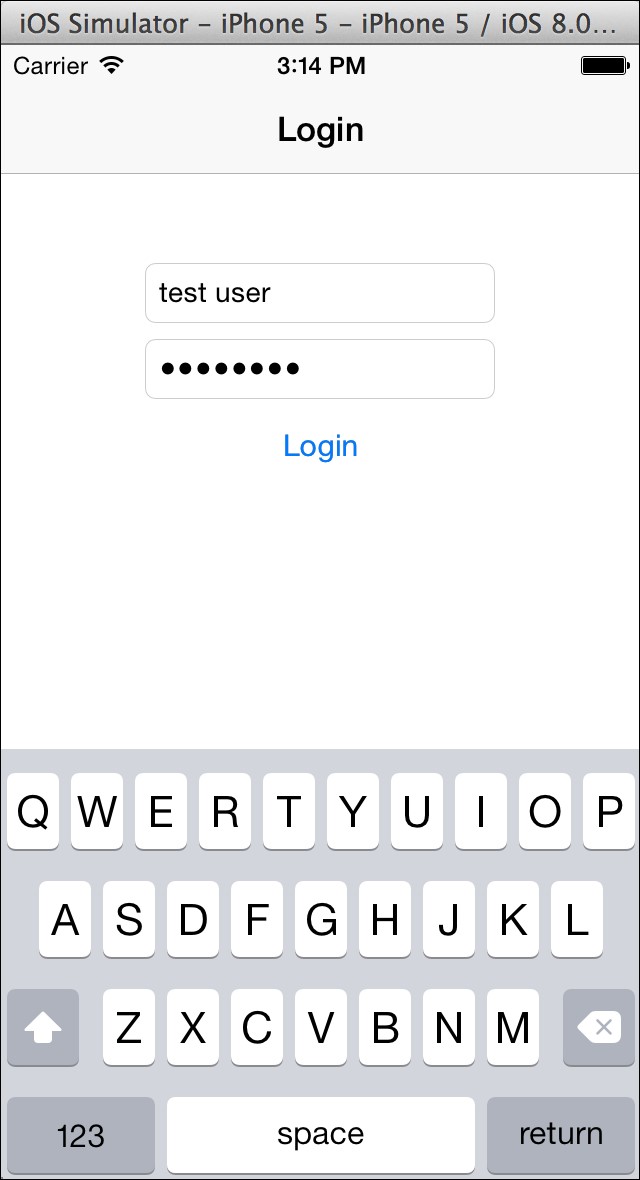
Creating a LoginController class
Return to the project in Xamarin Studio and perform the following steps:
- Double-click on the
MainStoryboard.storyboardfile to open it in the iOS designer. - Select your view controller and click on the Properties pane and select the Widget tab.
- Enter
LoginControllerinto the Class field. - Notice that the
LoginControllerclass is generated for you. You can create aControllersfolder and move the file in it if you wish.
The following screenshot shows you what the controller's settings will look like in Xamarin Studio after the changes have been made:
Now let's modify the layout of the controller by performing the following steps:
- Double-click on the
MainStoryboard.storyboardfile a second time to return to the iOS designer. - Tap on the navigation bar and edit the Title field to read
Login. - Drag two text fields onto the controller. Position and size them appropriately for the username and password entries. You might also want to remove the default text to make the fields blank.
- For the second field, check the Secure Text Entry checkbox. This will set the control to hide the characters for the password field.
- You might also want to fill out the Placeholder field for
UsernameandPasswordrespectively. - Drag a button onto the controller. Set the button's Title to
Login. - Drag an activity indicator onto the controller. Check the Animating and Hidden checkboxes.
- Next, create an outlet for each of the controls by filling out the Name field. Name the outlets
username,password,login, andindicatorrespectively. - Save the storyboard file and take a look at
LoginController.designer.cs.
You will see that Xamarin Studio has generated properties for each of the outlets:
Go ahead and compile the application to make sure that everything is okay. At this point, we also need to add a reference to the XamChat.Core project created in the previous chapter.
Next, let's set up our iOS application to register all of its view models and other services that will be used throughout the application. We will use the ServiceContainer class that we created in Chapter 4, XamChat – a Cross-platform App, to set up the dependencies throughout our application. Open AppDelegate.cs and add the following method:
public override bool FinishedLaunching(UIApplication application,NSDictionary launchOptions)
{
  //View Models
  ServiceContainer.Register<LoginViewModel>(() =>new LoginViewModel());
  ServiceContainer.Register<FriendViewModel>(() =>new FriendViewModel());
  ServiceContainer.Register<RegisterViewModel>(() =>new RegisterViewModel());
  ServiceContainer.Register<MessageViewModel>(() =>new MessageViewModel());
  //Models
  ServiceContainer.Register<ISettings>(() =>new FakeSettings());
  ServiceContainer.Register<IWebService>(() =>new FakeWebService());

  return true;
}
Down the road, we will replace the fake services with the real ones. Now, let's add the login functionality to LoginController.cs. First, add LoginViewModel to a member variable at the top of the class as follows:
readonly LoginViewModel loginViewModel = ServiceContainer.Resolve<LoginViewModel>();
This will pull a shared instance of LoginViewModel into a local variable in the controller. This is the pattern that we will use throughout the module in order to pass a shared view model from one class to another.
Next, override ViewDidLoad to hook up the view model's functionality with the views set up in outlets as follows:
public override void ViewDidLoad()
{
  base.ViewDidLoad();
  login.TouchUpInside += async(sender, e) =>
  {
    loginViewModel.Username = username.Text;
    loginViewModel.Password = password.Text;
    try
    {
      await loginViewModel.Login();
      //TODO: navigate to a new screen
    }
    catch (Exception exc)
    {
      new UIAlertView("Oops!", exc.Message, null, "Ok").Show();
    }
  };
}
We'll add the code to navigate to a new screen later in the chapter.
Next, let's hook up the IsBusyChanged event to actually perform an action as follows:
public override void ViewWillAppear(bool animated)
{
  base.ViewWillAppear(animated);
  loginViewModel.IsBusyChanged += OnIsBusyChanged;
}
public override void ViewWillDisappear(bool animated)
{
  base.ViewWillDisappear(animated);
  loginViewModel.IsBusyChanged -= OnIsBusyChanged;
}
void OnIsBusyChanged(object sender, EventArgs e)
{
  username.Enabled =
    password.Enabled =
    login.Enabled =
    indicator.Hidden = !loginViewModel.IsBusy;
}
Now you might be wondering, why we subscribe to the event in this manner. The problem is that the LoginViewModel class will last through your application's lifetime, while the LoginController class will not. If we subscribed to the event in ViewDidLoad, but didn't unsubscribe later, then our application will have a memory leak. We also avoided using a lambda expression for the event since it would otherwise be impossible to unsubscribe the event. Note that we don't have the same problem with the TouchUpInside event on the button, since it will live in memory as long as the controller does. This is a common problem with events in C#, which is why it is a good idea to use the preceding pattern on iOS.
If you run the application now, you should be able to enter a username and password, as shown in the following screenshot. When you press Login, you should see the indicator appear and all the controls disabled. Your application will correctly be calling the shared code, and should function correctly when we add a real web service.
Modifying the controller's layout
Now let's modify the layout of the controller by performing the following steps:
- Double-click on the
MainStoryboard.storyboardfile a second time to return to the iOS designer. - Tap on the navigation bar and edit the Title field to read
Login. - Drag two text fields onto the controller. Position and size them appropriately for the username and password entries. You might also want to remove the default text to make the fields blank.
- For the second field, check the Secure Text Entry checkbox. This will set the control to hide the characters for the password field.
- You might also want to fill out the Placeholder field for
UsernameandPasswordrespectively. - Drag a button onto the controller. Set the button's Title to
Login. - Drag an activity indicator onto the controller. Check the Animating and Hidden checkboxes.
- Next, create an outlet for each of the controls by filling out the Name field. Name the outlets
username,password,login, andindicatorrespectively. - Save the storyboard file and take a look at
LoginController.designer.cs.
You will see that Xamarin Studio has generated properties for each of the outlets:
Go ahead and compile the application to make sure that everything is okay. At this point, we also need to add a reference to the XamChat.Core project created in the previous chapter.
Next, let's set up our iOS application to register all of its view models and other services that will be used throughout the application. We will use the ServiceContainer class that we created in Chapter 4, XamChat – a Cross-platform App, to set up the dependencies throughout our application. Open AppDelegate.cs and add the following method:
public override bool FinishedLaunching(UIApplication application,NSDictionary launchOptions)
{
  //View Models
  ServiceContainer.Register<LoginViewModel>(() =>new LoginViewModel());
  ServiceContainer.Register<FriendViewModel>(() =>new FriendViewModel());
  ServiceContainer.Register<RegisterViewModel>(() =>new RegisterViewModel());
  ServiceContainer.Register<MessageViewModel>(() =>new MessageViewModel());
  //Models
  ServiceContainer.Register<ISettings>(() =>new FakeSettings());
  ServiceContainer.Register<IWebService>(() =>new FakeWebService());

  return true;
}
Down the road, we will replace the fake services with the real ones. Now, let's add the login functionality to LoginController.cs. First, add LoginViewModel to a member variable at the top of the class as follows:
readonly LoginViewModel loginViewModel = ServiceContainer.Resolve<LoginViewModel>();
This will pull a shared instance of LoginViewModel into a local variable in the controller. This is the pattern that we will use throughout the module in order to pass a shared view model from one class to another.
Next, override ViewDidLoad to hook up the view model's functionality with the views set up in outlets as follows:
public override void ViewDidLoad()
{
  base.ViewDidLoad();
  login.TouchUpInside += async(sender, e) =>
  {
    loginViewModel.Username = username.Text;
    loginViewModel.Password = password.Text;
    try
    {
      await loginViewModel.Login();
      //TODO: navigate to a new screen
    }
    catch (Exception exc)
    {
      new UIAlertView("Oops!", exc.Message, null, "Ok").Show();
    }
  };
}
We'll add the code to navigate to a new screen later in the chapter.
Next, let's hook up the IsBusyChanged event to actually perform an action as follows:
public override void ViewWillAppear(bool animated)
{
  base.ViewWillAppear(animated);
  loginViewModel.IsBusyChanged += OnIsBusyChanged;
}
public override void ViewWillDisappear(bool animated)
{
  base.ViewWillDisappear(animated);
  loginViewModel.IsBusyChanged -= OnIsBusyChanged;
}
void OnIsBusyChanged(object sender, EventArgs e)
{
  username.Enabled =
    password.Enabled =
    login.Enabled =
    indicator.Hidden = !loginViewModel.IsBusy;
}
Now you might be wondering, why we subscribe to the event in this manner. The problem is that the LoginViewModel class will last through your application's lifetime, while the LoginController class will not. If we subscribed to the event in ViewDidLoad, but didn't unsubscribe later, then our application will have a memory leak. We also avoided using a lambda expression for the event since it would otherwise be impossible to unsubscribe the event. Note that we don't have the same problem with the TouchUpInside event on the button, since it will live in memory as long as the controller does. This is a common problem with events in C#, which is why it is a good idea to use the preceding pattern on iOS.
If you run the application now, you should be able to enter a username and password, as shown in the following screenshot. When you press Login, you should see the indicator appear and all the controls disabled. Your application will correctly be calling the shared code, and should function correctly when we add a real web service.
Registering and subscribing view models and services
Next, let's set up our iOS application to register all of its view models and other services that will be used throughout the application. We will use the ServiceContainer class that we created in Chapter 4, XamChat – a Cross-platform App, to set up the dependencies throughout our application. Open AppDelegate.cs and add the following method:
public override bool FinishedLaunching(UIApplication application,NSDictionary launchOptions)
{
  //View Models
  ServiceContainer.Register<LoginViewModel>(() =>new LoginViewModel());
  ServiceContainer.Register<FriendViewModel>(() =>new FriendViewModel());
  ServiceContainer.Register<RegisterViewModel>(() =>new RegisterViewModel());
  ServiceContainer.Register<MessageViewModel>(() =>new MessageViewModel());
  //Models
  ServiceContainer.Register<ISettings>(() =>new FakeSettings());
  ServiceContainer.Register<IWebService>(() =>new FakeWebService());

  return true;
}
Down the road, we will replace the fake services with the real ones. Now, let's add the login functionality to LoginController.cs. First, add LoginViewModel to a member variable at the top of the class as follows:
readonly LoginViewModel loginViewModel = ServiceContainer.Resolve<LoginViewModel>();
This will pull a shared instance of LoginViewModel into a local variable in the controller. This is the pattern that we will use throughout the module in order to pass a shared view model from one class to another.
Next, override ViewDidLoad to hook up the view model's functionality with the views set up in outlets as follows:
public override void ViewDidLoad()
{
  base.ViewDidLoad();
  login.TouchUpInside += async(sender, e) =>
  {
    loginViewModel.Username = username.Text;
    loginViewModel.Password = password.Text;
    try
    {
      await loginViewModel.Login();
      //TODO: navigate to a new screen
    }
    catch (Exception exc)
    {
      new UIAlertView("Oops!", exc.Message, null, "Ok").Show();
    }
  };
}
We'll add the code to navigate to a new screen later in the chapter.
Next, let's hook up the IsBusyChanged event to actually perform an action as follows:
public override void ViewWillAppear(bool animated)
{
  base.ViewWillAppear(animated);
  loginViewModel.IsBusyChanged += OnIsBusyChanged;
}
public override void ViewWillDisappear(bool animated)
{
  base.ViewWillDisappear(animated);
  loginViewModel.IsBusyChanged -= OnIsBusyChanged;
}
void OnIsBusyChanged(object sender, EventArgs e)
{
  username.Enabled =
    password.Enabled =
    login.Enabled =
    indicator.Hidden = !loginViewModel.IsBusy;
}
Now you might be wondering, why we subscribe to the event in this manner. The problem is that the LoginViewModel class will last through your application's lifetime, while the LoginController class will not. If we subscribed to the event in ViewDidLoad, but didn't unsubscribe later, then our application will have a memory leak. We also avoided using a lambda expression for the event since it would otherwise be impossible to unsubscribe the event. Note that we don't have the same problem with the TouchUpInside event on the button, since it will live in memory as long as the controller does. This is a common problem with events in C#, which is why it is a good idea to use the preceding pattern on iOS.
If you run the application now, you should be able to enter a username and password, as shown in the following screenshot. When you press Login, you should see the indicator appear and all the controls disabled. Your application will correctly be calling the shared code, and should function correctly when we add a real web service.
A segue is a transition from one controller to another. In the same way, a storyboard file is a collection of controllers and their views attached together by segues. This, in turn, allows you to see the layouts of each controller and the general flow of your application at the same time.
There are just a few categories of segue, which are as follows:
- Push: This is used within a navigation controller. It pushes a new controller to the top of the navigation controller's stack. Push uses the standard animation technique for navigation controllers and is generally the most commonly used segue.
- Relationship: This is used to set a child controller of another controller. For example, the root controller of a navigation controller, container views, or split view controllers in an iPad application.
- Modal: On using this, a controller presented modally will appear on top of the parent controller. It will cover the entire screen until dismissed. There are several types of different transition animations available.
- Custom: This is a custom segue that includes an option for a custom class, which subclasses
UIStoryboardSegue. This gives you fine-grained control over the animation and how the next controller is presented.
Segues also use the following pattern while executing:
- The destination controller and its views are created.
- The segue object, a subclass of
UIStoryboardSegue, is created. This is normally only important for custom segues. - The
PrepareForSeguemethod is called on the source controller. This is a good place to run any custom code before a segue begins. - The segue's
Performmethod is called and the transition animation is started. This is where the bulk of the code resides for a custom segue.
In the Xamarin.iOS designer, you have the choice of either firing a segue automatically from a button or table view row, or just giving the segue an identifier. In the second case, you can start the segue yourself by calling the PerformSegue method on the source controller using its identifier.
Now, let's set up a new segue by setting up some aspects of our MainStoryboard.storyboard file by performing the following steps:
- Double-click on the
MainStoryboard.storyboardfile to open it in the iOS designer. - Add a new Table View Controller to the storyboard.
- Select your view controller and navigate to the Properties pane and the Widget tab.
- Enter
ConversationsControllerinto the Class field. - Scroll down under the View Controller section and enter Title of
Conversations. - Create a segue from
LoginControllertoConversationsControllerby clicking while holding Ctrl and dragging the blue line from one controller to the other. - Select the push segue from the popup that appears.
- Select the segue by clicking on it and give it an Identifier of
OnLogin. - Save the storyboard file.
Your storyboard will look something similar to what is shown in the following screenshot:
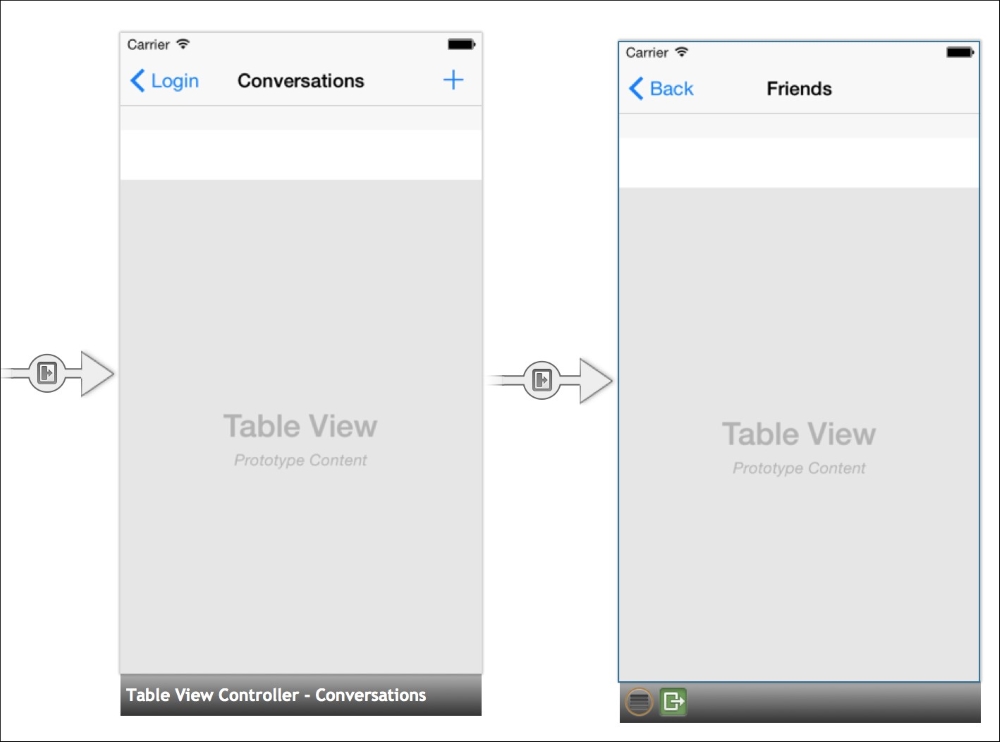
Open LoginController.cs, and modify the line of code that we marked as TODO earlier in this chapter as follows:
PerformSegue("OnLogin", this);Now if you build and run the application, you will navigate to the new controller after a successful log in. The segue will be performed, and you will see the built-in animation provided by the navigation controller.
Next, let's set up the table view on the second controller. We are using a powerful class on iOS called UITableView. It is used in many situations and is very similar to the concept of a list view on other platforms. The UITableView class is controlled by another class called UITableViewSource. It has methods that you need to override to set up how many rows should exist and how these rows should be displayed on the screen.
Before we jump in and start coding, let's review the most commonly used methods on UITableViewSource, which are as follows:
RowsInSection: This method allows you to define the number of rows in a section. All the table views have a number of sections and rows. By default, there is only one section; however, it is a requirement to return the number of rows in a section.NumberOfSections: This is the number of sections in the table view.GetCell: This method must return a cell for each row and should be implemented. It is up to the developer to set up how a cell should look like; you can also implement code to recycle the cells as you scroll. Recycling cells will yield better performance while scrolling.TitleForHeader: This method, if overridden, is the simplest way to return a string for the title. Each section in a table view has a standard header view, by default.RowSelected: This method will be called when the user selects a row.
There are additional methods that you can override, but these will get you by in most situations. You can also set up custom headers and footers if you need to develop a custom styled table view.
Now, let's open the ConversationsController.cs file, and create a nested class inside ConversationsController as follows:
class TableSource : UITableViewSource
{
  const string CellName = "ConversationCell";
  readonly MessageViewModel messageViewModel = ServiceContainer.Resolve<MessageViewModel>();

  public override int RowsInSection(UITableView tableView, int section)
  {
    return messageViewModel.Conversations == null ?0 : messageViewModel.Conversations.Length;
  }
  public override UITableViewCell GetCell(UITableView tableView, NSIndexPath indexPath)
  {
    var conversation = messageViewModel.Conversations[indexPath.Row];
    var cell = tableView.DequeueReusableCell(CellName);
    if (cell == null)
    {
      cell = new UITableViewCell(UITableViewCellStyle.Default, CellName);
      cell.Accessory = UITableViewCellAccessory.DisclosureIndicator;
    }
    cell.TextLabel.Text = conversation.Username;
    return cell;
  }
}
We implemented the two required methods to set up a table view: RowsInSection and GetCell. We returned the number of conversations found on the view model and set up our cell for each row. We also used UITableViewCellAccessory.DisclosureIndicator to add an indicator for the users to know that they can click on the row.
Notice our implementation of recycling cells. Calling DequeueReusableCell with a cell identifier will return a null cell the first time around. If null, you should create a new cell using the same cell identifier. Subsequent calls to DequeueReusableCell will return an existing cell, enabling you to reuse it. You can also define the TableView cells in the storyboard file, which is useful for custom cells. Our cell here is very simple, so it is easier to define it from the code. Recycling cells is important on mobile platforms to preserve memory and provide the user with a very fluid scrolling table.
Next, we need to set up the TableView source on TableView. Add some changes to our ConversationsController class as follows:
readonly MessageViewModel messageViewModel = ServiceContainer.Resolve<MessageViewModel>();

public override void ViewDidLoad()
{
  base.ViewDidLoad();
  TableView.Source = new TableSource();
}
public async override void ViewWillAppear(bool animated)
{
  base.ViewWillAppear(animated);
  try
  {
    await messageViewModel.GetConversations();
    TableView.ReloadData();
  }
  catch(Exception exc)
  {
    new UIAlertView("Oops!", exc.Message, null, "Ok").Show();
  }
}
So when the view appears, we will load our list of conversations. Upon completion of this task, we'll reload the table view so that it displays our list of conversations. If you run the application, you'll see a few conversations appear in the table view after logging in, as shown in the following screenshot. Down the road, everything will operate in the same manner when we load the conversations from a real web service.

The next fairly important screen is that of our friends list. When creating a new conversation, the app will load a list of friends to start a conversation with. We'll follow a very similar pattern to load our list of conversations.
To begin, we'll create UIBarButtonItem that navigates to a new controller named FriendsController by performing the following steps:
- Double-click on the
MainStoryboard.storyboardfile to open it in the iOS designer. - Add a new Table View Controller to the storyboard.
- Select your view controller and click on the Properties pane and make sure you have selected the Widget tab.
- Enter
FriendsControllerin the Class field. - Scroll down to the View Controller section, enter
Friendsin the Title field. - Drag a Navigation Item from the Toolbox pane onto the
ConversationsController. - Create a new Bar Button Item element and place it in the top-right corner of the new navigation bar.
- In the Properties pane of the bar button, set its Identifier to Add. This will use the built-in plus button, which is commonly used throughout iOS applications.
- Create a segue from Bar Button Item to the
FriendsControllerby holding Ctrl and dragging the blue line from the bar button to the next controller. - Select the push segue from the popup that appears.
- Save the storyboard file.
Your changes to the storyboard should look something similar to what is shown in the following screenshot:
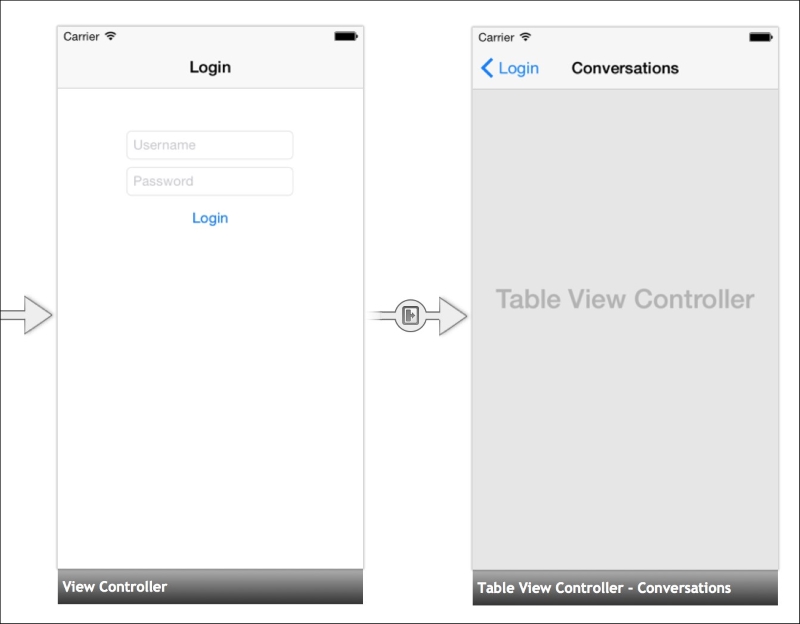
You will see a new FriendsController class that Xamarin Studio has generated for you. If you compile and run the application, you'll see the new bar button item we created. Clicking on it will take you to the new controller.
Now, let's implement UITableViewSource to display our friends list. Start with a new nested class inside FriendsController as follows:
class TableSource : UITableViewSource
{
  const string CellName = "FriendCell";
  readonly FriendViewModel friendViewModel = ServiceContainer.Resolve<FriendViewModel>();

  public override int RowsInSection(UITableView tableView, int section)
  {
    return friendViewModel.Friends == null ?0 : friendViewModel.Friends.Length;
  }
  public override UITableViewCell GetCell(UITableView tableView, NSIndexPath indexPath)
  {
    var friend = friendViewModel.Friends[indexPath.Row];
    var cell = tableView.DequeueReusableCell(CellName);
    if (cell == null)
    {
      cell = new UITableViewCell(UITableViewCellStyle.Default, CellName);
      cell.AccessoryView = UIButton.FromType(UIButtonType.ContactAdd);
      cell.AccessoryView.UserInteractionEnabled = false;
    }
    cell.TextLabel.Text = friend.Username;
    return cell;
  }
}
Just as before, we implemented table cell recycling and merely set the text on the label for each friend. We used cell.AccessoryView to indicate to the user that each cell is clickable and starts a new conversation. We disabled the user interaction on the button just to allow the row to be selected when the user clicks on the button. Otherwise, we'd have to implement a click event for the button.
Next, we'll need to modify FriendsController in the same way as we did for conversations, as follows:
readonly FriendViewModel friendViewModel = ServiceContainer.Resolve<FriendViewModel>();

public override void ViewDidLoad()
{
  base.ViewDidLoad();
  TableView.Source = new TableSource();
}
public async override void ViewWillAppear(bool animated)
{
  base.ViewWillAppear(animated);
  try
  {
    await friendViewModel.GetFriends();

    TableView.ReloadData();
  }
  catch(Exception exc)
  {
    new UIAlertView("Oops!", exc.Message, null, "Ok").Show();
  }
}
This will function exactly as the conversations list. The controller will load the friends list asynchronously and refresh the table view. If you compile and run the application, you'll be able to navigate to the screen and view the sample friend list we created in Chapter 4, XamChat – a Cross-platform App, as shown in the following screenshot:
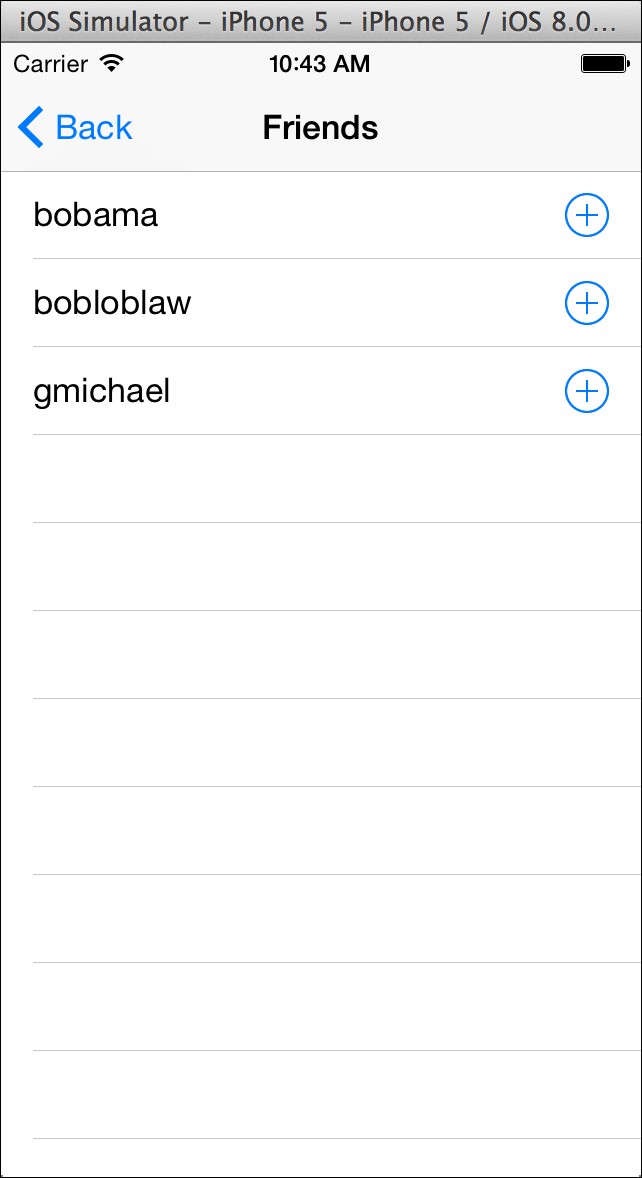
Now let's implement the screen to view a conversation or list of messages. We will try to model the screen after the built-in text message application on iOS. To do so, we will also cover the basics of how to create custom table view cells.
To start, we'll need a new MessagesController class to perform the following steps:
- Double-click on the
MainStoryboard.storyboardfile to open it in the iOS designer. - Add a new Table View Controller to the storyboard.
- Select your view controller and click on the Properties pane and make sure you have selected the Widget tab.
- Enter
MessagesControllerin the Class field. - Scroll down to the View Controller section, enter
Messagesin the Title field. - Create a segue from
ConversationsControllertoMessagesControllerby holding Ctrl and dragging the blue line from one controller to the other. - Select the push segue from the popup that appears. Enter the Identifier
OnConversationin the Properties pane. - Now, create two Table View Cells in the table view in
MessagesController. You can reuse the existing one created, by default. - Enter
MyMessageCellandTheirMessageCellrespectively into the Class field for each cell. - Set the Identifier to
MyCellandTheirCellrespectively on each cell. - Save the storyboard file.
Xamarin Studio will generate three files: MessagesController.cs, MyMessageCell.cs, and TheirMessageCell.cs. You might decide to keep things organized by creating a Views folder and moving the cells into it. Likewise, you can move the controller to a Controllers folder.
Now let's implement a base class for both these cells to inherit from:
public class BaseMessageCell : UITableViewCell
{
  public BaseMessageCell(IntPtr handle) : base(handle)
  {
  }
  public virtual void Update(Message message)
  {
  }
}
We will override the Update method later and take the appropriate action for each cell type. We need this class to make things easier while interacting with both the types of cells from UITableViewSource.
Now open MessagesController.cs and implement UITableViewSource inside a nested class, as follows:
class TableSource : UITableViewSource
{
  const string MyCellName = "MyCell";
  const string TheirCellName = "TheirCell";
  readonly MessageViewModel messageViewModel = ServiceContainer.Resolve<MessageViewModel>();
  readonly ISettings settings = ServiceContainer.Resolve<ISettings>();

  public override int RowsInSection(UITableView tableview, int section)
  {
    return messageViewModel.Messages == null ?0 : messageViewModel.Messages.Length;
  }
  public override UITableViewCell GetCell(UITableView tableView, NSIndexPath indexPath)
  {
    var message = messageViewModel.Messages [indexPath.Row];
    bool isMyMessage = message.UserId == settings.User.Id;
    var cell = tableView.DequeueReusableCell(isMyMessage ?MyCellName : TheirCellName) as BaseMessageCell;
    cell.Update(message);
    return cell;
  }
}
We added some logic to check whether a message is from a current user to decide on the appropriate table cell identifier. Since we have a base class for both cells, we can cast to BaseMessageCell and use its Update method.
Now let's make the changes to our MessagesController file to load our list of messages and display them:
readonly MessageViewModel messageViewModel = ServiceContainer.Resolve<MessageViewModel>();

public override void ViewDidLoad()
{
  base.ViewDidLoad();

  TableView.Source = new TableSource();
}
public async override void ViewWillAppear(bool animated)
{
  base.ViewWillAppear(animated);
  Title = messageViewModel.Conversation.Username;
  try
  {
    await messageViewModel.GetMessages();
    TableView.ReloadData();
  }
  catch (Exception exc)
  {
    new UIAlertView("Oops!", exc.Message, null, "Ok").Show();
  }
}
The only thing new here is where we set the Title property to the username of the conversation.
To complete our custom cells, we will need to make more changes in Xcode by performing the following steps:
- Double-click on the
MainStoryboard.storyboardfile to open it in the iOS designer. - Drag a new Label onto both the custom cells.
- Use some creativity to style both labels. I chose to make the text in
MyMessageCellblue andTheirMessageCellgreen. I set Alignment on the label to the right aligned inTheirMessageCell. - For the Name of each cell, enter
message. - Save the storyboard file and return.
Now add the following Update method to both MyMessageCell.cs and TheirMessageCell.cs:
public partial class MyMessageCell : BaseMessageCell
{
  public MyMessageCell (IntPtr handle) : base (handle)
  {
  }
  public override void Update(Message message)
  {
    this.message.Text = message.Text;
  }
}
It is a bit strange to have duplicated the code for each cell, but it is the simplest approach to take advantage of the outlets Xamarin Studio generated based on the storyboard file. You could also have chosen to use the same class for both cells (even with a different layout in Xcode); however, you then lose the ability to have different code in each cell.
If you run the application now, you will be able to view the messages list, as displayed in the following screenshot:
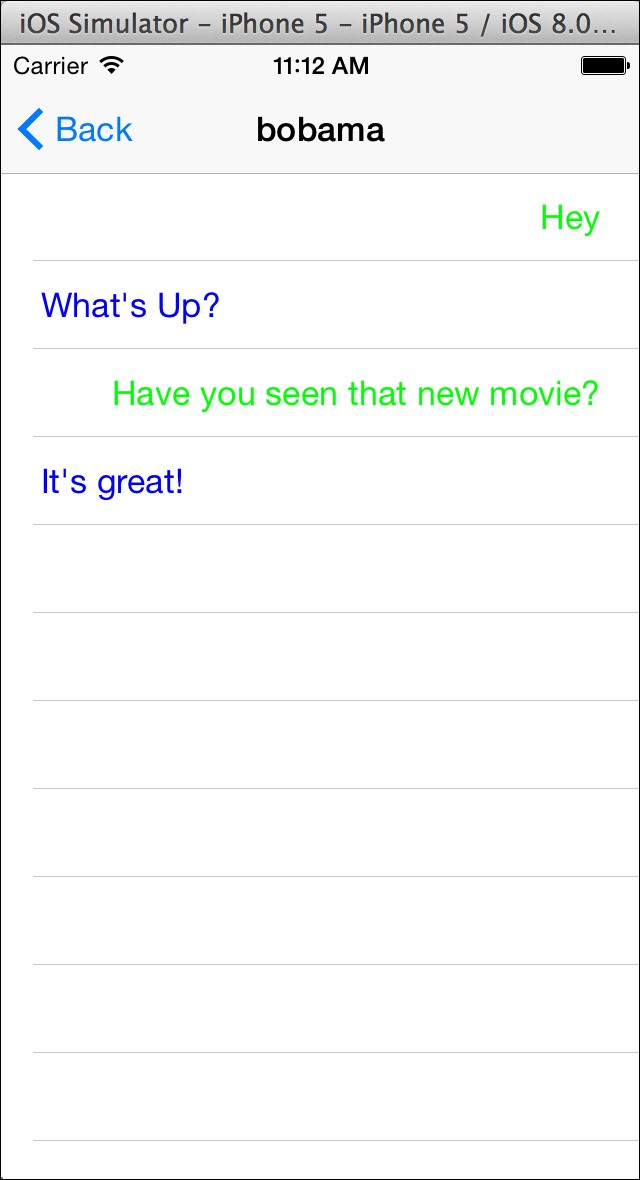
For the final piece of our application, we need to implement some custom functionality that Apple doesn't provide with their APIs. We need to add a text field with a button that appears to be attached to the bottom of the table view. Most of this will require writing code and wiring up a lot of events.
Let's begin by adding some new member variables to our MessagesController class as follows:
UIToolbar toolbar;
UITextField message;
UIBarButtonItem send;
NSObject willShowObserver, willHideObserver;
We will place the text field and bar buttons inside the toolbar, as shown in the following code. The NSObject fields will be an example of iOS's event system called notifications. We'll see how these are used shortly:
public override void ViewDidLoad()
{
  base.ViewDidLoad();

  //Text Field
  message = new UITextField(new RectangleF(0, 0, 240, 32))
  {
    BorderStyle = UITextBorderStyle.RoundedRect,ReturnKeyType = UIReturnKeyType.Send,ShouldReturn = _ =>
      {
        Send();
        return false;
      },
  };
  //Bar button item
  send = new UIBarButtonItem("Send", UIBarButtonItemStyle.Plain,(sender, e) => Send());

  //Toolbar
  toolbar = new UIToolbar(new RectangleF(0, TableView.Frame.Height - 44,TableView.Frame.Width, 44));
  toolbar.Items = new UIBarButtonItem[]
  {
    new UIBarButtonItem(message),
    send
  };
  NavigationController.View.AddSubview(toolbar);

  TableView.Source = new TableSource();
  TableView.TableFooterView = new UIView(new RectangleF(0, 0, TableView.Frame.Width, 44))
  {
    BackgroundColor = UIColor.Clear,
  };
}
Much of this work involves setting up a basic UI. It is not something we can do inside Xcode, because it's a custom UI in this case. We create a text field, bar button item, and toolbar from C# and add them to our navigation controller's view. This will display the toolbar at the top of the table view, no matter where it is scrolled to. Another trick we used was to add a footer view to the table view, which is of the same height as the toolbar. This will simplify some animations that we'll set up later.
Now we will need to modify ViewWillAppear as follows:
public async override void ViewWillAppear(bool animated)
{
  base.ViewWillAppear(animated);

  Title = messageViewModel.Conversation.Username;

  //Keyboard notifications
  willShowObserver = UIKeyboard.Notifications.ObserveWillShow((sender, e) => OnKeyboardNotification(e));
  willHideObserver = UIKeyboard.Notifications.ObserveWillHide((sender, e) => OnKeyboardNotification(e));

  //IsBusy
  messageViewModel.IsBusyChanged += OnIsBusyChanged;
  try
  {
    await messageViewModel.GetMessages();
    TableView.ReloadData();
    message.BecomeFirstResponder();
  }
  catch (Exception exc)
  {
    new UIAlertView("Oops!", exc.Message, null, "Ok").Show();
  }
}
Most of these changes are straightforward, but notice our use of iOS notifications. Xamarin has provided a C# friendly way to subscribe to notifications. There is a static nested class named Notifications inside various UIKit classes that provide notifications. Otherwise, you would have to use the NSNotificationCenter class, which is not as easy to use. To unsubscribe from these events, we merely need to dispose NSObject that is returned.
So let's add an override for ViewWillDisapper to clean up these events, as follows:
public override void ViewWillDisappear(bool animated)
{
  base.ViewWillDisappear(animated);
  //Unsubcribe notifications
  if (willShowObserver != null)
  {
    willShowObserver.Dispose();
    willShowObserver = null;
  }
  if (willHideObserver != null)
  {
    willHideObserver.Dispose();
    willHideObserver = null;
  }
  //IsBusy
  messageViewModel.IsBusyChanged -= OnIsBusyChanged;
}
Next, let's set up our methods for these events, as follows:
void OnIsBusyChanged (object sender, EventArgs e)
{
  message.Enabled = send.Enabled = !messageViewModel.IsBusy;
}
void ScrollToEnd()
{
  TableView.ContentOffset = new PointF(0, TableView.ContentSize.Height -TableView.Frame.Height);
}
void OnKeyboardNotification (UIKeyboardEventArgs e)
{
  //Check if the keyboard is becoming visible
  bool willShow = e.Notification.Name == UIKeyboard.WillShowNotification;

  //Start an animation, using values from the keyboard
  UIView.BeginAnimations("AnimateForKeyboard");
  UIView.SetAnimationDuration(e.AnimationDuration);
  UIView.SetAnimationCurve(e.AnimationCurve);

  //Calculate keyboard height, etc.
  if (willShow)
  {
    var keyboardFrame = e.FrameEnd;
    var frame = TableView.Frame;
    frame.Height -= keyboardFrame.Height;
    TableView.Frame = frame;
    frame = toolbar.Frame;
    frame.Y -= keyboardFrame.Height;
    toolbar.Frame = frame;
  }
  else
  {
    var keyboardFrame = e.FrameBegin;
    var frame = TableView.Frame;
    frame.Height += keyboardFrame.Height;
    TableView.Frame = frame;
    frame = toolbar.Frame;
    frame.Y += keyboardFrame.Height;
    toolbar.Frame = frame;
  }
  //Commit the animation
  UIView.CommitAnimations();
  ScrollToEnd();
}
That is quite a bit of code, but not too difficult. OnIsBusyChanged is used to disable some of our views while it is loading. ScrollToEnd is a quick method to scroll the table view to the end. We need this for the sake of usability. Some math is required because Apple does not provide a built-in method for this.
On the other hand, OnKeyboardNotification has quite a lot going on. We used the built-in animation system for iOS to set up an animation when the keyboard appears or hides. We use this to move views around for the onscreen keyboard. Using the animation system is quite easy; call UIView.BeginAnimations, modify some views, and then finish up with UIView.CommitAnimations. We also used a few more values from the keyboard to time our animation identically with the keyboard's animations.
Last but not least, we need to implement a function to send a new message as follows:
async void Send()
{
  //Just hide the keyboard if they didn't type anything
  if (string.IsNullOrEmpty(message.Text))
  {
    message.ResignFirstResponder();
    return;
  }
  //Set the text, send the message
  messageViewModel.Text = message.Text;
  await messageViewModel.SendMessage();

  //Clear the text field & view model
  message.Text = messageViewModel.Text = string.Empty;

  //Reload the table
  TableView.ReloadData();

  //Hide the keyboard
  message.ResignFirstResponder();

  //Scroll to end, to see the new message
  ScrollToEnd();
}
This code is also fairly straightforward. After sending the message, we merely need to reload the table, hide the keyboard, and then make sure we scroll to the bottom to see the new message, as shown in the following screenshot. Using the async keyword makes this easy.
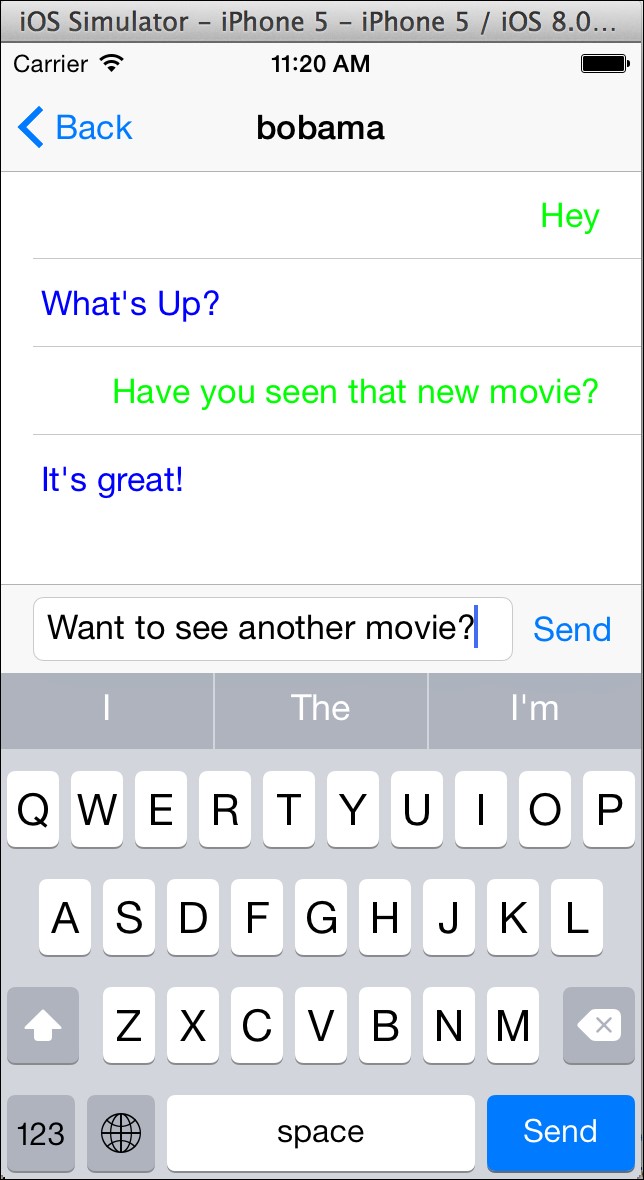
In this chapter, we covered the basic settings that Apple and Xamarin provide for developing iOS applications. This includes the Info.plist file and project options in Xamarin Studio. We covered UINavigationController, the basic building block for navigation in iOS applications, and implemented a login screen complete with username and password fields. Next, we covered iOS segues and the UITableView class. We implemented the friends list screen using UITableView, and the messages list screen, also using UITableView. Lastly, we added a custom UI functionality; a custom toolbar floating at the bottom of the messages list.
After completing this chapter, you will have a partially functional iOS version of XamChat. You will have a deeper understanding of the iOS platform and tools, and fairly good knowledge to apply to building your own iOS applications. Take it upon yourself to implement the remaining screens that we did not cover in the chapter. If you get lost, feel free to review the full sample application included with this module. In the next chapter, we will develop the Android UI for XamChat using the native Android APIs. A lot of our steps will be very similar to what we did on iOS, and we will be working mainly with the View layer of the MVVM design pattern.
In this chapter, we will begin developing the Android UI for our XamChat sample application. We will use the native Android APIs directly to create our application and call into our shared portable class library similar to what we did on iOS. Similarly, our Xamarin.Android application will be indistinguishable from an Android application written in Java.
To begin writing the Android version of XamChat, open the solution provided in the previous chapters, and create a new Android Application project. Name the project XamChat.Droid or some other appropriate name of your choice.
In this chapter, we will cover:
- The Android Manifest
- Writing a login screen for XamChat
- Android's ListView and BaseAdapter
- Adding a friends list
- Adding a list of messages
All Android applications have an XML file called the Android Manifest, which declares the basic information about the app such as the application version and name, and is named AndroidManifest.xml. This is very similar to the Info.plist file on iOS, but Android puts much more emphasis on its importance. A default project doesn't have a manifest, so let's begin by creating one by navigating to Project Options | Android Application and clicking on Add Android Manifest. Several new settings for your application will appear.
The most important settings, shown in the following screenshot, are as follows:
- Application name: This is the title of your application, which is displayed below the icon. It is not the same as the name selected on Google Play.
- Package name: This is similar to that on iOS; it's your app's bundle identifier or bundle ID. It is a unique name used to identify your application. The convention is to use the reverse domain style with your company name at the beginning; for example,
com.packt.xamchat. It must begin with a lower case letter and contain at least one "." character within. - Application icon: This is the icon displayed for your app on Android's home screen.
- Version number: This is a one-digit number that represents the version of your application. Raising this number indicates a newer version on Google Play.
- Version name: This is a user-friendly version string for your app that users will see in settings and on Google Play; for example, 1.0.0.
- Minimum Android version: This is the minimum version of Android that your application supports. In modern Android apps, you can generally target Android 4.0, but this is a decision based on your application's core audience.
- Target Android version: This is the version of the Android SDK your application is compiled against. Using higher numbers gives you access to new APIs, however, you might need to do some checks to call these APIs on newer devices.
- Install Location: This defines the different locations your Android application can be installed to: auto (user settings), external (SD card), or internal (device internal memory).
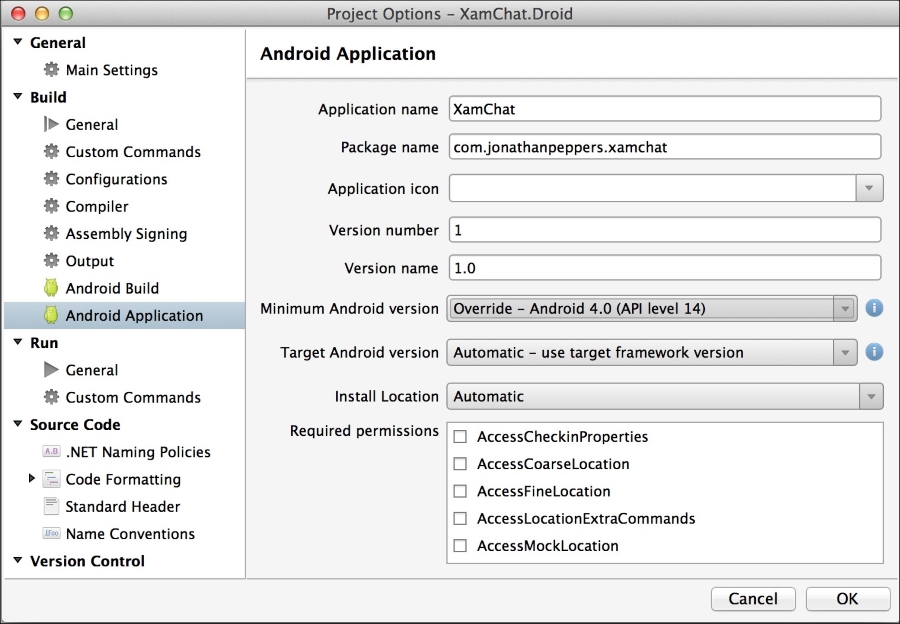
In addition to these settings, there is a set of checkboxes labeled Required permissions. These are displayed to users on Google Play prior to the application being installed. This is Android's way of enforcing a level of security, giving users a way to see what kinds of access an app will have to make changes to their device.
The following are some commonly used manifest permissions:
- Camera: This provides access to the device camera
- Internet: This provides access to make web requests over the Internet
- ReadContacts: This provides access to read the device's contacts library
- ReadExternalStorage: This provides access to read the SD card
- WriteContacts: This provides access to modify the device's contacts library
- WriteExternalStorage: This provides access to write to the SD card
In addition to these settings, a manual change to Android Manifest will be required many times. In this case, you can edit the manifest file as you would edit a standard XML file in Xamarin Studio. For a complete list of valid XML elements and attributes, visit http://developer.android.com/guide/topics/manifest/manifest-intro.html.
Now let's fill out the following settings for our application:
- Application name:
XamChat - Package name:
com.yourcompanyname.xamchat; make sure to name future apps beginning withcom.yourcompanyname - Version number: Just start with the number
1 - Version: This can be any string, but it is recommended to use something that resembles a version number
- Minimum Android version: Select Android 4.0.3 (API Level 15)
- Required permissions: Select Internet; we will be using it later
At this point, we need to reference our shared code from our portable class library we created in Chapter 4, XamChat – a Cross-platform App. Right-click on the References folder for the project, then click on Edit References..., and add a reference to the XamChat.Core project. You will now be able to access all the shared code that was written in Chapter 4, XamChat – a Cross-platform App.
Go to the Resources directory, and in the values folder, open Strings.xml; this is where all the text throughout your Android app should be stored. This is an Android convention that will make it very easy to add multiple languages to your application. Let's change our strings to the following:
<?xml version="1.0" encoding="utf-8"?>
<resources>
    <string name="ApplicationName">XamChat</string>
    <string name="ErrorTitle">Oops!</string>
    <string name="Loading">Loading</string>
</resources>
We'll use these values later in the chapter. Feel free to add new ones in cases where you display the text to the user. If you need to add more languages, it is very straightforward; you can see the Android documentation on this subject at http://developer.android.com/guide/topics/resources/localization.html.
Now let's implement our main application class; add a new Activity from the New File dialog. We won't be subclassing Activity in this file, but this template adds several Android using statements to the top of the file that imports the Android APIs to be used within your code. Create a new Application class where we can register everything in our ServiceContainer as follows:
[Application(Theme = "@android:style/Theme.Holo.Light")]
public class Application : Android.App.Application
{
  public Application(IntPtr javaReference, JniHandleOwnership transfer): base(javaReference, transfer)
  {
  }

  public override void OnCreate()
  {
    base.OnCreate();

    //ViewModels
    ServiceContainer.Register<LoginViewModel>(() => new LoginViewModel());
    ServiceContainer.Register<FriendViewModel>(() => new FriendViewModel());
    ServiceContainer.Register<MessageViewModel>(() => new MessageViewModel());
    ServiceContainer.Register<RegisterViewModel>(() => new RegisterViewModel());

    //Models
    ServiceContainer.Register<ISettings>(() => new FakeSettings());
    ServiceContainer.Register<IWebService>(() => new FakeWebService());
  }
}
We used the built-in Android theme, Theme.Holo.Light, just because it is a neat theme that matches the default style we used on iOS. Note the strange, empty constructor we have to create for this class to function. This is a current requirement of a custom Application class in Xamarin. You can just recognize this as boilerplate code, and you will need to add this in this case.
Now let's implement a simple base class for all the activities throughout our app. Create an Activities folder in the XamChat.Droid project and a new file named BaseActivity.cs with the following content:
[Activity]
public class BaseActivity<TViewModel> : Activitywhere TViewModel : BaseViewModel
{
  protected readonly TViewModel viewModel;
  protected ProgressDialog progress;

  public BaseActivity()
  {
    viewModel = ServiceContainer.Resolve(typeof(TViewModel)) asTViewModel;
  }
  protected override void OnCreate(Bundle bundle)
  {
    base.OnCreate(bundle);
    progress = new ProgressDialog(this);
    progress.SetCancelable(false);progress.SetTitle(Resource.String.Loading);}
  protected override void OnResume()
  {
    base.OnResume();
    viewModel.IsBusyChanged += OnIsBusyChanged;
  }
  protected override void OnPause()
  {
    base.OnPause();
    viewModel.IsBusyChanged -= OnIsBusyChanged;
  }
  void OnIsBusyChanged (object sender, EventArgs e)
  {
    if (viewModel.IsBusy)
      progress.Show();
    else
      progress.Hide();
  }
}
We did several things here to simplify the development of our other activities. First, we made this class generic, and made a protected variable named viewModel to store a ViewModel of a specific type. Note that we did not use generics on controllers in iOS due to platform limitations (see more on Xamarin's documentation website at http://docs.xamarin.com/guides/ios/advanced_topics/limitations/). We also implemented IsBusyChanged, and displayed a simple ProgressDialog function with the Loading string from the Strings.xml file to indicate the network activity.
Let's add one more method to display errors to the user, as follows:
protected void DisplayError(Exception exc)
{
  string error = exc.Message;
  new AlertDialog.Builder(this)
  .SetTitle(Resource.String.ErrorTitle)
  .SetMessage(error)
  .SetPositiveButton(Android.Resource.String.Ok,(IDialogInterfaceOnClickListener)null)
  .Show();
}
This method will display a pop-up dialog indicating that something went wrong. Notice that we also used ErrorTitle and the built-in Android resource for an Ok string.
This will complete the core setup for our Android application. From here, we can move on to implement the UI for the screens throughout our app.
Before creating Android views, it is important to know the different layouts or view group types available in Android. iOS does not have an equivalent for some of these because iOS has a very small variation of screen sizes on its devices. Since Android has virtually infinite screen sizes and densities, the Android SDK has a lot of built-in support for auto-sizing and layout for views.
The following are the common types of layouts:
ViewGroup: This is the base class for a view that contains a collection of child views. You normally won't use this class directly.LinearLayout: This is a layout that positions its child views in rows or columns (but not both). You can also set weights on each child to have them span different percentages of the available space.RelativeLayout: This is a layout that gives much more flexibility on the position of its children. You can position child views relative to each other so that they are above, below, to the left, or to the right of one another.FrameLayout: This layout positions its child views directly on top of one another in the z order on the screen. This layout is best used for cases where you have a large child view that needs other views on top of it and perhaps docked to one side.ListView: This displays views vertically in a list with the help of an adapter class that determines the number of child views. It also has support for its children to be selected.GridView: This displays views in rows and columns within a grid. It also requires the use of an adapter class to supply the number of children.
Before we begin writing the login screen, delete the Main.axml and MainActivity.cs files that were created from the Android project template, as they are not useful for this application. Next, create an Android layout file named Login.axml in the layout folder of the Resources directory in your project.
Now we can start adding functionalities to our Android layout as follows:
- Double-click on the
Login.axmlfile to open the Android designer. - Drag two Plain Text views onto the layout found in the Text Fields section.
- In the Id field, enter
@+id/usernameand@+id/passwordrespectively. This is a step that you will take for any control you want to work with from C# code. - For the password field, set its Input Type property to
textPassword. - Drag a Button onto the layout and set its Text property to
Login. - Set the button's Id property to
@+id/login. We will be using this control from code.
Your layout will look something like what is shown in the following screenshot when complete:
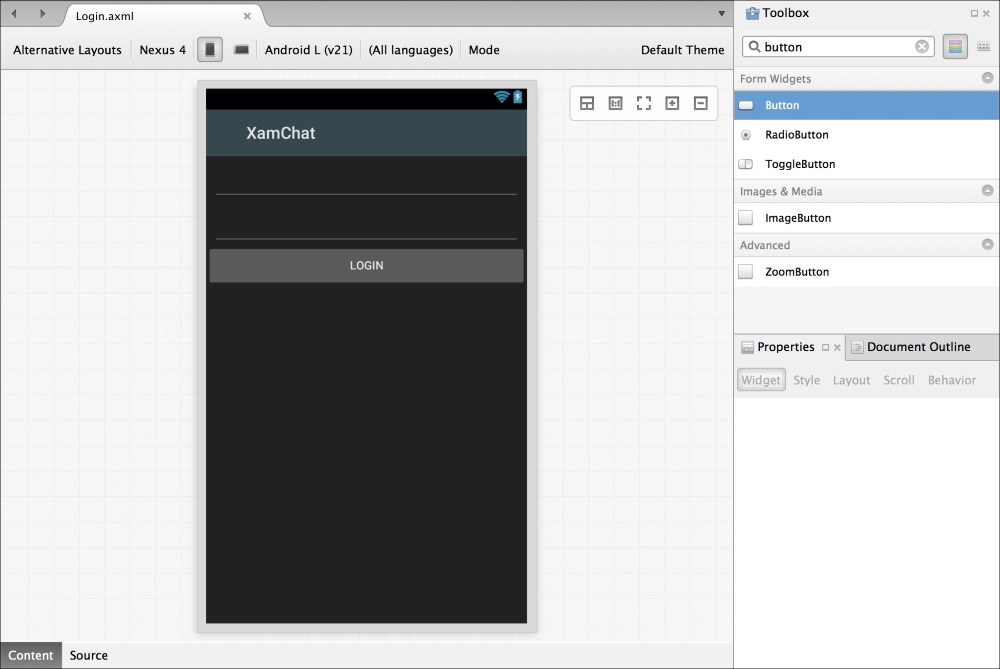
Now create a new Android Activity file named LoginActivity.cs in the Activites folder we created earlier. We will use this as the main activity that starts when the application runs. Let's implement the login functionality as follows:
[Activity(Label = "@string/ApplicationName", MainLauncher = true)]
public class LoginActivity : BaseActivity<LoginViewModel>
{
  EditText username, password;
  Button login;

  protected override void OnCreate(Bundle bundle)
  {
    base.OnCreate(bundle);
    SetContentView(Resource.Layout.Login);
    username = FindViewById<EditText>(Resource.Id.username);
    password = FindViewById<EditText>(Resource.Id.password);
    login = FindViewById<Button>(Resource.Id.login);
    login.Click += OnLogin;
  }
  protected override void OnResume()
  {
    base.OnResume();
    username.Text = password.Text = string.Empty;
  }
  async void OnLogin (object sender, EventArgs e)
  {
    viewModel.Username = username.Text;
    viewModel.Password = password.Text;
    try
    {
      await viewModel.Login();
        //TODO: navigate to a new activity
    }
    catch (Exception exc)
    {
      DisplayError(exc);
    }
  }
}
Notice that we set MainLauncher to true to make this activity the first activity for the application. In some apps, a splash screen is used as the first activity, so keep this in mind if you need to add a splash screen. We also took advantage of the ApplicationName value and the BaseActivity class we set up earlier in the chapter. We also overrode OnResume to clear out the two EditText controls so that the values are cleared out if you return to the screen.
Now if you launch the application, you will be greeted by the login screen we just implemented, as shown in the following screenshot:
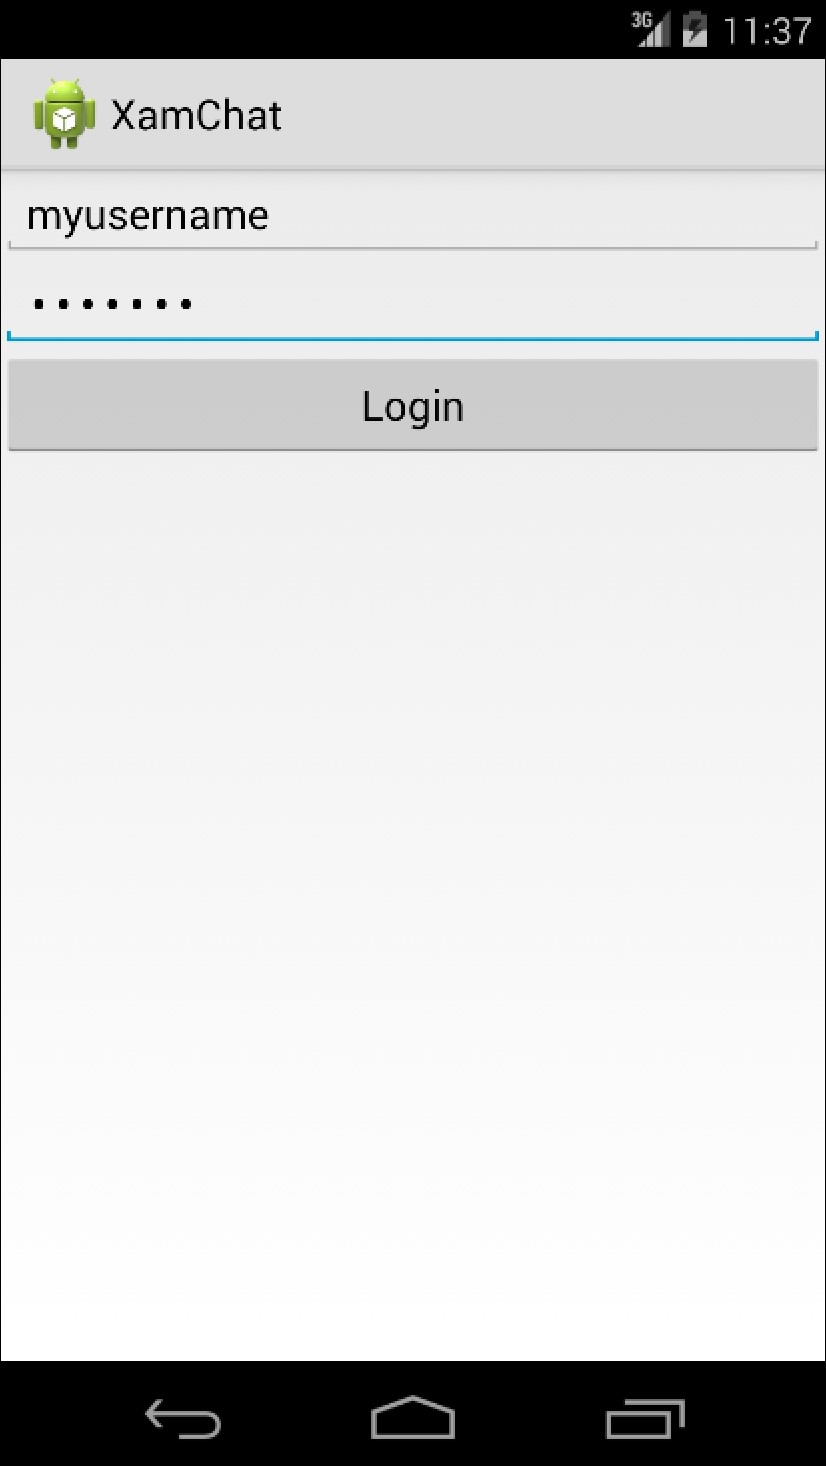
Layouts and ViewGroups in Andorid
The following are the common types of layouts:
ViewGroup: This is the base class for a view that contains a collection of child views. You normally won't use this class directly.LinearLayout: This is a layout that positions its child views in rows or columns (but not both). You can also set weights on each child to have them span different percentages of the available space.RelativeLayout: This is a layout that gives much more flexibility on the position of its children. You can position child views relative to each other so that they are above, below, to the left, or to the right of one another.FrameLayout: This layout positions its child views directly on top of one another in the z order on the screen. This layout is best used for cases where you have a large child view that needs other views on top of it and perhaps docked to one side.ListView: This displays views vertically in a list with the help of an adapter class that determines the number of child views. It also has support for its children to be selected.GridView: This displays views in rows and columns within a grid. It also requires the use of an adapter class to supply the number of children.
Before we begin writing the login screen, delete the Main.axml and MainActivity.cs files that were created from the Android project template, as they are not useful for this application. Next, create an Android layout file named Login.axml in the layout folder of the Resources directory in your project.
Now we can start adding functionalities to our Android layout as follows:
- Double-click on the
Login.axmlfile to open the Android designer. - Drag two Plain Text views onto the layout found in the Text Fields section.
- In the Id field, enter
@+id/usernameand@+id/passwordrespectively. This is a step that you will take for any control you want to work with from C# code. - For the password field, set its Input Type property to
textPassword. - Drag a Button onto the layout and set its Text property to
Login. - Set the button's Id property to
@+id/login. We will be using this control from code.
Your layout will look something like what is shown in the following screenshot when complete:
Now create a new Android Activity file named LoginActivity.cs in the Activites folder we created earlier. We will use this as the main activity that starts when the application runs. Let's implement the login functionality as follows:
[Activity(Label = "@string/ApplicationName", MainLauncher = true)]
public class LoginActivity : BaseActivity<LoginViewModel>
{
  EditText username, password;
  Button login;

  protected override void OnCreate(Bundle bundle)
  {
    base.OnCreate(bundle);
    SetContentView(Resource.Layout.Login);
    username = FindViewById<EditText>(Resource.Id.username);
    password = FindViewById<EditText>(Resource.Id.password);
    login = FindViewById<Button>(Resource.Id.login);
    login.Click += OnLogin;
  }
  protected override void OnResume()
  {
    base.OnResume();
    username.Text = password.Text = string.Empty;
  }
  async void OnLogin (object sender, EventArgs e)
  {
    viewModel.Username = username.Text;
    viewModel.Password = password.Text;
    try
    {
      await viewModel.Login();
        //TODO: navigate to a new activity
    }
    catch (Exception exc)
    {
      DisplayError(exc);
    }
  }
}
Notice that we set MainLauncher to true to make this activity the first activity for the application. In some apps, a splash screen is used as the first activity, so keep this in mind if you need to add a splash screen. We also took advantage of the ApplicationName value and the BaseActivity class we set up earlier in the chapter. We also overrode OnResume to clear out the two EditText controls so that the values are cleared out if you return to the screen.
Now if you launch the application, you will be greeted by the login screen we just implemented, as shown in the following screenshot:
Implementing the login functionality
Now create a new Android Activity file named LoginActivity.cs in the Activites folder we created earlier. We will use this as the main activity that starts when the application runs. Let's implement the login functionality as follows:
[Activity(Label = "@string/ApplicationName", MainLauncher = true)]
public class LoginActivity : BaseActivity<LoginViewModel>
{
  EditText username, password;
  Button login;

  protected override void OnCreate(Bundle bundle)
  {
    base.OnCreate(bundle);
    SetContentView(Resource.Layout.Login);
    username = FindViewById<EditText>(Resource.Id.username);
    password = FindViewById<EditText>(Resource.Id.password);
    login = FindViewById<Button>(Resource.Id.login);
    login.Click += OnLogin;
  }
  protected override void OnResume()
  {
    base.OnResume();
    username.Text = password.Text = string.Empty;
  }
  async void OnLogin (object sender, EventArgs e)
  {
    viewModel.Username = username.Text;
    viewModel.Password = password.Text;
    try
    {
      await viewModel.Login();
        //TODO: navigate to a new activity
    }
    catch (Exception exc)
    {
      DisplayError(exc);
    }
  }
}
Notice that we set MainLauncher to true to make this activity the first activity for the application. In some apps, a splash screen is used as the first activity, so keep this in mind if you need to add a splash screen. We also took advantage of the ApplicationName value and the BaseActivity class we set up earlier in the chapter. We also overrode OnResume to clear out the two EditText controls so that the values are cleared out if you return to the screen.
Now if you launch the application, you will be greeted by the login screen we just implemented, as shown in the following screenshot:
Now let's implement a conversations list on Android. The Android equivalent of the UITableView and UITableViewSource iOS classes are ListView and BaseAdapter. There are parallel concepts for these Android classes, such as implementing abstract methods and recycling cells during scrolling. There are a few different types of adapters used in Android such as ArrayAdapter or CursorAdaptor, although BaseAdapter is generally best suited for simple lists.
Let's implement our conversations screen. Let's begin by making a new Android Activity in your Activities folder named ConversationsActivity.cs. Let's start with only a couple of changes to the class definition as follows:
[Activity(Label = "Conversations")]
public class ConversationsActivity :BaseActivity<MessageViewModel>
{
  //Other code here later
}
Perform the following steps to implement a couple of Android layouts:
- Create a new Android layout in the
layoutfolder of theResourcesdirectory namedConversations.axml. - Drag a ListView control from Toolbox onto the layout, and set its Id to
@+id/conversationsList. - Create a second Android layout in the
layoutfolder in theResourcesdirectory namedConversationListItem.axml. - Drag a Text (Medium) and a Text (Small) control onto the layout from the Toolbox pane.
- Set their IDs to
@+id/conversationUsernameand@+id/conversationLastMessage. - Finally, let's set each of their Margins to
3dpin the Layout tab of the Properties box.
This will set up all the layout files we'll need to use throughout the conversations screen. Your ConversationListItem.axml layout will look something like what's shown in the following screenshot:
Now we can implement BaseAdapter as a nested class inside ConversationsActivity as follows:
class Adapter : BaseAdapter<Conversation>
{
  readonly MessageViewModel messageViewModel = ServiceContainer.Resolve<MessageViewModel>();
  readonly LayoutInflater inflater;

  public Adapter(Context context)
  {
    inflater = (LayoutInflater)context.GetSystemService (Context.LayoutInflaterService);
  }
  public override long GetItemId(int position)
  {
    //This is an abstract method, just a simple implementation
    return position;
  }
  public override View GetView(int position, View convertView, ViewGroup parent)
  {
    if (convertView == null)
    {
      convertView = inflater.Inflate (Resource.Layout.ConversationListItem, null);
    }
    var conversation = this [position];
    var username = convertView.FindViewById<TextView>(Resource.Id.conversationUsername);
    var lastMessage = convertView.FindViewById<TextView>(Resource.Id.conversationLastMessage);
    username.Text = conversation.Username;
    lastMessage.Text = conversation.LastMessage;
    return convertView;
  }
  public override int Count
  {
    get { return messageViewModel.Conversations == null ? 0: messageViewModel.Conversations.Length; }
  }
  public override Conversation this[int index]
  {
    get { return messageViewModel.Conversations [index]; }
  }
}
The following is a review of what is going on inside the adapter:
- We subclassed
BaseAdapter<Conversation>. - We passed in
Context(our activity) so that we can pull outLayoutInflater. This class enables you to load XML layout resources and inflate them into a view object. - We implemented
GetItemId. This is a general method used to identify rows, but we just returned the position for now. - We set up
GetView, which recycles theconvertViewvariable by only creating a new view if it is null. We also pulled out the text views in our layout to set their text. - We overrode
Countto return the number of conversations. - We implemented an indexer to return a
Conversationobject for a position.
Overall, this should be fairly similar to what we did on iOS.
Now let's set up the adapter in our activity by adding the following to the body of ConversationsActivity:
ListView listView;
Adapter adapter;

protected override void OnCreate(Bundle bundle)
{
  base.OnCreate(bundle);
  SetContentView(Resource.Layout.Conversations);
  listView = FindViewById<ListView>(Resource.Id.conversationsList);
  listView.Adapter = adapter = new Adapter(this);
}
protected async override void OnResume()
{
  base.OnResume();
  try
  {
    await viewModel.GetConversations();
    adapter.NotifyDataSetInvalidated();
  }
  catch (Exception exc)
  {
    DisplayError(exc);
  }
}
This code will set up the adapter and reload our list of conversations when the activity appears on the screen. Note that we called NotifyDataSetInvalidated here so that ListView reloads its rows after the number of conversations has been updated. This is parallel to what we did on iOS by calling the UITableView's ReloadData method.
Last but not least, we need to modify the OnLogin method we set up earlier in LoginActivity to start our new activity as follows:
StartActivity(typeof(ConversationsActivity));
Now if we compile and run our application, we can navigate to a conversations list after logging in, as shown in the following screenshot:
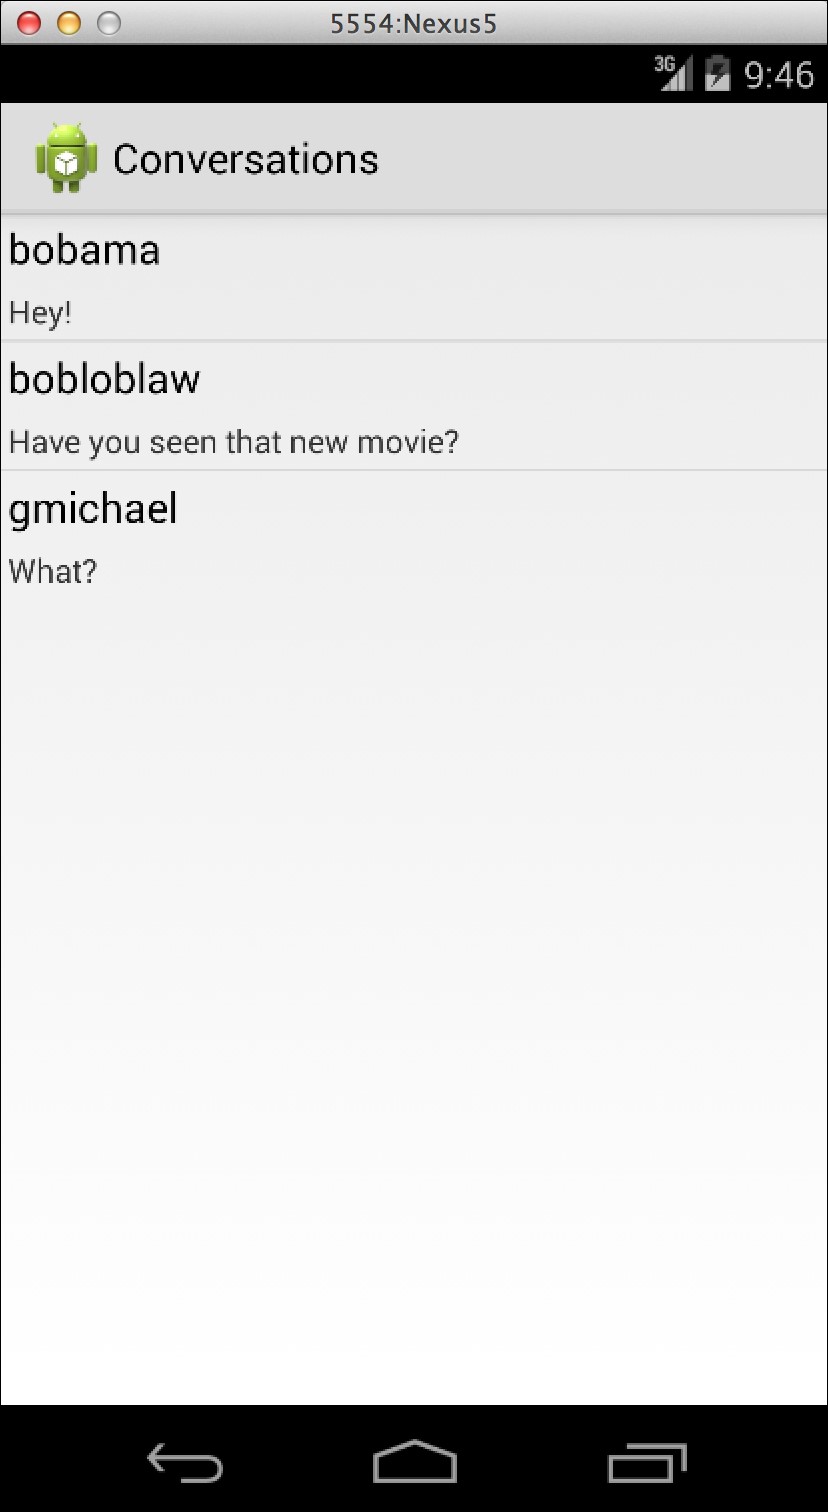
Implementing the conversations screen
Let's implement our conversations screen. Let's begin by making a new Android Activity in your Activities folder named ConversationsActivity.cs. Let's start with only a couple of changes to the class definition as follows:
[Activity(Label = "Conversations")]
public class ConversationsActivity :BaseActivity<MessageViewModel>
{
  //Other code here later
}
Perform the following steps to implement a couple of Android layouts:
- Create a new Android layout in the
layoutfolder of theResourcesdirectory namedConversations.axml. - Drag a ListView control from Toolbox onto the layout, and set its Id to
@+id/conversationsList. - Create a second Android layout in the
layoutfolder in theResourcesdirectory namedConversationListItem.axml. - Drag a Text (Medium) and a Text (Small) control onto the layout from the Toolbox pane.
- Set their IDs to
@+id/conversationUsernameand@+id/conversationLastMessage. - Finally, let's set each of their Margins to
3dpin the Layout tab of the Properties box.
This will set up all the layout files we'll need to use throughout the conversations screen. Your ConversationListItem.axml layout will look something like what's shown in the following screenshot:
Now we can implement BaseAdapter as a nested class inside ConversationsActivity as follows:
class Adapter : BaseAdapter<Conversation>
{
  readonly MessageViewModel messageViewModel = ServiceContainer.Resolve<MessageViewModel>();
  readonly LayoutInflater inflater;

  public Adapter(Context context)
  {
    inflater = (LayoutInflater)context.GetSystemService (Context.LayoutInflaterService);
  }
  public override long GetItemId(int position)
  {
    //This is an abstract method, just a simple implementation
    return position;
  }
  public override View GetView(int position, View convertView, ViewGroup parent)
  {
    if (convertView == null)
    {
      convertView = inflater.Inflate (Resource.Layout.ConversationListItem, null);
    }
    var conversation = this [position];
    var username = convertView.FindViewById<TextView>(Resource.Id.conversationUsername);
    var lastMessage = convertView.FindViewById<TextView>(Resource.Id.conversationLastMessage);
    username.Text = conversation.Username;
    lastMessage.Text = conversation.LastMessage;
    return convertView;
  }
  public override int Count
  {
    get { return messageViewModel.Conversations == null ? 0: messageViewModel.Conversations.Length; }
  }
  public override Conversation this[int index]
  {
    get { return messageViewModel.Conversations [index]; }
  }
}
The following is a review of what is going on inside the adapter:
- We subclassed
BaseAdapter<Conversation>. - We passed in
Context(our activity) so that we can pull outLayoutInflater. This class enables you to load XML layout resources and inflate them into a view object. - We implemented
GetItemId. This is a general method used to identify rows, but we just returned the position for now. - We set up
GetView, which recycles theconvertViewvariable by only creating a new view if it is null. We also pulled out the text views in our layout to set their text. - We overrode
Countto return the number of conversations. - We implemented an indexer to return a
Conversationobject for a position.
Overall, this should be fairly similar to what we did on iOS.
Now let's set up the adapter in our activity by adding the following to the body of ConversationsActivity:
ListView listView;
Adapter adapter;

protected override void OnCreate(Bundle bundle)
{
  base.OnCreate(bundle);
  SetContentView(Resource.Layout.Conversations);
  listView = FindViewById<ListView>(Resource.Id.conversationsList);
  listView.Adapter = adapter = new Adapter(this);
}
protected async override void OnResume()
{
  base.OnResume();
  try
  {
    await viewModel.GetConversations();
    adapter.NotifyDataSetInvalidated();
  }
  catch (Exception exc)
  {
    DisplayError(exc);
  }
}
This code will set up the adapter and reload our list of conversations when the activity appears on the screen. Note that we called NotifyDataSetInvalidated here so that ListView reloads its rows after the number of conversations has been updated. This is parallel to what we did on iOS by calling the UITableView's ReloadData method.
Last but not least, we need to modify the OnLogin method we set up earlier in LoginActivity to start our new activity as follows:
StartActivity(typeof(ConversationsActivity));
Now if we compile and run our application, we can navigate to a conversations list after logging in, as shown in the following screenshot:
Setting up the adapter
Now let's set up the adapter in our activity by adding the following to the body of ConversationsActivity:
ListView listView;
Adapter adapter;

protected override void OnCreate(Bundle bundle)
{
  base.OnCreate(bundle);
  SetContentView(Resource.Layout.Conversations);
  listView = FindViewById<ListView>(Resource.Id.conversationsList);
  listView.Adapter = adapter = new Adapter(this);
}
protected async override void OnResume()
{
  base.OnResume();
  try
  {
    await viewModel.GetConversations();
    adapter.NotifyDataSetInvalidated();
  }
  catch (Exception exc)
  {
    DisplayError(exc);
  }
}
This code will set up the adapter and reload our list of conversations when the activity appears on the screen. Note that we called NotifyDataSetInvalidated here so that ListView reloads its rows after the number of conversations has been updated. This is parallel to what we did on iOS by calling the UITableView's ReloadData method.
Last but not least, we need to modify the OnLogin method we set up earlier in LoginActivity to start our new activity as follows:
StartActivity(typeof(ConversationsActivity));
Now if we compile and run our application, we can navigate to a conversations list after logging in, as shown in the following screenshot:
Before we start implementing the friends list screen, we must first add a menu item to ActionBar in our application. Let's begin by creating a new menu folder within the Resources folder of our project. Next, create a new Android layout file named ConversationsMenu.axml. Remove the default layout created by XML, and replace it with the following:
<?xml version="1.0" encoding="utf-8"?>
<menu xmlns:android="http://schemas.android.com/apk/res/android">
  <item android:id="@+id/addFriendMenu"android:icon="@android:drawable/ic_menu_add"android:showAsAction="ifRoom"/>
</menu>
We set up a root menu with one menu item inside it.
The following is a breakdown of what we set for the item in XML:
android:id: We will use this later in C# to reference the menu item withResource.Id.addFriendMenu.android:icon: This is an image resource used to display the menu item. We used a built-in Android one for a generic plus icon.android:showAsAction: This will make the menu item visible if there is room for the item. If for some reason the device's screen is too narrow, an overflow menu would be displayed for the menu item.
Now we can make some changes in ConversationsActivity.cs to display the menu item as follows:
public override bool OnCreateOptionsMenu(IMenu menu)
{
  MenuInflater.Inflate(Resource.Menu.ConversationsMenu, menu);
  return base.OnCreateOptionsMenu(menu);
}
This code will take our layout and apply it to the menu at the top in our activity's action bar. Next, we can add some code to be run when the menu item is selected as follows:
public override bool OnOptionsItemSelected(IMenuItem item)
{
  if (item.ItemId == Resource.Id.addFriendMenu)
  {
    //TODO: launch the next activity
  }
  return base.OnOptionsItemSelected(item);
}
Now let's implement the next activity. Let's begin by making a copy of Conversations.axml found in the layout folder in the Resources directory and rename it Friends.axml. The only change we'll make in this file will be to rename the ListView's ID to @+id/friendsList.
Next, perform the following steps to create a layout that can be used for the list items in ListView:
- Make a new Android layout called
FriendListItem.axml. - Open the layout and switch to the Source tab found at the bottom of the screen.
- Change the root
LinearLayoutXML element to aRelativeLayoutelement. - Switch back to the Content tab found at the bottom of the screen.
- Drag a Text (Large) control from the Toolbox pane onto the layout and set its Id to
@+id/friendName. - Drag an ImageView control from the Toolbox pane onto the layout; you can either let its Id be its default value or blank it out.
- Change the image view's image to
@android:drawable/ic_menu_add. This is the same plus icon we used earlier in the chapter. You can select it from the Resources dialog under the Framework Resources tab. - Set the Width and Height of both the controls to
wrap_content. This is found under the Layout tab under the ViewGroup section. - Next, check the value for Align Parent Right on just the image view.
- Finally, set the Margins of both the controls to
3dpin the Layout tab of the Properties box.
Using the Xamarin designer can be very productive, but some developers prefer a higher level of control. You might consider writing the XML code yourself as an alternative, which is fairly straightforward, as shown in the following code:
<?xml version="1.0" encoding="utf-8"?>
<RelativeLayout xmlns:android="http://schemas.android.com/apk/res/android"
android:layout_width="fill_parent"
android:layout_height="fill_parent">
  <TextView android:text="Large Text"
  android:textAppearance="?android:attr/textAppearanceLarge"
  android:layout_width="wrap_content"
  android:layout_height="wrap_content"
  android:id="@+id/friendName"
  android:layout_margin="3dp" />
  <ImageView
  android:src="@android:drawable/ic_menu_add"
  android:layout_alignParentRight="true"
  android:layout_width="wrap_content"
  android:layout_height="wrap_content"
  android:layout_margin="3dp" />
</RelativeLayout>
Since we now have all the layouts we need for the new screen, let's create an Android Activity in the Activities folder named FriendsActivity.cs. Let's create the basic definition of the activity as follows, just like we did before:
[Activity(Label = "Friends")]
public class FriendsActivity : BaseActivity<FriendViewModel>
{
  protected override void OnCreate(Bundle bundle)
  {
    base.OnCreate(bundle);
  }
}
Now, let's implement a nested Adapter class to set up the list view items as follows:
class Adapter : BaseAdapter<User>
{
  readonly FriendViewModel friendViewModel = ServiceContainer.Resolve<FriendViewModel>();
  readonly LayoutInflater inflater;

  public Adapter(Context context)
  {
    inflater = (LayoutInflater)context.GetSystemService (Context.LayoutInflaterService);
  }
  public override long GetItemId(int position)
  {
    return position;
  }
  public override View GetView(int position, View convertView, ViewGroup parent)
  {
    if (convertView == null)
    {
      convertView = inflater.Inflate(Resource.Layout.FriendListItem, null);
    }
    var friend = this [position];
    var friendname = convertView.FindViewById<TextView>(Resource.Id.friendName);
    friendname.Text = friend.Username;
    return convertView;
  }
  public override int Count
  {
    get { return friendViewModel.Friends == null ? 0: friendViewModel.Friends.Length; }
  }
  public override User this[int index]
  {
    get { return friendViewModel.Friends [index]; }
  }
}
There is really no difference in this adapter and the previous one we implemented for the conversations screen. We only have to set the friend's name, and we use the User object instead of the Conversation object.
To finish setting up the adapter, we can update the body of the FriendsActivity class as follows:
ListView listView;
Adapter adapter;

protected override void OnCreate(Bundle bundle)
{
  base.OnCreate(bundle);
  SetContentView(Resource.Layout.Friends);
  listView = FindViewById<ListView>(Resource.Id.friendsList);
  listView.Adapter = adapter = new Adapter(this);
}
protected async override void OnResume()
{
  base.OnResume();
  try
  {
    await viewModel.GetFriends();
    adapter.NotifyDataSetInvalidated();
  }
  catch (Exception exc)
  {
    DisplayError(exc);
  }
}
Last but not least, we can update OnOptionsItemSelected in the ConversationsActivity class as follows:
public override bool OnOptionsItemSelected(IMenuItem item)
{
  if (item.ItemId == Resource.Id.addFriendMenu)
  {
    StartActivity(typeof(FriendsActivity));
  }
  return base.OnOptionsItemSelected(item);
}
So, if we compile and run the application, we can navigate to a fully implemented friends list screen, as shown in the following screenshot:
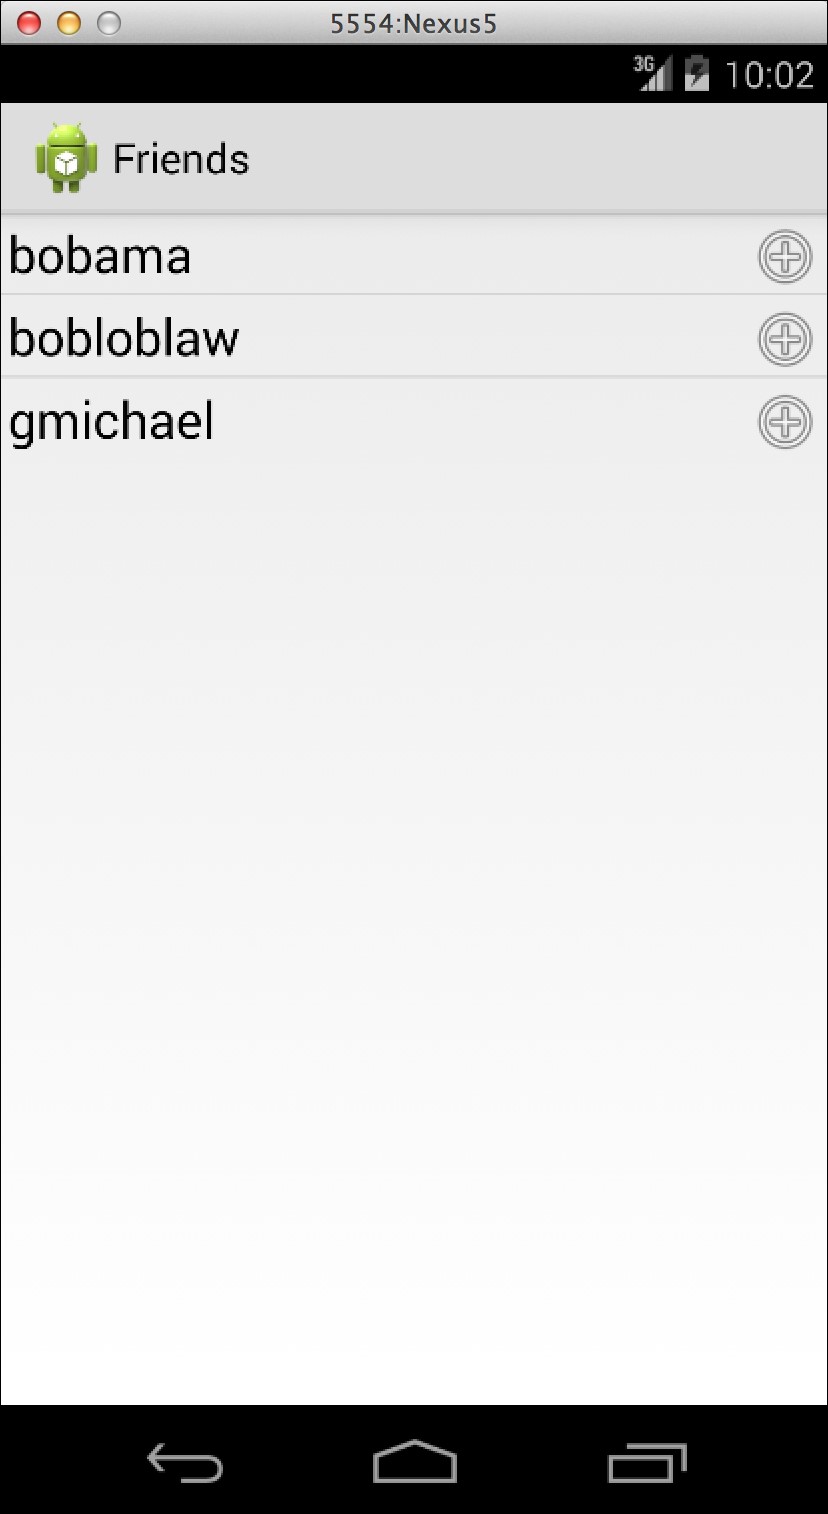
The next screen is a bit more complicated. We will need to create a ListView that uses multiple layout files for each row, depending on the type of the row. We'll also need to perform some layout tricks to place a view below the ListView and set up the ListView to autoscroll.
For the next screen, let's begin by creating a new layout named Messages.axml in the layout folder of the Resources directory and then perform the following steps:
- Drag a new ListView onto the layout. Set its Id to
@+id/messageList. - Check the box for Stack From Bottom, and set Transcript Mode to
alwaysScroll. This will set it up in order to display items from the bottom up. - Set the Weight value to
1for the ListView in the Layout tab under the LinearLayout section. - Drag a new RelativeLayout onto the layout. Let its Id be the default value, or remove it.
- Drag a new Button inside RelativeLayout. Set its Id to
@+id/sendButton. - Check the box for Align Parent Right in the Layout tab.
- Drag a new Plain Text found in the Text Field section inside RelativeLayout to the left of the button. Set its Id to
@+id/messageText. - In the Layout tab, set To Left Of to
@+id/sendButton, and set its Width tomatch_parent. - Check the box for Center in Parent to fix the vertical centering.
When completed, the XML file will be as follows:
<?xml version="1.0" encoding="utf-8"?>
<LinearLayout
  xmlns:android="http://schemas.android.com/apk/res/android"
  android:orientation="vertical"
  android:layout_width="match_parent"
  android:layout_height="match_parent">
  <ListView
    android:minWidth="25px"
    android:minHeight="25px"
    android:layout_width="fill_parent"
    android:layout_height="wrap_content"
    android:id="@+id/messageList"
    android:layout_weight="1"
    android:stackFromBottom="true"
    android:transcriptMode="alwaysScroll" />
  <RelativeLayout
  android:minWidth="25px"
  android:minHeight="25px"
  android:layout_width="fill_parent"
  android:layout_height="wrap_content">
  <Button
    android:text="Send"
    android:layout_alignParentRight="true"
    android:layout_width="wrap_content"
    android:layout_height="wrap_content"
    android:id="@+id/sendButton" />
  <EditText
    android:layout_width="match_parent"
    android:layout_height="wrap_content"
    android:layout_toLeftOf="@id/sendButton"
    android:layout_centerInParent="true"
    android:id="@+id/messageText" />
  </RelativeLayout>
</LinearLayout>
Next, perform the following steps to make two more Android layouts:
- Create a new layout named
MyMessageListItem.axmlin thelayoutfolder of theResourcesdirectory. - Open the layout and switch to the Source tab. Change the root XML element to a
RelativeLayoutelement. - Switch back to the Content tab, and drag two TextView controls onto the layout.
- In the Id field, enter
@+id/myMessageTextand@+id/myMessageDaterespectively. - For both the views, set Margin to
3dp, and Width and Height towrap_content. - For the first TextView, set its Color to
@android:color/holo_blue_brightunder the Style tab. - For the second TextView, check the Align Parent Right checkbox under the Layout tab.
- Create a new layout named
TheirMessageListItem.axmland repeat the process. Select a different color for the first TextView in the new layout.
Finally, we'll need to create a new activity for the screen. Create a new Android Activity named MessagesActivity.cs in the Activities directory. Let's begin with the standard code to set up an activity as follows:
[Activity(Label = "Messages")]
public class MessagesActivity : BaseActivity<MessageViewModel>
{
  protected override void OnCreate(Bundle bundle)
  {
    base.OnCreate(bundle);
  }
}
Next, let's implement a more complicated adapter than what we implemented earlier as follows:
class Adapter : BaseAdapter<Message>
{
  readonly MessageViewModel messageViewModel = ServiceContainer.Resolve<MessageViewModel>();
  readonly ISettings settings = ServiceContainer.Resolve<ISettings>();
  readonly LayoutInflater inflater;
  const int MyMessageType = 0, TheirMessageType = 1;

  public Adapter (Context context)
  {
    inflater = (LayoutInflater)context.GetSystemService (Context.LayoutInflaterService);
  }
  public override long GetItemId(int position)
  {
    return position;
  }
  public override int Count
  {
    get { return messageViewModel.Messages == null ? 0: messageViewModel.Messages.Length; }
  }
  public override Message this[int index]
  {
    get { return messageViewModel.Messages [index]; }
  }
  public override int ViewTypeCount
  {
    get { return 2; }
  }
  public override int GetItemViewType(int position)
  {
    var message = this [position];
    return message.UserId == settings.User.Id ?MyMessageType : TheirMessageType;
  }
}
This includes everything except our implementation of GetView, which we'll get to shortly. Here, the first changes are some constants for MyMessageType and TheirMessageType. We then implemented ViewTypeCount and GetItemViewType. This is Android's mechanism for using two different layouts for list items in a list view. We use one type of layout for the user's messages and a different one for the other user in the conversation.
Next, let's implement GetView as follows:
public override View GetView(int position, View convertView, ViewGroup parent)
{
  var message = this [position];
  int type = GetItemViewType(position);
  if (convertView == null)
  {
    if (type == MyMessageType)
    {
      convertView = inflater.Inflate(Resource.Layout.MyMessageListItem, null);
    }
    else
    {
      convertView = inflater.Inflate(Resource.Layout.TheirMessageListItem, null);
    }
  }
  TextView messageText, dateText;
  if (type == MyMessageType)
  {
    messageText = convertView.FindViewById<TextView>(Resource.Id.myMessageText);
    dateText = convertView.FindViewById<TextView>(Resource.Id.myMessageDate);
  }
  else
  {
    messageText = convertView.FindViewById<TextView>(Resource.Id.theirMessageText);
    dateText = convertView.FindViewById<TextView>(Resource.Id.theirMessageDate);
    }
  messageText.Text = message.Text;
  dateText.Text = message.Date.ToString("MM/dd/yy HH:mm");
  return convertView;
}
Let's break down our implementation through the following steps:
- We first pull out the
messageobject for the position of the row. - Next, we grab the view type that determines whether it is the current user's message or the other user in the conversation.
- If
convertViewisnull, we inflate the appropriate layout based on the type. - Next, we pull the two text views,
messageTextanddateText, out of theconvertView. We have to use the type value to make sure that we use the correct resource IDs. - We set the appropriate text on both the text views using the
messageobject. - We return
convertView.
Now let's finish MessagesActivity by setting up the rest of the adapter. First, let's implement some member variables and the OnCreate method as follows:
ListView listView;
EditText messageText;
Button sendButton;
Adapter adapter;

protected override void OnCreate(Bundle bundle)
{
  base.OnCreate(bundle);

  Title = viewModel.Conversation.Username;
  SetContentView(Resource.Layout.Messages);
  listView = FindViewById<ListView>(Resource.Id.messageList);
  messageText = FindViewById<EditText>(Resource.Id.messageText);
  sendButton = FindViewById<Button>(Resource.Id.sendButton);

  listView.Adapter = adapter = new Adapter(this);

  sendButton.Click += async (sender, e) =>
  {
    viewModel.Text = messageText.Text;
    try
    {
      await viewModel.SendMessage();
      messageText.Text = string.Empty;
      adapter.NotifyDataSetInvalidated();
      listView.SetSelection(adapter.Count);
    }
    catch (Exception exc)
    {
      DisplayError(exc);
    }
  };
}
So far this activity is fairly standard compared to our previous activities in this chapter. We also had to wire up the Click event of sendButton in OnCreate so that it sends the message and refreshes the list. We also used a trick to scroll the list view to the end by setting its selection to the last item.
Next, we'll need to implement OnResume to load the messages, invalidate the adapter, and then scroll the list view to the end as follows:
protected async override void OnResume()
{
  base.OnResume();
  try
  {
    await viewModel.GetMessages();
    adapter.NotifyDataSetInvalidated();
    listView.SetSelection(adapter.Count);
  }
  catch (Exception exc)
  {
    DisplayError(exc);
  }
}
So finally, if you compile and run the app, you will be able to navigate to the messages screen, and add new messages to the list, as shown in the following screenshot:
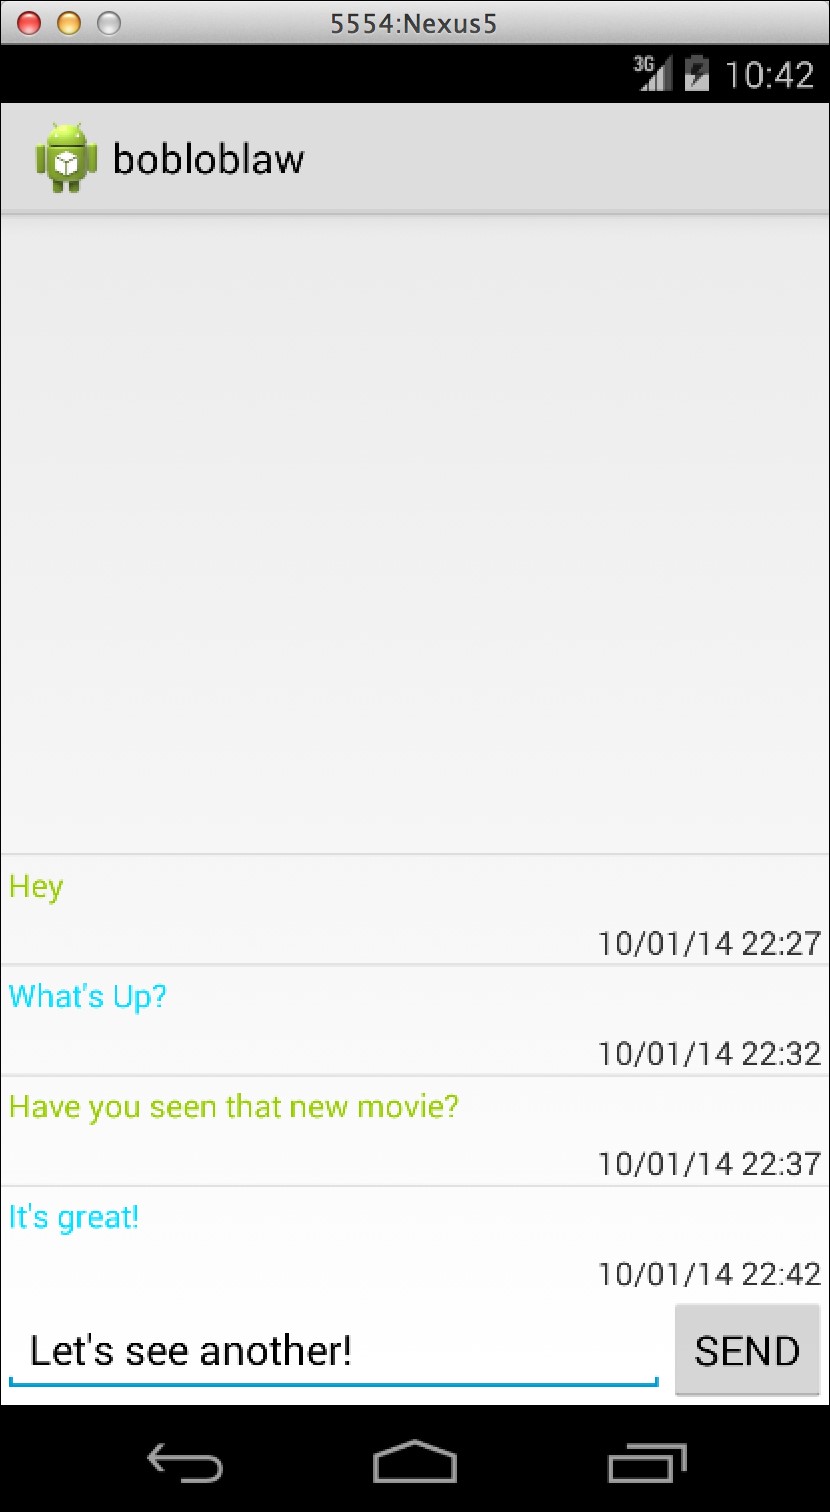
In this chapter, we started out by going over the basic settings in the Android Manifest file. Next, we implemented a custom Application class to set up our ServiceContainer. We then went over the different types of Android layouts and implemented a login screen using native Android views. We implemented the friends list screen, and learned about the basics of ListView and adapters. Finally, we implemented the messages screen, and used the more advanced functionality available in list view adapters and layouts.
After completing this chapter, you will have a partially functional Android version of XamChat. You will have gained a deeper understanding of the Android SDK and tools. You should be confident in developing your own Android applications using Xamarin. Take it upon yourself to implement the remaining screens that we did not cover in the chapter. If you get lost, feel free to review the full sample application included with this module. In the next chapter, we'll cover how to deploy to mobile devices and why is it very important to test your applications on real devices.
Deploying to devices is both important and a bit of a hassle when you try it the first time. Testing on a device will commonly display performance issues that aren't present in the simulator/emulator of your application. You can also test things that are only possible on real devices such as GPS, camera, memory limitations, or cellular network connectivity. There are also common pitfalls that exist when developing for Xamarin, which will only surface when testing on a real device.
In this chapter, we will cover the following topics:
- iOS provisioning
- Android device settings for debugging
- The linker
- Ahead-of-time (AOT) compilation
- Common memory pitfalls with Xamarin
Before we begin this chapter, it is important to note that an iOS Developer Program membership is required to deploy to iOS devices. Feel free to go back to Chapter 1, Setting Up Xamarin, to walk through this process.
Apple has a strict process for deploying applications to iOS devices. While being quite convoluted and sometimes painful for developers, Apple can enable a certain level of security by preventing the average user from side loading potentially malicious applications.
Before we can deploy our application to an iOS device, there are a few things we will need to set up in the iOS Dev Center. We will begin by creating an App ID or a bundle ID for your account. This is the primary identifier for any iOS application.
We will begin by navigating to http://developer.apple.com and performing the following steps:
- Click on the iOS Apps icon.
- Sign in with your developer account.
- Click on Certificates, Identifiers, & Profiles on the right-hand side navigation.
- Click on Identifiers.
- Click on the plus button to add a new iOS App ID.
- In the Name field, enter something meaningful such as
YourCompanyNameWildcard. - Select the Wildcard App ID radio button.
- In the Bundle ID field, select a reverse domain styled name for your company such as
com.yourcompanyname.*. - Click on Continue.
- Review the final setting and hit Submit.
Leave this web page open, as we will be using it throughout the chapter.
We just registered a wildcard bundle ID for your account; use this as a prefix for all future applications you wish to identify with this account. Later, when you are preparing to deploy an app to the Apple App Store, you will create an Explicit App ID such as com.yourcompanyname.yourapp. This allows you to deploy the specific app to the store, while the wildcard ID is best used for deploying to devices for testing.
Next, we need to locate the unique identifier on each device you plan on debugging your application on. Apple requires each device to be registered under your account with a limit of 200 devices per developer. The only way to circumvent this requirement is to register for the iOS Developer Enterprise program with a $299 yearly fee that is separate from the standard $99 developer fee.
We will begin by launching Xcode and performing the following steps:
- Navigate to Window | Devices in the top menu.
- Plug in your target device with a USB cable.
- On the left-hand side navigation, you should see your device's name. Click on it to select it.
- Notice the Identifier value for your device. Copy it to your clipboard.
The following screenshot shows what your screen should look like with your device selected in Xcode:

Return to http://developer.apple.com (hopefully, it is still open from earlier in the chapter) and perform the following steps:
- Navigate to Devices | All on the left-hand side navigation.
- Click on the plus button in the top-right corner of the page.
- Enter a meaningful name for your device and paste the Identifier value from your clipboard into the UDID field.
- Click on Continue.
- Review the information you entered and hit Register.
Down the road, when your account is fully set up, you can just click on the Use for Development button in Xcode and skip the second set of steps.
The following screenshot shows you what your device list should look like when complete:

Next, we will need to generate a certificate to represent you as the developer for your account. Prior to Xcode 5, you had to create a certificate signing request using the Keychain app on your Mac. You can find this under Applications, or using the search spotlight on OS X via Command + Space. The newer versions of Xcode make things a lot easier by integrating a lot of this process into Xcode.
Open Xcode and perform the following steps:
- Navigate to Xcode | Preferences in the menu at the top.
- Select the Accounts tab.
- Click on the plus button, on the bottom-left, and then click on Add Apple ID.
- Enter the e-mail and password for your developer account.
- On creating the account, click on View Details on the bottom-right.
- Click on the sync button on the bottom-left.
- If this is a new account, Xcode will display a warning that no certificates exist yet. Check each box and click on Request to generate the certificates.
Xcode will now automatically create a developer certificate for your account and install it into your Mac's keychain.
The following screenshot shows what your screen will look after setting up your account:

Next, we need to create a provisioning profile. This is the final file that allows applications to be installed on an iOS device. A provisioning profile contains an App ID, a list of device IDs, and finally, a certificate for the developer. You must also have the private key of the developer certificate in your Mac's keychain to use a provisioning profile.
The following are a few types of provisioning profiles:
- Development: This is used for debug or release builds. You will actively use this type of profile when your applications are in development.
- Ad Hoc: This is used mainly for release builds. This type of certificate is great for beta testing or distribution to a small set of users. You can distribute to an unlimited number of users using this method with an enterprise developer account.
- App Store: This is used for release builds for submission to the App Store. You cannot deploy an app to your device using this certificate; it can only be used for store submission.
Let's return to http://developer.apple.com and create a new provisioning profile by performing the following steps:
- Navigate to Provisioning Profiles | All on the left-hand side pane.
- Click on the plus button at the top-right of the page.
- Select iOS App Development and click on Continue.
- Select your wildcard App ID created earlier in the chapter and click on Continue.
- Select the certificate we created earlier in the chapter and click on Continue.
- Select the devices you want to deploy to and click on Continue.
- Enter an appropriate Profile Name such as
YourCompanyDev. - Click on Generate and your provisioning profile will be created.
The following screenshot shows the new profile that you will end up with on creation. Don't worry about downloading the file; we'll use Xcode to import the final profile.

To import the provisioning profile, return to Xcode and perform the following steps:
- Navigate to Xcode | Preferences in the menu at the top of the dialog.
- Select the Accounts tab.
- Select your account and click on View Details.
- Click on the sync button on the bottom-left.
- After a few seconds, your provisioning profiles will appear.
Xcode will automatically include any provisioning profiles you have created on the Apple developer site. Xcode will also create a few profiles on its own.
In the latest version of Xamarin Studio, you can view these profiles but will not be able to sync them. Navigate to Xamarin Studio | Preferences | Developer Accounts to view the provisioning profiles from Xamarin Studio. You can also view Xamarin's documentation on iOS provisioning on their documentation website at http://docs.xamarin.com/guides/ios/getting_started/device_provisioning/.
Compared to the hassle of deploying your application on iOS devices, Android is a breeze. To deploy an application to a device, you merely have to set a few settings on the device. This is due to Android's openness in comparison to iOS. Android device debugging is turned off for most users, but it can be easily turned on by any developer who might wish to have a go at writing Android applications.
We will begin by opening the Settings application. You might have to locate this by looking through all the applications on the device as follows:
- Scroll down and click on the section labeled Developer options.
- In the action bar at the top, you might have to toggle a switch to the ON position. This varies on each device.
- Scroll down and check USB Debugging.
- A warning confirmation message will appear. Then, click on OK.
The following screenshot shows what your device will look like during the process:

After enabling this option, all you have to do is plug in your device via USB and debug an Android application in Xamarin Studio. You will see your device listed in the Select Device dialog. Note that if you are on Windows or have a nonstandard device, you might have to visit your device vendor's website to install drivers. Most Samsung and Nexus devices install their drivers automatically. On Android 4.3 and higher, there is also a confirmation dialog on the device that appears before beginning a USB debugging session.
The following screenshot shows you what your device will look like for a Samsung Galaxy SII in the Select Device dialog. Xamarin Studio will display the model number, which is not always a name that you can recognize. You can view this model number in your device's settings.

To keep Xamarin applications small and lightweight for mobile devices, Xamarin has created a feature for their compiler called the linker. Its main purpose is to strip unused code out of the core Mono assemblies (such as System.dll) and platform-specific assemblies (such as Mono.Android.dll and monotouch.dll). However, it can also give you the same benefits if it is set up to run on your own assemblies. Without running the linker, the entire Mono framework can be around 30 megabytes. This is why linking is enabled by default in device builds, which enables you to keep your applications small.
The linker uses static analysis to work through the various code paths in an assembly. If it determines a method or class that is never used, it removes the unused code from that assembly. This can be a time-consuming process, so builds running in the simulator skip this step by default.
Xamarin applications have the following three main settings for the linker:
- Don't Link: In this setting, the linker compilation step is skipped. This is best used for builds running in the simulator or if you need to diagnose a potential issue with the linker.
- Link SDK Assemblies Only: In this setting, the linker will only be run on the core Mono assemblies such as
System.dll,System.Core.dll, andSystem.Xml.dll. - Link All Assemblies: In this setting, the linker is run against all the assemblies in your application, which include any class libraries or third-party assemblies you are using.
These settings can be found in the Project options of any Xamarin.iOS or Xamarin.Android application. These settings are generally not present on class libraries, as it is generally associated with an iOS or Android application that will be deployed.
The linker can also cause potential issues at runtime as there are cases in which its analysis determines incorrectly that a piece of code is unused. This can happen if you are using features in the System.Reflection namespace instead of accessing the method or property directly. This is one reason why it is important for you to test your application on physical devices, as linking is enabled for device builds.
To demonstrate this issue, let's take a look at the following code example:
//Just a simple class for holding info
public class Person
{
  public int Id { get; set; }
  public string Name { get; set; }
}

//Then somewhere later in your code
var person = new Person { Id = 1, Name = "Chuck Norris" };
var propInfo = person.GetType().GetProperty("Name");
string value = propInfo.GetValue(person) as string;
Console.WriteLine("Name: " + value);
Running the preceding code will work fine using the options for Don't Link or Link SDK Assemblies Only. However, if you try to run this, when using Link All Assemblies, you will get an exception similar to the following:
Unhandled Exception:
System.ArgumentException: Get Method not found for 'Name' at System.Reflection.MonoProperty.GetValue (System.Object obj, BindingFlags invokeAttr, System.Reflection.Binder binder, System.Object[] index, System.Globalization.CultureInfo culture) at System.Reflection.PropertyInfo.GetValue (System.Object obj)
Since the Name property's getter was never used directly from code, the linker stripped it from the assembly. This caused the reflection code to fail at runtime.
Even though potential issues can arise in your code, the option of Link All Assemblies is still quite useful. There are a few optimizations that can only be performed in this mode, and Xamarin can reduce your application to the smallest possible size. If performance or a tiny download size is the requirement for your application, you can try this option. However, thorough testing should be performed to verify that no problems are caused by linking your assemblies.
To resolve issues in your code, Xamarin has included a complete set of workarounds to prevent specific parts of your code from being stripped away.
Some of the options include the following:
- Mark class members with
[Preserve]. This will force the linker to include the attributed method, field, or property. - Mark an entire class with
[Preserve(AllMembers=true)]. This will preserve all code within the class. - Mark an entire assembly with
[assembly: Preserve]. This is an assembly-level attribute that will preserve all code contained within it. - Skip an entire assembly by modifying Additional mtouch arguments in your project options. Use
--linkskip=Systemto skip an entire assembly. This can be used on assemblies that you do not have the source code for. - Custom linking via an XML file. This is the best option to use when you need to skip linking on a specific class or method that you do not have the source code for. Use
–-xml=YourFile.xmlin Additional mtouch arguments.
The following is a sample XML file that demonstrates custom linking:
<linker>
  <assembly fullname="mscorlib">
    <type fullname="System.Environment">
      <field name="mono_corlib_version" />
        <method name="get_StackTrace" />
    </type>
  </assembly>
  <assembly fullname="My.Assembly.Name">
    <type fullname="MyTypeA" preserve="fields" />
       <method name=".ctor" />
    </type>
    <type fullname="MyTypeB" />
      <method signature="System.Void MyFunc(System.Int32 x)" />
        <field signature="System.String _myField" />
    </type>
  </assembly>
</linker>
Custom linking is the most complicated option and is usually the last resort. Luckily, most Xamarin applications will not have to work around many linker issues.
The runtime behind Mono and .NET on Windows is based on a just in time (JIT) compiler. C# and other .NET languages are compiled into Microsoft Intermediate Language (MSIL). At runtime, MSIL is compiled into a native code to run on whatever type of architecture is running your application. Xamarin.Android follows this exact pattern. However, due to Apple's restrictions on dynamically generated code, a JIT compiler is not allowed on iOS.
To work around this restriction, Xamarin has developed a new option called Ahead-of-time (AOT) compilation. In addition to making .NET possible on iOS, AOT has other benefits such as a shorter startup time and potentially better performance.
AOT also has some limitations that are generally related to C# generics. To compile an assembly ahead of time, the compiler will need to run some static analysis against your code to determine the type of information. Generics throw a wrench into this situation.
There are a few cases that are not supported by AOT, but they are completely valid in C#. The first is a generic interface, which is as follows:
interface MyInterface<T>
{
  T GetMyValue();
}
The compiler cannot determine the classes that can implement this interface ahead of time, especially when multiple assemblies are involved. The second limitation is related to the first. You cannot override virtual methods that contain generic parameters or return values.
The following is a simple example:
class MyClass<T>
{
  public virtual T GetMyValue()
  {
    //Some code here
  }
}

class MySubClass : MyClass<int>
{
  public override int GetMyValue()
  {
    //Some code here
  }
}
Again, the static analysis of the compiler cannot determine which classes can override this method at compile time.
Another limitation is that you cannot use DllImport in a generic class, as shown in the following code:
class MyGeneric<T>
{
  [DllImport('MyImport")]
  public static void MyImport();
}
If you are not familiar with the language feature, DllImport is a way to call native C/C++ methods from C#. Using them inside generic classes is not supported.
These limitations are another good reason why testing on devices is important since the preceding code will work fine on other platforms that can run C# code but not Xamarin.iOS.
Memory on mobile devices is certainly not an unlimited commodity. Because of this, memory usage in your application can be much more important than on desktop applications. At times, you might find the need to use a memory profiler, or improve your code to use memory more efficiently.
The following are the most common memory pitfalls:
- The garbage collector (GC) is unable to collect large objects fast enough to keep up with your application
- Your code inadvertently causes a memory leak
- A C# object is garbage collected but is later attempted to be used by native code
Let's take a look at the first problem where the GC cannot keep up. Let's say we have a Xamarin.iOS application with a button for sharing an image on Twitter as follows:
twitterShare.TouchUpInside += (sender, e) =>
{
  var image = UImage.FromFile("YourLargeImage.png");
  //Share to Twitter
};
Now let's assume the image is a 10 MB image from the user's camera roll. If the user clicks on the button and cancels the Twitter post rapidly, there could be a possibility of your application running out of memory. iOS will commonly force close apps using too much memory, and you don't want users to experience this with your app.
The best solution is to call Dispose on the image when you are finished with it as follows:
var image = UImage.FromFile('YourLargeImage.png");
//Share to Twitter
image.Dispose();
An even better approach would be to take advantage of the C# using statement as follows:
using(var image = UImage.FromFile('YourLargeImage.png"))
{
  //Share to Twitter
}
The C# using statement will automatically call Dispose in a try-finally block, so the object will get disposed even if an exception is thrown. I recommend that you take advantage of the using statement for any IDisposable class where possible. It is not always necessary for small objects such as NSString, but is always a good idea for larger, more heavyweight UIKit objects.
Memory leaks are the next potential issues. C# being a managed, garbage-collected language prevents a lot of memory leaks, but not all of them. The most common leaks in C# are caused by events.
Let's assume that we have a static class with an event as follows:
static class MyStatic
{
  public static event EventHandler MyEvent;
}
Now, let's say we need to subscribe to the event from an iOS controller as follows:
public override void ViewDidLoad()
{
  base.ViewDidLoad();

  MyStatic.MyEvent += (sender, e) =>
  {
    //Do something
  };
}
The problem here is that the static class will hold a reference to the controller until the event is unsubscribed. This is a situation that a lot of developers might miss. To fix this issue on iOS, I would subscribe to the event in ViewWillAppear and unsubscribe ViewWillDisappear. On Android, use OnStart and OnStop, or OnPause and OnResume.
You would correctly implement this event as follows:
public override void ViewWillAppear()
{
  base.ViewWillAppear();
  MyStatic.MyEvent += OnMyEvent;
}

public override void ViewWillDisappear()
{
  base.ViewWillDisappear ();
  MyStatic.MyEvent -= OnMyEvent;
}
However, an event is not a surefire cause of a memory leak. Subscribing to the TouchUpInside event on a button inside the ViewDidLoad method, for example, is just fine. Since the button lives in memory just as long as the controller does, everything can get garbage collected without any problems.
For the final issue, the garbage collector can sometimes remove a C# object. Later, an Objective-C object attempts to access it.
The following is an example to add a button to UITableViewCell:
public override UITableViewCell GetCell(UITableView tableView, NSIndexPath indexPath)
{
  var cell = tableView.DequeueReusableCell('MyCell");
  //Remaining cell setup here

  var button = UIButton.FromType(UIButtonType.InfoDark);
  button.TouchUpInside += (sender, e) =>
  {
    //Do something
  };
  cell.AccessoryView = button;
  return cell;
}
We add the built-in info button as an accessory view to the cell. The problem here is that the button will get garbage collected, but its Objective-C counterpart will remain in use as it is displayed on the screen. If you click on the button after some period of time, you will get a crash that looks something similar to the following:
mono-rt: Stacktrace:
mono-rt:   at <unknown>
mono-rt:   at (wrapper managed-to-native) MonoTouch.UIKit.UIApplication.UIApplicationMain (int,string[],intptr,intptr)
mono-rt:   at MonoTouch.UIKit.UIApplication.Main (string[],string,string)
... Continued ...
=================================================================
Got a SIGSEGV while executing native code. This usually indicates
a fatal error in the mono runtime or one of the native libraries
used by your application.
================================================================
It is not the most descriptive error message, but in general, you know that something went wrong in the native Objective-C code. To resolve the issue, create a custom subclass of UITableViewCell, and create a dedicated member variable for the button as follows:
public class MyCell : UITableViewCell
{
  UIButton button;
  public MyCell()
  {
    button = UIButton.FromType(UIButtonType.InfoDark);
    button.TouchUpInside += (sender, e) =>
    {
      //Do something
    };
    AccessoryView = button;
  }
}
Now, your GetCell implementation will look something like the following code:
public override UITableViewCell GetCell(UITableView tableView, NSIndexPath indexPath)
{
  var cell = tableView.DequeueReusableCell('MyCell") as MyCell;
  //Remaining cell setup here
  return cell;
}
Since the button is not a local variable, it will no longer get garbage collected sooner than needed. A crash is avoided, and in some ways this code is a bit cleaner. Similar situations can happen on Android with the interaction between C# and Java; however, it is less likely since both are garbage collected languages.
Garbage collector
Let's take a look at the first problem where the GC cannot keep up. Let's say we have a Xamarin.iOS application with a button for sharing an image on Twitter as follows:
twitterShare.TouchUpInside += (sender, e) =>
{
  var image = UImage.FromFile("YourLargeImage.png");
  //Share to Twitter
};
Now let's assume the image is a 10 MB image from the user's camera roll. If the user clicks on the button and cancels the Twitter post rapidly, there could be a possibility of your application running out of memory. iOS will commonly force close apps using too much memory, and you don't want users to experience this with your app.
The best solution is to call Dispose on the image when you are finished with it as follows:
var image = UImage.FromFile('YourLargeImage.png");
//Share to Twitter
image.Dispose();
An even better approach would be to take advantage of the C# using statement as follows:
using(var image = UImage.FromFile('YourLargeImage.png"))
{
  //Share to Twitter
}
The C# using statement will automatically call Dispose in a try-finally block, so the object will get disposed even if an exception is thrown. I recommend that you take advantage of the using statement for any IDisposable class where possible. It is not always necessary for small objects such as NSString, but is always a good idea for larger, more heavyweight UIKit objects.
Memory leaks are the next potential issues. C# being a managed, garbage-collected language prevents a lot of memory leaks, but not all of them. The most common leaks in C# are caused by events.
Let's assume that we have a static class with an event as follows:
static class MyStatic
{
  public static event EventHandler MyEvent;
}
Now, let's say we need to subscribe to the event from an iOS controller as follows:
public override void ViewDidLoad()
{
  base.ViewDidLoad();

  MyStatic.MyEvent += (sender, e) =>
  {
    //Do something
  };
}
The problem here is that the static class will hold a reference to the controller until the event is unsubscribed. This is a situation that a lot of developers might miss. To fix this issue on iOS, I would subscribe to the event in ViewWillAppear and unsubscribe ViewWillDisappear. On Android, use OnStart and OnStop, or OnPause and OnResume.
You would correctly implement this event as follows:
public override void ViewWillAppear()
{
  base.ViewWillAppear();
  MyStatic.MyEvent += OnMyEvent;
}

public override void ViewWillDisappear()
{
  base.ViewWillDisappear ();
  MyStatic.MyEvent -= OnMyEvent;
}
However, an event is not a surefire cause of a memory leak. Subscribing to the TouchUpInside event on a button inside the ViewDidLoad method, for example, is just fine. Since the button lives in memory just as long as the controller does, everything can get garbage collected without any problems.
For the final issue, the garbage collector can sometimes remove a C# object. Later, an Objective-C object attempts to access it.
The following is an example to add a button to UITableViewCell:
public override UITableViewCell GetCell(UITableView tableView, NSIndexPath indexPath)
{
  var cell = tableView.DequeueReusableCell('MyCell");
  //Remaining cell setup here

  var button = UIButton.FromType(UIButtonType.InfoDark);
  button.TouchUpInside += (sender, e) =>
  {
    //Do something
  };
  cell.AccessoryView = button;
  return cell;
}
We add the built-in info button as an accessory view to the cell. The problem here is that the button will get garbage collected, but its Objective-C counterpart will remain in use as it is displayed on the screen. If you click on the button after some period of time, you will get a crash that looks something similar to the following:
mono-rt: Stacktrace:
mono-rt:   at <unknown>
mono-rt:   at (wrapper managed-to-native) MonoTouch.UIKit.UIApplication.UIApplicationMain (int,string[],intptr,intptr)
mono-rt:   at MonoTouch.UIKit.UIApplication.Main (string[],string,string)
... Continued ...
=================================================================
Got a SIGSEGV while executing native code. This usually indicates
a fatal error in the mono runtime or one of the native libraries
used by your application.
================================================================
It is not the most descriptive error message, but in general, you know that something went wrong in the native Objective-C code. To resolve the issue, create a custom subclass of UITableViewCell, and create a dedicated member variable for the button as follows:
public class MyCell : UITableViewCell
{
  UIButton button;
  public MyCell()
  {
    button = UIButton.FromType(UIButtonType.InfoDark);
    button.TouchUpInside += (sender, e) =>
    {
      //Do something
    };
    AccessoryView = button;
  }
}
Now, your GetCell implementation will look something like the following code:
public override UITableViewCell GetCell(UITableView tableView, NSIndexPath indexPath)
{
  var cell = tableView.DequeueReusableCell('MyCell") as MyCell;
  //Remaining cell setup here
  return cell;
}
Since the button is not a local variable, it will no longer get garbage collected sooner than needed. A crash is avoided, and in some ways this code is a bit cleaner. Similar situations can happen on Android with the interaction between C# and Java; however, it is less likely since both are garbage collected languages.
Memory leaks
Memory leaks are the next potential issues. C# being a managed, garbage-collected language prevents a lot of memory leaks, but not all of them. The most common leaks in C# are caused by events.
Let's assume that we have a static class with an event as follows:
static class MyStatic
{
  public static event EventHandler MyEvent;
}
Now, let's say we need to subscribe to the event from an iOS controller as follows:
public override void ViewDidLoad()
{
  base.ViewDidLoad();

  MyStatic.MyEvent += (sender, e) =>
  {
    //Do something
  };
}
The problem here is that the static class will hold a reference to the controller until the event is unsubscribed. This is a situation that a lot of developers might miss. To fix this issue on iOS, I would subscribe to the event in ViewWillAppear and unsubscribe ViewWillDisappear. On Android, use OnStart and OnStop, or OnPause and OnResume.
You would correctly implement this event as follows:
public override void ViewWillAppear()
{
  base.ViewWillAppear();
  MyStatic.MyEvent += OnMyEvent;
}

public override void ViewWillDisappear()
{
  base.ViewWillDisappear ();
  MyStatic.MyEvent -= OnMyEvent;
}
However, an event is not a surefire cause of a memory leak. Subscribing to the TouchUpInside event on a button inside the ViewDidLoad method, for example, is just fine. Since the button lives in memory just as long as the controller does, everything can get garbage collected without any problems.
For the final issue, the garbage collector can sometimes remove a C# object. Later, an Objective-C object attempts to access it.
The following is an example to add a button to UITableViewCell:
public override UITableViewCell GetCell(UITableView tableView, NSIndexPath indexPath)
{
  var cell = tableView.DequeueReusableCell('MyCell");
  //Remaining cell setup here

  var button = UIButton.FromType(UIButtonType.InfoDark);
  button.TouchUpInside += (sender, e) =>
  {
    //Do something
  };
  cell.AccessoryView = button;
  return cell;
}
We add the built-in info button as an accessory view to the cell. The problem here is that the button will get garbage collected, but its Objective-C counterpart will remain in use as it is displayed on the screen. If you click on the button after some period of time, you will get a crash that looks something similar to the following:
mono-rt: Stacktrace:
mono-rt:   at <unknown>
mono-rt:   at (wrapper managed-to-native) MonoTouch.UIKit.UIApplication.UIApplicationMain (int,string[],intptr,intptr)
mono-rt:   at MonoTouch.UIKit.UIApplication.Main (string[],string,string)
... Continued ...
=================================================================
Got a SIGSEGV while executing native code. This usually indicates
a fatal error in the mono runtime or one of the native libraries
used by your application.
================================================================
It is not the most descriptive error message, but in general, you know that something went wrong in the native Objective-C code. To resolve the issue, create a custom subclass of UITableViewCell, and create a dedicated member variable for the button as follows:
public class MyCell : UITableViewCell
{
  UIButton button;
  public MyCell()
  {
    button = UIButton.FromType(UIButtonType.InfoDark);
    button.TouchUpInside += (sender, e) =>
    {
      //Do something
    };
    AccessoryView = button;
  }
}
Now, your GetCell implementation will look something like the following code:
public override UITableViewCell GetCell(UITableView tableView, NSIndexPath indexPath)
{
  var cell = tableView.DequeueReusableCell('MyCell") as MyCell;
  //Remaining cell setup here
  return cell;
}
Since the button is not a local variable, it will no longer get garbage collected sooner than needed. A crash is avoided, and in some ways this code is a bit cleaner. Similar situations can happen on Android with the interaction between C# and Java; however, it is less likely since both are garbage collected languages.
Accessing objects disposed by GC
For the final issue, the garbage collector can sometimes remove a C# object. Later, an Objective-C object attempts to access it.
The following is an example to add a button to UITableViewCell:
public override UITableViewCell GetCell(UITableView tableView, NSIndexPath indexPath)
{
  var cell = tableView.DequeueReusableCell('MyCell");
  //Remaining cell setup here

  var button = UIButton.FromType(UIButtonType.InfoDark);
  button.TouchUpInside += (sender, e) =>
  {
    //Do something
  };
  cell.AccessoryView = button;
  return cell;
}
We add the built-in info button as an accessory view to the cell. The problem here is that the button will get garbage collected, but its Objective-C counterpart will remain in use as it is displayed on the screen. If you click on the button after some period of time, you will get a crash that looks something similar to the following:
mono-rt: Stacktrace:
mono-rt:   at <unknown>
mono-rt:   at (wrapper managed-to-native) MonoTouch.UIKit.UIApplication.UIApplicationMain (int,string[],intptr,intptr)
mono-rt:   at MonoTouch.UIKit.UIApplication.Main (string[],string,string)
... Continued ...
=================================================================
Got a SIGSEGV while executing native code. This usually indicates
a fatal error in the mono runtime or one of the native libraries
used by your application.
================================================================
It is not the most descriptive error message, but in general, you know that something went wrong in the native Objective-C code. To resolve the issue, create a custom subclass of UITableViewCell, and create a dedicated member variable for the button as follows:
public class MyCell : UITableViewCell
{
  UIButton button;
  public MyCell()
  {
    button = UIButton.FromType(UIButtonType.InfoDark);
    button.TouchUpInside += (sender, e) =>
    {
      //Do something
    };
    AccessoryView = button;
  }
}
Now, your GetCell implementation will look something like the following code:
public override UITableViewCell GetCell(UITableView tableView, NSIndexPath indexPath)
{
  var cell = tableView.DequeueReusableCell('MyCell") as MyCell;
  //Remaining cell setup here
  return cell;
}
Since the button is not a local variable, it will no longer get garbage collected sooner than needed. A crash is avoided, and in some ways this code is a bit cleaner. Similar situations can happen on Android with the interaction between C# and Java; however, it is less likely since both are garbage collected languages.
In this chapter, we started out learning the process of setting up iOS provision profiles to deploy to iOS devices. Next, we looked at the required device settings for deploying your application to an Android device. We discovered the Xamarin linker and how it can make your applications smaller and more performance-oriented. We went through the various settings to resolve problems caused by your code and the linker, and we explained AOT compilation on iOS and the limitations that occur. Finally, we covered the most common memory pitfalls that can occur with Xamarin applications.
Testing your Xamarin application on mobile devices is important for various reasons. Some bugs are only displayed on the device due to the platform limitations that Xamarin has to work around. Your PC is much more powerful, so you will see different performances using the simulator rather than on a physical device. In the next chapter, we'll create a real web service using Windows Azure to drive our XamChat application. We will use a feature called Azure Mobile Services and implement push notifications on iOS and Android.
Modern mobile applications are defined by their network connectivity. A mobile app that does not interact with a web server is both a rare find and not as interactive or social as it would otherwise be. In this module, we'll use the Windows Azure cloud platform to implement a server-side backend for our XamChat application. We'll use a feature called Azure Mobile Services, which is an excellent fit for our application and has the benefit of built-in push notifications. Once we are done with this chapter, our XamChat sample application will be much closer to being a real application and will allow its users to interact with one another.
In this chapter, we will cover the following topics:
- The services offered by Windows Azure
- Setting up your Azure account
- Azure Mobile Services as a backend for XamChat
- Creating tables and scripts
- Implementing a real web service for XamChat
- Using the Apple Push Notification service
- Sending notifications with Google Cloud Messaging
Windows Azure is an excellent cloud platform released by Microsoft in 2010. Azure provides both Infrastructure as a Service (IaaS) and Platform as a Service (PaaS) for building modern web applications and services. This means that it provides you with access to direct virtual machines within which you can deploy any operating system or software of your choice. This is known as IaaS. Azure also provides multiple platforms for building applications such as Azure Websites or SQL Azure. These platforms are known as PaaS since you deploy your software at a high level and do not have to deal directly with virtual machines or manage software upgrades.
Let's go through the following more common services provided by Windows Azure:
- Virtual machines: Azure provides you with access to virtual machines of all sizes. You can install practically any operating system of your choice. There are many premade distributions to choose from within Azure's gallery.
- Websites: You can deploy any type of website that will run in Microsoft IIS from ASP.NET sites to PHP or Node.js.
- SQL Azure: This is a cloud-based version of Microsoft SQL Server, which is a full-featured Relational Database Management System (RDMS) for storing data.
- Mobile Services: This is a simple platform for building web services for mobile apps. It uses SQL Azure for backend storage and a simple JavaScript scripting system based on Node.js for adding business logic. In the latest version of Azure Mobile Services, you can also use C# and the ASP.NET Web API for developing server-side code.
- Storage: Azure provides Blob storage, a method for storing binary files, and Table storage, which is a NoSQL solution for persisting data.
- Service bus: This is a cloud-based solution for creating queues to facilitate communication between other cloud services. It also includes notification hubs as a simple way of providing push notifications to mobile apps.
- Worker roles: A simple way to run a custom process in the cloud can be a plain Windows executable or a .NET worker role project.
- Media services: A mechanism for providing streaming audio or video to nearly any device. It handles both encoding and delivery and can scale to support a large volume of users.
- HDInsight: A version of Apache Hadoop running in Windows Azure for managing extremely large databases, also called big data.
- Cloud services: This is a conglomeration of other services. Cloud services allow you to bundle multiple services together and create staging and production environments. It is a great tool for deployment; you can deploy changes to staging and swap staging and production to preserve uptime for your users.
Apart from these services, there are many more, and new ones are added pretty regularly. We will use Azure Mobile Services, which leverages SQL Azure, to build our web service for XamChat. You can visit http://windowsazure.com for a full rundown of pricing and services offered.
In this module, we chose to demonstrate a solution using Windows Azure as a web service backend for XamChat, since it is very easy to use with Xamarin applications because of the fantastic library found in the Xamarin Component Store. However, there are many more choices out there besides Azure that you might want to look at. Using Xamarin's development platform does not limit the types of web services your applications can interact with.
Here are a few more common ones:
- Parse: This service provides a product similar to that of Azure Mobile Services, complete with data storage and push notifications. This is a popular service among many mobile developers, even those not using Xamarin. You can get more information at http://parse.com.
- Urban Airship: This service provides push notifications for mobile apps across multiple platforms. You can get more information at http://urbanairship.com.
- Amazon Web Services: This service is a complete cloud solution that is equivalent to Windows Azure. It has everything that you need to deploy applications in the cloud with total virtual machine support. The main difference is that Azure is very C# focused and built for .NET developers. There are also not as many PaaS options on Amazon. You can get more information at
http://aws.amazon.com.
Additionally, you can develop your own web services with on-premises web servers or inexpensive hosting services using the languages and technologies of your choice.
To start developing with Windows Azure, you can subscribe to a free one-month trial along with free credits worth $200. You can get even more perks if you have an MSDN subscription. To go along with this, many of Azure's services have free tiers that give you lower performance versions. So if your trial expires, you can continue your development at little or no cost, depending on the services you are using.
Let's begin by navigating to http://windowsazure.com/en-us/pricing/free-trial and performing the following steps:
- Click on the Try it now link.
- Sign in with a Windows Live ID.
- For security purposes, verify your account via phone or text message.
- Enter the payment information. This is only used if you exceed your spending limits. You won't accidentally spend beyond budget by developing your app—it is fairly difficult to accidentally spend money until real users are interacting with your services.
- Check I agree to the policies and click on Sign Up.
- Review the final setting and click on Submit.
- If all the required information is entered correctly, you will now finally have access to the Azure subscription page. Your subscription page will look similar to the following screenshot:

You can click on the Portal link in the top-right corner of the page to access your account. In future, you can manage your Azure services at: http://manage.windowsazure.com.
Complete the Windows Azure tour to get a quick rundown of the management portal's features. You can then access the main menu to create new Azure services, virtual machines, and so on. The main menu looks similar to the following screenshot:

This concludes the sign-up process for Windows Azure. It is pretty simple compared to the Apple and Google Play developer programs. Feel free to play around, but don't be too worried about spending money. Azure has free versions of most services and also delivers a good amount of bandwidth for free. You can get more information on pricing at http://windowsazure.com/en-us/pricing/overview.
Note that there are a lot of misconceptions about Windows Azure being expensive. You can do all of your development for an application on the free tier without spending a dime. When putting applications into production, you can easily scale up or down on the number of VM instances to keep your costs under control. In general, you will not be spending much money if you do not have a lot of users. Likewise, you should be earning plenty of revenue if you happen to have lots of users.
For the server side of XamChat, we'll use Azure Mobile Services to provide backend storage to the application. A mobile service is a neat solution to accelerate development for mobile applications that provide data storage and a REST-based API, which is a standards-based way of communicating with a web service over HTTP. Azure Mobile Services also includes a .NET client library for interacting with the service from C#.
A few nice features of Azure Mobile Services are as follows:
- Storage of data in the cloud with SQL Azure or other Azure data services such as Blob or Table storage
- Easy authentication with Windows Live ID, Facebook, Google, and Twitter
- Push notifications with iOS, Android, and Windows devices
- Code the server side with JavaScript and Node.js or C#
- An easy-to-use .NET library for client-side development
- Scale Azure Mobile Services to accommodate high volumes of data
You can see why using Azure is a good choice for simple mobile applications. The benefits of accelerated development and the many features it provides are a great fit for our XamChat sample application.
Let's navigate to your account at http://manage.windowsazure.com and perform the following steps to create a mobile service:
- Click on the plus button in the bottom-left corner of the window.
- Navigate to Compute | Mobile Service | Create through the menu.
- Enter a domain URL of your choice such as
yourname-xamchat. - We use the free database option for now.
- Select a data center near your location in the Region dropdown.
- For the Backend dropdown, leave the selection on JavaScript for this module. It will be simpler to set up the backend since we are focusing more on the client side. Feel free to use C# as an alternative, but keep in mind the examples in this module will be written in JavaScript.
- Now, click on Next.
- Use the default database name and choose New SQL database server.
- Enter a login name and password for the SQL server, and keep this information in a safe place.
- Make sure the region is the same as that of your mobile service to ensure good performance between your mobile service and its database.
- Review your final settings and hit the Finish button.
The management portal will display the progress, and it will take several seconds to create your mobile service and SQL Server instances. Remember that Azure is creating and starting new virtual machines for you under the hood, so it is really doing a decent amount of work to accommodate your request.
When completed, your account will have one Mobile Service and one SQL database in addition to the Default Directory that is included in all the accounts, as shown in the following screenshot:

If you take a look at the Scale tab for your mobile service, you'll notice that it is running under the Free tier by default. This is a great place for development. At the time of writing this module, it accommodates 500 devices. When deploying your applications to production, you might consider the Basic or Standard tiers, which also give you the option to add multiple instances.
The first step to implement something in Azure Mobile Services is to create a new table. By default, Azure Mobile Services uses a feature called dynamic schemas with its SQL database. When you insert a row from the client, new columns are dynamically added to the table. This prevents you from having to create the database schema manually and is a neat code-first approach to develop your backend database. You can always connect to the SQL database manually to fine tune things or make manual changes to the schema.
Return to the management portal, select your mobile services instance, and perform the following steps:
- Click on the Data tab.
- Click on the Create button found at the bottom center of the page.
- Enter
Useras the table name. - Leave everything else at its default value and click on the Save button.
- Repeat this process to create three more tables named
Friend,Message, andConversation.
Now that we have our four tables, we need to create a script to facilitate the login process for the users of our app. Azure Mobile Services allows you to add custom logic to your tables by creating scripts that run in Node.js, a framework for developing web services with JavaScript. You can override what happens to each table during the insert, read, update, or delete operations. In addition to this, you can also create scripts that are completely customized if you need other functionalities.
Click on the User table and then click on the Script tab. Make sure you are viewing the insert operation. By default, your script will be very simple, as shown in the following snippet:
function insert(item, user, request) {

  request.execute();

}
Scripts in Azure Mobile Services have three parameters, which are stated as follows:
item: This parameter is the object that the client sends to the service. In our case, it will be theUserobject we created in the previous chapters.user: This parameter includes information about the authenticated user. We won't be using this in our examples.request: This parameter is an object used to run thetableoperation and send a response back to the client. Callingexecutewill complete the operation and return a successful response to the client.
We need to modify the preceding script to only insert a new user when that user does not already exist. If the user does exist, we need to make sure that the password matches the username. Let's make a few changes to the script, as shown in the following lines of code:
function insert(item, user, request) {
  var users = tables.getTable('user');
  users.where({ username : item.Username }).read({
    success: function(results) {
      if (results.length == 0) {
        //This is a new user
        request.execute();
      }
      else {
        var user = results[0];
        if (item.Password == user.Password) {
          request.respond(statusCodes.OK, user);
        }
        else {
        request.respond(statusCodes.UNAUTHORIZED, "Incorrect username or password");
        }
      }
    }
  });
}
Let's summarize what we did in the preceding JavaScript:
- First, we grabbed the
usertable. Note that you can reference the name of the table using lowercase. - Next, we ran a query to pull out any existing users with the
wherefunction. We useditem.Usernamesince this matches ourUserobject in C#. Notice how this method is similar toLinqin C#. - If there are no results, we let the request execute normally.
- Otherwise, we compare the passwords and return
statusCodes.OKif they match. - If the passwords do not match, we return
statusCodes.UNAUTHORIZED. This will cause the client to receive an error. - For a complete list of available functions and methods, make sure you check out the server script reference on MSDN at http://tinyurl.com/AzureMobileServices.
From here, just make sure that you click on the Save button to apply your changes. Azure Mobile Services also has the option of providing source control for your scripts via Git. Feel free to take advantage of this feature if you want to make changes to the script in your favorite editor locally instead of the website editor.
After this, we need to create one more script. The way XamChat was implemented earlier in the module allows, users to add friends by entering their friends' usernames. So, in order to insert into the Friend table, we will need to modify the insert script to look up users by their usernames.
Let's modify the insert script for the Friends table as follows:
function insert(item, user, request) {
  var users = tables.getTable('user');
  users.where({ username : item.Username }).read({
    success: function(results) {
      if (results.length === 0) {
        //Could not find the user
        request.respond(statusCodes.NOT_FOUND, "User not found");
      }
      else {
        var existingUser = results[0];
        item.UserId = existingUser.id;
        request.execute();
      }
    }
  });
}
This is pretty similar to what we did before; we ran a simple query to load the user table based on the Username value. We merely have to set the UserId value on the new friend table prior to the execution of the request.
With our server-side changes complete, the next step is to implement our new service in our XamChat iOS and Android applications. Luckily, as we used an interface named IWebService, all we need to do is implement this interface to get it working in our application.
Now we can start setting up our service in our iOS application by performing the following steps:
- Open the
XamChat.Coreproject that we created in Chapter 4, XamChat – a Cross-platform App. - Create an
Azurefolder within the project. - Create a new class named
AzureWebService.cs. - Create the
publicclass and implementIWebService. - Right-click on
IWebServicein your code and navigate to Refactor | Implement Interface. - A line will appear; press Enter to insert the method stubs.
When this setup is complete, your class will look something similar to the following:
public class AzureWebService : IWebService
{
  #region IWebService implementation

  public Task<User> Login(string username, string password)
  {
    throw new NotImplementedException();
  }

  // -- More methods here --

  #endregion
}To make development with Azure Mobile Services much easier, we need to add a reference to the .NET client library. To do this, we will use NuGet to add the library:
- Right-click on the
XamChat.Coreproject and navigate to Add | Add Packages. - Search for
Azure Mobile Servicesusing the search box. - Select the
Azure Mobile Servicespackage, which at the time of writing this module was version 1.2.5. - Click on Add Package.
- Repeat this process for the
XamChat.iOSandXamChat.Androidprojects. There is some platform-specific setup for each platform.
This will download the library and automatically add references to it in your projects. The NuGet package manager might complain of warnings, which can be ignored. NuGet was originally developed for Visual Studio on Windows, so any packages that contain PowerShell scripts or prompt for a license agreement might give you a warning.
Now, let's modify our AzureWebService.cs file. Add using Microsoft.WindowsAzure.MobileServices to the top of the file, and then make the following changes:
public class AzureWebService : IWebService
{
  MobileServiceClient client = new MobileServiceClient("https://your-service-name.azure-mobile.net/", "your-application-key");

  // -- Existing code here --
}
Make sure you fill in your mobile service name and application key. You can find your key on the Dashboard tab of the Azure Management Portal under the Manage Keys section.
Now let's implement our first method, Login, in the following manner:
public async Task<User> Login(string username, string password)
{
  var user = new User
  {
    Username = username,
    Password = password
  };
  await client.GetTable<User>().InsertAsync(user);
  return user;
}
This is fairly straightforward, because of how nice this library is to use. The GetTable<T> method knows how to use a table named User based on the C# class name. Upon the first call, the dynamic schema feature will create two new columns named Username and Password based on the C# properties of our class. Note that the InsertAsync method will also fill in the user's Id property for later use in our application since we will need the Id for future calls to the mobile service.
Next, open the AppDelegate.cs file to set up our new service and add the following code:
//Replace this line
ServiceContainer.Register<IWebService>(() => new FakeWebService());

//With this line
ServiceContainer.Register<IWebService>(() => new AzureWebService());
Additionally, you will need to add some platform-specific setup for Azure Mobile Services. Add using Microsoft.WindowsAzure.MobileServices to the top of the file and add the following line of code to the bottom of FinishedLaunching in your AppDelegate.cs file:
CurrentPlatform.Init();
Now, if you compile and run your application after you log in, your app should successfully call Azure Mobile Services and insert a new user. Navigate to the Data tab of your Azure Mobile Service in the Azure Management Portal, and select the User table. You will see the user you just inserted, as shown in the following screenshot:

Note
It is generally a bad idea to store passwords in plain text in your database. A simple approach to make things a bit more secure would be to store them as an MD5 hash. You should be able to make this change in the custom JavaScript that we are using to insert the password on the User table. A complete guide to securing Windows Azure applications can be found at http://msdn.microsoft.com/en-us/library/windowsazure/hh696898.aspx.
Next, let's make a new class named Friend.cs. Add it to the Azure folder that is next to the other class specific to Azure as follows:
public class Friend
{
  public string Id { get; set; }
  public string MyId { get; set; }
  public string UserId { get; set; }
  public string Username { get; set; }
}
We'll use this class to store the friends information about each user. Note that we also have an Id property, and all the classes saved in Azure Mobile Services should have a string property named Id. This will be the table's primary key in the SQL database.
Next, let's modify the Message and Conversation classes to prepare for push notifications down the road. Add a new property to the Message class as follows:
public string ToId { get; set; }Then, add the following new property to Conversation.cs:
public string MyId { get; set; }Here, we'll need to insert or seed some test data for our application to function correctly. The easiest way to insert data would be from C#, so let's implement the following simple method on our service to do so:
public async Task LoadData()
{
  var users = client.GetTable<User>();
  var friends = client.GetTable<Friend>();

  var me = new User
  {
    Username = "jonathanpeppers",
    Password = "password"
  };
  var friend = new User
  {
    Username = "chucknorris",
    Password = "password"
  };
  await users.InsertAsync(me);
  await users.InsertAsync(friend);
  await friends.InsertAsync(new Friend { MyId = me.Id, Username = friend.Username });
  await friends.InsertAsync(new Friend { MyId = friend.Id, Username = me.Username });
}
Next, let's add the following method to AppDelegate.cs and call it from within FinishedLaunching:
private async void LoadData()
{
  var service = ServiceContainer.Resolve<IWebService>() as AzureWebService;
  await service.LoadData();
}
If you run your application at this point, it will insert two users and make them friends with one another. Before doing so, let's add some more code to the LoadData method in AzureWebService.cs to insert conversations and messages as follows:
var conversations = client.GetTable<Conversation>();
var messages = client.GetTable<Message>();

var conversation = new Conversation
{
  MyId = me.Id,
  UserId = friend.Id,
  Username = friend.Username,
  LastMessage = "HEY!"
};
await conversations.InsertAsync(conversation);
await messages.InsertAsync(new Message {
  ConversationId = conversation.Id,
  ToId = me.Id,
  UserId = friend.Id, Username = friend.Username,
  Text = "What's up?", Date = DateTime.Now.AddSeconds(-60)
});
await messages.InsertAsync(new Message {
  ConversationId = conversation.Id,
  ToId = friend.Id,
  UserId = me.Id, Username = me.Username,
  Text = "Not much", Date = DateTime.Now.AddSeconds(-30)
});
await messages.InsertAsync(new Message {
  ConversationId = conversation.Id,
  ToId = me.Id,
  UserId = friend.Id, Username = friend.Username,
  Text = "HEY!", Date = DateTime.Now
});
Now, if you run the application, it will seed the database with some good data to work with. I'd recommend that you remove the call to LoadData once it is successful the first time, and perhaps remove the method entirely when the development is complete.
Before going further, let's implement the rest of our IWebService interface. It can be done as follows:
public async Task<User> Register(User user)
{
  await client.GetTable<User>().InsertAsync(user);
  return user;
}
public async Task<User[]> GetFriends(string userId)
{
  var list = await client.GetTable<Friend>().Where(f => f.MyId == userId).ToListAsync();
  return list.Select(f => new User { Id = f.UserId, Username = f.Username }).ToArray();
}
public async Task<User> AddFriend( string userId, string username)
{
  var friend = new Friend { MyId = userId, Username = username };
  await client.GetTable<Friend>().InsertAsync(friend);
  return new User { Id = friend.UserId, Username = friend.Username };
}
Each method here is pretty simple. Register is very similar to Login, but the main complication for the other methods is the need to convert a Friend object to User. We used the ToListAsync method from the Azure library to get List<T>; however, since our interface uses arrays, we quickly converted the list to an array. We also utilized a couple of basic Linq operators such as Where and Select to accomplish our implementation of IWebService.
Now let's complete the methods related to conversations and messages, which are as follows:
public async Task<Conversation[]> GetConversations(string userId)
{
  var list = await client.GetTable<Conversation>().Where(c => c.MyId == userId).ToListAsync();
  return list.ToArray();
}
public async Task<Message[]> GetMessages(string conversationId)
{
  var list = await client.GetTable<Message>().Where(m => m.ConversationId == conversationId).ToListAsync();
  return list.ToArray();
}
public async Task<Message> SendMessage(Message message)
{
  await client.GetTable<Message>().InsertAsync(message);
  return message;
}
This completes our implementation of IWebService. If you run the application at this point, it will function exactly as before with the exception that the app is actually talking to a real web server. New messages will get persisted in the SQL database, and our custom scripts will handle the custom logic that we need. Feel free to play around with our implementation; you might discover some features of Azure Mobile Services that will work great with your own applications.
At this point, another good exercise would be to set up Azure Mobile Services in our Android application. To do so, you will merely need to add the Azure Mobile Services NuGet package. After that, you should be able to swap out the ServiceContainer.Register call in your Application class and call CurrentPlatform.Init(). Everything will function exactly like on iOS. Isn't cross-platform development great?
Adding the Azure Mobile Services NuGet package
To make development with Azure Mobile Services much easier, we need to add a reference to the .NET client library. To do this, we will use NuGet to add the library:
- Right-click on the
XamChat.Coreproject and navigate to Add | Add Packages. - Search for
Azure Mobile Servicesusing the search box. - Select the
Azure Mobile Servicespackage, which at the time of writing this module was version 1.2.5. - Click on Add Package.
- Repeat this process for the
XamChat.iOSandXamChat.Androidprojects. There is some platform-specific setup for each platform.
This will download the library and automatically add references to it in your projects. The NuGet package manager might complain of warnings, which can be ignored. NuGet was originally developed for Visual Studio on Windows, so any packages that contain PowerShell scripts or prompt for a license agreement might give you a warning.
Now, let's modify our AzureWebService.cs file. Add using Microsoft.WindowsAzure.MobileServices to the top of the file, and then make the following changes:
public class AzureWebService : IWebService
{
  MobileServiceClient client = new MobileServiceClient("https://your-service-name.azure-mobile.net/", "your-application-key");

  // -- Existing code here --
}
Make sure you fill in your mobile service name and application key. You can find your key on the Dashboard tab of the Azure Management Portal under the Manage Keys section.
Now let's implement our first method, Login, in the following manner:
public async Task<User> Login(string username, string password)
{
  var user = new User
  {
    Username = username,
    Password = password
  };
  await client.GetTable<User>().InsertAsync(user);
  return user;
}
This is fairly straightforward, because of how nice this library is to use. The GetTable<T> method knows how to use a table named User based on the C# class name. Upon the first call, the dynamic schema feature will create two new columns named Username and Password based on the C# properties of our class. Note that the InsertAsync method will also fill in the user's Id property for later use in our application since we will need the Id for future calls to the mobile service.
Next, open the AppDelegate.cs file to set up our new service and add the following code:
//Replace this line
ServiceContainer.Register<IWebService>(() => new FakeWebService());

//With this line
ServiceContainer.Register<IWebService>(() => new AzureWebService());
Additionally, you will need to add some platform-specific setup for Azure Mobile Services. Add using Microsoft.WindowsAzure.MobileServices to the top of the file and add the following line of code to the bottom of FinishedLaunching in your AppDelegate.cs file:
CurrentPlatform.Init();
Now, if you compile and run your application after you log in, your app should successfully call Azure Mobile Services and insert a new user. Navigate to the Data tab of your Azure Mobile Service in the Azure Management Portal, and select the User table. You will see the user you just inserted, as shown in the following screenshot:
Note
It is generally a bad idea to store passwords in plain text in your database. A simple approach to make things a bit more secure would be to store them as an MD5 hash. You should be able to make this change in the custom JavaScript that we are using to insert the password on the User table. A complete guide to securing Windows Azure applications can be found at http://msdn.microsoft.com/en-us/library/windowsazure/hh696898.aspx.
Next, let's make a new class named Friend.cs. Add it to the Azure folder that is next to the other class specific to Azure as follows:
public class Friend
{
  public string Id { get; set; }
  public string MyId { get; set; }
  public string UserId { get; set; }
  public string Username { get; set; }
}
We'll use this class to store the friends information about each user. Note that we also have an Id property, and all the classes saved in Azure Mobile Services should have a string property named Id. This will be the table's primary key in the SQL database.
Next, let's modify the Message and Conversation classes to prepare for push notifications down the road. Add a new property to the Message class as follows:
public string ToId { get; set; }Then, add the following new property to Conversation.cs:
public string MyId { get; set; }Here, we'll need to insert or seed some test data for our application to function correctly. The easiest way to insert data would be from C#, so let's implement the following simple method on our service to do so:
public async Task LoadData()
{
  var users = client.GetTable<User>();
  var friends = client.GetTable<Friend>();

  var me = new User
  {
    Username = "jonathanpeppers",
    Password = "password"
  };
  var friend = new User
  {
    Username = "chucknorris",
    Password = "password"
  };
  await users.InsertAsync(me);
  await users.InsertAsync(friend);
  await friends.InsertAsync(new Friend { MyId = me.Id, Username = friend.Username });
  await friends.InsertAsync(new Friend { MyId = friend.Id, Username = me.Username });
}
Next, let's add the following method to AppDelegate.cs and call it from within FinishedLaunching:
private async void LoadData()
{
  var service = ServiceContainer.Resolve<IWebService>() as AzureWebService;
  await service.LoadData();
}
If you run your application at this point, it will insert two users and make them friends with one another. Before doing so, let's add some more code to the LoadData method in AzureWebService.cs to insert conversations and messages as follows:
var conversations = client.GetTable<Conversation>();
var messages = client.GetTable<Message>();

var conversation = new Conversation
{
  MyId = me.Id,
  UserId = friend.Id,
  Username = friend.Username,
  LastMessage = "HEY!"
};
await conversations.InsertAsync(conversation);
await messages.InsertAsync(new Message {
  ConversationId = conversation.Id,
  ToId = me.Id,
  UserId = friend.Id, Username = friend.Username,
  Text = "What's up?", Date = DateTime.Now.AddSeconds(-60)
});
await messages.InsertAsync(new Message {
  ConversationId = conversation.Id,
  ToId = friend.Id,
  UserId = me.Id, Username = me.Username,
  Text = "Not much", Date = DateTime.Now.AddSeconds(-30)
});
await messages.InsertAsync(new Message {
  ConversationId = conversation.Id,
  ToId = me.Id,
  UserId = friend.Id, Username = friend.Username,
  Text = "HEY!", Date = DateTime.Now
});
Now, if you run the application, it will seed the database with some good data to work with. I'd recommend that you remove the call to LoadData once it is successful the first time, and perhaps remove the method entirely when the development is complete.
Before going further, let's implement the rest of our IWebService interface. It can be done as follows:
public async Task<User> Register(User user)
{
  await client.GetTable<User>().InsertAsync(user);
  return user;
}
public async Task<User[]> GetFriends(string userId)
{
  var list = await client.GetTable<Friend>().Where(f => f.MyId == userId).ToListAsync();
  return list.Select(f => new User { Id = f.UserId, Username = f.Username }).ToArray();
}
public async Task<User> AddFriend( string userId, string username)
{
  var friend = new Friend { MyId = userId, Username = username };
  await client.GetTable<Friend>().InsertAsync(friend);
  return new User { Id = friend.UserId, Username = friend.Username };
}
Each method here is pretty simple. Register is very similar to Login, but the main complication for the other methods is the need to convert a Friend object to User. We used the ToListAsync method from the Azure library to get List<T>; however, since our interface uses arrays, we quickly converted the list to an array. We also utilized a couple of basic Linq operators such as Where and Select to accomplish our implementation of IWebService.
Now let's complete the methods related to conversations and messages, which are as follows:
public async Task<Conversation[]> GetConversations(string userId)
{
  var list = await client.GetTable<Conversation>().Where(c => c.MyId == userId).ToListAsync();
  return list.ToArray();
}
public async Task<Message[]> GetMessages(string conversationId)
{
  var list = await client.GetTable<Message>().Where(m => m.ConversationId == conversationId).ToListAsync();
  return list.ToArray();
}
public async Task<Message> SendMessage(Message message)
{
  await client.GetTable<Message>().InsertAsync(message);
  return message;
}
This completes our implementation of IWebService. If you run the application at this point, it will function exactly as before with the exception that the app is actually talking to a real web server. New messages will get persisted in the SQL database, and our custom scripts will handle the custom logic that we need. Feel free to play around with our implementation; you might discover some features of Azure Mobile Services that will work great with your own applications.
At this point, another good exercise would be to set up Azure Mobile Services in our Android application. To do so, you will merely need to add the Azure Mobile Services NuGet package. After that, you should be able to swap out the ServiceContainer.Register call in your Application class and call CurrentPlatform.Init(). Everything will function exactly like on iOS. Isn't cross-platform development great?
Implementing push notifications with Azure Mobile Services on iOS is very simple to set up from an Azure backend perspective. The most complicated part is working through Apple's process of creating certificates and provisioning profiles in order to configure your iOS application. Before we continue, make sure you have a valid iOS Developer Program account, as you will not be able to send push notifications without one. If you are unfamiliar with the concept of push notifications, take a look at Apple's documentation at http://tinyurl.com/XamarinAPNS.
To send push notifications, you need to set up the following:
- An explicit App ID registered with Apple
- A provisioning profile targeting that App ID
- A certificate for your server to trigger the push notification
Apple provides both a development and production certificate that you can use to send push notifications from your server.
Let's begin by navigating to http://developer.apple.com/account and performing the following steps:
- Click on the Identifiers link.
- Click on the plus button in the top-right corner of the window.
- Enter a description, such as
XamChat, for the bundle ID. - Enter your bundle ID under the Explicit App ID section. This should match the bundle ID you set up in your
Info.plistfile, for example,com.yourcompanyname.xamchat. - Under App Services, make sure you check Push Notifications.
- Now, click on Continue.
- Review your final settings and hit Submit.
This will create an explicit App ID similar to what you can see in the following screenshot, which we can use for sending push notifications:

For push notifications, we have to use a profile with an explicit App ID that is not a development certificate. Now let's set up a provisioning profile:
- Click on the Development link under Provisioning Profiles in the right-hand side pane.
- Click on the plus button in the top-right corner.
- Check iOS App Development and click on Continue.
- Select the App ID we just created and click on Continue.
- Select the developer and click on Continue.
- Select the devices you will be using and click on Continue.
- Enter a name for the profile and click on Generate.
- Download the profile and install it, or open XCode and use the sync button by navigating to Preferences | Accounts.
When finished, you should arrive at a success web page that looks similar to the following screenshot:

Next, we perform the following steps to set up the certificate our server needs:
- Click on the Development link under Certificates in the right-hand side pane.
- Click on the plus button in the top-right corner.
- Enable Apple Push Notifications service SSL (Sandbox) and click on Continue.
- Select your App ID as before and click on Continue.
- Create a new certificate signing request as per Apple's instructions. You can also refer to Chapter 7, Deploying and Testing on Devices, or locate the
*.certSigningRequestfile. - Next, click on Continue.
- Upload the signing request file and click on Generate.
- Next, click on Download.
- Open the file to import the certificate into Keychain.
- Locate the certificate in Keychain. It will be titled Apple Development iOS Push Services and will contain your bundle ID.
- Right-click on the certificate and export it somewhere on your filesystem. Enter a password that you will remember.
This will create the certificate that we need to send push notifications to our users from Azure Mobile Services. All that remains is to return to the Azure Management Portal and upload the certificate from the Push tab under Apple Push Notification Settings, as shown in the following screenshot:

This upload concludes the configuration we need from Apple's side.
Next, let's return to our XamChat.iOS project in Xamarin Studio to make the necessary changes on the client side for push notifications. We will need to add a few new classes to our shared code to start with.
Open IWebService.cs and add the following new method:
Task RegisterPush(string userId, string deviceToken);
Next, let's implement this method in FakeWebService.cs (just so it compiles) as follows:
public async Task RegisterPush(string userId, string deviceToken)
{
  await Sleep();
}
Now, let's add a new class named Device.cs in the Core/Azure folder:
public class Device
{
  public string Id { get; set;}
  public string UserId { get; set; }
  public string DeviceToken { get; set; }
}
Finally, we can implement the real method in AzureWebService.cs as follows:
public async Task RegisterPush( string userId, string deviceToken)
{
  await client.GetTable<Device>().InsertAsync(new Device {
      UserId = userId,
      DeviceToken = deviceToken
    });
}
As for ViewModels, we need to add one more new method to LoginViewModel.cs:
public async Task RegisterPush(string deviceToken)
{
  if (settings.User == null)
    throw new Exception("User is null");
  await service.RegisterPush(settings.User.Id, deviceToken);
}
Then, we need to add a small modification to MessageViewModel.cs. Add the following line when creating a new Message object in the SendMessage method:
ToId = Conversation.UserId,
This modification concludes what we need to add to our shared code. We will reuse this new functionality when we add push notifications to Android, so go ahead and take the time to link in the new Device.cs file in your XamChat.Droid project to build your entire solution.
Now, let's add the iOS platform-specific code we need. Add the following methods to your AppDelegate.cs file:
public async override void RegisteredForRemoteNotifications(UIApplication application, NSData deviceToken)
{
var loginViewModel = ServiceContainer.Resolve<LoginViewModel>();
try
{
string token = deviceToken.Description;
token = token.Substring(1, token.Length - 2);
await loginViewModel.RegisterPush(token);
}
catch (Exception exc)
{
Console.WriteLine("Error registering push: " + exc);
}
}
public override void FailedToRegisterForRemoteNotifications(UIApplication application, NSError error)
{
Console.WriteLine("Error registering push: " + error.LocalizedDescription);
}We implemented a couple of important methods in the preceding code snippet. RegisteredForRemoteNotifications will occur when Apple successfully returns a device token from its servers. It is returned within angle brackets, so we do a little work to trim those off and pass the device token through LoginViewModel to Azure Mobile Services. We also implemented FailedToRegisterForRemoteNotifications just to report any errors that might occur throughout the process.
One last thing to do is to actually make a call to register for remote notifications. Open LoginController.cs and add the following line of code directly after the successful call to log in:
UIApplication.SharedApplication.RegisterForRemoteNotificationTypes( UIRemoteNotificationType.Alert | UIRemoteNotificationType.Badge | UIRemoteNotificationType.Sound);
You can also call the method on startup; however, in our situation, we need a valid user ID to store in the Device table in Azure.
Now let's switch to the Azure Management Portal and make the remaining changes in JavaScript on the server side. Under the Data tab, create a new table named Device with the default settings.
Next, we need to modify the insert script so that the duplicate device tokens are not inserted:
function insert(item, user, request)
{
var devicesTable = tables.getTable('device');
devicesTable.where({ userId: item.UserId, deviceToken: item.DeviceToken }).read({ success: function (devices)
{
if (devices.length > 0)
{
request.respond(200, devices[0]);
}
else
{
request.execute();
}
}
});
}Last but not least, we need to modify the insert script for the Message table to send push notifications to the user. The message was sent as follows:
function insert(item, user, request) {
request.execute();
var devicesTable = tables.getTable('device');
devicesTable.where({ userId : item.ToId }).read({
success: function(devices) {
devices.forEach(function(device) {
var text = item.Username + ": " + item.Text;
push.apns.send(device.DeviceToken, {
alert: text,
badge: 1,
payload: {
message: text
}
});
});
}
});
}After executing the request, we retrieve a list of devices from the database and send out a push notification for each one. To test push notifications, deploy the application and log in with the secondary user (if using our examples: chucknorris). After logging in, you can just background the app with the home button. Next, log in with the primary user on your iOS simulator and send a message. You should receive a push notification, as shown in the following screenshot:

Setting up proper provisioning
Let's begin by navigating to http://developer.apple.com/account and performing the following steps:
- Click on the Identifiers link.
- Click on the plus button in the top-right corner of the window.
- Enter a description, such as
XamChat, for the bundle ID. - Enter your bundle ID under the Explicit App ID section. This should match the bundle ID you set up in your
Info.plistfile, for example,com.yourcompanyname.xamchat. - Under App Services, make sure you check Push Notifications.
- Now, click on Continue.
- Review your final settings and hit Submit.
This will create an explicit App ID similar to what you can see in the following screenshot, which we can use for sending push notifications:
For push notifications, we have to use a profile with an explicit App ID that is not a development certificate. Now let's set up a provisioning profile:
- Click on the Development link under Provisioning Profiles in the right-hand side pane.
- Click on the plus button in the top-right corner.
- Check iOS App Development and click on Continue.
- Select the App ID we just created and click on Continue.
- Select the developer and click on Continue.
- Select the devices you will be using and click on Continue.
- Enter a name for the profile and click on Generate.
- Download the profile and install it, or open XCode and use the sync button by navigating to Preferences | Accounts.
When finished, you should arrive at a success web page that looks similar to the following screenshot:
Next, we perform the following steps to set up the certificate our server needs:
- Click on the Development link under Certificates in the right-hand side pane.
- Click on the plus button in the top-right corner.
- Enable Apple Push Notifications service SSL (Sandbox) and click on Continue.
- Select your App ID as before and click on Continue.
- Create a new certificate signing request as per Apple's instructions. You can also refer to Chapter 7, Deploying and Testing on Devices, or locate the
*.certSigningRequestfile. - Next, click on Continue.
- Upload the signing request file and click on Generate.
- Next, click on Download.
- Open the file to import the certificate into Keychain.
- Locate the certificate in Keychain. It will be titled Apple Development iOS Push Services and will contain your bundle ID.
- Right-click on the certificate and export it somewhere on your filesystem. Enter a password that you will remember.
This will create the certificate that we need to send push notifications to our users from Azure Mobile Services. All that remains is to return to the Azure Management Portal and upload the certificate from the Push tab under Apple Push Notification Settings, as shown in the following screenshot:
This upload concludes the configuration we need from Apple's side.
Next, let's return to our XamChat.iOS project in Xamarin Studio to make the necessary changes on the client side for push notifications. We will need to add a few new classes to our shared code to start with.
Open IWebService.cs and add the following new method:
Task RegisterPush(string userId, string deviceToken);
Next, let's implement this method in FakeWebService.cs (just so it compiles) as follows:
public async Task RegisterPush(string userId, string deviceToken)
{
await Sleep();
}Now, let's add a new class named Device.cs in the Core/Azure folder:
public class Device
{
public string Id { get; set;}
public string UserId { get; set; }
public string DeviceToken { get; set; }
}Finally, we can implement the real method in AzureWebService.cs as follows:
public async Task RegisterPush( string userId, string deviceToken)
{
await client.GetTable<Device>().InsertAsync(new Device {
UserId = userId,
DeviceToken = deviceToken
});
}As for ViewModels, we need to add one more new method to LoginViewModel.cs:
public async Task RegisterPush(string deviceToken)
{
if (settings.User == null)
throw new Exception("User is null");
await service.RegisterPush(settings.User.Id, deviceToken);
}Then, we need to add a small modification to MessageViewModel.cs. Add the following line when creating a new Message object in the SendMessage method:
ToId = Conversation.UserId,
This modification concludes what we need to add to our shared code. We will reuse this new functionality when we add push notifications to Android, so go ahead and take the time to link in the new Device.cs file in your XamChat.Droid project to build your entire solution.
Now, let's add the iOS platform-specific code we need. Add the following methods to your AppDelegate.cs file:
public async override void RegisteredForRemoteNotifications(UIApplication application, NSData deviceToken)
{
var loginViewModel = ServiceContainer.Resolve<LoginViewModel>();
try
{
string token = deviceToken.Description;
token = token.Substring(1, token.Length - 2);
await loginViewModel.RegisterPush(token);
}
catch (Exception exc)
{
Console.WriteLine("Error registering push: " + exc);
}
}
public override void FailedToRegisterForRemoteNotifications(UIApplication application, NSError error)
{
Console.WriteLine("Error registering push: " + error.LocalizedDescription);
}We implemented a couple of important methods in the preceding code snippet. RegisteredForRemoteNotifications will occur when Apple successfully returns a device token from its servers. It is returned within angle brackets, so we do a little work to trim those off and pass the device token through LoginViewModel to Azure Mobile Services. We also implemented FailedToRegisterForRemoteNotifications just to report any errors that might occur throughout the process.
One last thing to do is to actually make a call to register for remote notifications. Open LoginController.cs and add the following line of code directly after the successful call to log in:
UIApplication.SharedApplication.RegisterForRemoteNotificationTypes( UIRemoteNotificationType.Alert | UIRemoteNotificationType.Badge | UIRemoteNotificationType.Sound);
You can also call the method on startup; however, in our situation, we need a valid user ID to store in the Device table in Azure.
Now let's switch to the Azure Management Portal and make the remaining changes in JavaScript on the server side. Under the Data tab, create a new table named Device with the default settings.
Next, we need to modify the insert script so that the duplicate device tokens are not inserted:
function insert(item, user, request)
{
var devicesTable = tables.getTable('device');
devicesTable.where({ userId: item.UserId, deviceToken: item.DeviceToken }).read({ success: function (devices)
{
if (devices.length > 0)
{
request.respond(200, devices[0]);
}
else
{
request.execute();
}
}
});
}Last but not least, we need to modify the insert script for the Message table to send push notifications to the user. The message was sent as follows:
function insert(item, user, request) {
request.execute();
var devicesTable = tables.getTable('device');
devicesTable.where({ userId : item.ToId }).read({
success: function(devices) {
devices.forEach(function(device) {
var text = item.Username + ": " + item.Text;
push.apns.send(device.DeviceToken, {
alert: text,
badge: 1,
payload: {
message: text
}
});
});
}
});
}After executing the request, we retrieve a list of devices from the database and send out a push notification for each one. To test push notifications, deploy the application and log in with the secondary user (if using our examples: chucknorris). After logging in, you can just background the app with the home button. Next, log in with the primary user on your iOS simulator and send a message. You should receive a push notification, as shown in the following screenshot:
Setting up your provisioning profile
For push notifications, we have to use a profile with an explicit App ID that is not a development certificate. Now let's set up a provisioning profile:
- Click on the Development link under Provisioning Profiles in the right-hand side pane.
- Click on the plus button in the top-right corner.
- Check iOS App Development and click on Continue.
- Select the App ID we just created and click on Continue.
- Select the developer and click on Continue.
- Select the devices you will be using and click on Continue.
- Enter a name for the profile and click on Generate.
- Download the profile and install it, or open XCode and use the sync button by navigating to Preferences | Accounts.
When finished, you should arrive at a success web page that looks similar to the following screenshot:
Next, we perform the following steps to set up the certificate our server needs:
- Click on the Development link under Certificates in the right-hand side pane.
- Click on the plus button in the top-right corner.
- Enable Apple Push Notifications service SSL (Sandbox) and click on Continue.
- Select your App ID as before and click on Continue.
- Create a new certificate signing request as per Apple's instructions. You can also refer to Chapter 7, Deploying and Testing on Devices, or locate the
*.certSigningRequestfile. - Next, click on Continue.
- Upload the signing request file and click on Generate.
- Next, click on Download.
- Open the file to import the certificate into Keychain.
- Locate the certificate in Keychain. It will be titled Apple Development iOS Push Services and will contain your bundle ID.
- Right-click on the certificate and export it somewhere on your filesystem. Enter a password that you will remember.
This will create the certificate that we need to send push notifications to our users from Azure Mobile Services. All that remains is to return to the Azure Management Portal and upload the certificate from the Push tab under Apple Push Notification Settings, as shown in the following screenshot:
This upload concludes the configuration we need from Apple's side.
Next, let's return to our XamChat.iOS project in Xamarin Studio to make the necessary changes on the client side for push notifications. We will need to add a few new classes to our shared code to start with.
Open IWebService.cs and add the following new method:
Task RegisterPush(string userId, string deviceToken);
Next, let's implement this method in FakeWebService.cs (just so it compiles) as follows:
public async Task RegisterPush(string userId, string deviceToken)
{
await Sleep();
}Now, let's add a new class named Device.cs in the Core/Azure folder:
public class Device
{
public string Id { get; set;}
public string UserId { get; set; }
public string DeviceToken { get; set; }
}Finally, we can implement the real method in AzureWebService.cs as follows:
public async Task RegisterPush( string userId, string deviceToken)
{
await client.GetTable<Device>().InsertAsync(new Device {
UserId = userId,
DeviceToken = deviceToken
});
}As for ViewModels, we need to add one more new method to LoginViewModel.cs:
public async Task RegisterPush(string deviceToken)
{
if (settings.User == null)
throw new Exception("User is null");
await service.RegisterPush(settings.User.Id, deviceToken);
}Then, we need to add a small modification to MessageViewModel.cs. Add the following line when creating a new Message object in the SendMessage method:
ToId = Conversation.UserId,
This modification concludes what we need to add to our shared code. We will reuse this new functionality when we add push notifications to Android, so go ahead and take the time to link in the new Device.cs file in your XamChat.Droid project to build your entire solution.
Now, let's add the iOS platform-specific code we need. Add the following methods to your AppDelegate.cs file:
public async override void RegisteredForRemoteNotifications(UIApplication application, NSData deviceToken)
{
var loginViewModel = ServiceContainer.Resolve<LoginViewModel>();
try
{
string token = deviceToken.Description;
token = token.Substring(1, token.Length - 2);
await loginViewModel.RegisterPush(token);
}
catch (Exception exc)
{
Console.WriteLine("Error registering push: " + exc);
}
}
public override void FailedToRegisterForRemoteNotifications(UIApplication application, NSError error)
{
Console.WriteLine("Error registering push: " + error.LocalizedDescription);
}We implemented a couple of important methods in the preceding code snippet. RegisteredForRemoteNotifications will occur when Apple successfully returns a device token from its servers. It is returned within angle brackets, so we do a little work to trim those off and pass the device token through LoginViewModel to Azure Mobile Services. We also implemented FailedToRegisterForRemoteNotifications just to report any errors that might occur throughout the process.
One last thing to do is to actually make a call to register for remote notifications. Open LoginController.cs and add the following line of code directly after the successful call to log in:
UIApplication.SharedApplication.RegisterForRemoteNotificationTypes( UIRemoteNotificationType.Alert | UIRemoteNotificationType.Badge | UIRemoteNotificationType.Sound);
You can also call the method on startup; however, in our situation, we need a valid user ID to store in the Device table in Azure.
Now let's switch to the Azure Management Portal and make the remaining changes in JavaScript on the server side. Under the Data tab, create a new table named Device with the default settings.
Next, we need to modify the insert script so that the duplicate device tokens are not inserted:
function insert(item, user, request)
{
var devicesTable = tables.getTable('device');
devicesTable.where({ userId: item.UserId, deviceToken: item.DeviceToken }).read({ success: function (devices)
{
if (devices.length > 0)
{
request.respond(200, devices[0]);
}
else
{
request.execute();
}
}
});
}Last but not least, we need to modify the insert script for the Message table to send push notifications to the user. The message was sent as follows:
function insert(item, user, request) {
request.execute();
var devicesTable = tables.getTable('device');
devicesTable.where({ userId : item.ToId }).read({
success: function(devices) {
devices.forEach(function(device) {
var text = item.Username + ": " + item.Text;
push.apns.send(device.DeviceToken, {
alert: text,
badge: 1,
payload: {
message: text
}
});
});
}
});
}After executing the request, we retrieve a list of devices from the database and send out a push notification for each one. To test push notifications, deploy the application and log in with the secondary user (if using our examples: chucknorris). After logging in, you can just background the app with the home button. Next, log in with the primary user on your iOS simulator and send a message. You should receive a push notification, as shown in the following screenshot:
Setting up a certificate signing request
Next, we perform the following steps to set up the certificate our server needs:
- Click on the Development link under Certificates in the right-hand side pane.
- Click on the plus button in the top-right corner.
- Enable Apple Push Notifications service SSL (Sandbox) and click on Continue.
- Select your App ID as before and click on Continue.
- Create a new certificate signing request as per Apple's instructions. You can also refer to Chapter 7, Deploying and Testing on Devices, or locate the
*.certSigningRequestfile. - Next, click on Continue.
- Upload the signing request file and click on Generate.
- Next, click on Download.
- Open the file to import the certificate into Keychain.
- Locate the certificate in Keychain. It will be titled Apple Development iOS Push Services and will contain your bundle ID.
- Right-click on the certificate and export it somewhere on your filesystem. Enter a password that you will remember.
This will create the certificate that we need to send push notifications to our users from Azure Mobile Services. All that remains is to return to the Azure Management Portal and upload the certificate from the Push tab under Apple Push Notification Settings, as shown in the following screenshot:
This upload concludes the configuration we need from Apple's side.
Next, let's return to our XamChat.iOS project in Xamarin Studio to make the necessary changes on the client side for push notifications. We will need to add a few new classes to our shared code to start with.
Open IWebService.cs and add the following new method:
Task RegisterPush(string userId, string deviceToken);
Next, let's implement this method in FakeWebService.cs (just so it compiles) as follows:
public async Task RegisterPush(string userId, string deviceToken)
{
await Sleep();
}Now, let's add a new class named Device.cs in the Core/Azure folder:
public class Device
{
public string Id { get; set;}
public string UserId { get; set; }
public string DeviceToken { get; set; }
}Finally, we can implement the real method in AzureWebService.cs as follows:
public async Task RegisterPush( string userId, string deviceToken)
{
await client.GetTable<Device>().InsertAsync(new Device {
UserId = userId,
DeviceToken = deviceToken
});
}As for ViewModels, we need to add one more new method to LoginViewModel.cs:
public async Task RegisterPush(string deviceToken)
{
if (settings.User == null)
throw new Exception("User is null");
await service.RegisterPush(settings.User.Id, deviceToken);
}Then, we need to add a small modification to MessageViewModel.cs. Add the following line when creating a new Message object in the SendMessage method:
ToId = Conversation.UserId,
This modification concludes what we need to add to our shared code. We will reuse this new functionality when we add push notifications to Android, so go ahead and take the time to link in the new Device.cs file in your XamChat.Droid project to build your entire solution.
Now, let's add the iOS platform-specific code we need. Add the following methods to your AppDelegate.cs file:
public async override void RegisteredForRemoteNotifications(UIApplication application, NSData deviceToken)
{
var loginViewModel = ServiceContainer.Resolve<LoginViewModel>();
try
{
string token = deviceToken.Description;
token = token.Substring(1, token.Length - 2);
await loginViewModel.RegisterPush(token);
}
catch (Exception exc)
{
Console.WriteLine("Error registering push: " + exc);
}
}
public override void FailedToRegisterForRemoteNotifications(UIApplication application, NSError error)
{
Console.WriteLine("Error registering push: " + error.LocalizedDescription);
}We implemented a couple of important methods in the preceding code snippet. RegisteredForRemoteNotifications will occur when Apple successfully returns a device token from its servers. It is returned within angle brackets, so we do a little work to trim those off and pass the device token through LoginViewModel to Azure Mobile Services. We also implemented FailedToRegisterForRemoteNotifications just to report any errors that might occur throughout the process.
One last thing to do is to actually make a call to register for remote notifications. Open LoginController.cs and add the following line of code directly after the successful call to log in:
UIApplication.SharedApplication.RegisterForRemoteNotificationTypes( UIRemoteNotificationType.Alert | UIRemoteNotificationType.Badge | UIRemoteNotificationType.Sound);
You can also call the method on startup; however, in our situation, we need a valid user ID to store in the Device table in Azure.
Now let's switch to the Azure Management Portal and make the remaining changes in JavaScript on the server side. Under the Data tab, create a new table named Device with the default settings.
Next, we need to modify the insert script so that the duplicate device tokens are not inserted:
function insert(item, user, request)
{
var devicesTable = tables.getTable('device');
devicesTable.where({ userId: item.UserId, deviceToken: item.DeviceToken }).read({ success: function (devices)
{
if (devices.length > 0)
{
request.respond(200, devices[0]);
}
else
{
request.execute();
}
}
});
}Last but not least, we need to modify the insert script for the Message table to send push notifications to the user. The message was sent as follows:
function insert(item, user, request) {
request.execute();
var devicesTable = tables.getTable('device');
devicesTable.where({ userId : item.ToId }).read({
success: function(devices) {
devices.forEach(function(device) {
var text = item.Username + ": " + item.Text;
push.apns.send(device.DeviceToken, {
alert: text,
badge: 1,
payload: {
message: text
}
});
});
}
});
}After executing the request, we retrieve a list of devices from the database and send out a push notification for each one. To test push notifications, deploy the application and log in with the secondary user (if using our examples: chucknorris). After logging in, you can just background the app with the home button. Next, log in with the primary user on your iOS simulator and send a message. You should receive a push notification, as shown in the following screenshot:
Making client-side changes for push notifications
Next, let's return to our XamChat.iOS project in Xamarin Studio to make the necessary changes on the client side for push notifications. We will need to add a few new classes to our shared code to start with.
Open IWebService.cs and add the following new method:
Task RegisterPush(string userId, string deviceToken);
Next, let's implement this method in FakeWebService.cs (just so it compiles) as follows:
public async Task RegisterPush(string userId, string deviceToken)
{
await Sleep();
}Now, let's add a new class named Device.cs in the Core/Azure folder:
public class Device
{
public string Id { get; set;}
public string UserId { get; set; }
public string DeviceToken { get; set; }
}Finally, we can implement the real method in AzureWebService.cs as follows:
public async Task RegisterPush( string userId, string deviceToken)
{
await client.GetTable<Device>().InsertAsync(new Device {
UserId = userId,
DeviceToken = deviceToken
});
}As for ViewModels, we need to add one more new method to LoginViewModel.cs:
public async Task RegisterPush(string deviceToken)
{
if (settings.User == null)
throw new Exception("User is null");
await service.RegisterPush(settings.User.Id, deviceToken);
}Then, we need to add a small modification to MessageViewModel.cs. Add the following line when creating a new Message object in the SendMessage method:
ToId = Conversation.UserId,
This modification concludes what we need to add to our shared code. We will reuse this new functionality when we add push notifications to Android, so go ahead and take the time to link in the new Device.cs file in your XamChat.Droid project to build your entire solution.
Now, let's add the iOS platform-specific code we need. Add the following methods to your AppDelegate.cs file:
public async override void RegisteredForRemoteNotifications(UIApplication application, NSData deviceToken)
{
var loginViewModel = ServiceContainer.Resolve<LoginViewModel>();
try
{
string token = deviceToken.Description;
token = token.Substring(1, token.Length - 2);
await loginViewModel.RegisterPush(token);
}
catch (Exception exc)
{
Console.WriteLine("Error registering push: " + exc);
}
}
public override void FailedToRegisterForRemoteNotifications(UIApplication application, NSError error)
{
Console.WriteLine("Error registering push: " + error.LocalizedDescription);
}We implemented a couple of important methods in the preceding code snippet. RegisteredForRemoteNotifications will occur when Apple successfully returns a device token from its servers. It is returned within angle brackets, so we do a little work to trim those off and pass the device token through LoginViewModel to Azure Mobile Services. We also implemented FailedToRegisterForRemoteNotifications just to report any errors that might occur throughout the process.
One last thing to do is to actually make a call to register for remote notifications. Open LoginController.cs and add the following line of code directly after the successful call to log in:
UIApplication.SharedApplication.RegisterForRemoteNotificationTypes( UIRemoteNotificationType.Alert | UIRemoteNotificationType.Badge | UIRemoteNotificationType.Sound);
You can also call the method on startup; however, in our situation, we need a valid user ID to store in the Device table in Azure.
Now let's switch to the Azure Management Portal and make the remaining changes in JavaScript on the server side. Under the Data tab, create a new table named Device with the default settings.
Next, we need to modify the insert script so that the duplicate device tokens are not inserted:
function insert(item, user, request)
{
var devicesTable = tables.getTable('device');
devicesTable.where({ userId: item.UserId, deviceToken: item.DeviceToken }).read({ success: function (devices)
{
if (devices.length > 0)
{
request.respond(200, devices[0]);
}
else
{
request.execute();
}
}
});
}Last but not least, we need to modify the insert script for the Message table to send push notifications to the user. The message was sent as follows:
function insert(item, user, request) {
request.execute();
var devicesTable = tables.getTable('device');
devicesTable.where({ userId : item.ToId }).read({
success: function(devices) {
devices.forEach(function(device) {
var text = item.Username + ": " + item.Text;
push.apns.send(device.DeviceToken, {
alert: text,
badge: 1,
payload: {
message: text
}
});
});
}
});
}After executing the request, we retrieve a list of devices from the database and send out a push notification for each one. To test push notifications, deploy the application and log in with the secondary user (if using our examples: chucknorris). After logging in, you can just background the app with the home button. Next, log in with the primary user on your iOS simulator and send a message. You should receive a push notification, as shown in the following screenshot:
Since we have already set up everything we need in the shared code and on Azure, setting up push notifications for Android will be a lot less work at this point of time. To continue, you will need a Google account with a verified e-mail address; however, I would recommend that you use an account registered with Google Play if you have one. You can refer to the full documentation on Google Cloud Messaging (GCM) at http://developer.android.com/google/gcm.
Let's begin by navigating to http://cloud.google.com/console and performing the following steps:
- Click on the Create Project button.
- Enter an appropriate project name such as
XamChat. - Enter a project ID; you can use the generated one. I prefer to use my application's bundle ID and replace the periods with hyphens.
- Agree to the Terms of Service.
- Click on the Create button.
- When creating your first project, you might have to verify the mobile number associated with your account.
- Note the Project Number field on the Overview page. We will need this number later.
The following screenshot shows the Overview tab:
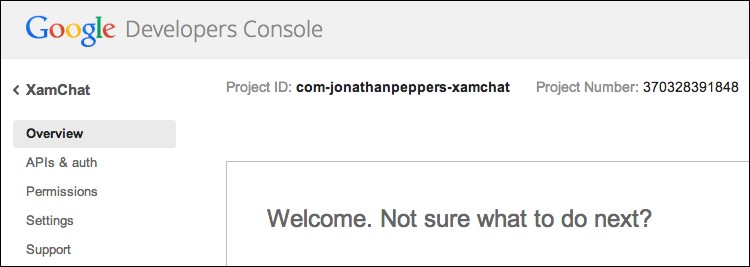
Now we can continue with our setup as follows:
- Click on APIs & auth in the left-hand side pane.
- Scroll down and click on Google Cloud Messaging for Android.
- Click on the OFF button at the top to enable the service. You might have to accept another agreement.
- Click on Registered Apps in the left-hand side pane.
- Click on the Register App button at the top.
- Enter
XamChatin the App Name field and click on Register. You can leave the Platform selection on Web Application at its default value. - Expand the Server Key section and copy the API Key value to your clipboard.
- Switch to the Azure Management Portal and navigate to the Push tab in your Azure Mobile Service instance.
- Paste the API key in the google cloud messaging settings section and click on Save.

Next, let's modify our insert script for the Message table to support Android as follows:
function insert(item, user, request) {
request.execute();
var devicesTable = tables.getTable('device');
devicesTable.where({ userId : item.ToId }).read({
success: function(devices) {
devices.forEach(function(device) {
if (device.DeviceToken.length > 72) {
push.gcm.send(device.DeviceToken, {
title: item.Username,
message: item.Text,
});
}
else {
var text = item.Username + ": " + item.Text;
push.apns.send(device.DeviceToken, {
alert: text,
badge: 1,
payload: {
message: text
}
});
}
});
}
});
}Basically, we send any deviceToken values that are longer than 72 characters to GCM. This is one simple way to do it, but you can also add a value to the Device table that indicates whether the device is Android or iOS. GCM also supports sending custom values to be displayed in the notification area, so we send an actual title along with the message.
This completes our setup on Azure's side. Setting up the next part in our Android application can be a bit difficult, so we will use a library called PushSharp to simplify our implementation.
First, navigate to http://github.com/Redth/PushSharp and perform the following steps:
- Download the project and place it in the same folder as your XamChat solution.
- Add the
PushSharp.Client.MonoForAndroid.Gcmproject to your solution. You can locate the project in thePushSharp.Clientsubdirectory. - Reference the new project from your
XamChat.Droidproject. - If it's not already installed, you will need to install the Android SDK Platform for Android 2.2 (API 8). You can install this from the Android SDK manager that can be launched from the Tools menu in Xamarin Studio.
Next, create a new class called PushConstants.cs as follows:
public static class PushConstants
{
public const string BundleId = "your-bundle-id";
public const string ProjectNumber = "your-project-number";
}Fill out the BundleId value with your application's bundle ID and the ProjectNumber value with the project number found on the Overview page of your Google Cloud Console.
Next, we need to set up some permissions to support push notifications in our application. Above the namespace declaration in this file, add the following:
[assembly: Permission( Name = XamChat.Droid.PushConstants.BundleId + ".permission.C2D_MESSAGE")] [assembly: UsesPermission( Name = XamChat.Droid.PushConstants.BundleId + ".permission.C2D_MESSAGE")] [assembly: UsesPermission( Name = "com.google.android.c2dm.permission.RECEIVE")] [assembly: UsesPermission( Name = "android.permission.GET_ACCOUNTS")] [assembly: UsesPermission( Name = "android.permission.INTERNET")] [assembly: UsesPermission( Name = "android.permission.WAKE_LOCK")]
You can also make these changes in our AndroidManifest.xml file; however, using C# attributes can be better since it gives you the ability to use code completion while typing.
Next, create another new class named PushReceiver.cs as follows:
[BroadcastReceiver(
Permission = GCMConstants.PERMISSION_GCM_INTENTS)]
[IntentFilter(
new string[] { GCMConstants.INTENT_FROM_GCM_MESSAGE },
Categories = new string[] { PushConstants.BundleId })]
[IntentFilter(
new string[] {
GCMConstants.INTENT_FROM_GCM_REGISTRATION_CALLBACK },
Categories = new string[] { PushConstants.BundleId })]
[IntentFilter(
new string[] {
GCMConstants.INTENT_FROM_GCM_LIBRARY_RETRY },
Categories = new string[] { PushConstants.BundleId })]
public class PushReceiver :
PushHandlerBroadcastReceiverBase<PushHandlerService>
{ }
The PushReceiver.cs class sets up BroadcastReceiver, which is Android's native way for different applications to talk with one another. For more information on this topic, check out the Android documentation at http://developer.android.com/reference/android/content/BroadcastReceiver.html.
Next, create one last class named PushService.cs as follows:
[Service]
public class PushHandlerService : PushHandlerServiceBase
{
public PushHandlerService() : base (PushConstants.ProjectNumber)
{ }
}Now, right-click on PushHandlerServiceBase and navigate to Refactor | Implement abstract members. Next, let's implement each member one by one:
protected async override void OnRegistered (Context context, string registrationId)
{
Console.WriteLine("Push successfully registered!");
var loginViewModel = ServiceContainer.Resolve<LoginViewModel>();
try
{
await loginViewModel.RegisterPush(registrationId);
}
catch (Exception exc)
{
Console.WriteLine("Error registering push: " + exc);
}
}The preceding code is very similar to what we did on iOS. We merely have to send the registrationId value to loginViewModel.
Next, we have to write the following code when the message is received:
protected override void OnMessage (Context context, Intent intent)
{
//Pull out the notification details
string title = intent.Extras.GetString("title");
string message = intent.Extras.GetString("message");
//Create a new intent
intent = new Intent(this, typeof(ConversationsActivity));
//Create the notification
var notification = new Notification(Android.Resource.Drawable.SymActionEmail, title);
notification.Flags = NotificationFlags.AutoCancel;
notification.SetLatestEventInfo(this,
new Java.Lang.String(title),
new Java.Lang.String(message), PendingIntent.GetActivity(this, 0, intent, 0));
//Send the notification through the NotificationManager
var notificationManager = GetSystemService(Context.NotificationService) as NotificationManager;
notificationManager.Notify(1, notification);
}This code will actually pull out the values from the notification and display them in the notification center of the Android device. We used the built-in resource for SymActionEmail to display an e-mail icon in the notification.
Next, we just need to implement two more abstract methods. For now, let's just use Console.WriteLine to report these events as follows:
protected override void OnUnRegistered(Context context, string registrationId)
{
Console.WriteLine("Push unregistered!");
}
protected override void OnError (Context context, string errorId)
{
Console.WriteLine("Push error: " + errorId);
}Down the road, you should consider removing registrations from the Device table in Azure when OnUnRegistered is called. Occasionally, a user's registrationId will change, so this is the place where your application is notified of this change.
Next, open Application.cs and add the following lines to the end of OnCreate:
PushClient.CheckDevice(this); PushClient.CheckManifest(this);
Next, open LoginActivity.cs and add the following line after a successful login:
PushClient.Register(this, PushConstants.ProjectNumber);
Now if you repeat the steps for testing push notifications on iOS, you should be able to send a push notification to our Android app. Even better, you should be able to send push notifications across platforms, since an iOS user can send a message to an Android user.

In this chapter, we went through what Windows Azure provides: Infrastructure as a Service and Platform as a Service. We set up a free Windows Azure account and set up an Azure Mobile Services instance. Next, we created all the tables we needed to store our data and wrote a few scripts to add the business logic to the web service. We implemented the client-side code for making requests against Azure Mobile Services. Lastly, we implemented push notifications for iOS using the Apple Push Notification Service and for Android using Google Cloud Messaging.
Using Azure Mobile Services, we were able to get by without writing much of the server-side code—mainly a few simple scripts. It would be pretty challenging to implement push notifications yourself instead of leveraging Azure's functionality for this. In the next chapter, we'll explore how to use third-party libraries with Xamarin. This includes everything from the Xamarin Component Store to using native Objective-C or Java libraries.
Xamarin supports a subset of the .NET framework, but for the most part, it includes all the standard APIs you would expect in the .NET base class libraries. Because of this, a large portion of C#'s open source libraries can be used directly in Xamarin projects. Additionally, if an open source project doesn't have a Xamarin or portable class library version, porting the code to be used in a Xamarin project can often be very straightforward. Xamarin also supports calling native Objective-C and Java libraries, so we will explore these as additional means of reusing existing code.
In this chapter, we will cover the following:
- The Xamarin Component Store
- NuGet
- Porting existing C# libraries
- Objective-C bindings
- Java bindings
The primary and obvious way to add third-party components to your project is via the Xamarin Component Store. The Component Store is fairly similar to NuGet, which we will cover later, except that the Component Store also contains premium components that are not free. All Xamarin components are required to include full sample projects and a getting started guide, while NuGet does not inherently provide documentation in its packages.
All the Xamarin.iOS and Xamarin.Android projects come with a Components folder. To get started, simply right-click on the folder and select Get More Components to launch the store dialog, as shown in the following screenshot:

At the time of writing this module, there are well over 200 components available to enhance your iOS and Android applications. This is a great place to find the most common components to use within your Xamarin applications. Each component is complete with artwork. You might possibly need a demonstration video, reviews, and other information before purchasing a premium component.
The most well-known and useful components are as follows:
- Json.NET: This is the de facto standard for parsing and serializing JSON with C#
- RestSharp: This is a commonly used simple REST client for .NET
- SQLite.NET: This is a simple Object Relational Mapping (ORM) to use when working with local SQLite databases in your mobile applications
- Facebook SDK: This is the standard SDK provided by Facebook to integrate its services into your apps
- Xamarin.Mobile: This is a cross-platform library to access your device's contacts, GPS, photo library, and camera with a common API
- ActionBarSherlock: This is a powerful
ActionBarreplacement for Android
Note that some of these libraries are native Java or Objective-C libraries, while some are plain C#. Xamarin is built from the ground up to support calling native libraries, so the Component Store offers many of the common libraries that Objective-C or Java developers would leverage when developing mobile applications.
You can also submit your own components to the Component Store. If you have a useful open source project or just want to earn some extra cash, creating a component is simple. We won't be covering it in this module, but you can navigate to http://components.xamarin.com/submit for full documentation on the subject, as shown in the following screenshot:

Even though Xamarin is becoming a popular platform, many open source .NET libraries are simply not up to speed with supporting Xamarin.iOS and Xamarin.Android. However, in these cases, you are definitely not out of luck. Often, if there is a Silverlight or Windows Phone version of the library, you can simply create an iOS or Android class library and add the files with no code changes.
To help with this process, Xamarin has created an online service tool to scan your existing code and determine how far off a library is from being portable. Navigate to http://scan.xamarin.com and upload any *.exe or *.dll file to have its methods analyzed for cross-platform development. After the scanning process, you'll get a report of the porting percentage (how much your component / application is portable to all platforms: Android, iOS, Windows Phone, and Windows Store).
The following screenshot is a sample report of the Lucene .NET client library:

If the library is running a high percentage on portability, you should have a relatively easy time porting it to Android or iOS. In most cases, it can even be easier to port the library to Xamarin than Windows Phone or WinRT.
To illustrate this process, let's port an open source project that doesn't have Xamarin or a portable class library support. I have selected a dependency injection library called Ninject due to its usefulness and relationship to ninjas. You can find out more about the library at http://www.ninject.org.
Let's begin setting up the library to work with Xamarin projects as follows:
- First, download the source code for Ninject from https://github.com/ninject/Ninject.
- Open
Ninject.slnin Xamarin Studio. - Add a new iOS Library Project named
Ninject.iOS. - Link all the files from the
Ninjectmain project. Make sure you use the Add Existing Folder dialog to speed up this process.
Tip
If you aren't familiar with GitHub, I recommend that you download the desktop client for Mac found at http://mac.github.com.
Now try to build the Ninject.iOS project; you will get several compiler errors in a file named DynamicMethodFactory.cs, as shown in the following screenshot:

Open DynamicMethodFactory.cs and notice the following code at the top of the file:
#if !NO_LCG #region Using Directivesusing System; using System.Reflection; using System.Reflection.Emit; using Ninject.Components; #endregion /// *** File contents here *** #endif
It is not possible to use System.Reflection.Emit on iOS due to Apple's platform restrictions. Luckily, the library writers have created a preprocessor directive called NO_LCG (which stands for Lightweight Code Generation) to allow the library to run on platforms that do not support System.Reflection.Emit.
To fix our iOS project, open the project options and navigate to the Build | Compiler section. Add NO_LCG to the Define Symbols field for both Debug and Release in the Configuration drop-down menu. Click on OK to save your changes. Notice how the entire file is now highlighted with a light gray color in Xamarin Studio, as shown in the following screenshot. This means that the code will be omitted from being compiled.

If you compile the project now, it will be completed successfully and a Ninject.iOS.dll file will be created, which you can reference from any Xamarin.iOS project. You can also reference the Ninject.iOS project directly instead of using the *.dll file.
At this point, you might wish to repeat the process to create a Xamarin.Android class library project. Luckily, Xamarin.Android supports System.Reflection.Emit, so you can skip adding the additional preprocessor directive if you wish.
Xamarin has developed a sophisticated system to call native Objective-C libraries from C# in iOS projects. The core of Xamarin.iOS uses the same technology to call native Apple APIs in UIKit, CoreGraphics, and other iOS frameworks. Developers can create iOS binding projects to expose the Objective-C classes and methods to C# using simple interfaces and attributes.
To aid in creating Objective-C bindings, Xamarin has created a small tool named Objective Sharpie that can process Objective-C header files for you and export the valid C# definitions to add to a binding project. This tool is a great starting point for most bindings that will get your binding three-fourths of the way complete, and you will want to hand-edit and fine-tune things to be more C#-friendly in a lot of cases.
As an example, we will write a binding for the Google Analytics library for iOS. It is a simple and useful library that can track the user activities in your iOS or Android applications. At the time of writing, the version of the Google Analytics SDK was 3.10, so some of these instructions might change as new versions are released.
First, download and install Objective Sharpie from http://tinyurl.com/ObjectiveSharpie, then perform the following steps:
- Download the latest Google Analytics SDK for iOS available at https://tinyurl.com/GoogleAnalyticsForiOS.
- Create a new iOS Binding Project named
GoogleAnalytics.iOS. - Run Objective Sharpie.
- Select iOS 7.1 as Target SDK and click on Next.
- Add all of the header (
*.h) files included with the Google Analytics SDK; you can find these in theLibraryfolder of the download. Click on Next. - Pick a suitable namespace such as
GoogleAnalyticsand click on Generate. - Copy the resulting
ApiDefinition.csfile that was generated into your iOS binding project. - After a few seconds, your C# file will be generated. Click on Quit.
You should have not received any error messages from Objective Sharpie during the process, and when finished, your screen should look like the following screenshot:

Tip
At the time of writing this module, Objective Sharpie does not work properly with Xcode 6.0 and higher. I recommend that you download Xcode 5.1.1 if you run into this issue. You can install two versions of Xcode side by side by renaming an existing one in Finder and installing a second one. You can find older Xcode downloads at https://developer.apple.com/downloads/index.action.
Now if you return to your binding project, you'll notice that Objective Sharpie has generated an interface definition for every class discovered in the header files of the library. It has also generated many enum values that the library uses and changed casing and naming conventions to follow C# more closely where possible.
As you read through the binding, you'll notice several C# attributes that define different aspects about the Objective-C library such as the following:
BaseType: This declares an interface as an Objective-C class. The base class (also called superclass) is passed in to the attribute. If it has no base class,NSObjectshould be used.Export: This declares a method or property on an Objective-C class. A string that maps the Objective-C name to the C# name is passed in. Objective-C method names are generally in the following form:myMethod:someParam:someOtherParam.Static: This marks a method or property asstaticin C#.Bind: This is used on properties to map a getter or setter to a different Objective-C method. Objective-C properties can rename a getter or setter for a property.NullAllowed: This allowsnullto be passed to a method or property. By default, an exception is thrown if this occurs.Field: This declares an Objective-C field that is exposed as a public variable in C#.Model: This identifies a class toXamarin.iOSto have methods that can be optionally overridden. This is generally used on Objective-C delegates.Internal: This flags the generated member with the C# internal keyword. It can be used to hide certain members that you don't want to expose to the outside world.Abstract: This identifies an Objective-C method as required, which goes hand in hand withModel. In C#, it will generate an abstract method.
The only other rule to know is how to define constructors. Xamarin had to invent a convention for this since C# interfaces do not support constructors.
To define a constructor besides the default one, use the following code:
[Export("initWithFrame:")]
IntPtr Constructor(RectangleF frame);This would define a constructor on the class that takes in RectangleF as a parameter. The method name Constructor and the return type IntPtr signal the Xamarin compiler to generate a constructor.
Now, let's return to our binding project to finish setting up everything. If you compile the project at this point, you'll get a few compiler errors. Let's fix them one by one as follows:
- Change the default namespace of the project to
GoogleAnalytics. This setting is found in the project options by navigating to General | Main Settings. - Add
libGoogleAnalyticsServices.afrom the SDK download to the project. - Add
usingstatements forMonoTouch.Foundation,MonoTouch.UIKit, andMonoTouch.ObjCRuntimeat the top of theApiDefinition.csfile. - Remove the multiple duplicate declarations of
GAILogLevel. You might also wish to move enumerations to theStructsAndEnums.csfile. - Remove the declaration for
GAIErrorCode. - In the
SetAllmethod ofGAIDictionaryBuilder, rename theparamsparameter toparameters, asparamsis a reserved word in C#. - Remove the duplicate declarations for
GAILogger,GAITracker,GAITrackedViewController, and any other duplicate classes you find. - Go through any
Fielddeclarations and change[Field("Foobar")]to[Field("Foobar", "__Internal")]. This tells the compiler where the field resides; in this case, it will be included internally in our binding project. - Remove all the
Verifyattributes. These are spots where Objective Sharpie was unsure of the operation it performed. In our example, all of them are fine so it is safe to remove them.
One more error remains regarding Objective Sharpie not being able to generate C# delegates for methods that have callbacks. Navigate to the GAI interface and change the following method:
[Export ("dispatchWithCompletionHandler:")]void DispatchWithCompletionHandler (
GAIDispatchResultHandler completionHandler);You will also need to define the following delegate at the top of this file:
public delegate void GAIDispatchResultHandler(
GAIDispatchResult result);After going through these issues, you should be able to compile the binding and get no errors. You could have read the Objective-C header files and written the definitions yourself by hand; however, using Objective Sharpie generally means a lot less work.
At this point, if you try to use the library in an iOS project, you would get an error such as the following:
Error MT5210: Native linking failed, undefined symbol:
_FooBar. Please verify that all the necessary frameworks
have been referenced and native libraries are properly
linked in.We need to define the other frameworks and libraries that the Objective-C library uses. This is very similar to how references work in C#. If we review the Google Analytics documentation, it says that you must add CoreData, SystemConfiguration, and libz.dylib. Additionally, you must add a weak reference to AdSupport.
Open libGoogleAnalyticsServices.linkwith.cs that was created automatically nested underneath the *.a file and make the following changes:
[assembly: LinkWith ("libGoogleAnalyticsServices.a",
LinkTarget.ArmV7 | LinkTarget.ArmV7s | LinkTarget.Simulator,
LinkerFlags = "-lz",
Frameworks = "CoreData SystemConfiguration",
WeakFrameworks = "AdSupport",
ForceLoad = true)]
We added references to frameworks in the following ways:
- Frameworks: Add them to the
Frameworksvalue on theLinkWithattribute, delimited by spaces. - Weak Frameworks: Add them to the
WeakFrameworksproperty on theLinkWithattribute in the same manner. Weak frameworks are libraries that can be ignored if they are not found. In this case,AdSupportwas added in iOS 6; however, this library will still work on older versions of iOS. - Dynamic Libraries: Libraries such as
libz.dylibcan be declared inLinkerFlags. Generally, you drop the.dylibextension and replacelibwith–l.
After these changes are implemented, you will be able to successfully use the library from iOS projects. For complete documentation on Objective-C bindings, visit the Xamarin documentation site at http://docs.xamarin.com/ios.
Working with Objective Sharpie
First, download and install Objective Sharpie from http://tinyurl.com/ObjectiveSharpie, then perform the following steps:
- Download the latest Google Analytics SDK for iOS available at https://tinyurl.com/GoogleAnalyticsForiOS.
- Create a new iOS Binding Project named
GoogleAnalytics.iOS. - Run Objective Sharpie.
- Select iOS 7.1 as Target SDK and click on Next.
- Add all of the header (
*.h) files included with the Google Analytics SDK; you can find these in theLibraryfolder of the download. Click on Next. - Pick a suitable namespace such as
GoogleAnalyticsand click on Generate. - Copy the resulting
ApiDefinition.csfile that was generated into your iOS binding project. - After a few seconds, your C# file will be generated. Click on Quit.
You should have not received any error messages from Objective Sharpie during the process, and when finished, your screen should look like the following screenshot:
Tip
At the time of writing this module, Objective Sharpie does not work properly with Xcode 6.0 and higher. I recommend that you download Xcode 5.1.1 if you run into this issue. You can install two versions of Xcode side by side by renaming an existing one in Finder and installing a second one. You can find older Xcode downloads at https://developer.apple.com/downloads/index.action.
Now if you return to your binding project, you'll notice that Objective Sharpie has generated an interface definition for every class discovered in the header files of the library. It has also generated many enum values that the library uses and changed casing and naming conventions to follow C# more closely where possible.
As you read through the binding, you'll notice several C# attributes that define different aspects about the Objective-C library such as the following:
BaseType: This declares an interface as an Objective-C class. The base class (also called superclass) is passed in to the attribute. If it has no base class,NSObjectshould be used.Export: This declares a method or property on an Objective-C class. A string that maps the Objective-C name to the C# name is passed in. Objective-C method names are generally in the following form:myMethod:someParam:someOtherParam.Static: This marks a method or property asstaticin C#.Bind: This is used on properties to map a getter or setter to a different Objective-C method. Objective-C properties can rename a getter or setter for a property.NullAllowed: This allowsnullto be passed to a method or property. By default, an exception is thrown if this occurs.Field: This declares an Objective-C field that is exposed as a public variable in C#.Model: This identifies a class toXamarin.iOSto have methods that can be optionally overridden. This is generally used on Objective-C delegates.Internal: This flags the generated member with the C# internal keyword. It can be used to hide certain members that you don't want to expose to the outside world.Abstract: This identifies an Objective-C method as required, which goes hand in hand withModel. In C#, it will generate an abstract method.
The only other rule to know is how to define constructors. Xamarin had to invent a convention for this since C# interfaces do not support constructors.
To define a constructor besides the default one, use the following code:
[Export("initWithFrame:")]
IntPtr Constructor(RectangleF frame);This would define a constructor on the class that takes in RectangleF as a parameter. The method name Constructor and the return type IntPtr signal the Xamarin compiler to generate a constructor.
Now, let's return to our binding project to finish setting up everything. If you compile the project at this point, you'll get a few compiler errors. Let's fix them one by one as follows:
- Change the default namespace of the project to
GoogleAnalytics. This setting is found in the project options by navigating to General | Main Settings. - Add
libGoogleAnalyticsServices.afrom the SDK download to the project. - Add
usingstatements forMonoTouch.Foundation,MonoTouch.UIKit, andMonoTouch.ObjCRuntimeat the top of theApiDefinition.csfile. - Remove the multiple duplicate declarations of
GAILogLevel. You might also wish to move enumerations to theStructsAndEnums.csfile. - Remove the declaration for
GAIErrorCode. - In the
SetAllmethod ofGAIDictionaryBuilder, rename theparamsparameter toparameters, asparamsis a reserved word in C#. - Remove the duplicate declarations for
GAILogger,GAITracker,GAITrackedViewController, and any other duplicate classes you find. - Go through any
Fielddeclarations and change[Field("Foobar")]to[Field("Foobar", "__Internal")]. This tells the compiler where the field resides; in this case, it will be included internally in our binding project. - Remove all the
Verifyattributes. These are spots where Objective Sharpie was unsure of the operation it performed. In our example, all of them are fine so it is safe to remove them.
One more error remains regarding Objective Sharpie not being able to generate C# delegates for methods that have callbacks. Navigate to the GAI interface and change the following method:
[Export ("dispatchWithCompletionHandler:")]void DispatchWithCompletionHandler (
GAIDispatchResultHandler completionHandler);You will also need to define the following delegate at the top of this file:
public delegate void GAIDispatchResultHandler(
GAIDispatchResult result);After going through these issues, you should be able to compile the binding and get no errors. You could have read the Objective-C header files and written the definitions yourself by hand; however, using Objective Sharpie generally means a lot less work.
At this point, if you try to use the library in an iOS project, you would get an error such as the following:
Error MT5210: Native linking failed, undefined symbol:
_FooBar. Please verify that all the necessary frameworks
have been referenced and native libraries are properly
linked in.We need to define the other frameworks and libraries that the Objective-C library uses. This is very similar to how references work in C#. If we review the Google Analytics documentation, it says that you must add CoreData, SystemConfiguration, and libz.dylib. Additionally, you must add a weak reference to AdSupport.
Open libGoogleAnalyticsServices.linkwith.cs that was created automatically nested underneath the *.a file and make the following changes:
[assembly: LinkWith ("libGoogleAnalyticsServices.a",
LinkTarget.ArmV7 | LinkTarget.ArmV7s | LinkTarget.Simulator,
LinkerFlags = "-lz",
Frameworks = "CoreData SystemConfiguration",
WeakFrameworks = "AdSupport",
ForceLoad = true)]
We added references to frameworks in the following ways:
- Frameworks: Add them to the
Frameworksvalue on theLinkWithattribute, delimited by spaces. - Weak Frameworks: Add them to the
WeakFrameworksproperty on theLinkWithattribute in the same manner. Weak frameworks are libraries that can be ignored if they are not found. In this case,AdSupportwas added in iOS 6; however, this library will still work on older versions of iOS. - Dynamic Libraries: Libraries such as
libz.dylibcan be declared inLinkerFlags. Generally, you drop the.dylibextension and replacelibwith–l.
After these changes are implemented, you will be able to successfully use the library from iOS projects. For complete documentation on Objective-C bindings, visit the Xamarin documentation site at http://docs.xamarin.com/ios.
In the same manner as iOS, Xamarin has provided full support for calling into Java libraries from C# with Xamarin.Android. The native Android SDKs function in this way and developers can leverage the Android Java Bindings project to take advantage of other native Java libraries in C#. The main difference here is that not a lot has to be done by hand in comparison to Objective-C bindings. The Java syntax is very similar to that of C#, so many mappings are exactly one-to-one. In addition, Java has metadata information included with its libraries, which Xamarin uses to automatically generate the C# code required for calling into Java.
As an example, let's make a binding for the Android version of the Google Analytics SDK. Before we begin, download the SDK from http://tinyurl.com/GoogleAnalyticsForAndroid. At the time of writing, the version of the Android SDK 3.01, so some of these instructions might change over time.
Let's begin creating a Java binding as follows:
- Start a new
Android Java Bindings Libraryproject in Xamarin Studio. You can use the same solution as we did for iOS if you wish. - Name the project
GoogleAnalytics.Droid. - Add
libGoogleAnalyticsServices.jarfrom the Android SDK to the project under theJarsfolder. By default, the build action for the file will beEmbeddedJar. This packs the jar file into the DLL, which is the best option for ease of use. - Build the project. You will get a few errors, which we'll address in a moment.
Most of the time you spend working on Java bindings will be to fix small issues that prevent the generated C# code from compiling. Don't fret; a lot of libraries will work on the first try without having to make any changes at all. Generally, the larger the Java library is, the more work you have to do to get it working from C#.
The following are the types of issues you might run into:
- Java obfuscation: If the library is run through an obfuscation tool such as ProGuard, the class and method names might not be valid C# names.
- Covariant return types: Java has different rules for return types in overridden virtual methods than C# does. For this reason, you might need to modify the return type for the generated C# code to compile.
- Visibility: The rules that Java has for accessibility are different from those of C#; the visibility of methods in subclasses can be changed. Sometimes, you will have to change visibility in C# to get it to compile.
- Naming collisions: Sometimes, the C# code generator can get things a bit wrong and generate two members or classes with the same name.
- Java generics: The use of generic classes in Java can often cause issues in C#.
So before we get started on solving these issues in our Java binding, let's first clean up the namespaces in the project. Java namespaces are of the form com.mycompany.mylibrary by default, so let's change the definition to match C# more closely. In the Transforms directory of the project, open Metadata.xml and add the following XML tag inside the root metadata node:
<attr path="/api/package[@name='com.google.analytics.tracking .android']" name="managedName">GoogleAnalytics.Tracking</attr>
The attr node tells the Xamarin compiler what needs to be replaced in the Java definition with another value. In this case, we are replacing managedName of the package with GoogleAnalytics.Tracking because it will make much more sense in C#. The path value might look a bit strange, which is because it uses an XML matching query language named XPath. In general, just think of it as a pattern matching query for XML. For full documentation on XPath syntax, check out some of the many resources online such as http://w3schools.com/xpath.
You might be asking yourself at this point, what is the XPath expression matching against? Return to Xamarin Studio and right-click on the solution at the top. Navigate to Display Options | Show All Files. Open api.xml under the obj/Debug folder. This is the Java definition file that describes all the types and methods within the Java library. If you notice, the XML here directly correlates to the XPath expressions we'll be writing.
In our next step, let's remove all the packages (or namespaces) we don't plan on using in this library. This is generally a good idea for large libraries since you don't want to waste time fixing issues with parts of the library you won't even be calling from C#. Note that it doesn't actually remove the Java code; it just prevents the generation of any C# declarations for calling it from C#.
Add the following declarations in Metadata.xml:
<remove-node path="/api/package[@name='com.google.analytics .containertag.common']" /> <remove-node path="/api/package[@name='com.google.analytics .containertag.proto']" /> <remove-node path="/api/package[@name='com.google.analytics .midtier.proto.containertag']" /> <remove-node path="/api/package[@name='com.google.android .gms.analytics.internal']" /> <remove-node path="/api/package[@name='com.google.android .gms.common.util']" /> <remove-nodepath="/api/package[@name='com.google.tagmanager']" /> <remove-node path="/api/package[@name='com.google.tagmanager.proto']" /> <remove-node path="/api/package[@name='com.google.tagmanager.protobuf.nano']" />
Now when you build the library, we can start resolving issues. The first error you will receive will be something like the following:
GoogleAnalytics.Tracking.GoogleAnalytics.cs(74,74):
Error CS0234: The type or namespace name 'TrackerHandler'
does not exist in the namespace 'GoogleAnalytics.Tracking'.
Are you missing an assembly reference?If we locate TrackerHandler within the api.xml file, we'll see the following class declaration:
<class abstract="true" deprecated="not deprecated" extends="java.lang.Object" extends-generic-aware="java.lang.Object" final="false" name="TrackerHandler" static="false" visibility=""/>
So, can you spot the problem? We need to fill out the visibility XML attribute, which for some reason is blank. Add the following line to Metadata.xml:
<attr path="/api/package[@name='com.google.analytics .tracking.android']/class[@name='TrackerHandler']" name="visibility">public</attr>
This XPath expression will locate the TrackerHandler class inside the com.google.analytics.tracking.android package and change visibility to public.
If you build the project now, it will complete successfully with one warning. In Java binding projects, it is a good idea to fix warnings since they generally indicate that a class or method is being omitted from the binding. Notice the following warning:
GoogleAnalytics.Droid: Warning BG8102:
Class GoogleAnalytics.Tracking.CampaignTrackingService has
unknown base type android.app.IntentService (BG8102)
(GoogleAnalytics.Droid)To fix this issue, locate the type definition for CampaignTrackingService in api.xml, which is as follows:
<class abstract="false" deprecated="not deprecated" extends="android.app.IntentService" extends-generic-aware="android.app.IntentService" final="false" name="CampaignTrackingService" static="false" visibility="public">
The way to fix the issue here is to change the base class to the Xamarin.Android definition for IntentService. Add the following code to Metadata.xml:
<attr path="/api/package[@name='com.google.analytics .tracking.android']/class[@name='CampaignTrackingService']" name="extends">mono.android.app.IntentService</attr>
This changes the extends attribute to use the IntentService found in Mono.Android.dll. I located the Java name for this class by opening Mono.Android.dll in Xamarin Studio's Assembly Browser. Let's take a look at the Register attribute, as shown in the following screenshot:

To inspect the *.dll files in Xamarin Studio, you merely have to open them. You can also double-click on any assembly in the References folder in your project.
If you build the binding project now, we're left with one last error, which is as follows:
GoogleAnalytics.Tracking.CampaignTrackingService.cs(24,24):
Error CS0507:
'CampaignTrackingService.OnHandleIntent(Intent)':
cannot change access modifiers when overriding 'protected'
inherited member
'IntentService.OnHandleIntent(Android.Content.Intent)'
(CS0507) (GoogleAnalytics.Droid)If you navigate to the api.xml file, you can see the definition for OnHandleIntent as follows:
<method abstract="false" deprecated="not deprecated" final="false" name="onHandleIntent" native="false" return="void" static="false" synchronized="false" visibility="public">
We can see here that the Java method for this class is public, but the base class is protected. So, the best way to fix this is to change the C# version to protected as well. Writing an XPath expression to match this is a bit more complicated, but luckily Xamarin has an easy way to retrieve it. If you double-click on the error message in the Errors pad of Xamarin Studio, you'll see the following comment in the generated C# code:
// Metadata.xml XPath method reference: path="/api/package[@name='com.google.analytics .tracking.android']/class[@name='CampaignTrackingService'] /method[@name='onHandleIntent' and count(parameter)=1 and parameter[1][@type='android.content.Intent']]"
Copy this value to path and add the following to Metadata.xml:
<attr path="/api/package[@name='com.google.analytics .tracking.android']/class[@name='CampaignTrackingService'] /method[@name='onHandleIntent' and count(parameter)=1 and parameter[1][@type='android.content.Intent']]" name="visibility">protected</attr>
Now, we can build the project and get zero errors and zero warnings. The library is now ready for use within your Xamarin.Android projects.
However, if you start working with the library, notice how the parameter names for the methods are p0, p1, p2, and so on. Here are a few method definitions of the EasyTracker class:
public static EasyTracker GetInstance(Context p0); public static void SetResourcePackageName(string p0); public virtual void ActivityStart(Activity p0); public virtual void ActivityStop(Activity p0);
You can imagine how difficult it would be to consume a Java library without knowing the proper parameter names. The reason the parameters are named this way is because the Java metadata for its libraries does not include the information to set the correct name for each parameter. So, Xamarin.Android does the best thing it can and autonames each parameter sequentially.
To rename the parameters in this class, we can add the following to Metadata.xml:
<attr path="/api/package[@name='com.google.analytics .tracking.android']/class[@name='EasyTracker'] /method[@name='getInstance']/parameter[@name='p0']" name="name">context</attr> <attr path="/api/package[@name='com.google.analytics .tracking.android']/class[@name='EasyTracker'] /method[@name='setResourcePackageName']/parameter[@name='p0']" name="name">packageName</attr> <attr path="/api/package[@name='com.google.analytics .tracking.android']/class[@name='EasyTracker'] /method[@name='activityStart']/parameter[@name='p0']" name="name">activity</attr> <attr path="/api/package[@name='com.google.analytics .tracking.android']/class[@name='EasyTracker'] /method[@name='activityStop']/parameter[@name='p0']" name="name">activity</attr>
On rebuilding the binding project, this will effectively rename the parameters for these four methods in the EasyTracker class. At this time, I would recommend that you go through the classes you plan on using in your application and rename the parameters so that it will make more sense to you. You might need to refer to the Google Analytics documentation to get the naming correct. Luckily, there is a javadocs.zip file included in the SDK that provides HTML reference for the library.
For a full reference on implementing Java bindings, make sure you check out Xamarin's documentation site at http://docs.xamarin.com/android. There are certainly more complicated scenarios than what we ran into when creating a binding for the Google Analytics library.
In this chapter, we added libraries from the Xamarin Component Store to Xamarin projects and ported an existing C# library, Ninject, to both Xamarin.iOS and Xamarin.Android. Next, we installed Objective Sharpie and explored its usage to generate Objective-C bindings. Finally, we wrote a functional Objective-C binding for the Google Analytics SDK for iOS and a Java binding for the Google Analytics SDK for Android. We also wrote several XPath expressions to clean up the Java binding.
There are several available options to use the existing third-party libraries from your Xamarin.iOS and Xamarin.Android applications. We looked at everything from using the Xamarin Component Store, porting existing code and setting up Java and Objective-C libraries to be used from C#. In the next chapter, we will cover the Xamarin.Mobile library as a way to access a user's contacts, camera, and GPS location.
Some of the most vital features used by mobile applications today are based on the new types of data that can be collected by our devices. Features such as GPS location and camera are staples in modern applications such as Instagram or Twitter. It's difficult to develop an application and not use some of these native features. So, let's explore our options to take advantage of this functionality with Xamarin.
In this chapter, we will do the following:
- Introduce the Xamarin.Mobile library
- Read the address book on Android and iOS
- Retrieve the GPS location of our device
- Pull photos from the camera and photo library
To simplify the development of these features across multiple platforms, Xamarin has developed a library called Xamarin.Mobile. It delivers a single API to access the contacts, GPS location, heading of the screen, camera, and photo library for iOS, Android, and even Windows platforms. It also takes advantage of the Task Parallel Libraries (TPL) to deliver a modern C# API that will make our developers more productive than what their native alternatives would. This gives you the ability to write nice, clean, asynchronous code using the async and await keywords in C#. You can also reuse the same code in iOS and Android, minus a few differences that are required by the Android platform.
To install Xamarin.Mobile, open the Xamarin Component Store in Xamarin Studio, and add the Xamarin.Mobile component to a project as shown in the following screenshot. You're going to use the following features (of the component):
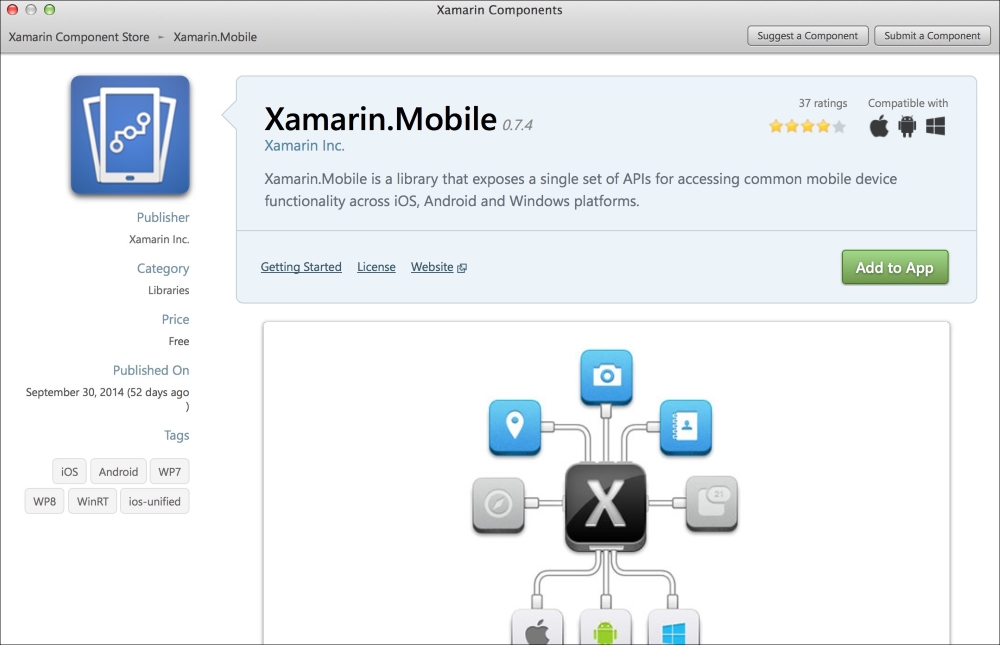
Before we dig further into using Xamarin.Mobile, let's review the namespaces and functionality available with the library:
Xamarin.Contacts: This contains classes that enable you to interact with the full address book. It includes everything from the contact's photo, phone numbers, address, e-mail, website, and so on.Xamarin.Geolocation: This combined with the accelerometer gives you access to the device's GPS location, including the altitude, heading, longitude, latitude, and speed. You can track the device's position explicitly or listen for GPS position changes over time.Xamarin.Media: This grants access to the device's cameras (if there is more than one) and built-in photo library. This is an easy way to add photo selection capabilities to any application.
For the full documentation of Xamarin.Mobile, visit the API documentation with the Component Store at http://componentsapi.xamarin.com. You can also view it in the native Mono documentation browser by clicking on Open API Documentation when viewing the component in Xamarin Studio.
Xamarin.Mobile is also an open source project with the standard Apache 2.0 license. You can contribute to the project or submit issues to the GitHub page at https://github.com/xamarin/Xamarin.Mobile. Feel free to use Xamarin.Mobile in your applications or fork, and modify it for your own purposes.
To begin our exploration of what Xamarin.Mobile offers, let's access the address book within a Xamarin application. For iOS, the first step is to make a Single View Application project by navigating to iOS | iPhone Storyboard. Make sure you add Xamarin.Mobile to the project from the Component Store.
Now, let's implement a simple UITableView with a list of contacts:
- Open the
MainStoryboard.storyboardfile. Delete any existing controllers created by the project template. - Create
UINavigationControllerwith aUITableViewControlleras its root child controller. - Set the Class of
UITableViewControllertoContactsControllerby navigating to Properties | Widget in the iOS designer. - Save the storyboard file and return to Xamarin Studio.
Open the automatically generated ContactsController.cs and start implementing the table view. Add using Xamarin.Contacts; to the top of the file and make the following changes to the controller:
public partial class ContactsController :UITableViewController, IUITableViewDataSource
{
public ContactsController (IntPtr handle) : base (handle)
{
Title = "Contacts";
}
}We filled out the title for the navigation bar, "Contacts", and set the class to implement IUITableViewDataSource. This is a new type of interface that Xamarin has created to simplify using Objective-C protocols from C#. It is exactly the same as creating a class that inherits from UITableViewSource, as we did in the earlier chapters, but you can do it from your controller as well. Xamarin has done some tricks here. They created an interface with the methods that can be optionally implemented, which isn't something that C# supports. This type of interface can make your code a bit cleaner by reducing the need for a new class, which is great for very simple controllers.
Next, let's add some code to load the contacts:
Contact[] contacts;
public async override void ViewDidLoad()
{
base.ViewDidLoad();
try
{
var book = new AddressBook();
await book.RequestPermission();
contacts = book.ToArray();
}
catch
{
new UIAlertView("Oops!","Something went wrong, try again later.",null, "Ok").Show();
}
}To use Xamarin.Mobile for loading contacts, you must first create an AddressBook object. Next, we have to call RequestPermissions in order to ask the user for permission to access the address book. This is an important step since it is required by iOS devices before an application can access the user's contacts. This prevents potentially nefarious applications from retrieving contacts without the user's knowledge. Android, on the other hand, only presents these permissions before installing an application.
Next, we used the System.Linq extension method ToArray to enumerate over the address book and store it in a member variable named contacts. You can also use foreach over the AddressBook object depending on your needs.
If you were to compile and run the application at this point, you would be greeted by the standard iOS pop up requesting access to contacts, as shown in the following screenshot:
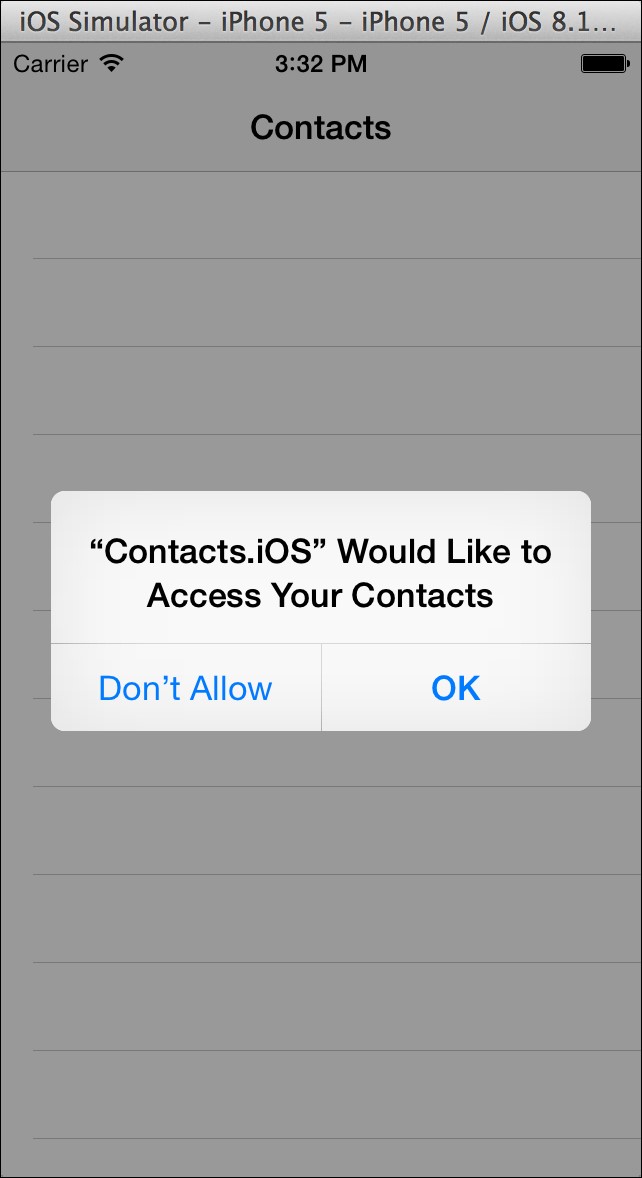
If you accidentally hit Don't Allow, you can change this setting by navigating to Settings | Privacy | Contacts on the device. In the iOS Simulator, you can also reset all the privacy prompts in the simulator by closing the application and navigating to Settings | General | Reset | Reset Location & Privacy. This is a good tip to know whether you need to retest during development.
So, for the next step, we'll need to implement the IUITableViewDataSource interface so that we can work with the array of contacts and display them on the screen. Add the following methods to the controller just like you would to UITableViewSource:
public override int RowsInSection(UITableView tableview, int section)
{
return contacts != null ? contacts.Length : 0;
}
public override UITableViewCell GetCell(UITableView tableView, NSIndexPath indexPath)
{
var contact = contacts [indexPath.Row];
var cell = tableView.DequeueReusableCell(CellName);
if (cell == null)
cell = new UITableViewCell(UITableViewCellStyle.Default, CellName);
cell.TextLabel.Text =contact.LastName + ", " + contact.FirstName;
return cell;
}Also, add a CellName constant string to the class by selecting a string identifier such as ContactCell. Now, if you compile and run the program, you'll be able to see the list of contacts on the device. The following screenshot shows the default list of contacts in the iOS Simulator:
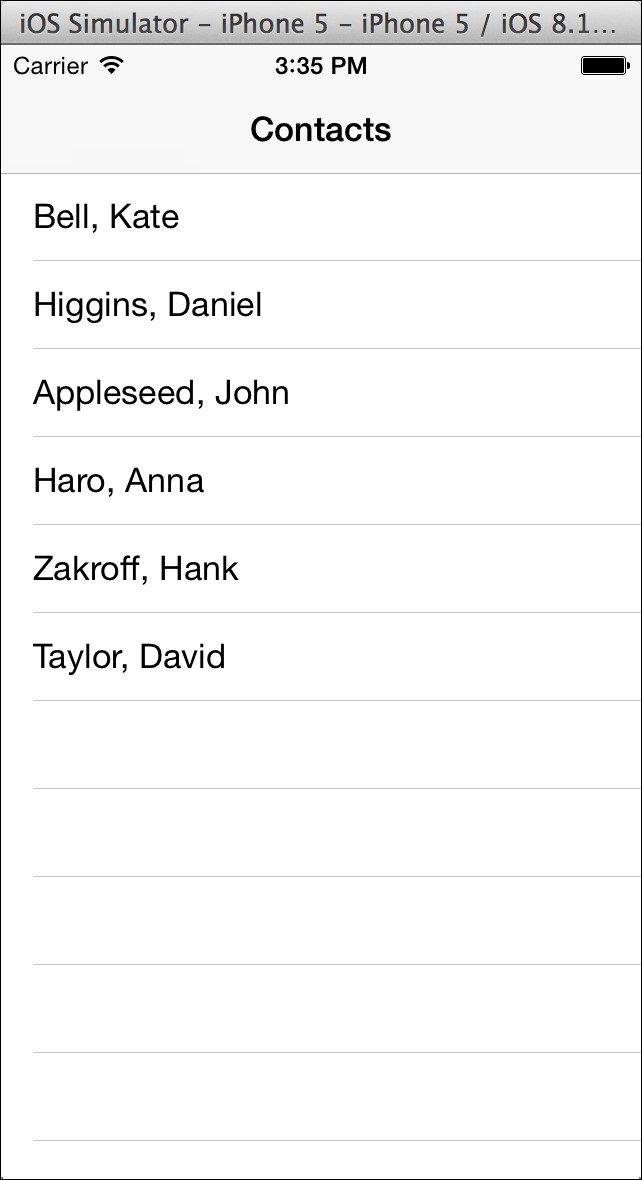
In a very similar fashion, we can retrieve a list of contacts in Android with Xamarin.Mobile. All of the APIs in Xamarin.Mobile are identical in Android with the exception of the requirement of Android.Content.Context to be passed in a few places. This is because many native Android APIs require a reference to the current activity (or to the other context such as Application) in order to function properly. To begin, create a standard Android application project by navigating to Android | Android Application in Xamarin Studio. Make sure you add Xamarin.Mobile to the project from the Component Store.
In a parallel iOS, let's create a simple ListView to display a list of contacts as follows:
- Open the
Main.axmlfile from thelayoutfolder in theResourcesdirectory in the Android designer. - Remove the default button from the project template and add ListView to the layout.
- Set its Id to
@+id/contacts. - Save the file and open
MainActivity.csso that we can make some changes to the code.
Let's begin by removing most of the code; we don't need the code that came from the project template. You will also need to add a using statement for Xamarin.Contacts. Next, let's implement a simple BaseAdapter<Contact> class inside the MainActivity class as follows:
class ContactsAdapter : BaseAdapter<Contact>
{
public Contact[] Contacts { get; set; }
public override long GetItemId(int position)
{
return position;
}
public override View GetView(int position, View convertView, ViewGroup parent)
{
var contact = this [position];
var textView = convertView as TextView;
if (textView == null)
{
textView = new TextView(parent.Context);
}
textView.Text = contact.LastName + ", " + contact.FirstName;
return textView;
}
public override int Count
{
get { return Contacts == null ? 0 : Contacts.Length; }
}
public override Contact this[int index]
{
get { return Contacts [index]; }
}
}This will display each contact in TextView for each row in ListView. One thing that we've done here in order to simplify things is add a property for the array of contacts. This should be pretty straightforward and similar to what we did in the previous chapters.
Now, let's set up the adapter in OnCreate as follows:
protected async override void OnCreate(Bundle bundle)
{
base.OnCreate(bundle);
SetContentView(Resource.Layout.Main);
var listView = FindViewById<ListView>(Resource.Id.contacts);
var adapter = new ContactsAdapter();
listView.Adapter = adapter;
try
{
var book = new AddressBook(this);
await book.RequestPermission();
adapter.Contacts = book.ToArray();
adapter.NotifyDataSetChanged();
}
catch
{
new AlertDialog.Builder(this).SetTitle("Oops").SetMessage("Something went wrong, try again later.").SetPositiveButton("Ok", delegate { }).Show();
}
}This code calls Xamarin.Mobile that is identical to what we did on the code for iOS except that here, this had to be passed for the Android Context in the constructor for AddressBook. Our code changes are complete; however, if you run the application right now, an exception would be thrown. Android requires permission in the manifest file, which will notify the user of its access to the address book when downloaded from Google Play.
We must create an AndroidManifest.xml file and declare a permission as follows:
- Open the project options for the Android project.
- Select the Android Application tab under Build.
- Click on Add Android manifest.
- Under the Required permissions section, check ReadContacts.
- Click on OK to save your changes.
Now, if you run the application, you will get a list of all the contacts on the device, as shown in the following screenshot:
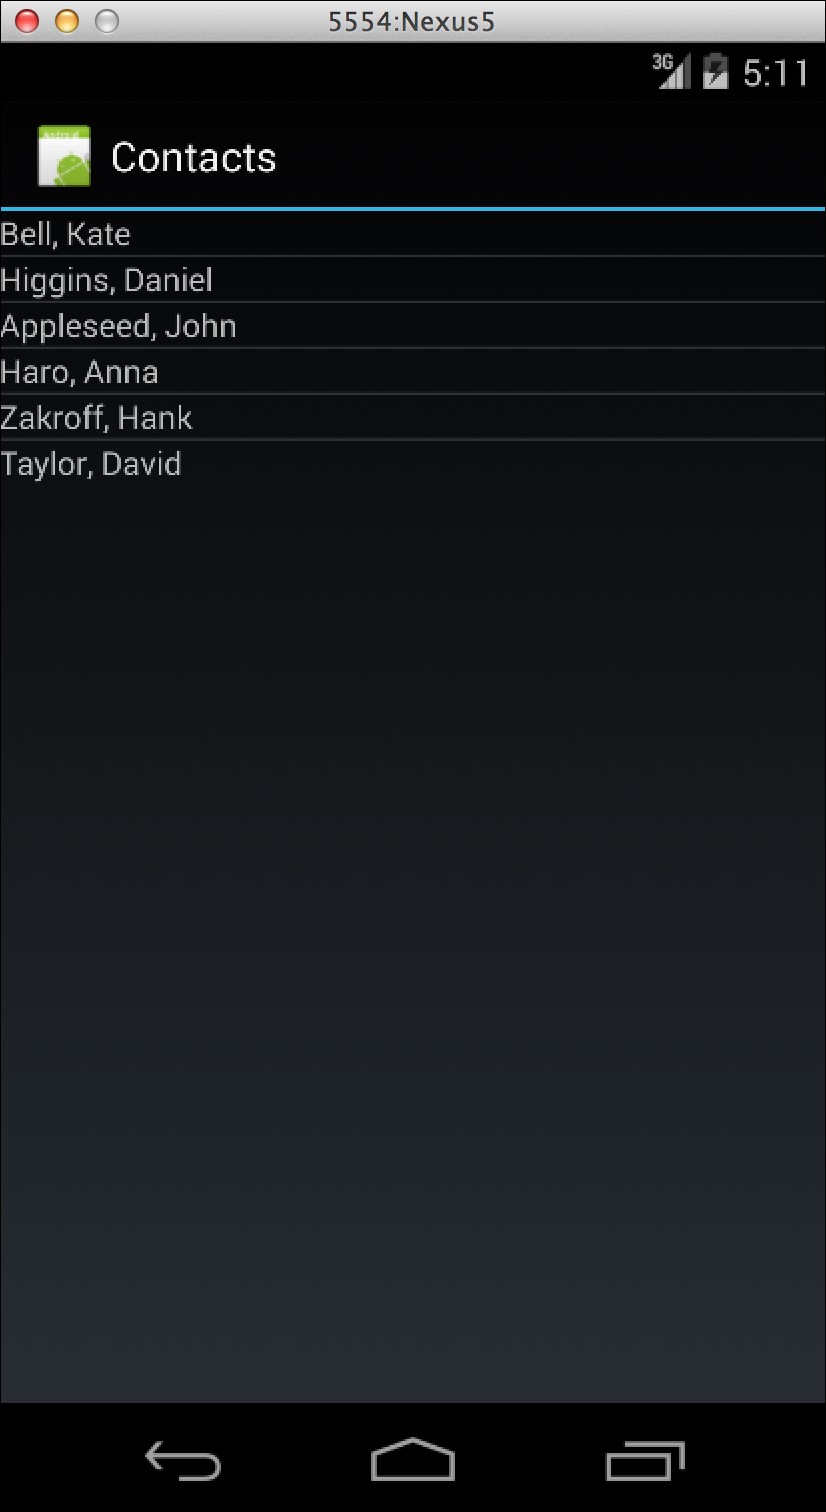
Retrieving contacts on Android
In a very similar fashion, we can retrieve a list of contacts in Android with Xamarin.Mobile. All of the APIs in Xamarin.Mobile are identical in Android with the exception of the requirement of Android.Content.Context to be passed in a few places. This is because many native Android APIs require a reference to the current activity (or to the other context such as Application) in order to function properly. To begin, create a standard Android application project by navigating to Android | Android Application in Xamarin Studio. Make sure you add Xamarin.Mobile to the project from the Component Store.
In a parallel iOS, let's create a simple ListView to display a list of contacts as follows:
- Open the
Main.axmlfile from thelayoutfolder in theResourcesdirectory in the Android designer. - Remove the default button from the project template and add ListView to the layout.
- Set its Id to
@+id/contacts. - Save the file and open
MainActivity.csso that we can make some changes to the code.
Let's begin by removing most of the code; we don't need the code that came from the project template. You will also need to add a using statement for Xamarin.Contacts. Next, let's implement a simple BaseAdapter<Contact> class inside the MainActivity class as follows:
class ContactsAdapter : BaseAdapter<Contact>
{
public Contact[] Contacts { get; set; }
public override long GetItemId(int position)
{
return position;
}
public override View GetView(int position, View convertView, ViewGroup parent)
{
var contact = this [position];
var textView = convertView as TextView;
if (textView == null)
{
textView = new TextView(parent.Context);
}
textView.Text = contact.LastName + ", " + contact.FirstName;
return textView;
}
public override int Count
{
get { return Contacts == null ? 0 : Contacts.Length; }
}
public override Contact this[int index]
{
get { return Contacts [index]; }
}
}This will display each contact in TextView for each row in ListView. One thing that we've done here in order to simplify things is add a property for the array of contacts. This should be pretty straightforward and similar to what we did in the previous chapters.
Now, let's set up the adapter in OnCreate as follows:
protected async override void OnCreate(Bundle bundle)
{
base.OnCreate(bundle);
SetContentView(Resource.Layout.Main);
var listView = FindViewById<ListView>(Resource.Id.contacts);
var adapter = new ContactsAdapter();
listView.Adapter = adapter;
try
{
var book = new AddressBook(this);
await book.RequestPermission();
adapter.Contacts = book.ToArray();
adapter.NotifyDataSetChanged();
}
catch
{
new AlertDialog.Builder(this).SetTitle("Oops").SetMessage("Something went wrong, try again later.").SetPositiveButton("Ok", delegate { }).Show();
}
}This code calls Xamarin.Mobile that is identical to what we did on the code for iOS except that here, this had to be passed for the Android Context in the constructor for AddressBook. Our code changes are complete; however, if you run the application right now, an exception would be thrown. Android requires permission in the manifest file, which will notify the user of its access to the address book when downloaded from Google Play.
We must create an AndroidManifest.xml file and declare a permission as follows:
- Open the project options for the Android project.
- Select the Android Application tab under Build.
- Click on Add Android manifest.
- Under the Required permissions section, check ReadContacts.
- Click on OK to save your changes.
Now, if you run the application, you will get a list of all the contacts on the device, as shown in the following screenshot:
Using Xamarin.Mobile to track a user's GPS location is as simple as accessing their contacts. There is a similar process for setting up access on iOS and Android, but in the case of location, you don't have to request permission from code. iOS will automatically show the standard alert requesting the permission. Android, on the other hand, merely requires a manifest setting.
As an example, let's create an application that displays a list of GPS location updates over time. Let's begin with an iOS example by creating a Single View Application project. This can be done by navigating to iOS | iPhone Storyboard and clicking on Single View Application, just like we did in the previous section. Make sure you add Xamarin.Mobile to the project from the Component Store.
Now, let's implement a simple UITableView to display a list of GPS updates as follows:
- Open the
MainStoryboard.storyboardfile. Delete any existing controllers created by the project template. - Create
UINavigationControllerwithUITableViewControlleras its root child controller. - Set the class of
UITableViewControllertoLocationControllerby navigating to Properties | Widget in the iOS designer. - Save the storyboard file and return to Xamarin Studio.
Open LocationController.cs and let's start by setting up our GPS to update a table view over time. Add using Xamarin.Geolocation; to the top of the file. We can set up some member variables and create our Geolocator object in the controller's constructor as follows:
Geolocator locator;
List<string> messages = new List<string>();
public LocationController (IntPtr handle) : base (handle)
{
Title = "GPS";
locator = new Geolocator();
locator.PositionChanged += OnPositionChanged;
locator.PositionError += OnPositionError;
}Next, we can set up our event handlers as follows:
void OnPositionChanged (object sender, PositionEventArgs e)
{
messages.Add(string.Format("Long: {0:0.##} Lat: {1:0.##}",e.Position.Longitude, e.Position.Latitude));
TableView.ReloadData();
}
void OnPositionError (object sender, PositionErrorEventArgs e)
{
messages.Add(e.Error.ToString());
TableView.ReloadData();
}These will add a message to the list when there is an error or a location change. We used string.Format to only display the longitude and latitude up to two decimal places.
Next, we have to actually tell Geolocator to start listening for GPS updates. We can do this in ViewDidLoad as follows:
public override void ViewDidLoad()
{
base.ViewDidLoad();
locator.StartListening(1000, 50);
}In the preceding code, 1000 is a hint for the minimum time to update the GPS location, and the value 50 is a hint for the number of meters that will trigger a position update.
Last but not least, we need to set up the table view. Set up LocationController to implement IUITableViewDataSource and add the following methods to the controller:
public override int RowsInSection(UITableView tableview, int section)
{
return messages.Count;
}
public override UITableViewCell GetCell(UITableView tableView, NSIndexPath indexPath)
{
var cell = tableView.DequeueReusableCell(CellName);
if (cell == null)
cell = new UITableViewCell(UITableViewCellStyle.Default, CellName);
cell.TextLabel.Text = messages [indexPath.Row];
return cell;
}If you compile and run the application, you should see an iOS permission prompt followed by the longitude and latitude in the table view over time, as shown in the following screenshot:

Just as in the previous section, using Xamarin.Mobile for GPS location is almost identical to the APIs we used in iOS. To begin with our Android example, go to Android | Android Application in Xamarin Studio. Make sure you add Xamarin.Mobile to the project from the Component Store.
Let's create ListView to display a list of messages of the GPS location updates as follows:
- Open the
Main.axmlfile from thelayoutfolder under theResourcesdirectory in the Android designer. - Remove the default button from the project template and add
ListViewto the layout. - Set its Id to
@+id/locations. - Save the file and open
MainActivity.csso that we can make some code changes.
As usual, remove any extra code that was created by the project template. Next, add a using statement for Xamarin.Geolocation. Then, add a simple BaseAdapter<string> to the MainActivity class as follows:
class Adapter : BaseAdapter<string>
{
List<string> messages = new List<string>();
public void Add(string message)
{
messages.Add(message);
NotifyDataSetChanged();
}
public override long GetItemId(int position)
{
return position;
}
public override View GetView(int position, View convertView, ViewGroup parent)
{
var textView = convertView as TextView;
if (textView == null)
textView = new TextView(parent.Context);
textView.Text = messages [position];
return textView;
}
public override int Count
{
get { return messages.Count; }
}
public override string this[int index]
{
get { return messages [index]; }
}
}This is similar to other Android adapters we have set up in the past. One difference here is that we made a member variable that contains a List<string> of messages and a method to add the new messages to the list.
Now, let's add a few methods to the MainActivity class in order to set up the GPS location updates as follows:
Geolocator locator;
Adapter adapter;
protected override void OnCreate(Bundle bundle)
{
base.OnCreate(bundle);
SetContentView(Resource.Layout.Main);
var listView = FindViewById<ListView>(Resource.Id.locations);
listView.Adapter = adapter = new Adapter();
locator = new Geolocator(this);
locator.PositionChanged += OnPositionChanged;
locator.PositionError += OnPositionError;
}
protected override void OnResume()
{
base.OnResume();
locator.StartListening(1000, 50);
}
protected override void OnPause()
{
base.OnPause();
locator.StopListening();
}
void OnPositionChanged (object sender, PositionEventArgs e)
{
adapter.Add(string.Format("Long: {0:0.##} Lat: {1:0.##}",e.Position.Longitude, e.Position.Latitude));
}
void OnPositionError (object sender, PositionErrorEventArgs e)
{
adapter.Add(e.Error.ToString());
}Again, this looks identical to the code for iOS except for the constructor for Geolocator. If you run the application at this point, it would start with no errors. However, no events will be fired from the Geolocator object. We first need to add a permission to access the location from the Android Manifest file. It is also a good idea to start the locator in OnResume and stop it in OnPause. This will conserve the battery by stopping GPS location when this activity is no longer on the screen.
Let's create an AndroidManifest.xml file and declare two permissions as follows:
- Open the project options for the Android project.
- Select the Android Application tab under Build.
- Click on Add Android manifest.
- Under the Required permissions section, check AccessCoarseLocation and AccessFineLocation.
- Click on OK to save your changes.
Now, if you compile and run the application, you will get the GPS location updates over time, as shown in the following screenshot:
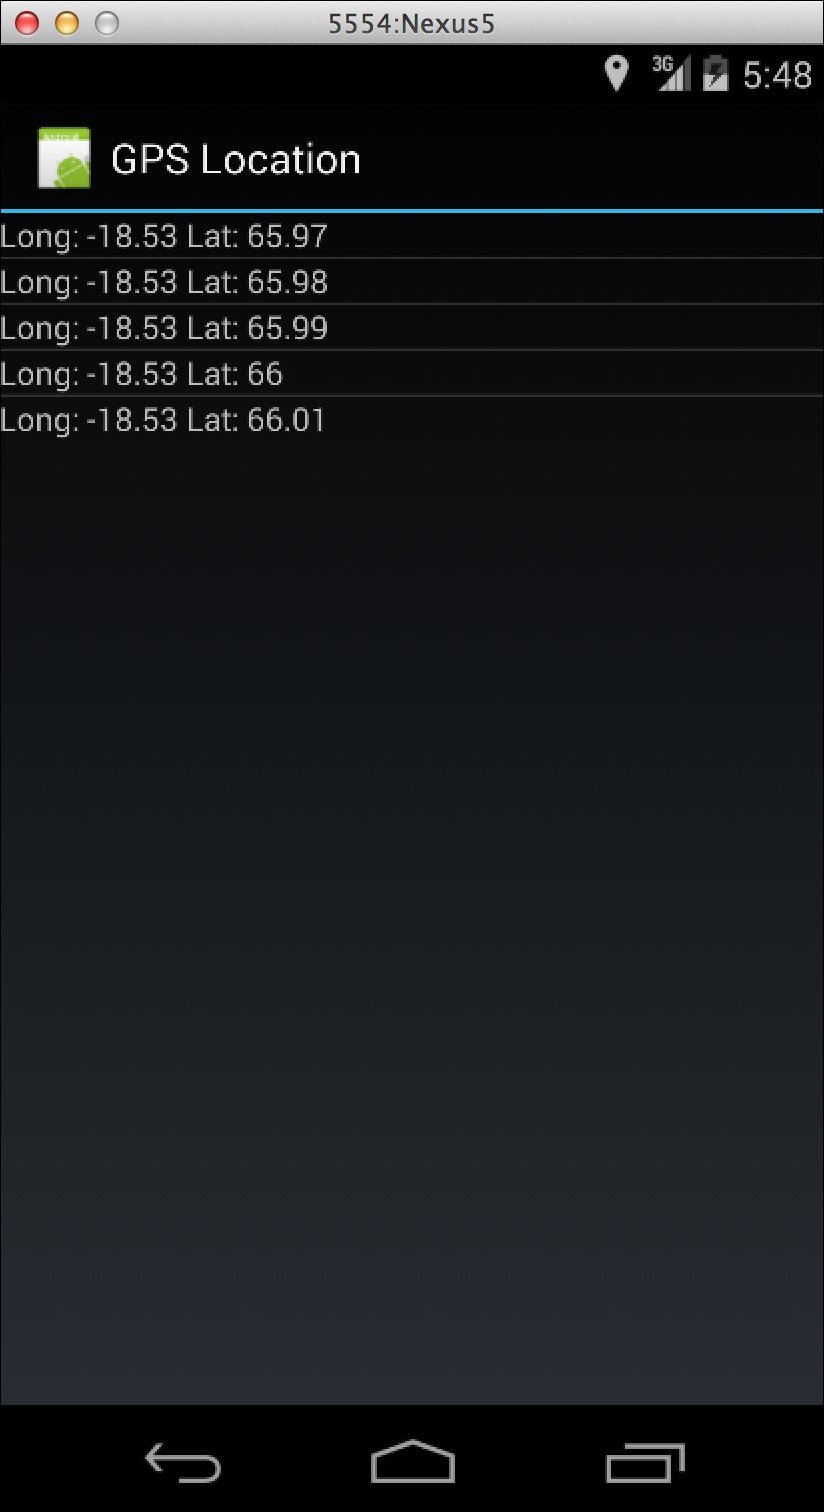
Implementing GPS location on Android
Just as in the previous section, using Xamarin.Mobile for GPS location is almost identical to the APIs we used in iOS. To begin with our Android example, go to Android | Android Application in Xamarin Studio. Make sure you add Xamarin.Mobile to the project from the Component Store.
Let's create ListView to display a list of messages of the GPS location updates as follows:
- Open the
Main.axmlfile from thelayoutfolder under theResourcesdirectory in the Android designer. - Remove the default button from the project template and add
ListViewto the layout. - Set its Id to
@+id/locations. - Save the file and open
MainActivity.csso that we can make some code changes.
As usual, remove any extra code that was created by the project template. Next, add a using statement for Xamarin.Geolocation. Then, add a simple BaseAdapter<string> to the MainActivity class as follows:
class Adapter : BaseAdapter<string>
{
List<string> messages = new List<string>();
public void Add(string message)
{
messages.Add(message);
NotifyDataSetChanged();
}
public override long GetItemId(int position)
{
return position;
}
public override View GetView(int position, View convertView, ViewGroup parent)
{
var textView = convertView as TextView;
if (textView == null)
textView = new TextView(parent.Context);
textView.Text = messages [position];
return textView;
}
public override int Count
{
get { return messages.Count; }
}
public override string this[int index]
{
get { return messages [index]; }
}
}This is similar to other Android adapters we have set up in the past. One difference here is that we made a member variable that contains a List<string> of messages and a method to add the new messages to the list.
Now, let's add a few methods to the MainActivity class in order to set up the GPS location updates as follows:
Geolocator locator;
Adapter adapter;
protected override void OnCreate(Bundle bundle)
{
base.OnCreate(bundle);
SetContentView(Resource.Layout.Main);
var listView = FindViewById<ListView>(Resource.Id.locations);
listView.Adapter = adapter = new Adapter();
locator = new Geolocator(this);
locator.PositionChanged += OnPositionChanged;
locator.PositionError += OnPositionError;
}
protected override void OnResume()
{
base.OnResume();
locator.StartListening(1000, 50);
}
protected override void OnPause()
{
base.OnPause();
locator.StopListening();
}
void OnPositionChanged (object sender, PositionEventArgs e)
{
adapter.Add(string.Format("Long: {0:0.##} Lat: {1:0.##}",e.Position.Longitude, e.Position.Latitude));
}
void OnPositionError (object sender, PositionErrorEventArgs e)
{
adapter.Add(e.Error.ToString());
}Again, this looks identical to the code for iOS except for the constructor for Geolocator. If you run the application at this point, it would start with no errors. However, no events will be fired from the Geolocator object. We first need to add a permission to access the location from the Android Manifest file. It is also a good idea to start the locator in OnResume and stop it in OnPause. This will conserve the battery by stopping GPS location when this activity is no longer on the screen.
Let's create an AndroidManifest.xml file and declare two permissions as follows:
- Open the project options for the Android project.
- Select the Android Application tab under Build.
- Click on Add Android manifest.
- Under the Required permissions section, check AccessCoarseLocation and AccessFineLocation.
- Click on OK to save your changes.
Now, if you compile and run the application, you will get the GPS location updates over time, as shown in the following screenshot:
The last major feature of Xamarin.Mobile is the ability to access photos in order to give users the ability to add their own content to your applications. Using a class called MediaPicker, you can pull photos from the device's camera or photo library and optionally display your own UI for the operation.
Let's create an application that loads an image from the camera or photo library on the press of a button and displays it on the screen. To begin with, create a Single View Application project by going to iOS | iPhone Storyboard | Single View Application in Xamarin Studio. Make sure to add Xamarin.Mobile to the project from the Component Store.
Now, let's implement a screen with two UIButton and a UIImageView as follows:
- Open the
MainStoryboard.storyboardfile. Delete any existing controllers created by the project template. - Create
UIViewControllerwith oneUIImageViewand twoUIButtonnamedLibraryandCamera. - Set the class of
UITableViewControllertoContactsControllerby navigating to Properties | Widget in the iOS designer. - Create the Name field for each view in the controller named
imageView,library, andcamerarespectively. - Save the storyboard file and return to Xamarin Studio.
Now, open PhotoController.cs and add the following code in ViewDidLoad:
MediaPicker picker;
public override void ViewDidLoad()
{
base.ViewDidLoad();
picker = new MediaPicker();
if (!picker.IsCameraAvailable)
camera.Enabled = false;
camera.TouchUpInside += OnCamera;
library.TouchUpInside += OnLibrary;
}Note that we have to check IsCameraAvailable and disable the camera button. There are iOS devices such as the first generation iPad that could possibly not have a camera. Besides this, we just need to create an instance of MediaPicker that can be used when you click on each button.
Now, let's add a method for each button's TouchUpInside event and a couple of other helper methods as follows:
async void OnCamera (object sender, EventArgs e)
{
try
{
var file = await picker.TakePhotoAsync(new StoreCameraMediaOptions());
imageView.Image = ToImage(file);
}
catch
{
ShowError();
}
}
async void OnLibrary (object sender, EventArgs e)
{
try
{
var file = await picker.PickPhotoAsync();
imageView.Image = ToImage(file);
}
catch
{
ShowError();
}
}
UIImage ToImage(MediaFile file)
{
using (var stream = file.GetStream())
{
using (var data = NSData.FromStream(stream))
{
return UIImage.LoadFromData(data);
}
}
}
void ShowError()
{
new UIAlertView("Oops!", "Something went wrong, try again later.", null, "Ok").Show();
}Using MediaPIcker is pretty straightforward; you merely have to call TakePhotoAsync or PickPhotoAsync to retrieve a MediaFile instance. Then, you can call GetStream to do what you want with the image data. In our case, we created UIImage to display directly in UIImageView. It is also necessary to use a try-catch block in case something unexpected happens or the user cancels.
You should now be able to run the app and select a photo to be viewed on the screen. The following screenshot shows a nice default photo from the iOS simulator that I selected from the photo library:
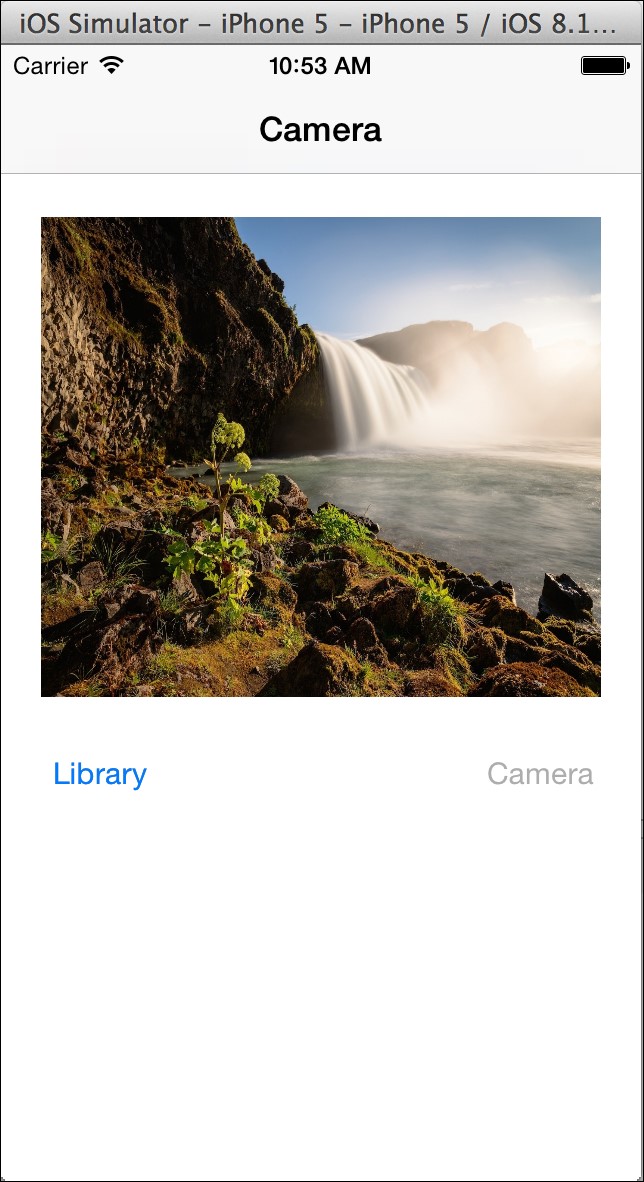
In comparison to iOS, we have to use a slightly different pattern on Android to retrieve photos from the camera or photo library. A common pattern in Android is that it calls StartActivityForResult to launch an activity from another application. When this activity is completed, OnActivityResult will be called from your activity. Because of this, Xamarin.Mobile could not use the same APIs on Android as the other platforms. To start our example, create an Android Application project by going to Android | Android Application in Xamarin Studio. Make sure you add Xamarin.Mobile to the project from the Component Store.
Let's create two Buttons and an ImageView to mimic our UI on iOS as follows:
- Open the
Main.axmlfile from thelayoutfolder under theResourcesdirectory in the Android designer. - Remove the default button from the project template, and add two new
ButtonnamedLibraryandCamera. - Set their Id to
@+id/libraryand@+id/camera, respectively. - Create an
ImageViewwith an Id of@+id/imageView. - Save the file and open
MainActivity.csso that we can make changes to our code.
As usual, remove any extra code that was created by the project template. Next, add a using statement for Xamarin.Media. Then, we can add a new OnCreate method and some member variables for our activity as follows:
MediaPicker picker;
ImageView imageView;
protected override void OnCreate(Bundle bundle)
{
base.OnCreate(bundle);
SetContentView(Resource.Layout.Main);
var library = FindViewById<Button>(Resource.Id.library);
var camera = FindViewById<Button>(Resource.Id.camera);
imageView = FindViewById<ImageView>(Resource.Id.imageView);
picker = new MediaPicker(this);
library.Click += OnLibrary;
camera.Click += OnCamera;
if (!picker.IsCameraAvailable)
camera.Enabled = false;
}We retrieved the instance of our views and created a new MediaPicker by passing our activity as Context to its constructor. We hooked up some Click event handlers, and disabled the camera button since a camera is not available.
Next, let's implement the two Click event handlers as follows:
void OnLibrary (object sender, EventArgs e)
{
var intent = picker.GetPickPhotoUI();
StartActivityForResult (intent, 1);
}
void OnCamera (object sender, EventArgs e)
{
var intent = picker.GetTakePhotoUI(new StoreCameraMediaOptions
{
Name = "test.jpg", Directory = "PhotoPicker"
});
StartActivityForResult (intent, 1);
}In each case, we make a call to GetPickPhotoUI or GetTakePhotoUI in order to get an instance of an Android Intent object. This object is used to start the new activities within an application. StartActivityForResult will also start the Intent object, expecting a result to be returned from the new activity. We also set some values with StoreCameraMediaOptions to specify a filename and temporary directory to store the photo.
Next, we need to implement OnActivityResult in order to handle what will happen when the new activity is completed:
protected async override void OnActivityResult(
int requestCode, Result resultCode, Intent data)
{
if (resultCode == Result.Canceled)
return;
var file = await data.GetMediaFileExtraAsync(this);
using (var stream = file.GetStream())
{
imageView.SetImageBitmap(await
BitmapFactory.DecodeStreamAsync(stream));
}
}If this is successful, we retrieve MediaFile and load a new Bitmap with the returned Stream. Next, all that is needed is to call SetImageBitmap to display the image on the screen.
Let's create an AndroidManifest.xml file and declare two permissions as follows:
- Open the project options for the Android project.
- Select the Android Application tab under Build.
- Click on Add Android manifest.
- Under the Required permissions section, check Camera and WriteExternalStorage.
- Click on OK to save your changes.
You should now be able to run the application and load photos to be displayed on the screen, as shown in the following screenshot:
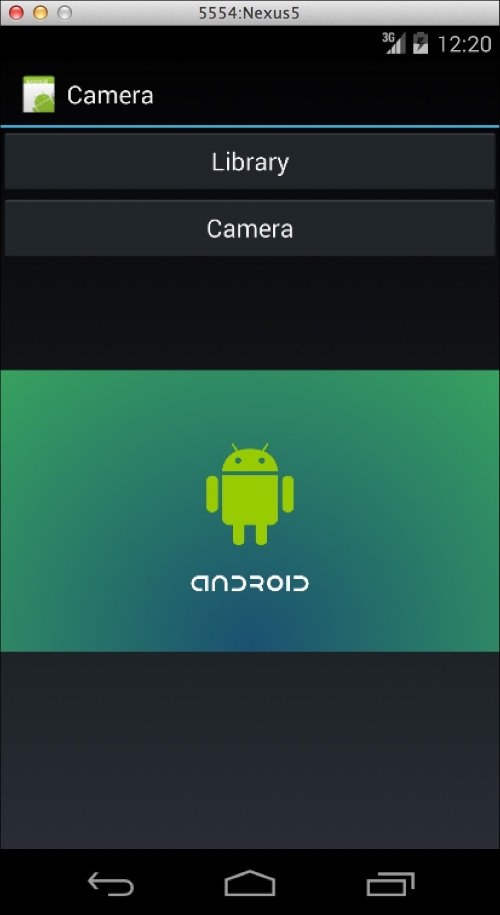
Accessing photos on Android
In comparison to iOS, we have to use a slightly different pattern on Android to retrieve photos from the camera or photo library. A common pattern in Android is that it calls StartActivityForResult to launch an activity from another application. When this activity is completed, OnActivityResult will be called from your activity. Because of this, Xamarin.Mobile could not use the same APIs on Android as the other platforms. To start our example, create an Android Application project by going to Android | Android Application in Xamarin Studio. Make sure you add Xamarin.Mobile to the project from the Component Store.
Let's create two Buttons and an ImageView to mimic our UI on iOS as follows:
- Open the
Main.axmlfile from thelayoutfolder under theResourcesdirectory in the Android designer. - Remove the default button from the project template, and add two new
ButtonnamedLibraryandCamera. - Set their Id to
@+id/libraryand@+id/camera, respectively. - Create an
ImageViewwith an Id of@+id/imageView. - Save the file and open
MainActivity.csso that we can make changes to our code.
As usual, remove any extra code that was created by the project template. Next, add a using statement for Xamarin.Media. Then, we can add a new OnCreate method and some member variables for our activity as follows:
MediaPicker picker;
ImageView imageView;
protected override void OnCreate(Bundle bundle)
{
base.OnCreate(bundle);
SetContentView(Resource.Layout.Main);
var library = FindViewById<Button>(Resource.Id.library);
var camera = FindViewById<Button>(Resource.Id.camera);
imageView = FindViewById<ImageView>(Resource.Id.imageView);
picker = new MediaPicker(this);
library.Click += OnLibrary;
camera.Click += OnCamera;
if (!picker.IsCameraAvailable)
camera.Enabled = false;
}We retrieved the instance of our views and created a new MediaPicker by passing our activity as Context to its constructor. We hooked up some Click event handlers, and disabled the camera button since a camera is not available.
Next, let's implement the two Click event handlers as follows:
void OnLibrary (object sender, EventArgs e)
{
var intent = picker.GetPickPhotoUI();
StartActivityForResult (intent, 1);
}
void OnCamera (object sender, EventArgs e)
{
var intent = picker.GetTakePhotoUI(new StoreCameraMediaOptions
{
Name = "test.jpg", Directory = "PhotoPicker"
});
StartActivityForResult (intent, 1);
}In each case, we make a call to GetPickPhotoUI or GetTakePhotoUI in order to get an instance of an Android Intent object. This object is used to start the new activities within an application. StartActivityForResult will also start the Intent object, expecting a result to be returned from the new activity. We also set some values with StoreCameraMediaOptions to specify a filename and temporary directory to store the photo.
Next, we need to implement OnActivityResult in order to handle what will happen when the new activity is completed:
protected async override void OnActivityResult(
int requestCode, Result resultCode, Intent data)
{
if (resultCode == Result.Canceled)
return;
var file = await data.GetMediaFileExtraAsync(this);
using (var stream = file.GetStream())
{
imageView.SetImageBitmap(await
BitmapFactory.DecodeStreamAsync(stream));
}
}If this is successful, we retrieve MediaFile and load a new Bitmap with the returned Stream. Next, all that is needed is to call SetImageBitmap to display the image on the screen.
Let's create an AndroidManifest.xml file and declare two permissions as follows:
- Open the project options for the Android project.
- Select the Android Application tab under Build.
- Click on Add Android manifest.
- Under the Required permissions section, check Camera and WriteExternalStorage.
- Click on OK to save your changes.
You should now be able to run the application and load photos to be displayed on the screen, as shown in the following screenshot:
In this chapter, we discovered the Xamarin.Mobile library and how it can accelerate common native tasks in a cross-platform way. We retrieved the contacts from the address book and set up GPS location updates over time. Lastly, we loaded photos from the camera and photo library. Using the native APIs directly would mean twice as much code on each platform, so we saw how the Xamarin.Mobile library is a useful abstraction that can reduce some development time.
After completing this chapter, you should have a complete grasp of the Xamarin.Mobile library and the common functionality it provides for cross-platform development. It gives clean, modern APIs that offer the async/await functionality that can be accessed across iOS, Android, and Windows Phone. Accessing contacts, GPS, and photos across platforms is very straightforward with Xamarin.Mobile.
In the next chapter, we will cover the steps of how to submit applications to the iOS App Store and Google Play. This will include how to prepare your app to pass the iOS guidelines as well as properly signing up your app for Google Play.
Since the beginning of Xamarin's lifetime as a company, their motto has always been to expose the native APIs on iOS and Android directly to C#. This was a great strategy at the beginning, because applications built with Xamarin.iOS or Xamarin.Android were pretty much indistinguishable from a native Objective-C or Java application. Code sharing was generally limited to non-UI code that left a potential gap to fill in the Xamarin ecosystem: a cross-platform UI abstraction. Xamarin.Forms is the solution to this problem, a cross-platform UI framework that renders native controls on each platform. Xamarin.Forms is a great solution for those who know C# (and XAML), but also might not want to get into the full details of using the native iOS and Android APIs.
In this chapter, we will cover the following:
- Create "Hello World" in Xamarin.Forms
- Discuss Xamarin.Forms architecture
- Use XAML with Xamarin.Forms
- Cover data binding and MVVM with Xamarin.Forms
To understand how a Xamarin.Forms application is put together, let's begin by creating a simple "Hello World" application.
Open Xamarin Studio and perform the following steps:
- Create a new solution.
- Navigate to the C# | Mobile Apps section.
- Create a new Blank App (Xamarin.Forms Portable) solution.
- Name your solution something appropriate such as
HelloForms.
Notice the three new projects that were successfully created: HelloForms, HelloForms.Android, and HelloForms.iOS. In Xamarin.Forms applications, the bulk of your code will be shared, and each platform-specific project is just a small amount of code that starts the Xamarin.Forms framework.
Let's examine the minimal parts of a Xamarin.Forms application:
App.csin theHelloFormsPCL library. This class holds the startup page of the Xamarin.Forms application. A simple static method,GetMainPage(), returns the startup page of the application. In the default project template,- A
ContentPageis created with a single label that will be rendered as aUILabelon iOS and aTextViewon Android. MainActivity.csin theHelloForms.AndroidAndroid project. This is the main launcher activity of the Android application. The important part for Xamarin.Forms here is the call toForms.Init(this, bundle)that initializes the Android-specific portion of the Xamarin.Forms framework. Next is a call toSetPage(App.GetMainPage())that displays the native version of the main Xamarin.Forms page.AppDelegate.csin theHelloForms.iOSiOS project. This is very similar to Android, except iOS applications startup via aUIApplicationDelegateclass.Forms.Init()will initialize the iOS-specific parts of Xamarin.Forms, whileApp.GetMainPage().CreateViewController()will generate a native controller that can be used as theRootViewControllerof the main window of the application.
Go ahead and run the iOS project; you should see something similar to the following screenshot:

If you run the Android project, you will get a UI very similar to the iOS, but using the native Android controls, as shown in the following screenshot:

Tip
Even though not covered in this module, Xamarin.Forms also supports Windows Phone applications. However, a PC running Windows and Visual Studio is required to develop for Windows Phone. If you can get a Xamarin.Forms application working on iOS and Android, then getting a Windows Phone version working should be a piece of cake.
Getting started with Xamarin.Forms is very easy, but it is always good to look behind the curtain to understand what is happening behind the scenes. In the earlier chapters of this module, we created a cross-platform application using native iOS and Android APIs directly. Certain applications are much more suited for this development approach, so understanding the difference between a Xamarin.Forms application and a plain Xamarin application is important to know when choosing what framework is best suited for your app.
Xamarin.Forms is an abstraction over the native iOS and Android APIs that you can call directly from C#. So, Xamarin.Forms is using the same APIs you would in a plain Xamarin application, while providing a framework that allows you to define your UIs in a cross-platform way. An abstraction layer such as this is in many ways a very good thing because it gives you the benefit of sharing the code driving your UI as well as any backend C# code that could have also been shared in a standard Xamarin app. The main disadvantage, however, is a slight hit in performance and being limited by the Xamarin.Forms framework as far as what types of controls are available. Xamarin.Forms also gives the option of writing renderers that allow you to override your UI in a platform-specific way. However, in my opinion, renderers are still somewhat limited in what can be achieved.
See the difference in a Xamarin.Forms application and a traditional Xamarin app in the following diagram:

In both the applications, the business logic and backend code of the application can be shared, but Xamarin.Forms gives you an enormous benefit by allowing your UI code to be shared as well.
Additionally, Xamarin.Forms applications have two project templates to choose from, so let's cover each option:
In general, both the options will work fine for any application. Shared projects are basically a collection of code files that get added automatically to another project referencing it. Using a shared project allows you to use preprocessor statements to implement platform-specific code. Portable class library projects, on the other hand, create a portable .NET assembly that can be used on iOS, Android, and various other platforms. PCLs can't use preprocessor statements, so you generally set up platform-specific code with an interface or abstract/base classes. In most cases, I think a portable class library is a better option since it inherently encourages better programming practices. You can refer to Chapter 3, Code Sharing between iOS and Android, for details on the advantages and disadvantages of these two code-sharing techniques.
In addition to defining Xamarin.Forms controls from C# code, Xamarin has provided the tool to develop your UI in Extensible Application Markup Language (XAML). XAML is a declarative language that is basically a set of XML elements that map to a certain control in the Xamarin.Forms framework. Using XAML is comparable to what you would think of using HTML to define the UI on a web page, with the exception that XAML in Xamarin.Forms creates C# objects that represent a native UI.
To understand how XAML works in Xamarin.Forms, let's create a new page with lots of UI on it:
- Create a new Xamarin.Forms Portable solution by navigating to C# | Mobile Apps | Blank App (Xamarin.Forms Portable).
- Name the project something appropriate such as
UIDemo. - Add a new file by navigating to the Forms | Forms ContentPage XAML item template. Name the page
UIDemoPage. - Open
UIDemoPage.xaml.
Now, let's edit the XAML code. Add the following XAML code between the <ContentPage.Content> tag:
<StackLayout Orientation="Vertical" Padding="10,20,10,10"> <Label Text="My Label" XAlign="Center" /> <Button Text="My Button" /> <Entry Text="My Entry" /> <Image Source="xamagon.png" /> <Switch IsToggled="true" /> <Stepper Value="10" /> </StackLayout>
Go ahead and run the application on iOS and Android. Your application will look something like the following screenshot:

Then, on Android, Xamarin.Forms will render the screen in the same way, but with the native Android controls:

First, we created a StackLayout control, which is a container for other controls. It can layout controls either vertically or horizontally one by one as defined by the Orientation value. We also applied a padding of 10 around the sides and bottom, and 20 from the top to adjust the iOS status bar. You might be familiar with this syntax for defining rectangles if you are familiar with WPF or Silverlight. Xamarin.Forms uses the same syntax of the left, top, right, and bottom values delimited by commas.
We also used several of the built-in Xamarin.Forms controls to see how they work:
Label: We used this earlier in the chapter. This is used only to display the text. This maps to aUILabelon iOS and aTextViewon Android.Button: This is a general purpose button that can be tapped by a user. This control maps to aUIButtonon iOS and aButtonon Android.Entry: This control is a single-line text entry. It maps to aUITextFieldon iOS and anEditTexton Android.Image: This is a simple control to display an image on the screen, which maps to aUIImageon iOS and anImageViewon Android. We used theSourceproperty of this control that loads an image from theResourcesfolder on iOS and theResources/drawablefolder on Android. You can also set URLs on this property, but it is best to include the image in your project for the performance.Switch: This is an on/off switch or a toggle button. It maps to aUISwitchon iOS and aSwitchon Android.Stepper: This is a general-purpose input to enter numbers via two plus and minus buttons. On iOS, this maps to aUIStepper, while on Android Xamarin.Forms implements this functionality with twoButton.
This is just some of the controls provided by Xamarin.Forms. There are also more complicated controls such as the ListView and TableView you would expect to develop mobile UIs.
Even though we used XAML in this example, you can also implement this Xamarin.Forms page from C#. Here is an example of what this would look like:
public class UIDemoPageFromCode : ContentPage
{
public UIDemoPageFromCode()
{
var layout = new StackLayout
{
Orientation = StackOrientation.Vertical,
Padding = new Thickness(10, 20, 10, 10),
};
layout.Children.Add(new Label
{
Text = "My Label",
XAlign = TextAlignment.Center,
});
layout.Children.Add(new Button
{
Text ="My Button",
});
layout.Children.Add(new Image
{
Source = "xamagon.png",
});
layout.Children.Add(new Switch
{
IsToggled = true,
});
layout.Children.Add(new Stepper
{
Value = 10,
});
Content = layout;
}
}So you can see that using XAML can be a bit more readable and is generally a bit better at declaring UIs. However, using C# to define your UIs is still a viable, straightforward approach.
At this point, you should be grasping the basics of Xamarin.Forms, but you may be wondering how the MVVM design pattern fits into the picture. The MVVM design pattern was originally conceived for its use along with XAML and the powerful data binding features XAML provides, so it is only natural that it is a perfect design pattern to be used with Xamarin.Forms.
Let's cover the basics of how data binding and MVVM is set up with Xamarin.Forms:
- Your Model and ViewModel layers will remain mostly unchanged from the MVVM pattern we covered earlier in the module.
- Your ViewModel layer should implement the
INotifyPropertyChangedinterface, which facilitates data binding. To simplify things in Xamarin.Forms, you can use theBindableObjectbase class and callOnPropertyChangedwhen the values change on your ViewModel. - Any page or control in Xamarin.Forms has a
BindingContextproperty, which is the object that it is data bound to. In general, you can set a corresponding ViewModel to each view'sBindingContextproperty. - In XAML, you can set up data binding using the syntax of the form
Text="{Binding Name}". This example will bind the Text property of the control to a Name property of the object residing in theBindingContext. - In conjunction with data binding, events can be translated to commands using the
ICommandinterface. So, for example, a button's click event can be data bound to a command exposed by a ViewModel. There is a built-inCommandclass in Xamarin.Forms to support this.
Now that we have covered the basics, let's go through it step by step and partially convert our XamChat sample application discussed earlier in the module to use Xamarin.Forms. For the most part, we can reuse most of the Model and ViewModel layers, although we will have to make a few minor changes to support data binding from XAML.
Let's begin by creating a new Xamarin.Forms application backed by a PCL named XamChat:
- First, create three folders in the
XamChatproject namedViews,ViewModels, andModels. - Add the appropriate
ViewModelsandModelsclasses from the XamChat application in the earlier chapter. These are found in theXamChat.Coreproject. - Build the project and just make sure that everything is saved. You will get a few compiler errors that we will resolve shortly.
The first class that we will need to edit is the BaseViewModel class. Open it and make the following changes:
public class BaseViewModel : BindableObject
{
protected readonly IWebService service = DependencyService.Get<IWebService>();
protected readonly ISettings settings = DependencyService.Get<ISettings>();
private bool isBusy = false;
public bool IsBusy
{get {return isBusy;}
set {isBusy = value; OnPropertyChanged();}}
}First of all, we removed the calls to the ServiceContainer class, because Xamarin.Forms provides its own IoC container called DependencyService. It functions very similar to the container we built in the previous chapters, except that it only has one method, Get<T>, and the registrations are set up via an assembly attribute that we will set up shortly.
Additionally, we removed the IsBusyChanged event in favor of the INotifyPropertyChanged interface that supports data binding. Inheriting from BindableObject gives us the helper method, OnPropertyChanged, which we use to inform bindings that the value has changed in Xamarin.Forms. Notice that we didn't pass string, which contains the property name, to OnPropertyChanged. This method uses a lesser-known feature of .NET 4.0 called CallerMemberName, which will automatically fill in the calling property's name at runtime.
Next, let's set up our required services with DependencyService. Open App.cs in the root of the PCL project, and add the following two lines above the namespace declaration:
[assembly: Dependency(typeof(XamChat.Core.FakeWebService))] [assembly: Dependency(typeof(XamChat.Core.FakeSettings))]
DependencyService will automatically pick up these attributes and inspect the types that we declared. Any interfaces that these types implement will be returned for any future callers of DependencyService.Get<T>. I normally put all Dependency declarations in the App.cs file so that they are easy to manage and in one place.
Next, let's modify LoginViewModel by adding a new property:
public Command LoginCommand { get; set; }We'll use this shortly to data bind a button's command. One last change in the View Model layer is to set up INotifyPropertyChanged for the MessageViewModel:
Conversation[] conversations;
public Conversation[] Conversations
{get {return conversations; }
set {conversations = value; OnPropertyChanged();}
}Likewise, you can repeat this pattern for the remaining public properties throughout the ViewModel layer, but this is all that we will need for this example. Next, let's create a new Foms ContentPage Xaml item under the Views folder named LoginPage. In the code-behind file LoginPage.xaml.cs, we'll just need to make a few changes:
public partial class LoginPage : ContentPage
{
readonly LoginViewModel loginViewModel = new LoginViewModel();
public LoginPage()
{
Title = "XamChat";
BindingContext = loginViewModel;
loginViewModel.LoginCommand = new Command(async () =>
{
try
{
await loginViewModel.Login();
await Navigation.PushAsync(new ConversationsPage());
}
catch (Exception exc)
{
await DisplayAlert("Oops!", exc.Message, "Ok");
}
});
InitializeComponent();
}
}We did a few important things here, including setting the BindingContext to our LoginViewModel. We set up LoginCommand, which basically invokes the Login method and displays a message if something goes wrong. It also navigates to a new page if successful. We also set the title, which will show up in the top navigation bar of the application.
Next, open LoginPage.xaml, and we'll add the following XAML code inside the content page's content:
<StackLayout Orientation="Vertical" Padding="10,10,10,10">
<Entry Placeholder="Username" Text="{Binding Username}" />
<Entry Placeholder="Password" Text="{Binding Password}" IsPassword="true" />
<Button Text="Login" Command="{Binding LoginCommand}" />
<ActivityIndicator IsVisible="{Binding IsBusy}" IsRunning="true" />
</StackLayout>This will set up the basics of two text fields, a button, and a spinner complete with all the bindings to make everything work. Since we set up the BindingContext from the LoginPage code behind, all the properties are bound to the LoginViewModel.
Next, create ConversationsPage as a XAML page as we did earlier, and edit the ConversationsPage.xaml.cs code behind:
public partial class ConversationsPage : ContentPage
{
readonly MessageViewModel messageViewModel = new MessageViewModel();
public ConversationsPage()
{
Title = "Conversations";
BindingContext = messageViewModel;
InitializeComponent ();
Appearing += async (sender, e) =>
{
try
{
await messageViewModel.GetConversations();
}
catch (Exception exc)
{
await DisplayAlert("Oops!", exc.Message, "Ok");
}
};
}
}In this case, we repeated a lot of the same steps. The exception is that we used the Appearing event as a way to load the conversations to display on the screen.
Now let's add the following XAML code to ConversationsPage.xaml:
<ListView ItemsSource="{Binding Conversations}">
<ListView.ItemTemplate>
<DataTemplate>
<TextCell Text="{Binding Username}" />
</DataTemplate>
</ListView.ItemTemplate>
</ListView>In this example, we used ListView to data bind a list of items and display on the screen. We defined a DataTemplate class that represents a set of cells for each item in the list that ItemsSource is data bound to. In our case, a TextCell displaying the Username is created for each item in the Conversations list.
Last but not least, we must return to the App.cs file and modify the startup page:
public static Page GetMainPage()
{
return new NavigationPage(new LoginPage());
}We used NavigationPage here so that Xamarin.Forms can push and pop between different pages. This uses a UINavigationController on iOS so you can see how the native APIs are being used on each platform.
At this point, if you compile and run the application, you will get a functional iOS and an Android application that can login and view a list of conversations:

In this chapter, we covered the basics of Xamarin.Forms and learned how it can be very useful to build your own cross-platform applications. Xamarin.Forms shines for certain types of apps, but can be limiting if you need to write more complicated UIs or take advantage of native drawing APIs. We discovered how to use XAML to declare our Xamarin.Forms UIs and understood how Xamarin.Forms controls are rendered on each platform. We also dived into the concepts of data binding and discovered how to use the MVVM design pattern with Xamarin.Forms. Last but not least, we began porting the XamChat application that was discussed earlier in the module to Xamarin.Forms and we were able to reuse most of the backend code.
Now that you have completed the development of your cross-platform application, the next obvious step is to distribute your app on the app stores. Xamarin apps are distributed in exactly the same way as Java or Objective-C apps; however, there are still a lot of hoops to jump through to successfully get your applications on the stores. iOS has an official approval process, which makes app store submission a much lengthier process than Android. Developers have to wait for a week, a month, or longer depending on how many times the app is rejected. Android requires some additional steps to submit the app on Google Play compared to debugging your application, but you can still get your application submitted in just a few hours.
In this chapter, we will cover:
- The App Store Review Guidelines
- Submitting an iOS app to the App Store
- Setting up Android signing keys
- Submitting an Android app to Google Play
- Tips for being successful on app stores
Your application's name, app icon, screenshots, and other aspects are declared on Apple's website called iTunes Connect. Sales reports, app store rejections, contract and bank information, and app updates are all managed through the website at http://itunesconnect.apple.com.
The primary purpose of Apple's guidelines is to keep the iOS App Store safe and free of malware. There is certainly little to no malware found on the iOS App Store. Generally, the worst thing an iOS application could do to you is bombard you with ads. To a certain extent, the guidelines also reinforce Apple's revenue share with payments within your application. Sadly, some of Apple's guidelines controversially eliminate one of their competitors in a key area on iOS. An example of this would be an app selling e-books, since it would be a direct competitor with iTunes and iBooks.

However, the key point here is to get your applications through the store approval process without facing the App Store rejections. As long as you are not intentionally trying to break the rules, most applications will not face much difficulty in getting approved by Apple. The most common rejections are related to mistakes by developers, which is a good thing, since you would not want to release an app with a critical issue to the public.
The App Store Review Guidelines are quite lengthy, so let's break it down into the most common situations you might run into. A full list of the guidelines are found at https://developer.apple.com/appstore/resources/approval/guidelines.html. Note that a valid iOS developer account is required to view this site.
Some general rules to follow are as follows:
- Applications that crash, have bugs, or fail critically will be rejected
- Applications that do not perform as advertised or contain hidden features will be rejected
- Applications that use nonpublic Apple APIs, or read/write files from prohibited locations on the filesystem will be rejected
- Apps that provide little value or that have been overdone (such as flashlight, burp, or fart apps) will be rejected
- Applications cannot use trademarked words as the app name or keywords without the permission of the trademark holder
- Applications cannot distribute copyrighted material illegally
- Apps that can simply be implemented by a mobile-friendly website, such as apps with lots of HTML content that provide no native functionality can be rejected
These rules make sense to keep the overall quality and safety of the iOS App Store higher than it would have otherwise been. It can be difficult to get a simple app with very few features into the store due to some of these rules, so make sure that your app is useful and compelling enough for the App Store review team to allow it to be available on the store.
Some rules related to the mistakes made by the developers or incorrect labeling in iTunes Connect are as follows:
- Applications or metadata that mention other mobile platforms such as Android, for example, will be rejected
- Applications that are labeled with an incorrect or inappropriate category/genre, screenshots, or icons will be rejected
- Developers must give an appropriate age rating and keywords for the application
- Support, privacy policy, and marketing URLs must be functional at the time the app is reviewed
- Developers should not declare iOS features that are not used; for example, do not declare Game Center or iCloud usage if your application does not actually use these features
- Applications that use features such as location or push notifications without the consent of the user will be rejected
These can sometimes simply be a mistake on the developer's part. Just make sure you double-check all of your application's information before that final submission to the iOS App Store.
Additionally, Apple has the following rules regarding content that can be contained within an application:
- Applications that contain objectionable content or content that can be considered rude will be rejected
- Applications that are designed to upset or disgust users will be rejected
- Applications that contain excessive imagery of violence will be rejected
- Applications that target a specific government, race, culture, or company as enemies will be rejected
- Applications with icons or screenshots that do not adhere to the four plus age rating might be rejected
The app store delivers apps to children and adults alike. Apple also supports an over 17 age restriction on applications; however, this will seriously limit the number of potential users for your app. It's best to keep applications clean and appropriate for as many ages as possible.
The next category of rules listed related to Apple's 70/30 revenue share from the App Store are as follows:
- Applications that link to products or software sold on a website might be rejected.
- Apps using a payment mechanism other than iOS in-app purchases (IAPs) will be rejected.
- Applications that use IAPs to purchase physical goods will be rejected.
- Apps can display digital content that is purchased outside the application as long as you cannot link to or purchase from within the app. All digital content purchased within the app must use IAPs.
These rules are easy to follow as long as you are not trying to circumvent Apple's revenue share in the App Store. Always use IAPs to unlock the digital content within your applications.
Last but not least, here are some general tips related to App Store rejections:
- If your application requires a username and password, make sure you include the credentials under the Demo Account Information section for the app review team to use.
- If your application contains IAPs or other features that the app review team must explicitly test, make sure you include instructions in Review Notes to reach the appropriate screen in your application.
- Schedule ahead! Don't let your product's app rejection ruin a deadline; plan at least a month into your schedule for app store approval.
- When in doubt, be as descriptive as possible in the Review Notes section of iTunes Connect.
If your application does get rejected, most of the time there is an easy resolution. Apple's review team will explicitly reference the guidelines if a rule is broken and will include the relevant crash logs and screenshots. If you can correct an issue without submitting a new build, you can respond to the app review team via the Resolution Center option in the iTunes Connect website. If you upload a new build, this will put your application at the end of the queue to be reviewed.
There are certainly more in-depth and specific rules for features in iOS, so make sure you take a look at the complete set of guidelines if you are thinking about doing something creative or out of the box with an iOS feature. As always, if you are unsure about a specific guideline, it is best to seek professional, legal advice on the matter. Calling Apple's support number will not shed any light on the subject since its support personnel are not allowed to give advice related to the App Store Review Guidelines.
Before we get started with submitting our application to the store, we need to review a short checklist to make sure you are ready to do so. It is a pain to reach a point in the process and realize you have something missing or haven't done something quite right. Additionally, there are a few requirements that will need to be met by a designer or the marketing team, which should not necessarily be left to the developer.
Make sure you have done the following prior to beginning with the submission:
- Your application's
Info.plistfile is completely filled out. This includes splash screen images, app icons, app name, and other settings that need to be filled out for advanced features. Note that the app name here is what is displayed under the application icon. It can be differ from the App Store name, and unlike the App Store name, it does not have to be unique from all the other apps in the store. - You have at least three names selected for your app on the App Store. A name might be unavailable even if it is not currently taken on the App Store, as it could have been previously taken by a developer for an app that was removed from the store for some reason.
- You have a large 1024 x 1024 app icon image. There isn't a need to include this file in the application, unless you are distributing enterprise or ad hoc builds through iTunes (the desktop application).
- You have at least one screenshot per device that your application is targeting. This includes iPhone 4 retina, iPhone 5, iPhone 6, iPhone 6 Plus, and iPad retina sized screenshots for a universal iOS application. However, I would strongly recommend that you fill out all the five screenshots slots.
- You have a well-written and edited description for the App Store.
- You have selected a set of keywords to improve the search for your application.
Once you have double-checked the preceding checklist, we can begin the process for submission. Our first step will be to create a provisioning profile for the App Store distribution.
Let's begin by creating a new provisioning profile by carrying out the following steps:
- Navigate to http://developer.apple.com/ios.
- Click on Certificates, Identifiers & Profiles in the right-hand navigation bar.
- Click on Provisioning Profiles.
- Click on the plus button in the top-right corner of the window.
- Select App Store under Distribution and click on Continue.
- Select your app ID. You should have created one already in Chapter 7, Deploying and Testing on Devices; click on Continue.
- Select the certificate for the provisioning profile. Normally, there will be only one option here. Click on Continue.
- Give the profile an appropriate name such as
MyAppAppStore. Click on Generate. - Once complete, you can download and install the profile manually or synchronize your provisioning profiles in Xcode under Preferences | Accounts, as we did earlier in the module.
You will arrive at the following screen when successful:

For our next set of steps, we will start filling out the details of your application to be displayed on the Apple App Store.
We can begin by performing the following set of steps to set up your app in iTunes Connect:
- Navigate to http://itunesconnect.apple.com and log in.
- Click on My Apps.
- Click on the plus button in the top-left corner of the window, followed by New iOS App.
- Enter an app Name to be displayed on the App Store.
- Enter the Version to be displayed on the App Store.
- Choose a Primary Language for your app.
- Enter a value in the SKU field. This is used to identify your app in reports.
- Select your Bundle ID. You should have already created one in Chapter 7, Deploying and Testing on Devices; click on Continue.
- There is a lot of required information to fill out here. If you miss any, iTunes Connect is pretty helpful at displaying warnings. It should be fairly user-friendly since the site is meant to be used by marketing professionals as well as developers.
- Click on Save after making your changes.
There are a lot of optional fields too. Make sure you fill out Review Notes or Demo Account Information. If there is any additional information, the app review team will require to review your application. When complete, you will see your application with the status Prepare for Submission, as seen in the following screenshot:

Now we need to actually upload our app to iTunes Connect. You must either upload a build from Xcode or Application Loader. Either method will produce the same results, but some prefer to use Application Loader if a nondeveloper submits the app.
Our last step for App Store submission is to provide our binary file that contains our application to the store. We need to create the Release build of our application, signed with the distribution provisioning profile we created earlier in this chapter.
Xamarin Studio makes this very simple. We can configure the build as follows:
After a few moments, Xamarin Studio will open the archived builds menu, as shown in the following screenshot:

The process creates a xarchive file that is stored in ~/Library/Developer/Xcode/Archives. The Validate… button will check your archive for any potential errors that can occur during the upload, while Distribute… will actually submit the application to the store. Sadly, at the time of writing this module, the Distribute… button merely launches the Application Loader application, which cannot upload the xarchive files. Until Xamarin works this out, you can access these options for the archive in Xcode by navigating to Window | Organizer in the Archives tab.
Go ahead and locate the archive in Xcode; you might have to restart Xcode if it does not appear, and perform the following steps:
- Click on Distribute…. Don't worry, it will validate the archive before uploading.
- Select Submit to the iOS App Store and click on Next.
- Log in with your credentials for iTunes Connect and click on Next.
- Select the appropriate provisioning profile for the application and click on Submit.
After several moments, depending on the size of your application, you will get a confirmation screen, and the status of your application will change to Upload Received. The following screenshot shows what a confirmation screen looks like:
If you return to iTunes Connect, and navigate to the Prerelease tab, you will see the build you just uploaded with a status of Processing:

After a few minutes, the build will get processed and can be added to an App Store release. The next step is to select the build under the Versions tab, which is under the Build section, as shown in the following screenshot:

After hitting Save, you should be able to click on Submit for Review without any remaining warnings. Next, answer the three questions about export laws, ad identifiers, and so on and hit Submit as the final step to submit your app.
At this point, you have no control over the status of your application while its waiting in line to be reviewed by an Apple employee. This can take one to two weeks, depending on the current workload of apps to be reviewed and the time of the year. Updates will also go through the same process, but the wait time is generally a bit shorter than a new app submission.
Luckily, there are a few situations where you can fast track this process. If you navigate to https://developer.apple.com/appstore/contact/?topic=expedite, you can request for an expedited app review. Your issue must either be a critical bug fix or a time-sensitive event related to your application. Apple doesn't guarantee accepting an expedite request, but it can be a lifesaver in times of need.
Additionally, if something goes wrong with a build you submitted, you can cancel the submission by going to the top of the app details page and selecting remove this version from review. In situations where you discover a bug after submission, this allows you to upload a new build in its place.
Creating a distribution provisioning profile
Once you have double-checked the preceding checklist, we can begin the process for submission. Our first step will be to create a provisioning profile for the App Store distribution.
Let's begin by creating a new provisioning profile by carrying out the following steps:
- Navigate to http://developer.apple.com/ios.
- Click on Certificates, Identifiers & Profiles in the right-hand navigation bar.
- Click on Provisioning Profiles.
- Click on the plus button in the top-right corner of the window.
- Select App Store under Distribution and click on Continue.
- Select your app ID. You should have created one already in Chapter 7, Deploying and Testing on Devices; click on Continue.
- Select the certificate for the provisioning profile. Normally, there will be only one option here. Click on Continue.
- Give the profile an appropriate name such as
MyAppAppStore. Click on Generate. - Once complete, you can download and install the profile manually or synchronize your provisioning profiles in Xcode under Preferences | Accounts, as we did earlier in the module.
You will arrive at the following screen when successful:
For our next set of steps, we will start filling out the details of your application to be displayed on the Apple App Store.
We can begin by performing the following set of steps to set up your app in iTunes Connect:
- Navigate to http://itunesconnect.apple.com and log in.
- Click on My Apps.
- Click on the plus button in the top-left corner of the window, followed by New iOS App.
- Enter an app Name to be displayed on the App Store.
- Enter the Version to be displayed on the App Store.
- Choose a Primary Language for your app.
- Enter a value in the SKU field. This is used to identify your app in reports.
- Select your Bundle ID. You should have already created one in Chapter 7, Deploying and Testing on Devices; click on Continue.
- There is a lot of required information to fill out here. If you miss any, iTunes Connect is pretty helpful at displaying warnings. It should be fairly user-friendly since the site is meant to be used by marketing professionals as well as developers.
- Click on Save after making your changes.
There are a lot of optional fields too. Make sure you fill out Review Notes or Demo Account Information. If there is any additional information, the app review team will require to review your application. When complete, you will see your application with the status Prepare for Submission, as seen in the following screenshot:
Now we need to actually upload our app to iTunes Connect. You must either upload a build from Xcode or Application Loader. Either method will produce the same results, but some prefer to use Application Loader if a nondeveloper submits the app.
Our last step for App Store submission is to provide our binary file that contains our application to the store. We need to create the Release build of our application, signed with the distribution provisioning profile we created earlier in this chapter.
Xamarin Studio makes this very simple. We can configure the build as follows:
After a few moments, Xamarin Studio will open the archived builds menu, as shown in the following screenshot:
The process creates a xarchive file that is stored in ~/Library/Developer/Xcode/Archives. The Validate… button will check your archive for any potential errors that can occur during the upload, while Distribute… will actually submit the application to the store. Sadly, at the time of writing this module, the Distribute… button merely launches the Application Loader application, which cannot upload the xarchive files. Until Xamarin works this out, you can access these options for the archive in Xcode by navigating to Window | Organizer in the Archives tab.
Go ahead and locate the archive in Xcode; you might have to restart Xcode if it does not appear, and perform the following steps:
- Click on Distribute…. Don't worry, it will validate the archive before uploading.
- Select Submit to the iOS App Store and click on Next.
- Log in with your credentials for iTunes Connect and click on Next.
- Select the appropriate provisioning profile for the application and click on Submit.
After several moments, depending on the size of your application, you will get a confirmation screen, and the status of your application will change to Upload Received. The following screenshot shows what a confirmation screen looks like:
If you return to iTunes Connect, and navigate to the Prerelease tab, you will see the build you just uploaded with a status of Processing:
After a few minutes, the build will get processed and can be added to an App Store release. The next step is to select the build under the Versions tab, which is under the Build section, as shown in the following screenshot:
After hitting Save, you should be able to click on Submit for Review without any remaining warnings. Next, answer the three questions about export laws, ad identifiers, and so on and hit Submit as the final step to submit your app.
At this point, you have no control over the status of your application while its waiting in line to be reviewed by an Apple employee. This can take one to two weeks, depending on the current workload of apps to be reviewed and the time of the year. Updates will also go through the same process, but the wait time is generally a bit shorter than a new app submission.
Luckily, there are a few situations where you can fast track this process. If you navigate to https://developer.apple.com/appstore/contact/?topic=expedite, you can request for an expedited app review. Your issue must either be a critical bug fix or a time-sensitive event related to your application. Apple doesn't guarantee accepting an expedite request, but it can be a lifesaver in times of need.
Additionally, if something goes wrong with a build you submitted, you can cancel the submission by going to the top of the app details page and selecting remove this version from review. In situations where you discover a bug after submission, this allows you to upload a new build in its place.
Adding your app to iTunes Connect
For our next set of steps, we will start filling out the details of your application to be displayed on the Apple App Store.
We can begin by performing the following set of steps to set up your app in iTunes Connect:
- Navigate to http://itunesconnect.apple.com and log in.
- Click on My Apps.
- Click on the plus button in the top-left corner of the window, followed by New iOS App.
- Enter an app Name to be displayed on the App Store.
- Enter the Version to be displayed on the App Store.
- Choose a Primary Language for your app.
- Enter a value in the SKU field. This is used to identify your app in reports.
- Select your Bundle ID. You should have already created one in Chapter 7, Deploying and Testing on Devices; click on Continue.
- There is a lot of required information to fill out here. If you miss any, iTunes Connect is pretty helpful at displaying warnings. It should be fairly user-friendly since the site is meant to be used by marketing professionals as well as developers.
- Click on Save after making your changes.
There are a lot of optional fields too. Make sure you fill out Review Notes or Demo Account Information. If there is any additional information, the app review team will require to review your application. When complete, you will see your application with the status Prepare for Submission, as seen in the following screenshot:
Now we need to actually upload our app to iTunes Connect. You must either upload a build from Xcode or Application Loader. Either method will produce the same results, but some prefer to use Application Loader if a nondeveloper submits the app.
Our last step for App Store submission is to provide our binary file that contains our application to the store. We need to create the Release build of our application, signed with the distribution provisioning profile we created earlier in this chapter.
Xamarin Studio makes this very simple. We can configure the build as follows:
After a few moments, Xamarin Studio will open the archived builds menu, as shown in the following screenshot:
The process creates a xarchive file that is stored in ~/Library/Developer/Xcode/Archives. The Validate… button will check your archive for any potential errors that can occur during the upload, while Distribute… will actually submit the application to the store. Sadly, at the time of writing this module, the Distribute… button merely launches the Application Loader application, which cannot upload the xarchive files. Until Xamarin works this out, you can access these options for the archive in Xcode by navigating to Window | Organizer in the Archives tab.
Go ahead and locate the archive in Xcode; you might have to restart Xcode if it does not appear, and perform the following steps:
- Click on Distribute…. Don't worry, it will validate the archive before uploading.
- Select Submit to the iOS App Store and click on Next.
- Log in with your credentials for iTunes Connect and click on Next.
- Select the appropriate provisioning profile for the application and click on Submit.
After several moments, depending on the size of your application, you will get a confirmation screen, and the status of your application will change to Upload Received. The following screenshot shows what a confirmation screen looks like:
If you return to iTunes Connect, and navigate to the Prerelease tab, you will see the build you just uploaded with a status of Processing:
After a few minutes, the build will get processed and can be added to an App Store release. The next step is to select the build under the Versions tab, which is under the Build section, as shown in the following screenshot:
After hitting Save, you should be able to click on Submit for Review without any remaining warnings. Next, answer the three questions about export laws, ad identifiers, and so on and hit Submit as the final step to submit your app.
At this point, you have no control over the status of your application while its waiting in line to be reviewed by an Apple employee. This can take one to two weeks, depending on the current workload of apps to be reviewed and the time of the year. Updates will also go through the same process, but the wait time is generally a bit shorter than a new app submission.
Luckily, there are a few situations where you can fast track this process. If you navigate to https://developer.apple.com/appstore/contact/?topic=expedite, you can request for an expedited app review. Your issue must either be a critical bug fix or a time-sensitive event related to your application. Apple doesn't guarantee accepting an expedite request, but it can be a lifesaver in times of need.
Additionally, if something goes wrong with a build you submitted, you can cancel the submission by going to the top of the app details page and selecting remove this version from review. In situations where you discover a bug after submission, this allows you to upload a new build in its place.
Making an iOS binary for the App Store
Our last step for App Store submission is to provide our binary file that contains our application to the store. We need to create the Release build of our application, signed with the distribution provisioning profile we created earlier in this chapter.
Xamarin Studio makes this very simple. We can configure the build as follows:
After a few moments, Xamarin Studio will open the archived builds menu, as shown in the following screenshot:
The process creates a xarchive file that is stored in ~/Library/Developer/Xcode/Archives. The Validate… button will check your archive for any potential errors that can occur during the upload, while Distribute… will actually submit the application to the store. Sadly, at the time of writing this module, the Distribute… button merely launches the Application Loader application, which cannot upload the xarchive files. Until Xamarin works this out, you can access these options for the archive in Xcode by navigating to Window | Organizer in the Archives tab.
Go ahead and locate the archive in Xcode; you might have to restart Xcode if it does not appear, and perform the following steps:
- Click on Distribute…. Don't worry, it will validate the archive before uploading.
- Select Submit to the iOS App Store and click on Next.
- Log in with your credentials for iTunes Connect and click on Next.
- Select the appropriate provisioning profile for the application and click on Submit.
After several moments, depending on the size of your application, you will get a confirmation screen, and the status of your application will change to Upload Received. The following screenshot shows what a confirmation screen looks like:
If you return to iTunes Connect, and navigate to the Prerelease tab, you will see the build you just uploaded with a status of Processing:
After a few minutes, the build will get processed and can be added to an App Store release. The next step is to select the build under the Versions tab, which is under the Build section, as shown in the following screenshot:
After hitting Save, you should be able to click on Submit for Review without any remaining warnings. Next, answer the three questions about export laws, ad identifiers, and so on and hit Submit as the final step to submit your app.
At this point, you have no control over the status of your application while its waiting in line to be reviewed by an Apple employee. This can take one to two weeks, depending on the current workload of apps to be reviewed and the time of the year. Updates will also go through the same process, but the wait time is generally a bit shorter than a new app submission.
Luckily, there are a few situations where you can fast track this process. If you navigate to https://developer.apple.com/appstore/contact/?topic=expedite, you can request for an expedited app review. Your issue must either be a critical bug fix or a time-sensitive event related to your application. Apple doesn't guarantee accepting an expedite request, but it can be a lifesaver in times of need.
Additionally, if something goes wrong with a build you submitted, you can cancel the submission by going to the top of the app details page and selecting remove this version from review. In situations where you discover a bug after submission, this allows you to upload a new build in its place.
All Android packages (the apk files) are signed by a certificate or a keystore file to enable their installation on a device. When you are debugging/developing your application, your package is automatically signed by a development certificate that was generated by the Android SDK. It is fine to use this certificate for development or even beta testing; however, it cannot be used on an application distributed to Google Play.
To create a production certificate, we can use a command-line tool included with the Android SDK named keytool. To create your own keystore file, run the following line in a terminal window:
keytool -genkey -v -keystore <filename>.keystore -alias <key-name> -keyalg RSA -keysize 2048 -validity 10000
Replace <filename> and <key-name> with appropriate terms for your application. The keytool command-line tool will then prompt several questions for you to identify the party that is signing the application. This is very similar to an SSL certificate if you have ever worked with one before. You will also be prompted for a keystore password and a key password; you can let these be the same or change them, depending on how secure you want your key to be.
Your console output will look something like what is shown in the following screenshot:

When complete, you should store your keystore file and password in a very safe place. Once you sign an application with this keystore file and submit it to Google Play, you will not be able to submit the updates of the application without signing it with the same key. There is no mechanism to retrieve a lost keystore file. If you do happen to lose it, your only option is to remove the existing app from the store, and submit a new app that contains your updated changes. This can potentially cause you to lose a lot of users.
To sign an Android package, you can use another command-line tool included with the Android SDK named jarsigner. However, Xamarin Studio simplifies this process by providing a user interface to run your package.
Open your Android project in Xamarin Studio and carry out the following steps to walk you through the process of signing an apk file:
- Change your build configuration to Release.
- Select the appropriate project and navigate to Project | Publish Android Application.
- Select the
keystorefile that you just created. - Enter the values in the Password, Alias, and Key Password fields you used when creating the key. Click on Forward.
- Choose a directory to deploy the
apkfile and click on Create.
When successful, a pad in Xamarin Studio will appear that displays the progress. The pad that appears looks like what is shown in the following screenshot:

It is important to note that Xamarin.Android automatically runs a second tool called zipalign after signing the APK. This tool aligns the bytes within an APK to improve the start up time of your app. If you plan on running jarsigner from the command line itself, you must run zipalign as well. Otherwise, the app will crash on startup, and Google Play will also not accept the APK.
Once you have a signed the Android package, submitting your application to Google Play is relatively painless compared to iOS. Everything can be completed via the Developer Console tab in the browser without having to upload the package with an OS X application.
Before starting the submission, make sure you have completed the tasks on the following checklist:
- You have declared an
AndroidManifest.xmlfile with your application name, package name, and icon declared. - You have an
apkfile signed with a production key. - You have selected an application name for Google Play. This is not unique across the store.
- You have a 512 x 512 high-resolution icon image for Google Play.
- You have a well-written and edited description for the store.
- You have at least two screenshots. However, I recommend that you use all the eight slots that include sizes for phones and 7- and 10-inch tablets.
After going through the checklist, you should be fully prepared to submit your application to Google Play. The tab to add new apps looks like the following screenshot:

To begin with, navigate to https://play.google.com/apps/publish and log in to your account, then carry out the following steps:
- Select the All Applications tab and click on Add new application.
- Enter a name to be displayed for the app on Google Play and click on Upload APK.
- Click on Upload your first APK to Production.
- Browse to your signed
apkfile and click on OK. You will see the APK tab's checkmark turn green. - Select the Store Listing tab.
- Fill out all the required fields, including Description, High-res Icon, Categorization, and Privacy Policy (or select the checkbox that says you aren't submitting a policy), and provide at least two screenshots.
- Click on Save. You will see the checkmark on the Store Listing tab turn green.
- Select the Pricing & Distribution tab.
- Select a price and the countries you wish to distribute to.
- Accept the agreement for Content guidelines and US export laws.
- Click on Save. You will see the checkmark on the Pricing & Distribution tab turn green.
- Select the Ready to publish dropdown in the top-right corner, as shown in the following screenshot, and select Publish this app:

In a few hours, your application will be available on Google Play. No approval process is required, and the updates to your apps are equally painless.
To provide a safe store environment, Google retroactively deletes applications that violate its policies and will generally delete the entire developer account—not just the application. Google's policies are are aimed at improving the quality of applications available on Google Play and are not quite as lengthy as the set of rules on iOS. That being said, the following is a basic summary of Google's policies:
- Apps cannot have sexually explicit material, gratuitous violence, or hate speeches.
- Apps cannot infringe upon copyrighted material.
- Apps cannot be malicious in nature, or capture private information of users without their knowledge.
- Apps cannot modify the basic functionalities of users' devices (such as modifying the home screen) without their consent. If applications include this functionality, it must be easy for the users to turn off this functionality.
- All the digital content within your application must use Google Play's in-app billing (or in-app purchases). Physical goods cannot be purchased with IAPs.
- Applications must not abuse the cellular network usage that could result in the user incurring high bill amounts.
As with iOS, if you have a concern about one of the policies, it is best to procure professional, legal advice about the policy. For a complete list of the policies, visit https://play.google.com/about/developer-content-policy.html.

Google Play Developer Program Policies
To provide a safe store environment, Google retroactively deletes applications that violate its policies and will generally delete the entire developer account—not just the application. Google's policies are are aimed at improving the quality of applications available on Google Play and are not quite as lengthy as the set of rules on iOS. That being said, the following is a basic summary of Google's policies:
- Apps cannot have sexually explicit material, gratuitous violence, or hate speeches.
- Apps cannot infringe upon copyrighted material.
- Apps cannot be malicious in nature, or capture private information of users without their knowledge.
- Apps cannot modify the basic functionalities of users' devices (such as modifying the home screen) without their consent. If applications include this functionality, it must be easy for the users to turn off this functionality.
- All the digital content within your application must use Google Play's in-app billing (or in-app purchases). Physical goods cannot be purchased with IAPs.
- Applications must not abuse the cellular network usage that could result in the user incurring high bill amounts.
As with iOS, if you have a concern about one of the policies, it is best to procure professional, legal advice about the policy. For a complete list of the policies, visit https://play.google.com/about/developer-content-policy.html.
From my personal experience, I have been submitting applications built with Xamarin to the iOS App Store and Google Play for quite some time. After delivering over 50 mobile applications totaling tens of millions downloads, a lot of lessons are to be learned about what makes a mobile application a success or a failure. Xamarin apps are indistinguishable from Java or Objective-C apps to the end user, so you can make your app successful by following the same patterns as standard iOS or Android applications.
There is quite a bit you can do to make your app more successful. Here are some tips to follow:
- Pricing it right: If your application appeals to almost anyone, consider a freemium model that makes revenue from ad placements or in-app purchases. However, if your app is fairly niche, you will be much better off pricing your app at $1.99 or higher. However, premium apps must hold a higher standard of quality.
- Knowing your competition: If there are other apps in the same space as yours, make sure your application is better or offers a much wider feature set than the competition. It might also be a good idea to avoid the space altogether if there are already several apps with the same functionality as yours.
- Prompting loyal users for reviews: It is a good idea to prompt users for a review after they open your application several times. This gives users who really like your application a chance to write a good review.
- Supporting your users: Provide a valid support e-mail address or Facebook page for you to easily interact with your users. Respond to bug reports and negative reviews—Google Play even has the option to e-mail users who write reviews on your app. Adding a feedback button directly in the app is also a great option here.
- Keeping your application small: Staying under the 100 MB limit on iOS or 50 MB on Google Play will allow users to download your application on their cellular data plan. Doing this negates the possibility of friction to install your app, as users will associate a lengthy download with a slow running application.
- Submitting your app to review websites: Try to get as many reviews on the web as possible. Apple provides the ability to send coupon codes, but with the Android version of your app, you can send your actual Android package. Sending your app to review websites or popular Youtube channels can be a great way to free advertising.
- Using an app analytics or a tracking service: Reporting your app's usage and crash reports can be very helpful to understand your users. Fixing crashes in the wild and modifying your user interface to improve spending behavior is very important. Examples of these would be to add Google Analytics or Flurry Analytics to your app.
There is no silver bullet to having a successful mobile application. If your application is compelling, fulfills a need, and functions quickly and properly, you could have the next hit on your hands. Being able to deliver a consistent cross-platform experience using Xamarin will also give you a head start on your competitors.
In this chapter, we covered everything you need to know to submit your application to the iOS App Store and Google Play. We covered the App Store Review Guidelines and simplified them for the most common situations you might run into during the approval process. We went over the set up process for provisioning your app's metadata and upload your binary to iTunes Connect. For Android, we went over how to create a production signing key and sign your Android package (apk) file. We went over submitting an application to Google Play, and finished the chapter with tips on how to deliver a successful and hopefully profitable application to the app stores.
I hope that with this module, you have experienced an end-to-end, practical walkthrough to develop real-world, cross-platform applications with Xamarin. Using C#, which is such a great language compared to the alternatives, you should be very productive. Additionally, you will save time by sharing code without, in any way, limiting the native experience for your users.

