


 Download code from GitHub
As we start our journey into the world of 2D game development, let's start this chapter by talking about the most important elements of creating 2D games. A 2D sprite is a two-dimensional image that is rendered on your screen while the game is still running.
In this chapter, we will start working on our own Platformer game. It consists of a character that must navigate through a platform level by jumping and running to achieve certain tasks. Along the way, we will learn how to use sprites and how Unity handles them. In this particular chapter, we will cover:
Using the 2D mode within Unity
Importing and rendering sprites
Creating sprite sheets and atlases
Beginning to use scripting
Unity has a 2D mode that allows us to quickly set up the project for 2D game development. In fact, the main reason to use this mode is to automatically import new assets as Sprites.
When creating a new project, you have the option to choose between the 3D and the 2D mode. Let's select the 2D mode, as shown in the following image:

Now, we need to import the standard assets that we will use to build our game. Click on Asset packages and select 2D.
Note
Unity doesn't come with the standard packages, you need to download them from the official website.

Finally, we can click on Create project. If you have used Unity before for 3D game development, you will notice a few differences in the default interface. In particular, the 2D view is already selected:

Furthermore, the camera in new scenes will always be orthographic, which is exactly what we want:

Having selected the 2D mode doesn't mean that you cannot change it any more. In fact, you can change it to 3D mode whenever you want by going to Edit | Project Settings | Editor and selecting 3D under Default Behavior Mode.
This can come in handy when adding 3D models to your 2D project and vice versa. It is recommended that you switch before importing 2D sprites or 3D models to the appropriate mode since Unity will import textures accordingly.
During the course of this book, we will use custom packages, since we don't have time to create all the graphics on our own.
For our first game, we are going to use a package from http://kenney.nl, which is a website full of interesting graphic packages, and free to use in any project. In particular, you need to download the following package: http://kenney.nl/assets/platformer-art-deluxe.
Once the file has been downloaded, it is compressed, so we will need to open it with a software for decompression.
As you can see, there are many folders containing different expansions of the pack. We only need the basepack folder. We need to copy this folder into the Asset folder in Unity. You can do this by just dragging and dropping it in the Project panel. Finally, we can rename it PlatformerPack, so our project will be better organized.
When working on our 2D game, we need sprites to fill in our environment, and also to display characters. Several sprites can be used to create an animation, like a walking character: each sprite represents a certain frame in the animation.

Tip
If we don't import the package when we have created the project, we can do it at any moment by clicking on Assets | Import Package.
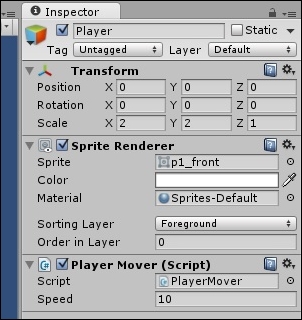
In the Project panel, click on p1_front to see its setting in the Inspector. It can be found under Platformer Pack | Player, or can be searched by using the small search box in the right upper corner of the Project panel. Once selected, the Inspector looks like the following:

You can control the properties of the sprites by changing the values in the Inspector. In order to understand them, let's break them down:
Sprite Mode: This mode consists of two options
SingleandMultiple.Singleshould be selected when the image contains only a single object or character that will be used as a single sprite.Multiple, instead, it should be selected when multiple elements are contained within the same image .These may include different variations of the same object or its animation sheet.Packing Tag: This is an optional variable used to specify the name of the
Sprite Sheetin which this texture will be packed. This is useful when we need to optimize our game.Pixels Per Unit: This controls the scale of the sprite. This variable defines how many pixels correspond to one world space unit. The default value for this is
100.Pivot: This allows us to change the pivot point for our sprite, which, by default, is set to
Center. When required, you can change it to one of the other predefined points or place it in a custom position by selectingCustom.
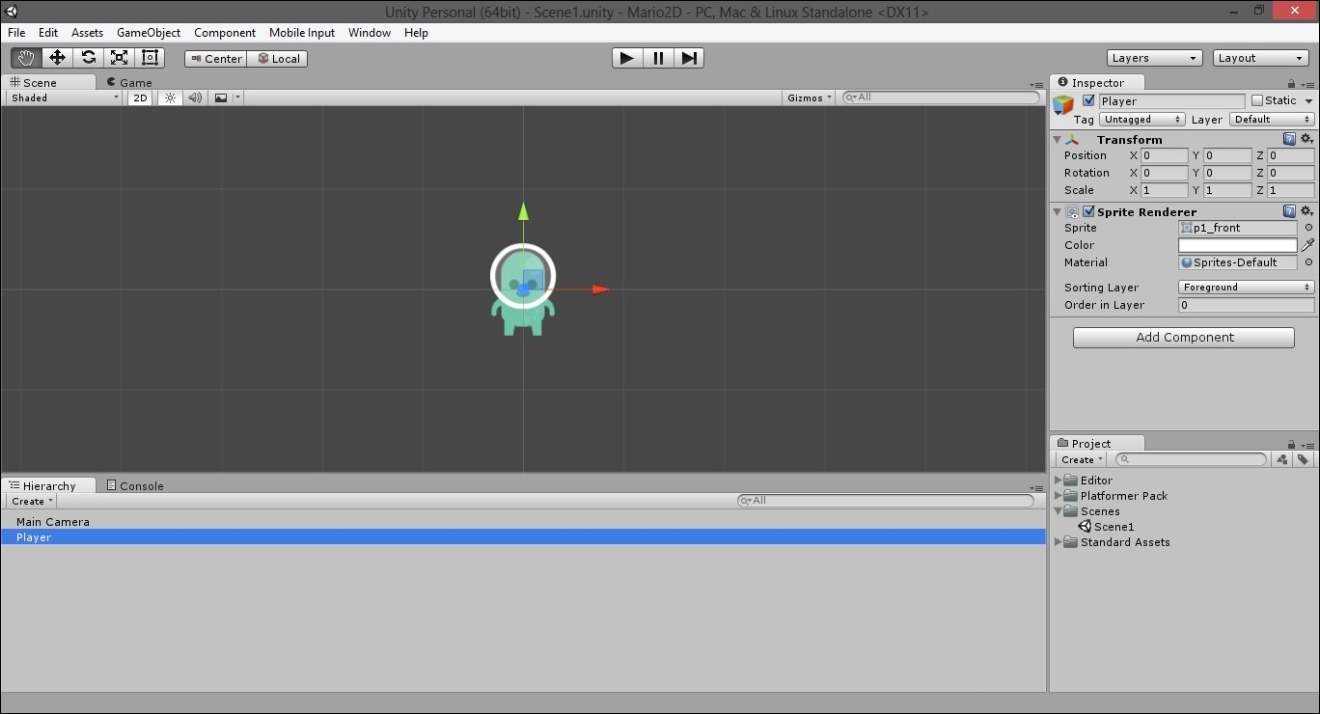
Since we already have the p1_front sprite selected, let's drag it into the Hierarchy panel.
When we add a sprite in our scene, a game object is created with a Sprite Renderer component attached to it. This component is responsible for rendering a Sprite in the game; without it, the game object would be empty.

Let's explore the options in this component. First, Sprite is the variable that will store the sprite to render on screen. In this case, it is automatically with the sprite we have dragged in. The Color variable controls the color of the Sprite along with its alpha channel. If we click on it, a color picker shows up; we can see the effect of our change immediately in the Scene view:

The Material variable stores information about the material of the sprite. By default, it is set to Default Sprite Material. Usually, we don't want to change this during 2D game development; however, it may be necessary in particular cases, for instance when the sprite needs to be affected by lights.
Then, the Sorting Layer and Order In Layer variables are used to define the order of visualization of the sprites in the scene. In fact, not all the sprites are on the same level. Think about a background, a cloud, and our character. The cloud should be located on top of the background and the character should be on top of both of them. By default, the Sorting Layer is set to Default and Order In Layer to 0. So far, Default is the only layer available. Since we want to order our sprites later, let's create a few more layers. Click on Add Sorting Layer under Sorting Layer. As a result, the Inspector shows us the Tags & Layers settings. By clicking on the + button in the right bottom corner, we are able to add other sorting layers. Let's add two more layers, and name them respectively Background and Foreground, as shown in the following image:

The order of these layers is important. We can easily change it by clicking on the designated layer and dragging it above or below another one.
Now, select the game object we have created in the Hierarchy panel again. In the Inspector, we are able to change its sorting layer to Foreground.
Before going forward, create a new folder in the Project panel named Scenes and save the scene inside it as Scene1. We can do this by clicking on File | Save Scene.
In the importing settings, we can find the Sprite Editor button. After we have selected p1_spritesheet again from Platformer Pack | Player, we can now click on the button. As a result, the Sprite Editor window shows up.
The Sprite Editor should be used when dealing with a sprite that contains multiple elements (If this is the case, don't forget to set Multiple in the Sprite Mode). So, we should see something like the following:

Our goal is to slice all the single positions of the character in the image, so that we can use them as an individual sprites in our scene. There are different ways to achieve this. Let's discuss some of them:
Click and drag: This allows you to simply click and drag over the desired elements to create rectangular selections that will define each sprite. You can change each selection as preferred. You are able to change the position by dragging the rectangle, its size by clicking on the corners of each rectangle, and the Pivot point by clicking and dragging it. Furthermore, clicking on the trim button in the sprite window will change the size of the rectangle to fit the selected sprite.
By clicking on the slice button in the top left of the Sprite Editor, a new window appears. This allows you to select other ways to slice your
Sprite Sheets. The default slicing type is set toAutomatic, but you can also choose different kinds of grids too.Automatic: When using the automatic method, Unity will detect each sprite and draw a trimmed rectangle around it. With
Automaticselected, you can also change the Pivot position for each sprite. We can also select a Method to tell Unity what should happen to the sprites that are already defined. TheDelete Existingmethod deletes all the previous selections and creates new ones from scratch. TheSmartmethod attempts to create new selections for undefined sprites, while adjusting them to fit with the older selections. Finally, theSafemethod adds new selections over the previous ones without changing them.Grid: This allows you to create equal size selections for all the sprites in the image. Once we have set
Gridas slicing type, then we will be able to change the size used for the slicing, and eventually adjust the position of the Pivot point for each sprite.
In particular, for our project, we can just use the Automatic method - it will work fine.
Note
By clicking on the Revert button, we can restart from scratch, removing all the previous selections.

After closing the Sprite Editor, let's check the image file in the Project panel. As you can see, a little icon appeared and it allows us to expand the file and see all the single Sprites we have created in the Sprite Editor. Now, these can be used as normal Sprites in our game and can be placed in our scenes and scripts.
Note
Having a single image with different Sprites is a technique called Sprite sheets. When importing sprites to your game project, it is preferred to group them into one image. This is because Unity can send a single file in the graphic card, and, as a result, enhance the performance by saving both memory and computational time.
Furthermore, sprite sheets are useful for creating 2D animations (such as walking, jumping, breathing, and explosions). In fact, it allows us to keep everything organized and easy to use. In the next chapter, we will discuss the process of animation in more detail.
Starting from this chapter, and continuing in the next two, we will work on our first project. It is a Platformer game that resembles the original Mario game.
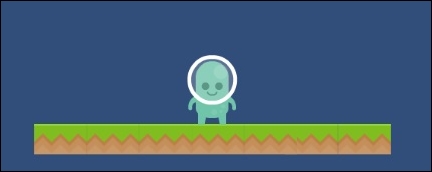
In this chapter our objective is to create a character that will move on a platform across the x-axis. We can achieve this by using the player input. Now, let's continue from where we stopped. We should have a game object named p1_front, now we can rename it as Player. As a result, your scene should look like the following:
However, our character is now floating in the middle of nowhere. Therefore, adding some ground for him to move on is a good start. To achieve this, go to the Project panel and from the Platformer Pack folder select tiles_spritesheet. We can see its Import Settings in the Inspector. We need to change the Sprite Mode to Multiple and then click on Apply.
Open the Sprite Editor for our selected asset by clicking on the Sprite Editor button. As we did before, we can slice the image by using the Automatic method and it will work fine. Now that each sprite has been sliced, click on Apply and close the editor. You will now notice that more sprites have been generated under tiles_spritesheet, as shown here:

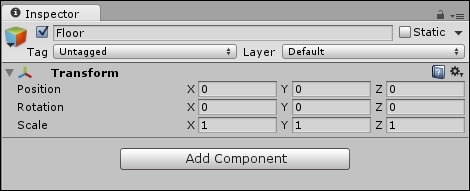
In order to keep things organized, let's create a new empty game object. It can be done by right-clicking in the Hierarchy panel, and then selecting Empty game object. In the Inspector, we can rename this Floor and change its position in (0,0,0), as shown in the following image:
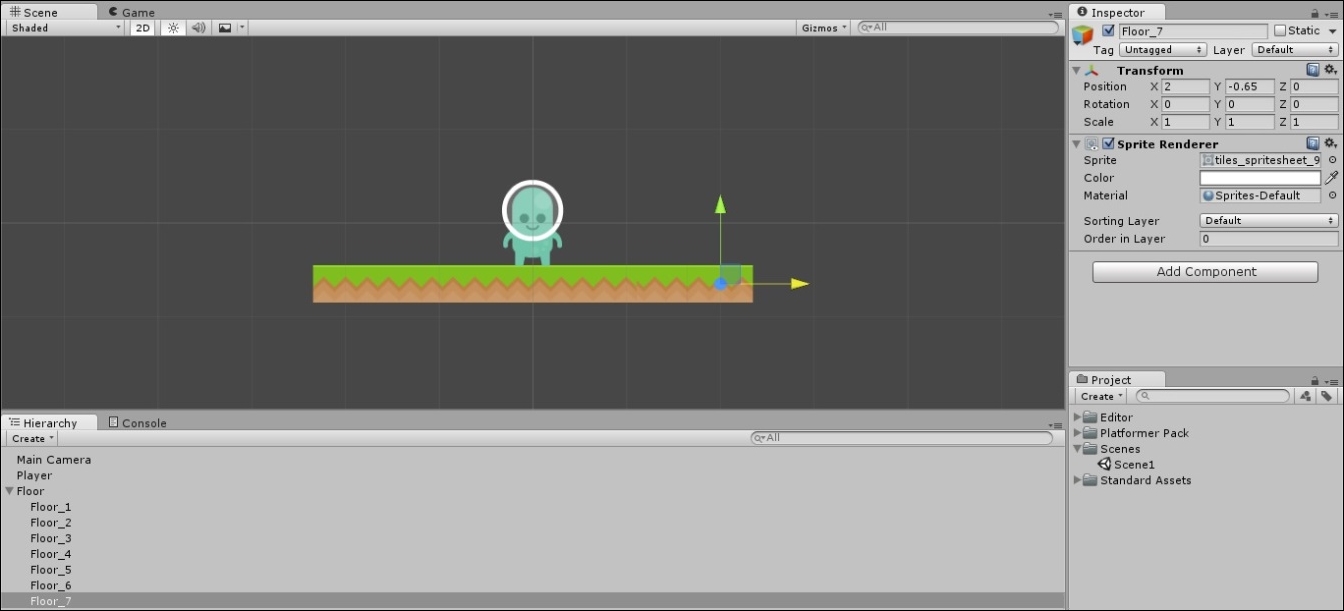
Now we can drag the sprite named tiles_spritesheet_9 onto the Floor object we just created. Rename the file to Floor_1 and set its position to (-2,-0.65, 0). Now we also need to change the sorting layer to Foreground and the sorting order to 1 so it doesn't overlap with our player.
As you can see, we have the first tile of our floor under the player and now we want to create more tiles in order to create a floor that the player can walk on. We could scale the Floor_1 object to make it larger. However, the advantage to having titles is the possibility to use more of them next to each other in a seamless way. Therefore, let's duplicate it. To achieve this, select the Floor_1 object and then you can duplicate either by right-clicking and selecting Duplicate, or by using Ctrl + D (for Mac users cmd + D). You will notice that the new object is automatically named Floor_2, which is what we would like to have to keep things organized. Click on the new object and by using the Rect tool, move it to the left from the scene view, next to the original object. Now, to get our floor, let's repeat this procedure and move the tiles, until we have something like the following:
If you want to reproduce the scene like in the previous image, the last tile on the right is positioned at (2,-0.65,0).
After finishing the floor tiles, let's check the game view. It appears that the objects are rather small. We can fix this by scaling the game objects. This is not best practice, because usually the graphics should already be created without the need to scale. On the other hand, we may want to change the camera settings to look at our world more closely. However, for the purpose of learning something new, we can change the scale of the player to (2, 2, 1). This way, we can make our player bigger. Repeat the same with the Floor game object by setting its scale to (2, 2, 1). As a result, all of its children (for example, the single tiles of the floor) will be scaled. As a result, the game view should look like the following:
Our next step is allowing the player to move the character, in this case, along the x-axis. To achieve this, we need to create a script. In the Project panel, create a new folder and rename it as Scripts. In this new folder, let's create a new C# script by right-clicking and then selecting Create | C# Script. Rename it to PlayerMovement and then attach the script to our player by dragging and dropping it onto the player object. Double-click on the script to open it.
First, we need to add some variables to control the movement. In particular, one for the speed, and another two for the boundary of our world. Let's add the following variables:
    // The Player's speed
    public float speed = 10.0f;

    //Game boundaries
    private float leftWall = -4f;
    private float rightWall = 4f;
Now, in the Update() function we first need to calculate how far it will be translated and where, based on the input of the player. In this case, we take the horizontal axis, which, by default, is bound to the arrow keys. In order to calculate this, we need to take into consideration how much time is passed from the last frame. This can be done by adding Time.deltaTime into the equation. Then, we need to translate the character so it doesn't fall off the boundary after the translation. So we will write the following:
  // Update is called once per frame
  void Update () {
        // Get the horizontal axis that by default is bound to the arrow keys
        // The value is in the range -1 to 1
        // Make it move per seconds instead of frames
        float translation = Input.GetAxis("Horizontal") * speed * Time.deltaTime;
        // Move along the object's x-axis within the floor bounds
        if (transform.position.x + translation < rightWall &&
           transform.position.x + translation > leftWall)
            transform.Translate(translation, 0, 0);
    }
Save the changes and hit the play button. By using the left and right arrow (alternatively A and D), you will be able to move the character across the platform. You can change the speed of the player by adjusting the speed value from the Inspector, as shown here:
Now, our scene needs a background. In the Project panel in the Platformer Pack folder drag the file bg into the scene. Rename the game object to Background and set the scale to (5,3,0). As a result, the game view should look like the following:

In this chapter, we covered 2D sprites and started working on our first project. In particular, we have discussed the 2D mode, importing Sprites, the Sprite Renderer component, and the Sprite Editor. We also learned how to use sprites in our game and how to script a character to make it move along the x-axis.
In the next chapter, we will bring our character to life by adding animations into our game!

